Verified and Tested 2/8/15
Introduction
This guide will show you how to generate and use SSH keys (public and private) using PuTTYgen and PuTTY for Linux servers.
How to Generate and Use an SSH Key
First things first. We must generate our public and private keys using PuTTYgen. PuTTYgen and PuTTY can be downloaded here: PuTTY
Once they have been downloaded to a proper directory, open PuTTYgen first. Click on “Generate” to begin the key generation process. It will ask you to move your mouse around over the program window to help generate “random” data.
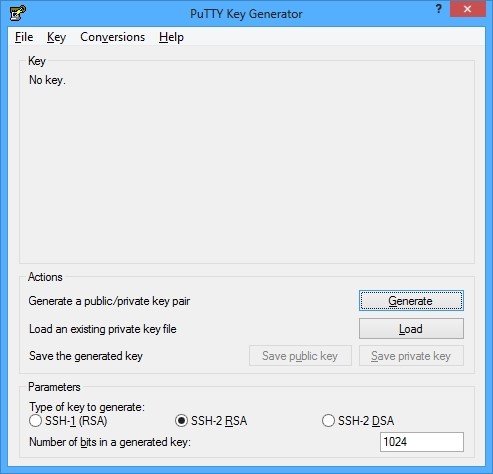
PuTTY Key Generator
When the key is generated, the window will look like the picture below.
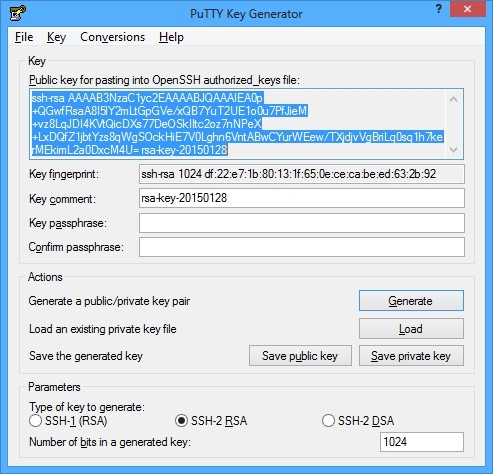
Sample public Key
Most of the information presented here is superfluous except in special instances. All you will want to do is update the “Key comment” box with a better friendly name for the key. Once you have done that, select all of the text in the “Key” box and paste it into Notepad or Notepad++ (preferred). Save that text file somewhere safe. You will also need to click “Save private key” on this window. Name it something useful and place it somewhere secure as well.
To use this key with a PuTTY connection, simply select the “Auth” menu on the left side of the program. This can be found under Connection -> SSH -> Auth. In this menu, there is a box titled “Private key file for authentication.” Click browse and find the .ppk file that you saved in the previous step.
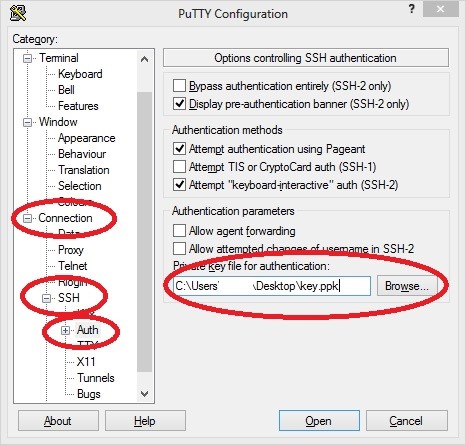
SSH Key Authentication
At this point, if you name and save your connection in the “Session” category, you won’t ever have to follow this process again for that server/IP. Otherwise, you would need to choose your key each time you connect.
Creating a New Server with this SSH Key for Linux Servers
Creating a cloud server that uses an SSH key is simple. You will first need to setup your key in the cloud portal.
Click on “SSH Keys” on the left side under “Manage Servers.”
From there, click “Add SSH Key.”
When the window pops up, simply name your key, and paste the public key text (that you saved to a notepad file in a previous step) into the large box.
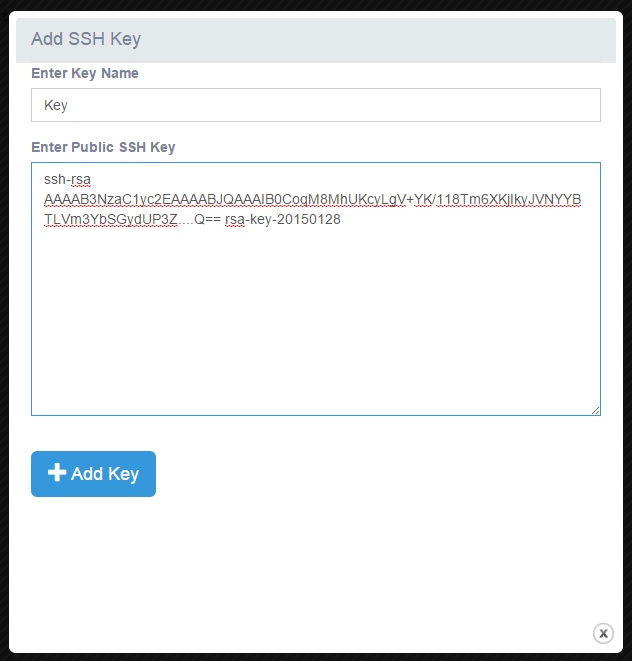
Cloud Portal:Add SSH Key
Click “Add Key.” If there were no issues with the key (inappropriate line breaks, errors, etc) it will save to the portal and be accessible for new servers.
To create a server that utilizes this key for root login, simply follow the “create server” steps found here.
-When choosing your server size and OS, you will see an option at the bottom that says “Pick SSH Key.” You will see the key we just created in that list. When the server comes online, simply use the previous PuTTY steps to connect to the server using that public key. The username will always be root when using our public key system.
Adding the Public SSH Key to an Existing Server
The steps for enabling public/private key login on a standard server that was not provisioned with a key originally is quite simple as well
Simply use PuTTY to log into the server as usual using the root account and password. You may already want to save a PuTTY profile with your key, even though the server will reject it until it is configured.
For all Linux-based operating systems, you only need to create root’s .ssh directory, and paste the public key into a file named “authorized_keys”
From here, you can either use a text editing program to paste the key in (vi/vim/nano, etc), or you can use echo. The echo command would look something like this:
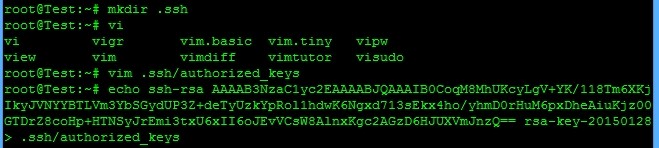
Authorized Keys
At this point, you can log out of the server and log in using the previously stated method to open a PuTTY session with a private key attached. Upon entering the username “root”, the server should allow you to login without entering a password. If successful, you should see a message that states “Authenticating with public key.” The screenshot below has an example:
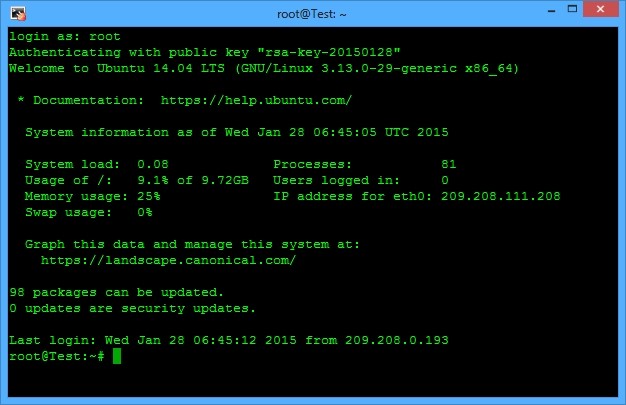
Sample Log in
Done! At this point, if you plan to access the server often, you will definitely want to save a profile. You can also setup a username to auto-login with under Data -> “Auto-login username.” Simply type root into that box and save it along with the private key and IP address to a PuTTY profile, and you can have instant passwordless login access to your server!
For more information about PuTTY, visit www.putty.org.
For more information about PuTTYgen, visit www.puttygen.com.
* This post is for informational purposes only and does not constitute professional, legal, financial, or technical advice. Each situation is unique and may require guidance from a qualified professional.
Readers should conduct their own due diligence before making any decisions.