GitLab is a free, open-source, web-based version control platform that allows you to manage all your Git repositories from the centralized server. GitLab is a great alternative to Github, offering very useful features including code review, issue management, repository branching, merging, time tracking, and continuous integration and deployment. GitLab is specially designed for developers to create, review, and deploy their projects.
GitLab is available in three different editions: Community Edition (CE), Enterprise Edition (EE), and a GitLab-hosted version. You can install any of them depending on the requirements of your use case.
In this tutorial, we will show you how to install GitLab CE on CentOS 8.
Next, you will need to install some required dependencies on your system. You can install all of them with the following command:
dnf install curl policycoreutils python3-policycoreutils -y
Step 1 – Install GitLab CE
By default, GitLab is not available in the CentOS 8 default repository, so you will need to add the GitLab repository in your system.
You can install it with the following command:
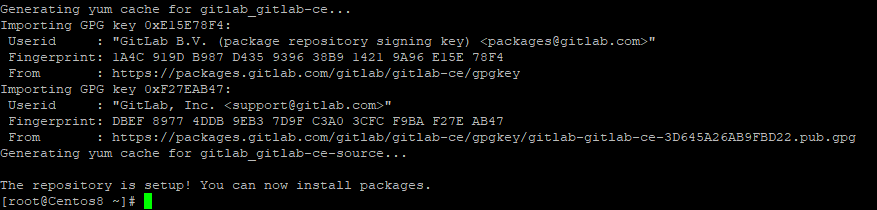
curl -s https://packages.gitlab.com/install/repositories/gitlab/gitlab-ce/script.rpm.sh | bash
Once the repository is added, you should get the following output:
Next, install GitLab CE by running the following command:
dnf install gitlab-ce -y
Once the installation has been completed successfully, you can proceed to the next step.
Step 2 – Secure GitLab with Let’s Encrypt
Next, you will need to set the GitLab URL and enable Let’s Encrypt integration. You can do it by editing the file /etc/gitlab/gitlab.rb:
nano /etc/gitlab/gitlab.rb
Change the following lines that match your domain name and enable Let’s Encrypt integration with your desired value:
external_url 'https://gitlab.example.com'
letsencrypt['enable'] = true
letsencrypt['contact_emails'] = ['admin@example.com']
letsencrypt['auto_renew'] = true
letsencrypt['auto_renew_hour'] = 12
letsencrypt['auto_renew_minute'] = 15
letsencrypt['auto_renew_day_of_month'] = "*/4"
Save and close the file when you are finished. Then, reconfigure GitLab CE with the following command:
gitlab-ctl reconfigure
This command will reconfigure GitLab and secure it with Let’s Encrypt SSL. Once the GitLab setup has been completed successfully, you should get the following output:
  * execute[reload prometheus] action run
    - execute /opt/gitlab/bin/gitlab-ctl hup prometheus
Recipe: monitoring::alertmanager
  * runit_service[alertmanager] action restart (up to date)
Recipe: monitoring::postgres-exporter
  * runit_service[postgres-exporter] action restart (up to date)
Recipe: monitoring::grafana
  * runit_service[grafana] action restart (up to date)
Recipe: nginx::enable
  * execute[reload nginx] action run
    - execute gitlab-ctl hup nginx
Recipe: letsencrypt::enable
  * ruby_block[display_le_message] action run
    - execute the ruby block display_le_message
Recipe: crond::enable
  * runit_service[crond] action restart (up to date)

Running handlers:
Running handlers complete
Chef Client finished, 609/1641 resources updated in 10 minutes 43 seconds

Warnings:
Environment variable LANG specifies a non-UTF-8 locale. GitLab requires UTF-8 encoding to function properly. Please check your locale settings.

gitlab Reconfigured!
Step 3 – Access GitLab Web UI
At this point, GitLab is installed and configured, and you can now access the GitLab UI by visiting the URL https://gitlab.example.com. You will be redirected to the password change screen as shown below:
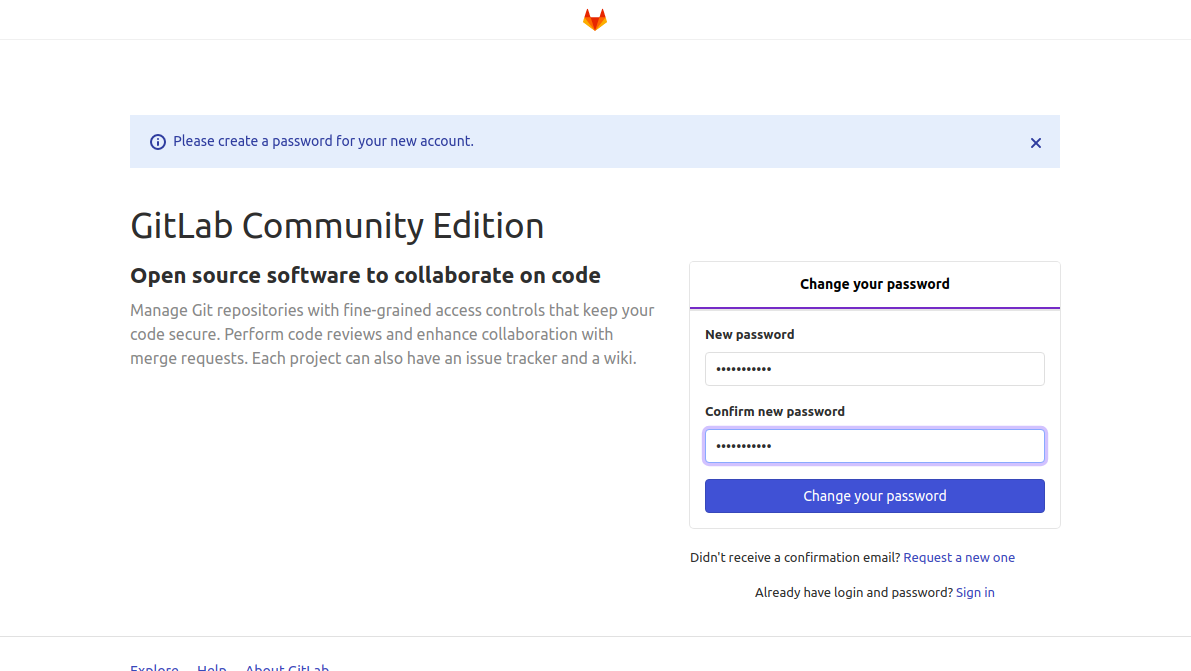
Set the new password for the root user and click on the Change your password button. Once the password is changed successfully, you should see the GitLab login screen:
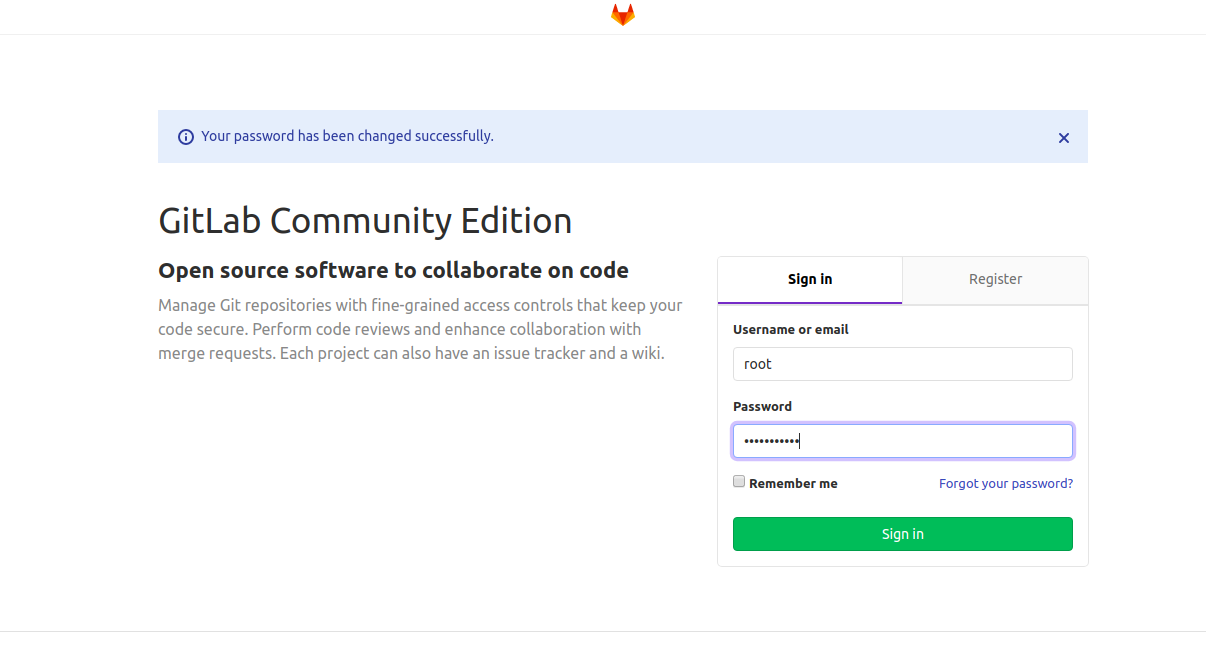
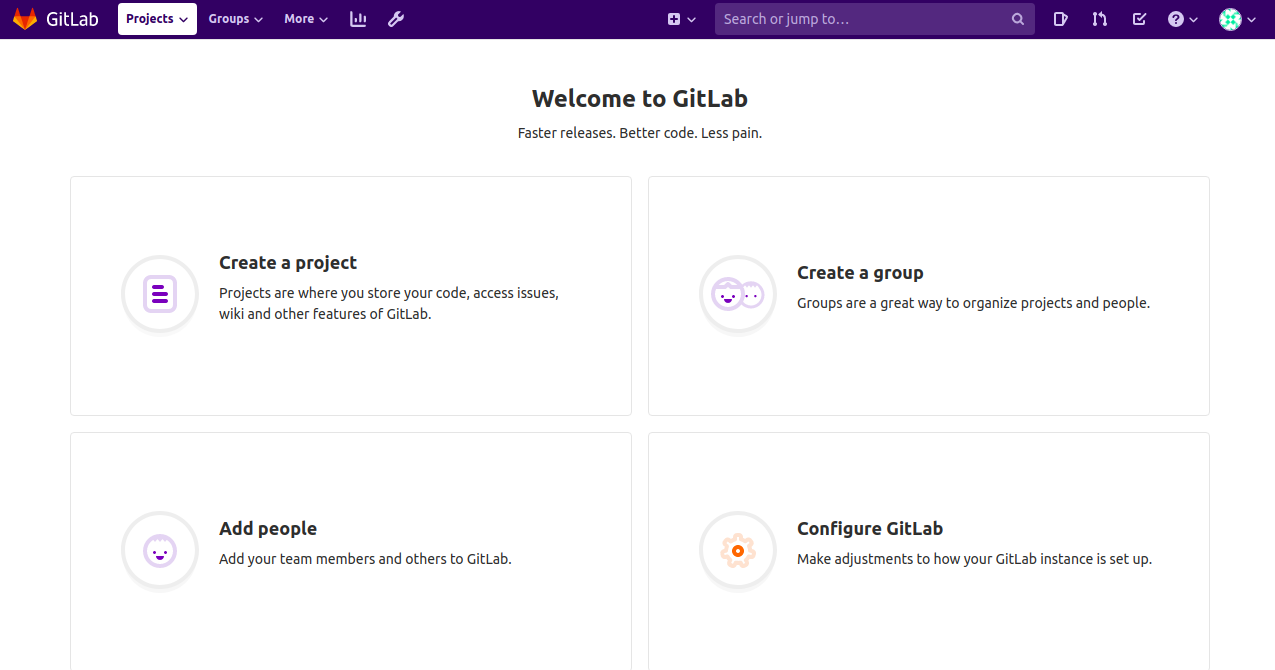
Enter root as your username, your specified password, and click on the Sign in button. You should see the GitLab dashboard in the following screen:
Step 4 – Disable User Sign Up
By default, GitLab allows new users to sign up, which is very dangerous for security reasons. It is recommended to disable user registration on the GitLab welcome page.
To disable User Sign Up, click on the Admin area as shown below:
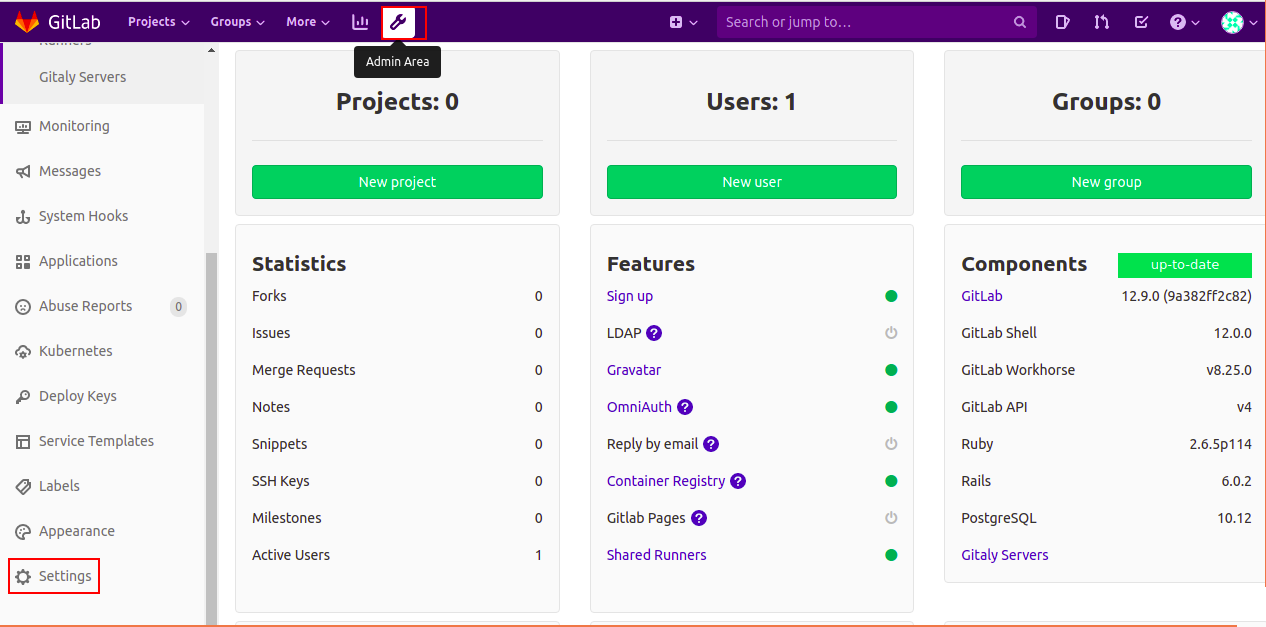
Now, click on Settings in the left pane. You should see the following page:
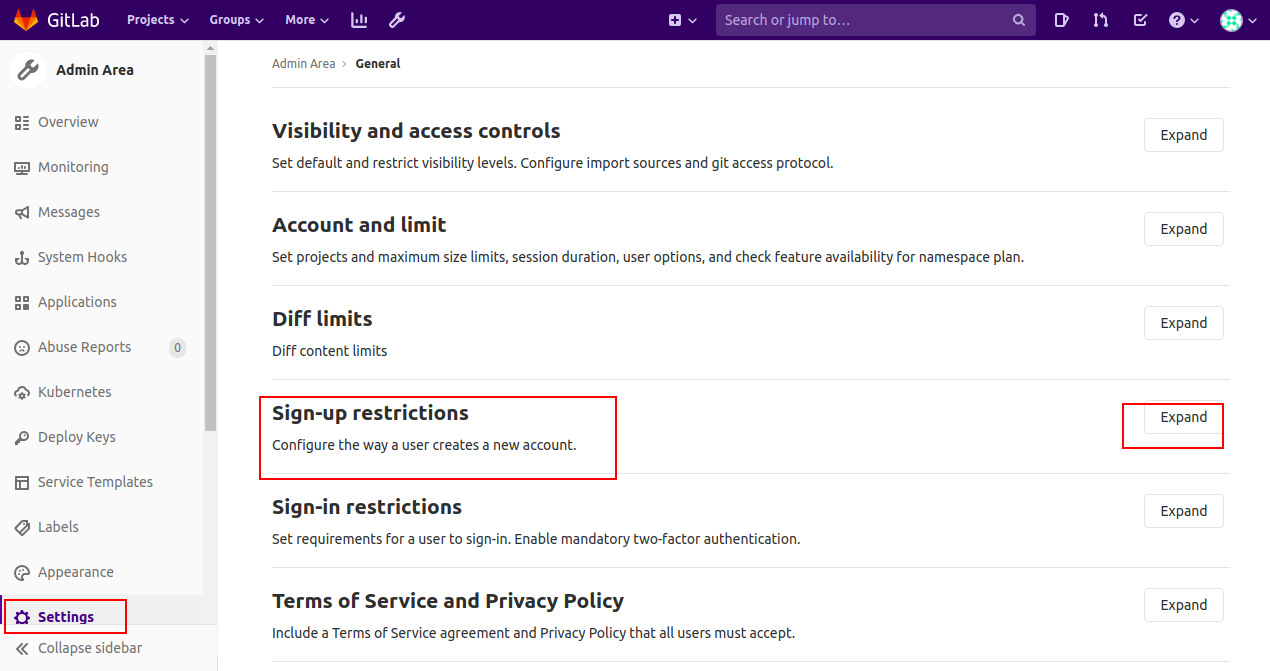
Next, Expand the Sign-up restrictions. You should see the following page:
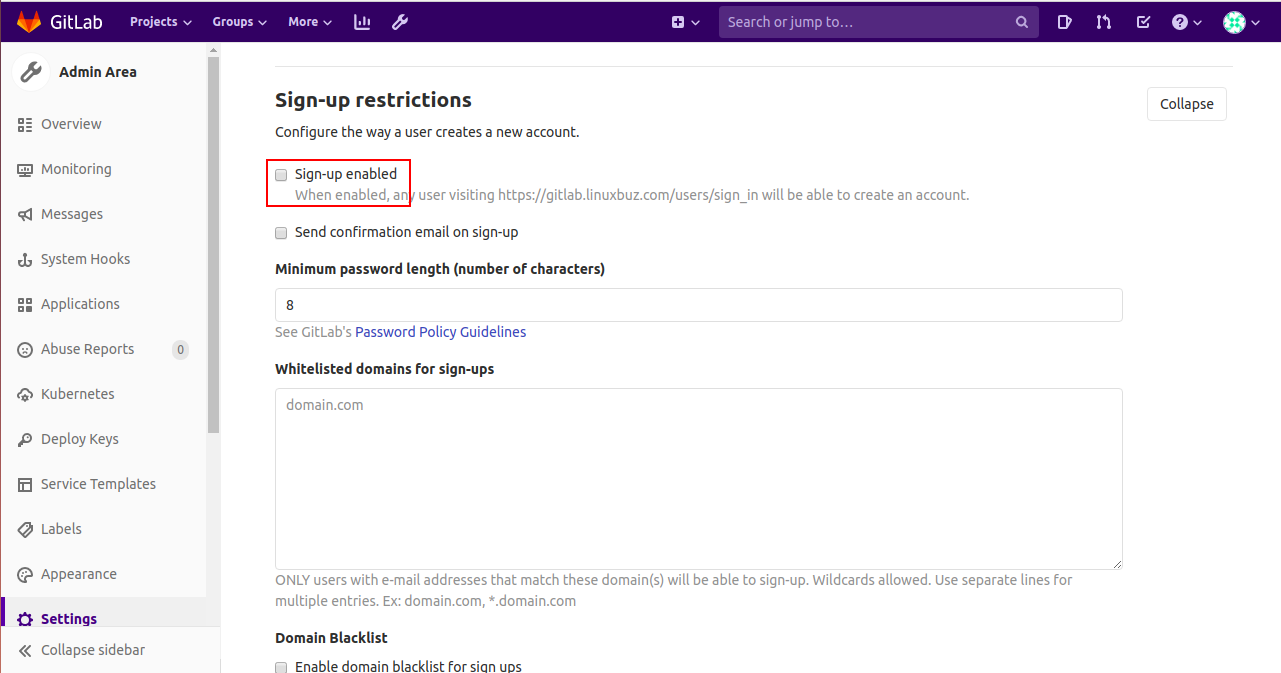
Next, uncheck Sign-up enabled button to disable User registration on the GitLab welcome page and click on the Save Changes button.
Next, log out of your GitLab dashboard. You should see the following screen:
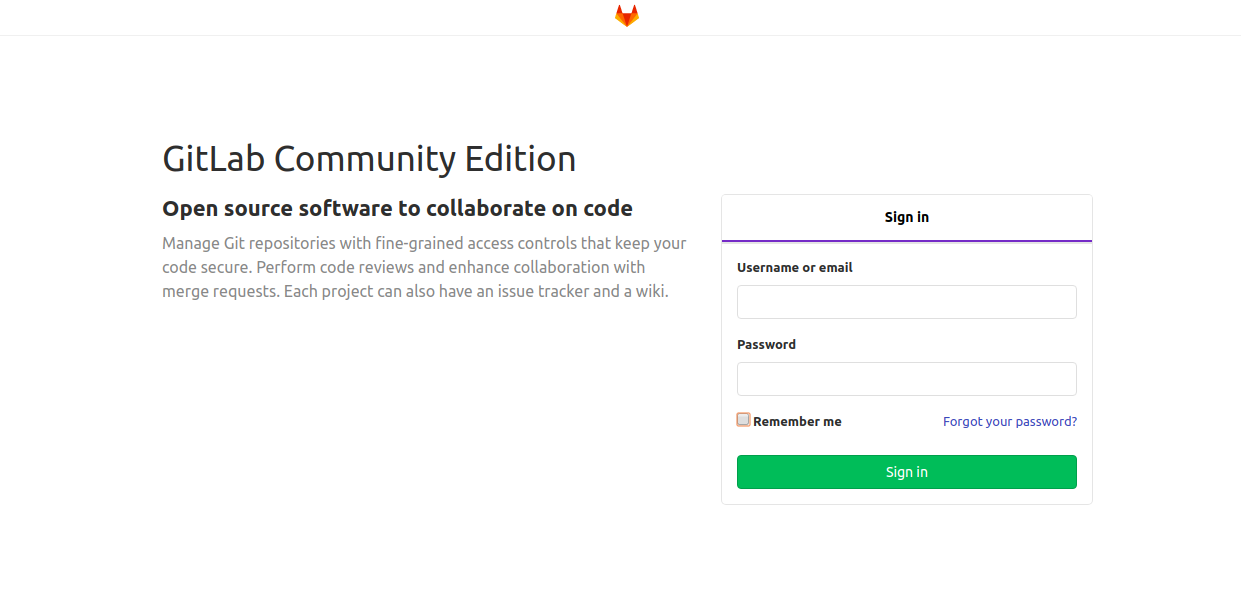
As you can see, the tab for user registration is missing.
Step 5 – Automate GitLab Backup
You can take a complete backup of GitLab data with the following command:
gitlab-rake gitlab:backup:create
This command will take a complete backup of GitLab data and save it in the /var/opt/gitlab/backups directory. Once the backup has been completed successfully, you should get the following output:
2020-03-22 10:59:34 -0400 -- Dumping database ...
Dumping PostgreSQL database gitlabhq_production ... [DONE]
2020-03-22 10:59:37 -0400 -- done
2020-03-22 10:59:37 -0400 -- Dumping repositories ...
2020-03-22 10:59:38 -0400 -- done
2020-03-22 10:59:38 -0400 -- Dumping uploads ...
2020-03-22 10:59:38 -0400 -- done
2020-03-22 10:59:38 -0400 -- Dumping builds ...
2020-03-22 10:59:38 -0400 -- done
2020-03-22 10:59:38 -0400 -- Dumping artifacts ...
2020-03-22 10:59:38 -0400 -- done
2020-03-22 10:59:38 -0400 -- Dumping pages ...
2020-03-22 10:59:38 -0400 -- done
2020-03-22 10:59:38 -0400 -- Dumping lfs objects ...
2020-03-22 10:59:38 -0400 -- done
2020-03-22 10:59:38 -0400 -- Dumping container registry images ...
2020-03-22 10:59:38 -0400 -- done
Creating backup archive: 1584889178_2020_03_22_12.9.0_gitlab_backup.tar ... done
Uploading backup archive to remote storage  ... skipped
Deleting tmp directories ... done
done
done
done
done
done
done
done
done
Deleting old backups ... skipping
Backup task is done.
It is recommended to schedule backups with Cron so that you don’t need to run backups regularly.
You can schedule backups by editing the following file:
nano /etc/crontab
Add the following line to back up GitLab data every day at 8:00 PM:
0 20 * * * gitlab-rake gitlab:backup:create
Save and close the file when you are finished.
Conclusion
Congratulations! You have successfully installed and configured GitLab CE on CentOS 8 server. You can now host your own repository with GitLab and start collaborating with other developers today with GitLab on a VPS with Atlantic.Net!
* This post is for informational purposes only and does not constitute professional, legal, financial, or technical advice. Each situation is unique and may require guidance from a qualified professional.
Readers should conduct their own due diligence before making any decisions.