Syncthing is a free and open-source file synchronization tool used to synchronize files across multiple devices. Syncthing uses peer-to-peer architecture, meaning that each device attached to your Syncthing network retains copies of the files in your shared folders and pushes new content whenever any changes have been made. Syncthing can be run on most operating systems including Linux, Windows, MacOS, FreeBSD, Solaris and OpenBSD.
Syncthing offers many features and benefits, some of which are listed below:
- Easy-to-use
- Secure against attacks
- Powerful and portable
- Safe from data loss
- Fully automatic
In this tutorial, we will show you how to install and configure the Syncthing Cloud Sync service on Ubuntu 18.04.
Prerequisites
- Two fresh Ubuntu servers
- Root passwords configured on both servers.
Step 1 – Install Syncthing on Both Servers
By default, Syncthing is not available in the Ubuntu 18.04 default repository, so you will need to add Syncthing repository in your system.
First, install the required packages with the following command:
apt-get install curl apt-transport-https -y
Once installed, download and import the GPG Key for the repository with the following command:
curl -s https://syncthing.net/release-key.txt | apt-key add -
Next, add the Syncthing repository with the following command:
echo "deb https://apt.syncthing.net/ syncthing release" > /etc/apt/sources.list.d/syncthing.list
Next, update the repository and install the Syncthing service with the following command:
apt-get update -y
apt-get install syncthing -y
Once installed, you can verify the installed version of Syncthing with the following command:
syncthing --version
You should get the following output:
syncthing v1.3.4 "Fermium Flea" (go1.13.7 linux-amd64) deb@build.syncthing.net 2020-01-14 07:01:03 UTC
Note: Now repeat the process on Server 2
Step 2 – Create a Systemd Service File for Syncthing
Next, you will need to create a systemd service file to manage the Syncthing service on both servers.
On server1, create a systemd service file with the following command:
nano /etc/systemd/system/syncthing@.service
Add the following lines:
[Unit]
Description=Syncthing - Open Source Continuous File Synchronization for %I
Documentation=man:syncthing(1)
After=network.target

[Service]
User=%i
ExecStart=/usr/bin/syncthing -no-browser -gui-address="server1-ip-address:8384" -no-restart -logflags=0
Restart=on-failure
SuccessExitStatus=3 4
RestartForceExitStatus=3 4

[Install]
WantedBy=multi-user.target
Save and close the file when you are finished.
On server2, create a systemd service file with the following command:
nano /etc/systemd/system/syncthing@.service
Add the following lines:
[Unit]
Description=Syncthing - Open Source Continuous File Synchronization for %I
Documentation=man:syncthing(1)
After=network.target

[Service]
User=%i
ExecStart=/usr/bin/syncthing -no-browser -gui-address="server2-ip-address:8384" -no-restart -logflags=0
Restart=on-failure
SuccessExitStatus=3 4
RestartForceExitStatus=3 4

[Install]
WantedBy=multi-user.target
Save and close the file when you are finished. Next, reload the systemd daemon and start the Syncthing service as a root user on both servers with the following command:
systemctl daemon-reload
systemctl start syncthing@root
Next, enable the Syncthing service to start after system reboot with the following command:
systemctl enable syncthing@root
Next, verify the status of the Syncthing service with the following command:
systemctl status syncthing@root
You should get the following output:

At this point, Syncthing service is started and listening on port 8384.
Step 3 – Access Syncthing Web Interface
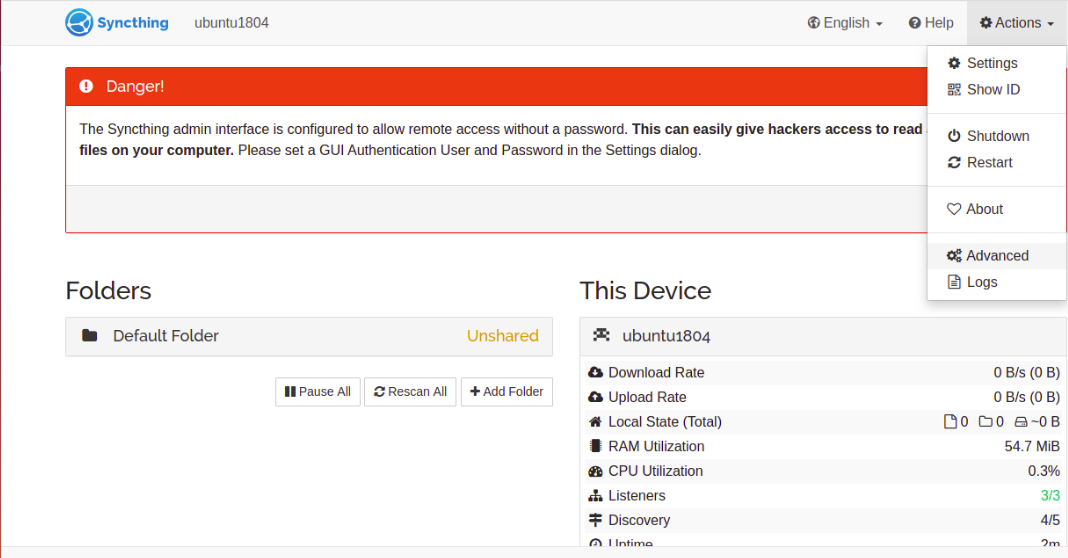
Now, open your web browser and access the Syncthing web UI using the URL http://server1-ip-address:8384. You will be redirected to the Syncthing web interface as shown below:

By default, the Syncthing web interface can be accessed without username and password, so it is a good idea to set an admin user and password for Syncthing.
To do so, click on the Actions => Advanced in the top-right pane. You should see the following page:
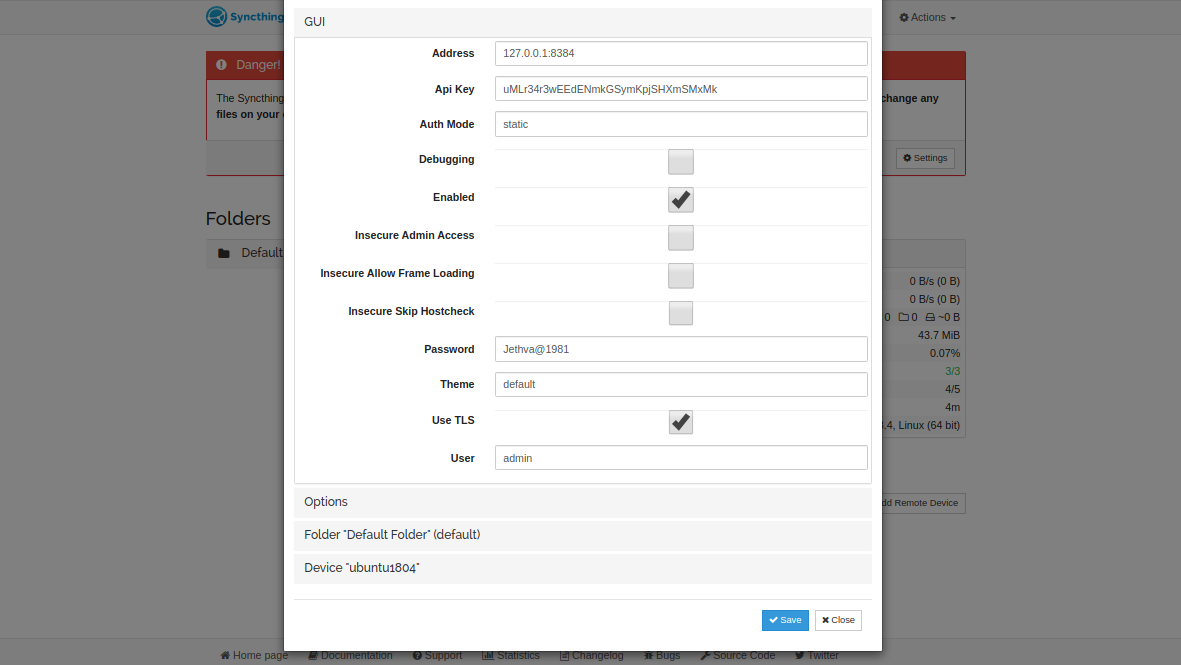
Now, provide your admin username and password and click on the Save button to apply the changes. You should get an authentication prompt for the username and password as shown below:
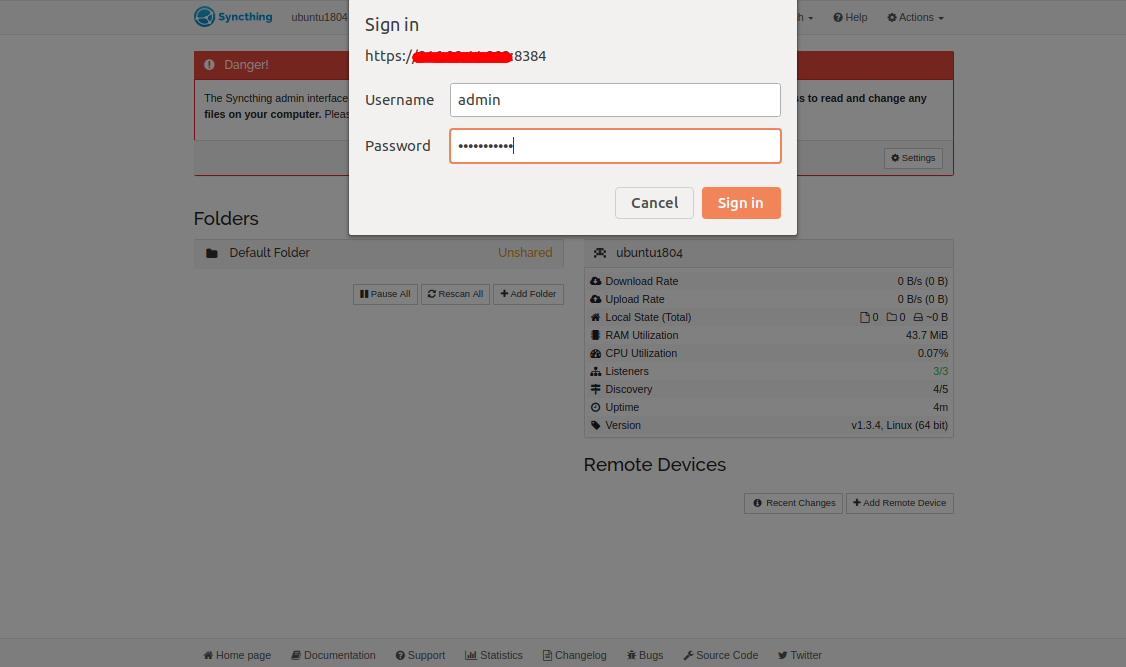
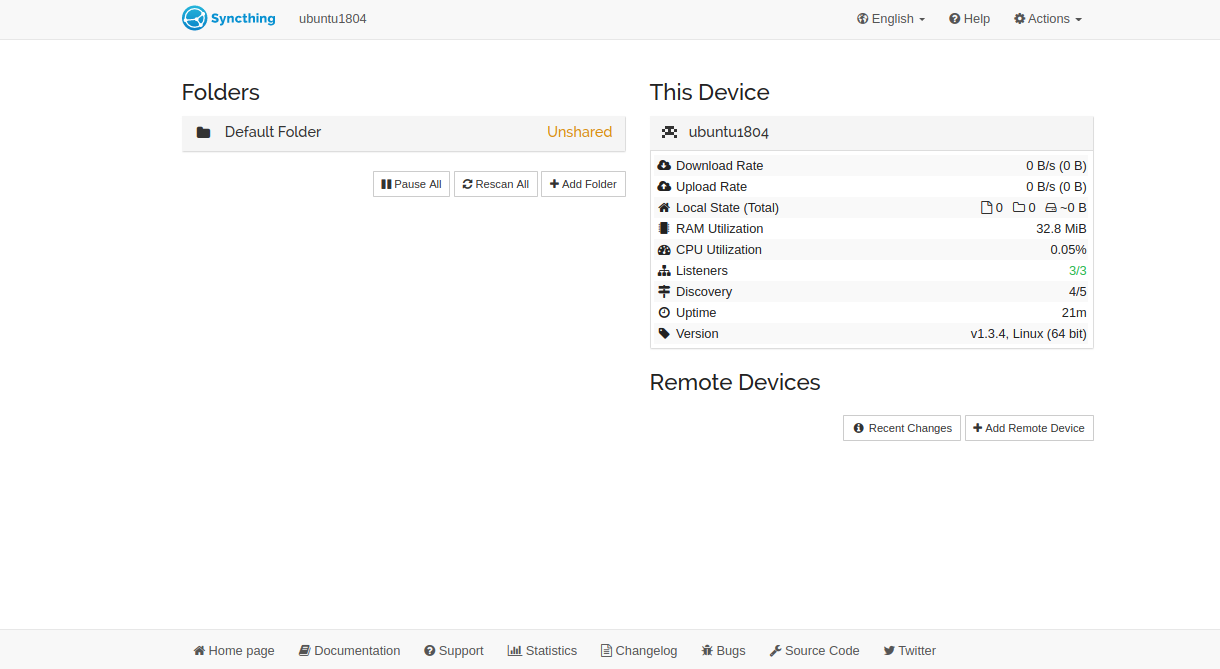
Provide your admin username and password and click on the Sign in button. You should see the following page:
Do the same procedure on the second server to set the admin password.
Step 4 – Sync Data Between Two Servers
In this section, we will create a shared directory on server1 and sync it with server2.
Create a Shared Directory
First, you will need to add a folder that you want to share between two servers.
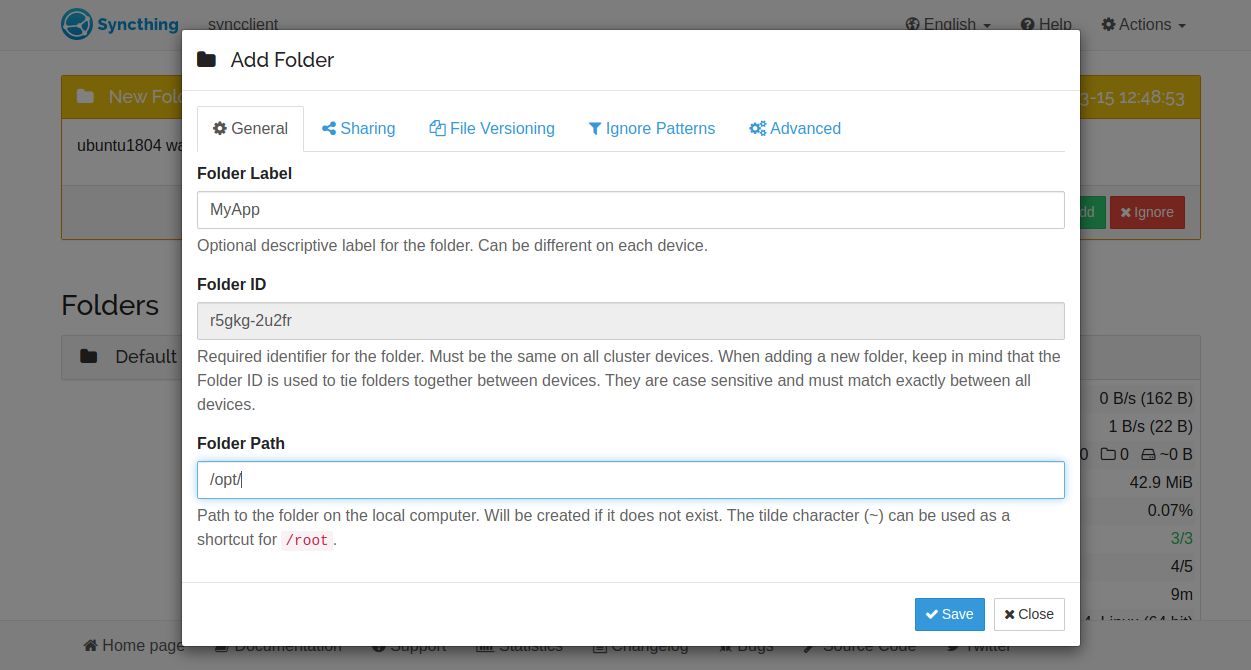
On the server1 dashboard, click on Add Folder. You should see the following screen:

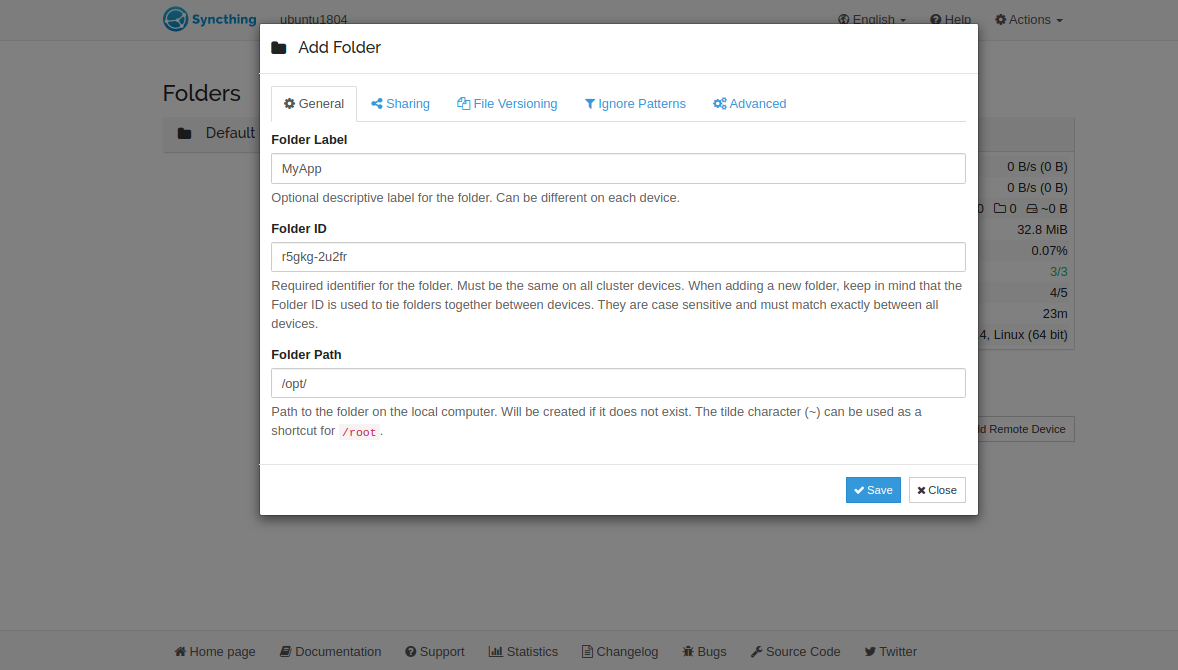
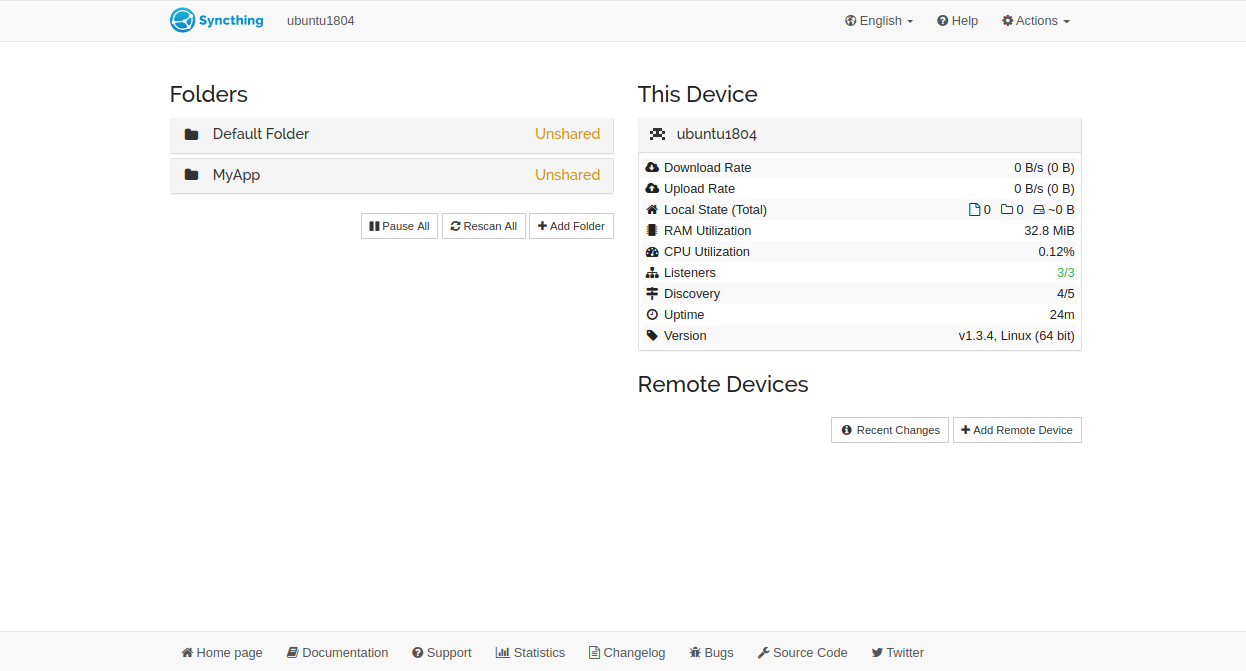
Provide your folder name, folder ID, and the path of the folder and click on the Save button. Once the folder has been created, you should see the following screen:
Sync Device ID
In order to get your two servers to talk to each other, you will need to exchange device IDs with other servers.
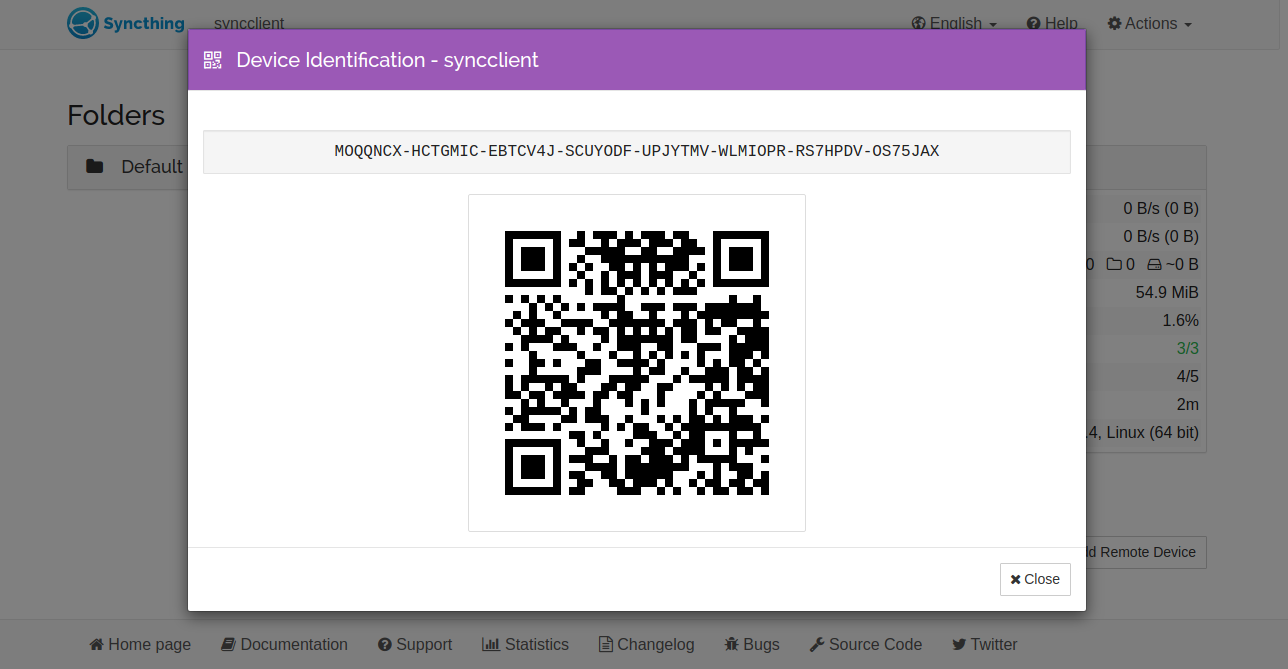
First, you will need to find the device ID of the second server.
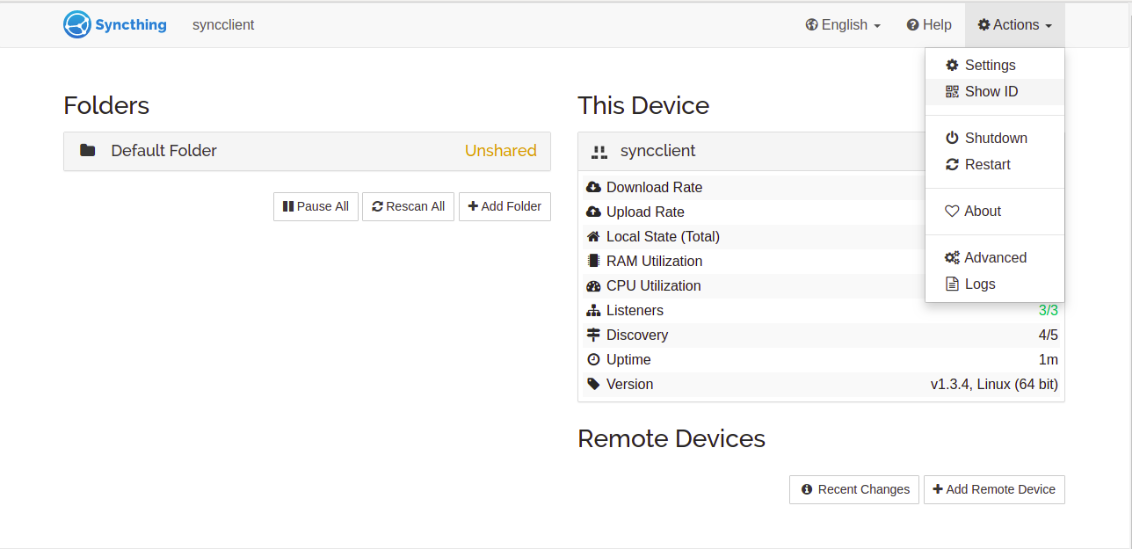
On the server2 dashboard, click on the Actions => Show ID to obtain Device ID as shown below:
On the server1 dashboard, click on Add Remote Device as shown below:
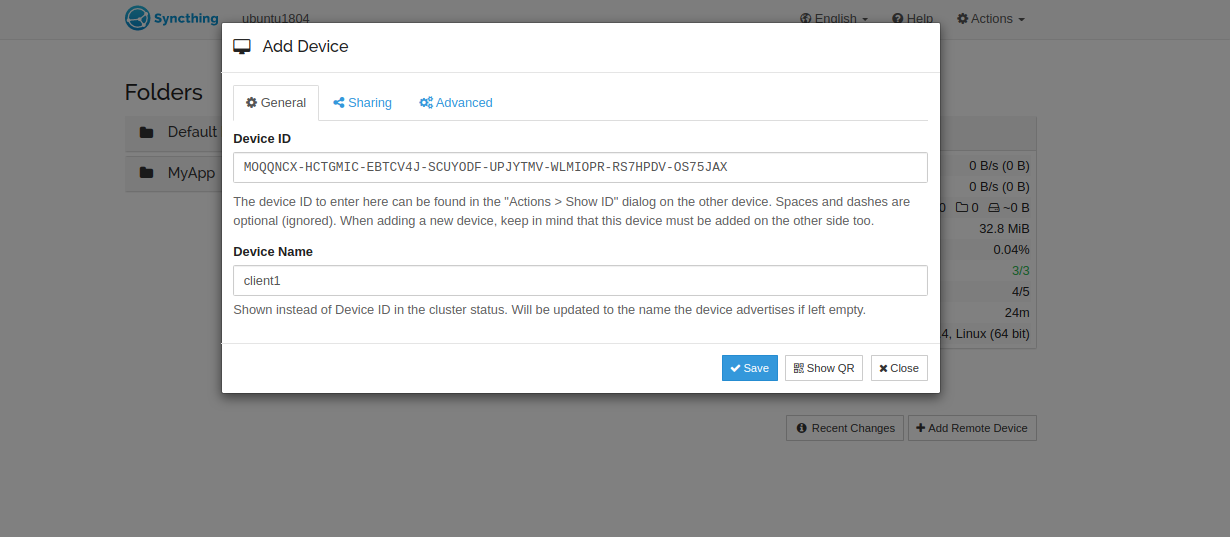
Provide server2 device ID, Device Name and click on the Sharing tab. You should see the following page:

Select a directory that you created earlier and click on the Save button. You should see the following page:
On the Server2 dashboard, refresh the page. You should see the following page:
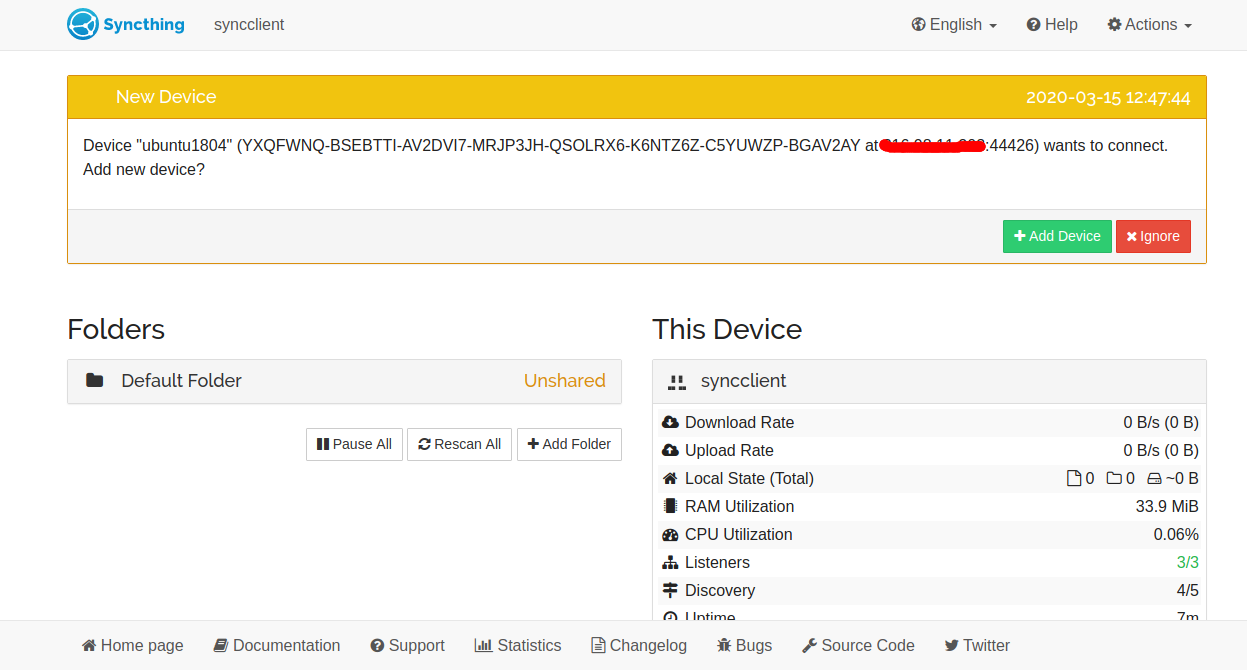
Click on the Add Device button to add the Server1 device ID to Server2. You should see the following page:
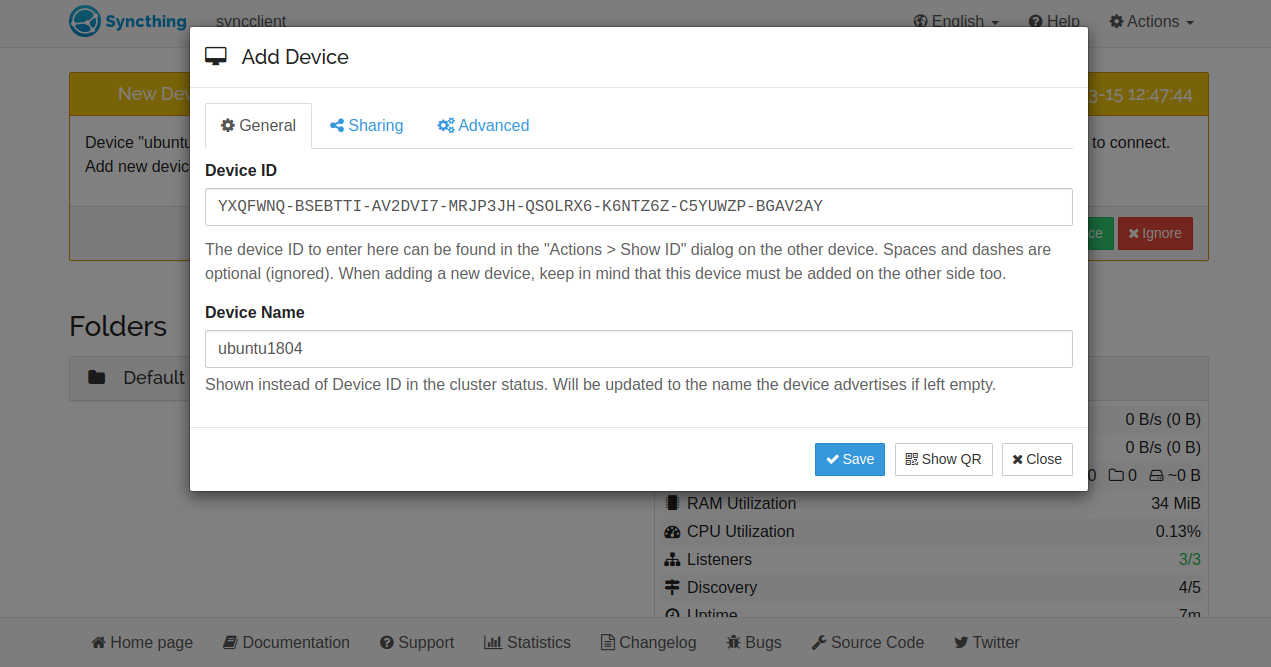
Click on the Save button to add the Server1 device ID to Server2. You will be asked whether you want to add folder shared on Server1 as shown below:

Click on the Add button. You should see the following page:
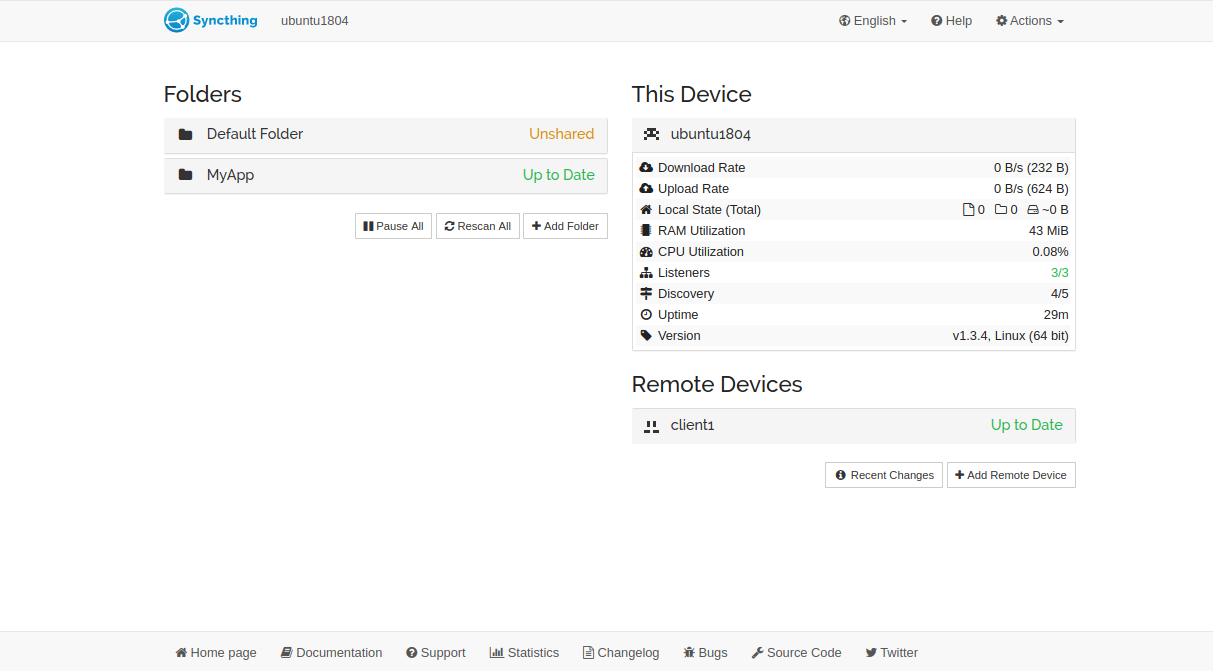
Provide Folder label, Folder ID, Folder path and click on the Save button. You should see that server1 has been added to server2 in the following page:
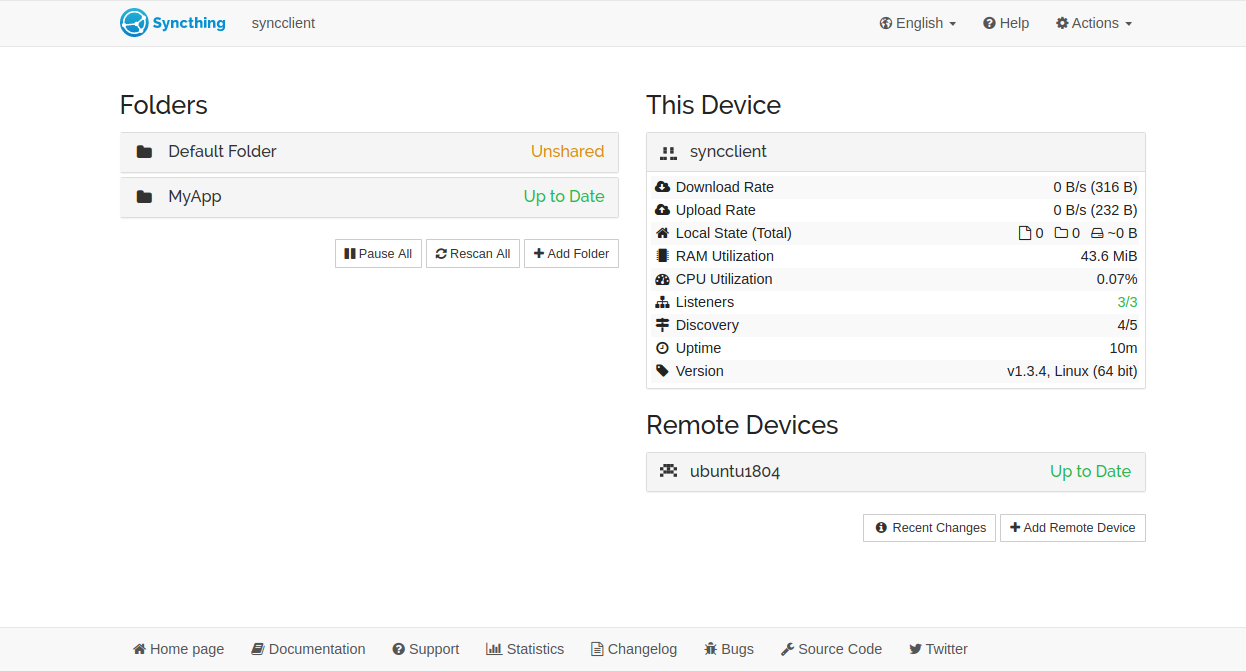
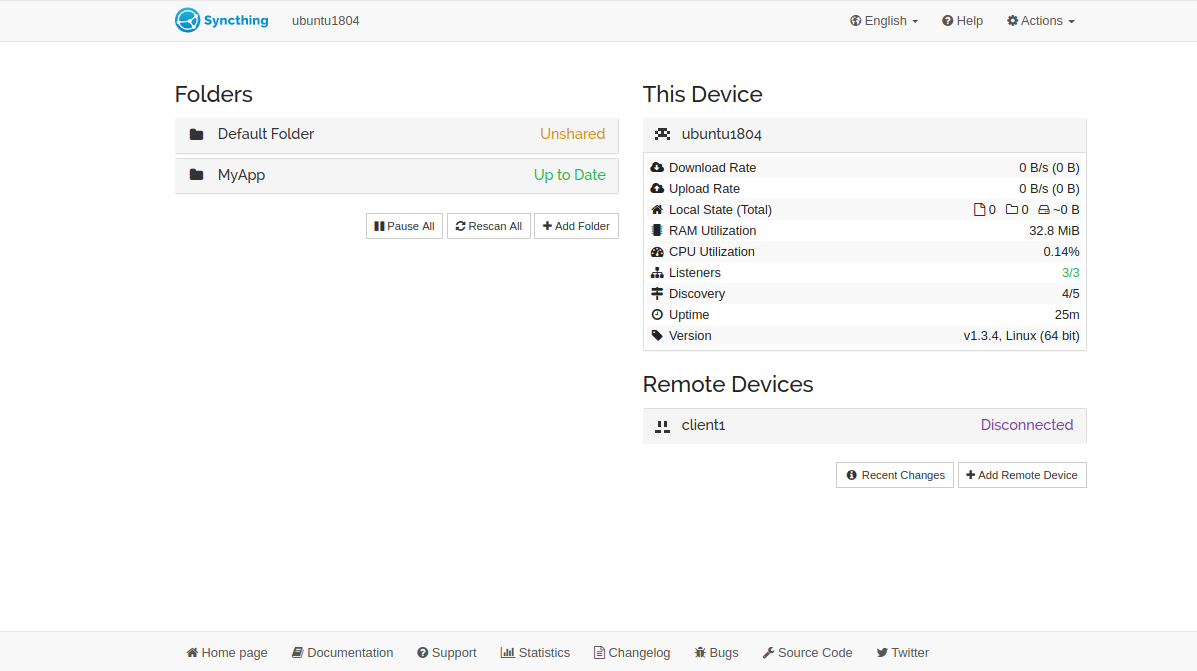
On the server1 dashboard, refresh the page and you should see that server2 has been added to server1 in the following page:
At this point, both servers are connected and syncing the directory /opt/MyApp. Now, any changes made in the /opt/MyApp directory will be replicated to the other server.
Conclusion
In the above guide, you learned how to install and configure the Syncthing service on Ubuntu 18.04 server. You also learned how to sync a directory between two servers. You can now add an additional directory or server to sync. Try it today on VPS Hosting from Atlantic.Net!
* This post is for informational purposes only and does not constitute professional, legal, financial, or technical advice. Each situation is unique and may require guidance from a qualified professional.
Readers should conduct their own due diligence before making any decisions.