MySQL is a free and open-source relational database management system for Linux-based operating systems. MySQL is the most widely used database system and is used for many open-source projects and high availability systems. If your server is running the older version of MySQL 5.7, then it is recommended to install MySQL 8 to use newly released features.
In this tutorial, we will explain how to install MySQL 8 on Ubuntu 18.04.
Step 1 – Install MySQL 8 Repository
By default, MySQL 8 is not available in the Ubuntu 18.04 default repository, so you will need to add the MySQL 8 repository in your system.
First, download the repository package with the following command:
apt-get update -y
wget -c https://repo.mysql.com//mysql-apt-config_0.8.13-1_all.deb
Once downloaded, install the downloaded package with the following command:
dpkg -i mysql-apt-config_0.8.13-1_all.deb
During the installation process, you will be asked to choose the MySQL version as shown in the following screen:
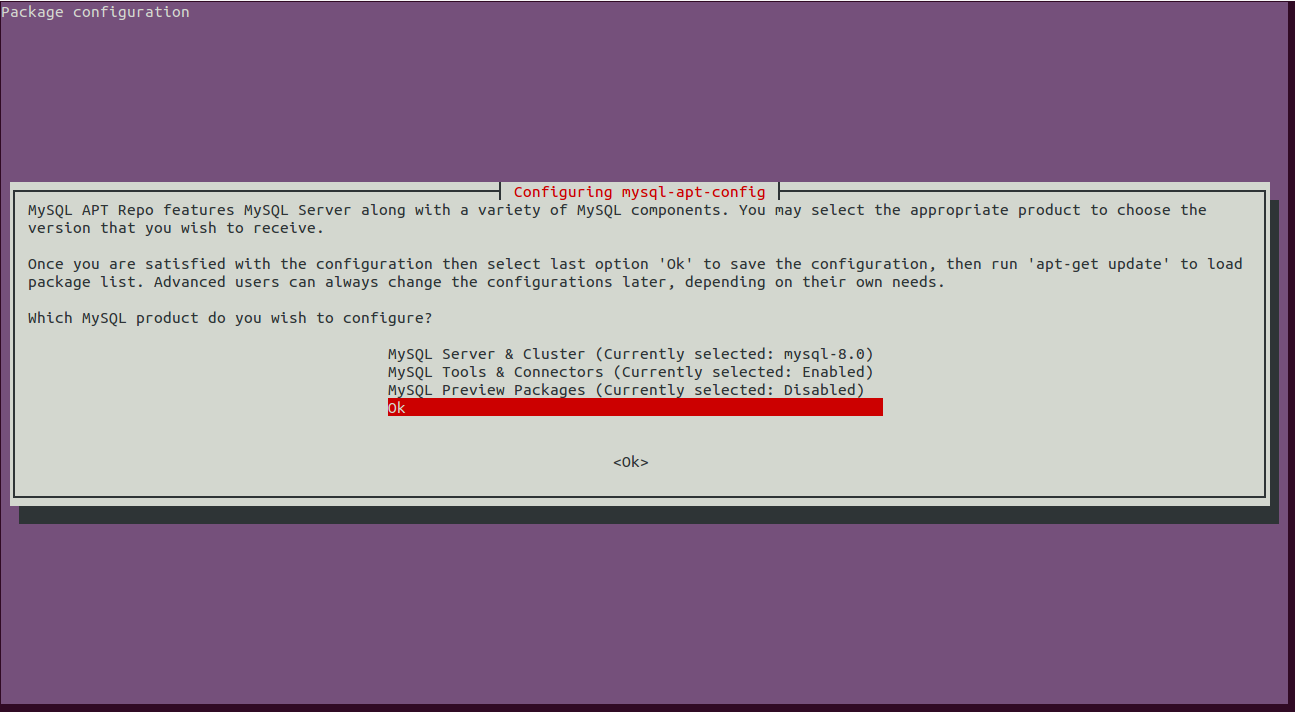
Scroll down, select Ok and hit Enter to finish the installation.
Step 2 – Install MySQL 8
Next, update the repository with the following command:
apt-get update -y
Once the repository is updated, run the following command to install MySQL 8 in your system.
apt-get install mysql-server -y
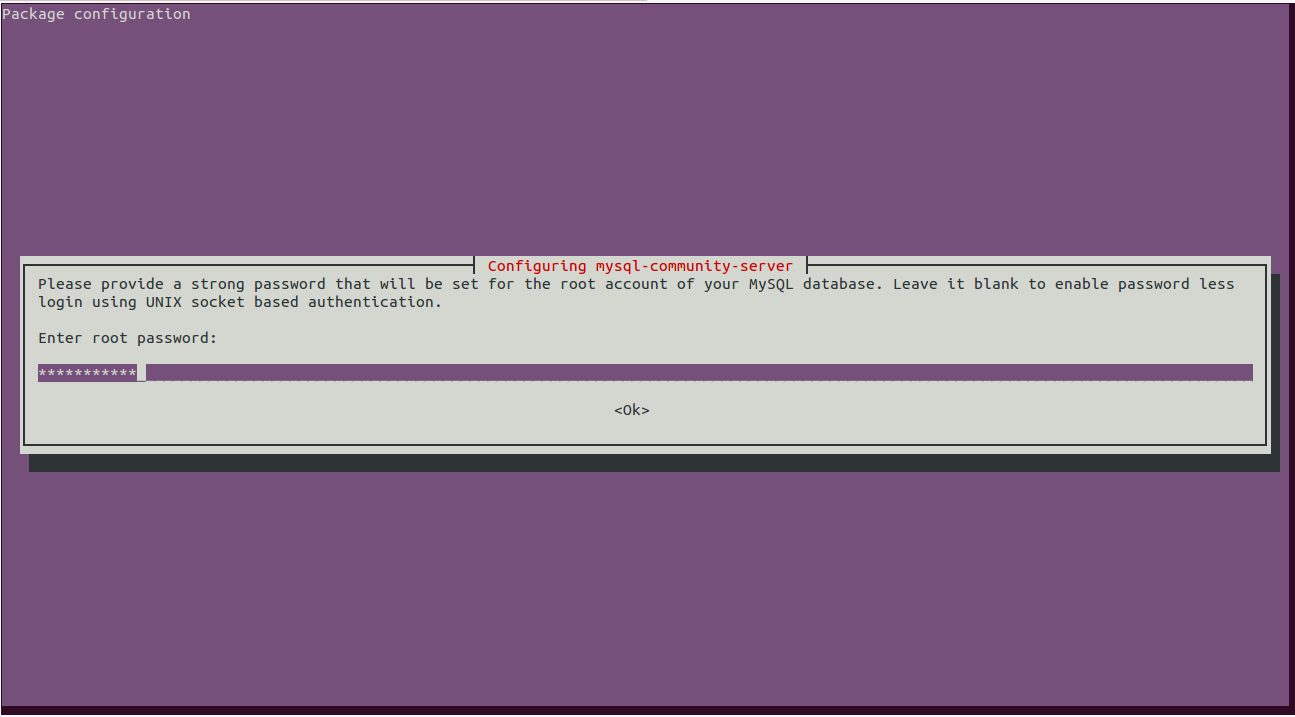
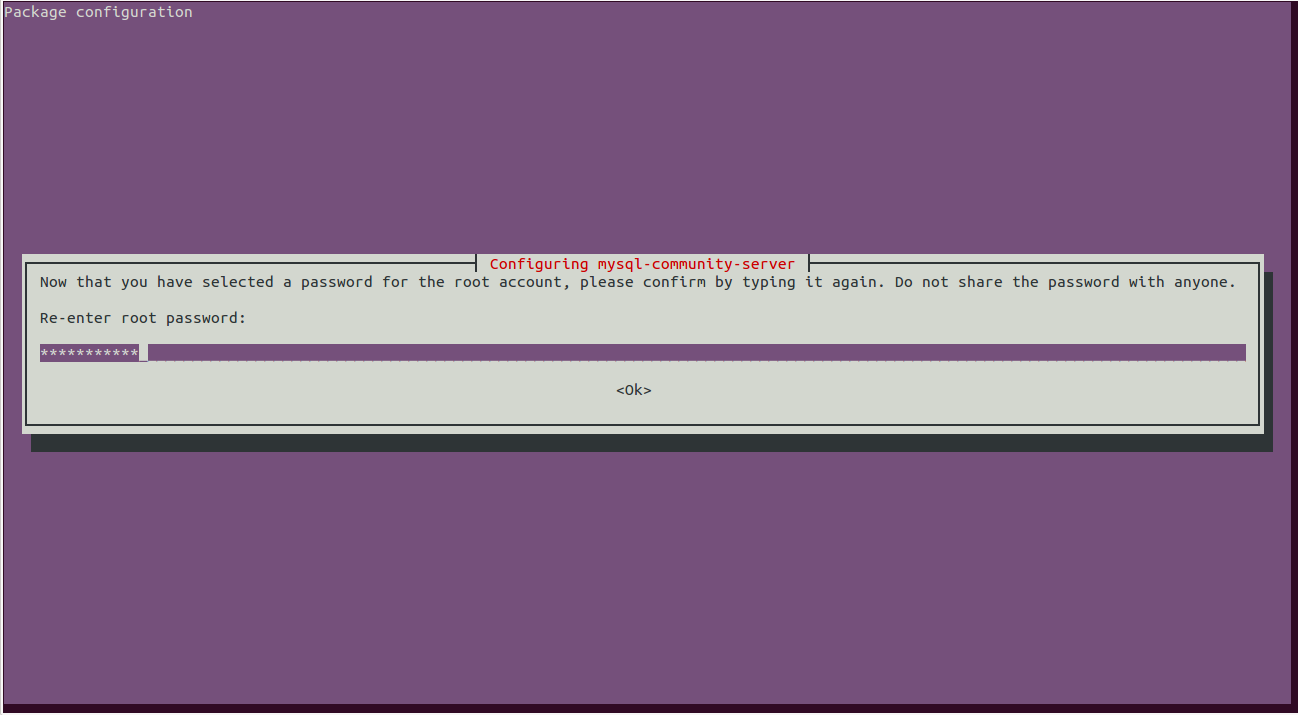
During the installation process, you will be asked to set the MySQL root password as shown below:
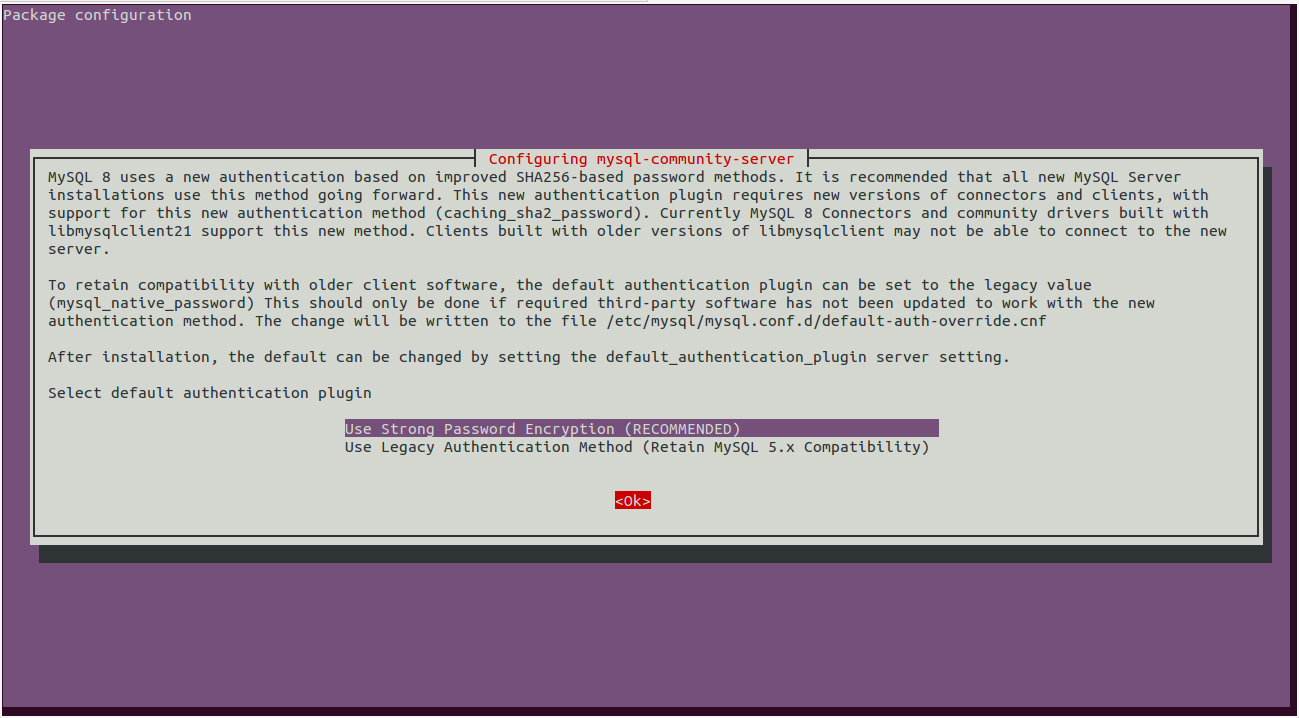
Next, you will need to select the default authentication plugin for MySQL as shown below:
Select “Use Strong Password Encryption” and hit Enter to finish the installation.
Next, you can verify the installed version of the MySQL with the following command:
mysql -V
You should get the following output:
mysql Ver 8.0.19 for Linux on x86_64 (MySQL Community Server - GPL)
Step 3 – Manage MySQL Service
You can manage the MySQL service with the systemctl utility.
To start the MySQL service, run the following command:
systemctl start mysql
To enable the MySQL service to start after a system reboot, run the following command:
systemctl enable mysql
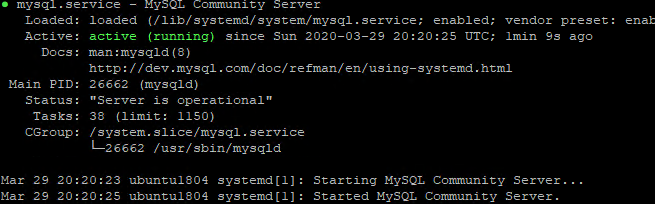
To check the status of the MySQL service, run the following command:
systemctl status mysql
Output:
Step 4 – Secure MySQL Installation
It is also recommended to secure the MySQL installation and set the MySQL root password. You can do it using the mysql_secure_installation script:
mysql_secure_installation
You will be asked to provide your current root MySQL password as shown below:
Securing the MySQL server deployment.

Enter password for user root:
Provide your root password and hit Enter. You will be asked to validate the password to improve security as shown below:

Type Y and hit Enter to check the password strength as shown below:
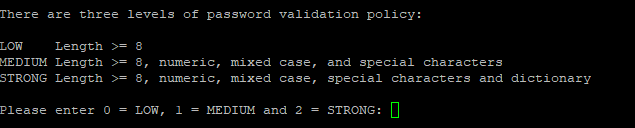
Here, you can select your desired password strength and hit Enter to continue:
Estimated strength of the password: 100
Change the password for root ? ((Press y|Y for Yes, any other key for No) : Y
Type Y and hit Enter to change the password to one with the selected password strength:
New password:
Re-enter new password:
Type your new password and hit Enter to continue. You should see the following output:
Estimated strength of the password: 100
Do you wish to continue with the password provided?(Press y|Y for Yes, any other key for No) : Y
Type Y and hit Enter to continue with your provided password as shown below:
By default, a MySQL installation has an anonymous user,
allowing anyone to log into MySQL without having to have
a user account created for them. This is intended only for
testing, and to make the installation go a bit smoother.
You should remove them before moving into a production
environment.

Remove anonymous users? (Press y|Y for Yes, any other key for No) : Y
Success.
Next, type Y and hit Enter to remove the anonymous user. You should see the following output:
Normally, root should only be allowed to connect from
'localhost'. This ensures that someone cannot guess at
the root password from the network.

Disallow root login remotely? (Press y|Y for Yes, any other key for No) : Y
Next, type Y and hit Enter to disallow root login from the remote machine. You should see the following output:
By default, MySQL comes with a database named 'test' that
anyone can access. This is also intended only for testing,
and should be removed before moving into a production
environment.

Remove test database and access to it? (Press y|Y for Yes, any other key for No) : Y
Type Y and hit Enter to remove the test database. You should see the following output:
 - Dropping test database...
Success.

 - Removing privileges on test database...
Success.

Reloading the privilege tables will ensure that all changes
made so far will take effect immediately.

Reload privilege tables now? (Press y|Y for Yes, any other key for No) : Y
Finally, type Y and hit Enter to reload the privileges tables.
Conclusion
Congratulations! You have successfully installed and secured MySQL 8 on Ubuntu 18.04. You can now connect to MySQL and create a database, user, or table and integrate it with many applications. Get started with MySQL today on VPS Hosting from Atlantic.Net!
* This post is for informational purposes only and does not constitute professional, legal, financial, or technical advice. Each situation is unique and may require guidance from a qualified professional.
Readers should conduct their own due diligence before making any decisions.