Table of Contents
Verified and Tested 06/01/2021
Introduction
In this guide, we will be reviewing the basic configuration options on first initializing your cPanel & WHM server. It will examine some essential areas that may need to be customized by you to get the whole experience and your needs out of cPanel & WHM.
Initial Configuration of cPanel & WHM on CentOS 7
Once you have your cPanel & WHM server provisioned, you will want to log into the server. Upon fresh login, you should be presented with an End User Agreement license page like the one below. After review, click on the blue button “I Agree/Go to Step 2.”
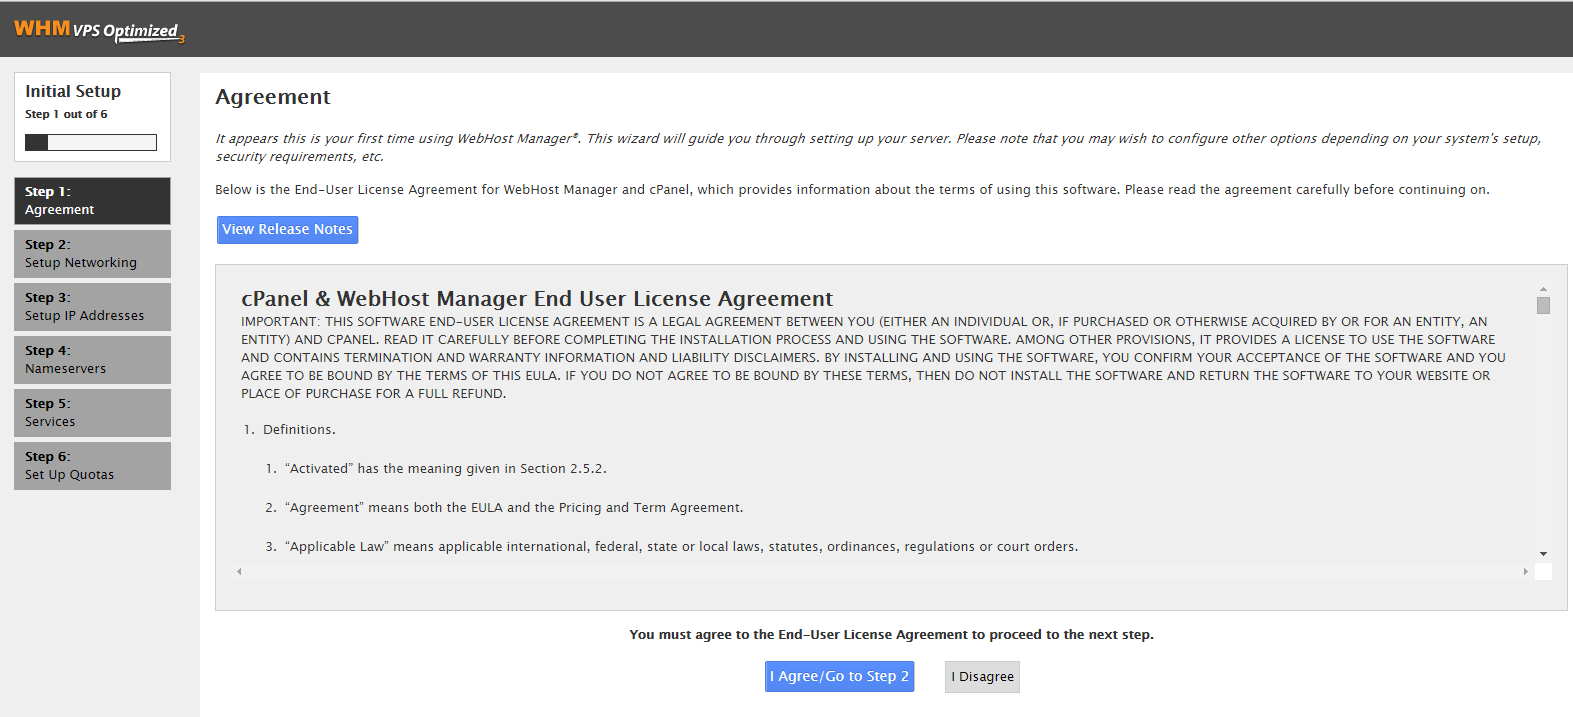 License Agreement
On this next page, you will be prompted to set up networking. The first section on this page is the Contact information. This is information so the server knows how to contact you should something go wrong. This section looks like the below, and the areas 1, 2, 3, and 4 are described as follows:
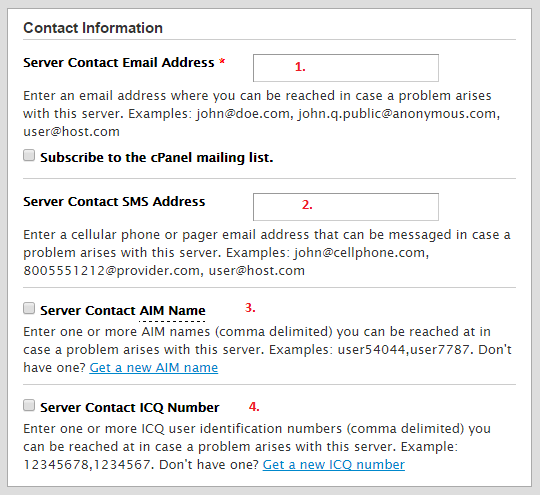 Contact Information
1. “Server Contact Email Address” – This first area is the server contact email address. This would be the email address the server will email should anything go wrong. It is recommended that you insert a contact address that you often check, as it is a required field.
2. “Server Contact SMS Address” – This is an optional field for putting in a phone or pager email that is capable of receiving SMS.
3. “Server Contact AIM Name” – This is an optional field for using an AIM username for the server to message. It will prompt you for a username and password should you enable this.
4. “Server Contact ICQ Number” – This is an optional field for an ICQ number, and it will ask you for the number and password should you enable this.
The next section is the Hostname section which defaults to the below image. For this field, you DO NOT want to use your base domain/website. You will want to use a subdomain of your domain. Something like “server1.domain.tld” or “webserver.domain.tld” where domain.tld is your domain/website. If you do not have a domain, you may make up/create a subdomain, but please note that this value will never resolve if there are no DNS records for it. As an additional note, please use a value here that you either have or will create an A record or other type of DNS record for. This will allow you to access your server by using that subdomain easily.
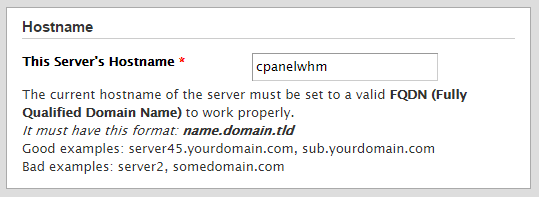 Hostname
The third section on this page is for Resolvers. These are important as they handle how your server will resolve traffic and where it will go. These should be left at the default value of 209.208.127.65 and 209.208.25.18. There is not a third resolver for our servers to use.
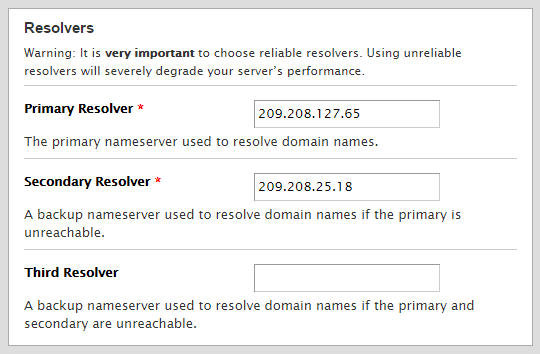 Resolvers
The last section is the Main Network Device. This field should also be left as the default value, as eth0 is the primary network device. Once done, you can click on “Save & Go to Step 3.”
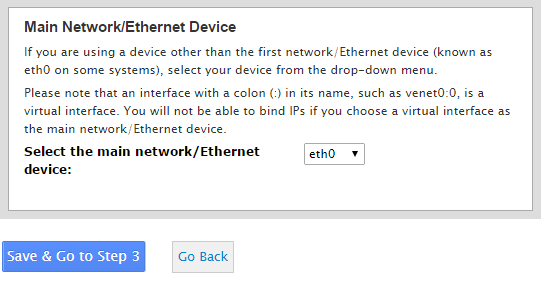 Ethernet Device
The next page will be the “Setup IP Addresses” page. You do not have to do anything here unless you have already reserved and assigned an additional IP to this server. If you have not, you may click “Skip This Step and Use Default Settings.” If you have an additional IP address, add it to the field and click “Add IP(s).”
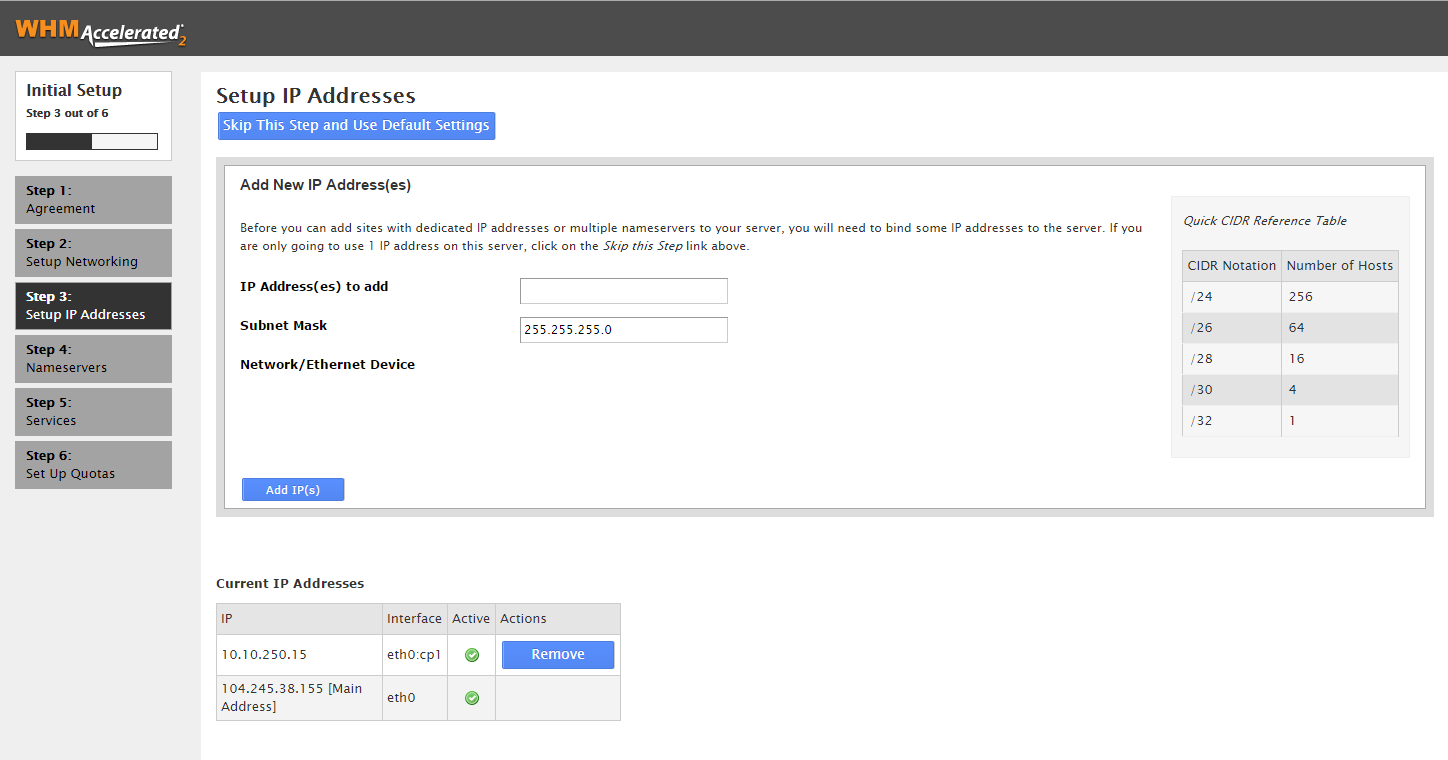 Setup IP Address
The next page will bring you directly to a Nameservers page. The first box here is Nameserver Configuration. It is important to note that if you are NOT using your server to host your own private or public DNS, you should choose the option “Disabled.” If you are using your own nameservers, pick the nameserver option that best applies to you. In most cases, the default BIND will work for your needs.
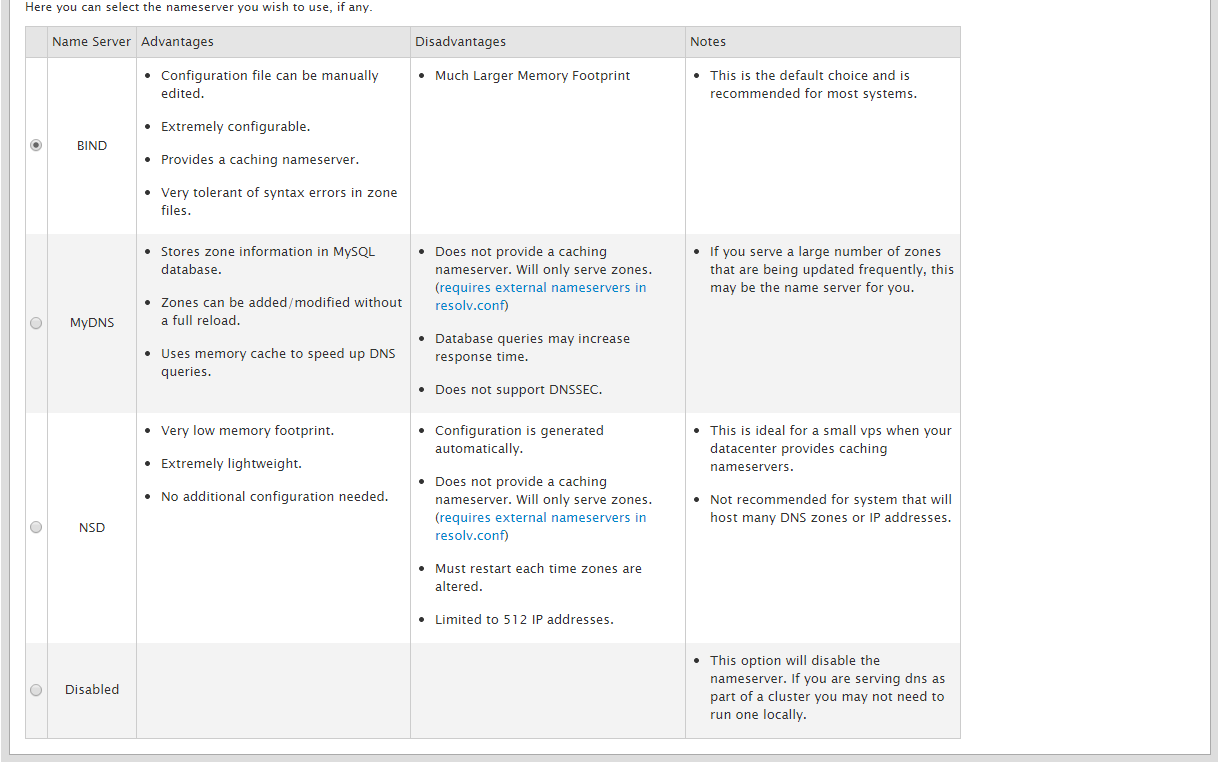 Name Server
After this, there is a section for choosing the nameservers that domains on this server will use. If you have your own nameservers for use, you will put these here. DO NOT leave the default values. Using our Cloud DNS for your domains, you will want to use ns1.quickroutedns and ns2.quickroutedns, as the picture below shows.
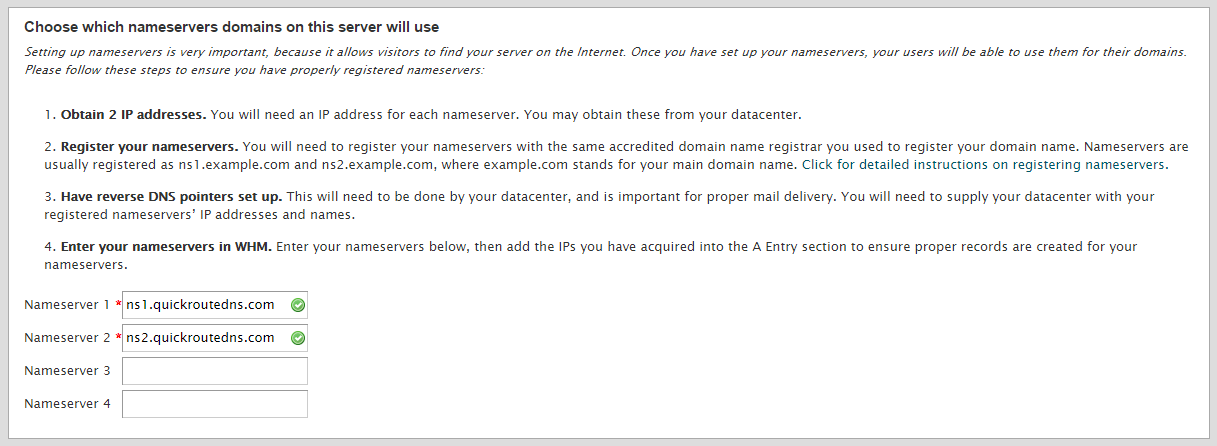 Authoritative DNS
In the next section, you should leave it as is and click on the “Save & Go to Step 5.”
The next page deals with FTP, mail, and cPHulk services. In the first section for FTP, you can leave as the default, which is set to Pure-FTPD. If you’d rather use ProFTPD, you may do so. If you do not need FTP, you may disable it, but if you plan to upload files, it would be best to pick between Pure and Pro FTPD.
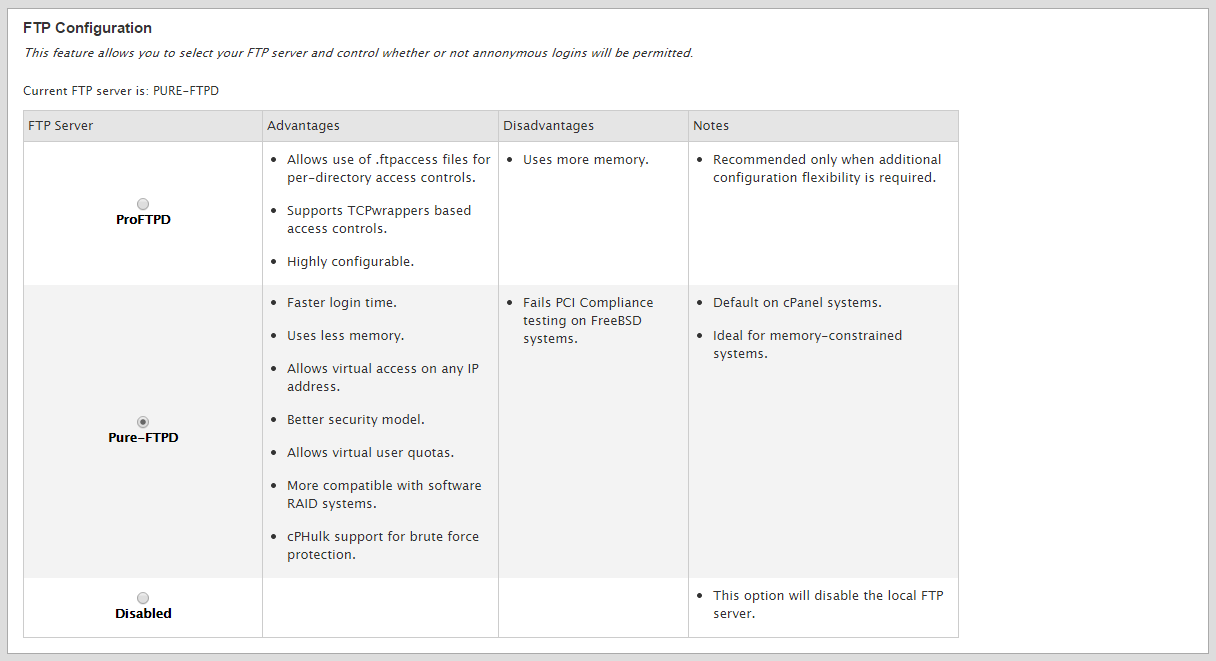 FTP Configuration
The following section deals with email and what you want to use for your mail on the server. If you won’t be using email, you can disable this. Otherwise, the default Dovecot is an excellent choice. You may use Courier if you prefer. There’s also the check box for Convert Mailbox Format. You can leave this checked, and it is only in play if you are migrating email from another server.
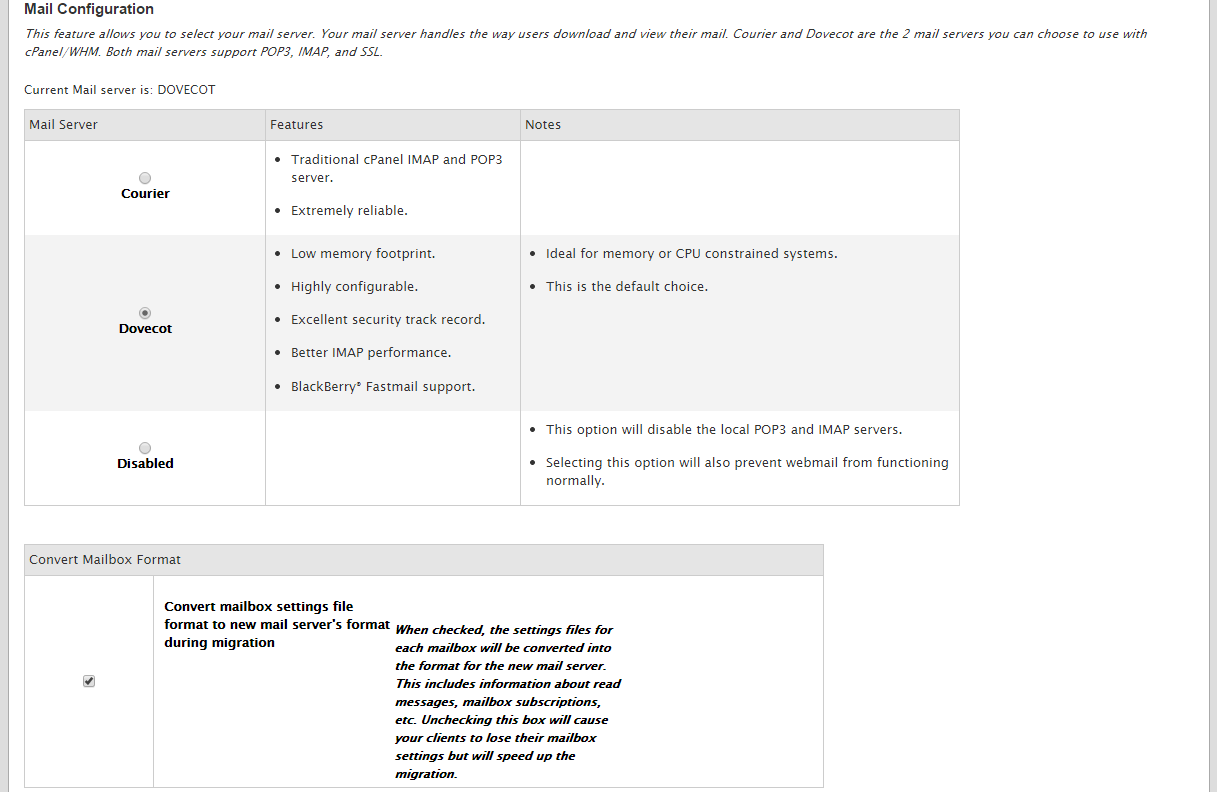 Mail Configuration
The following sections deal with cPHulk and Perl Modules. cPHulk is brute force protection built into cPanel & WHM. It’s a great idea to enable this and leave it on the default. Remember to add your IP to the whitelist for the service once this configuration is done. The standard set of perl modules is used if you use perl modules that reference /usr/bin/perl. Otherwise, it is not needed. You can click on “Save & Go to Step 6” when done here.
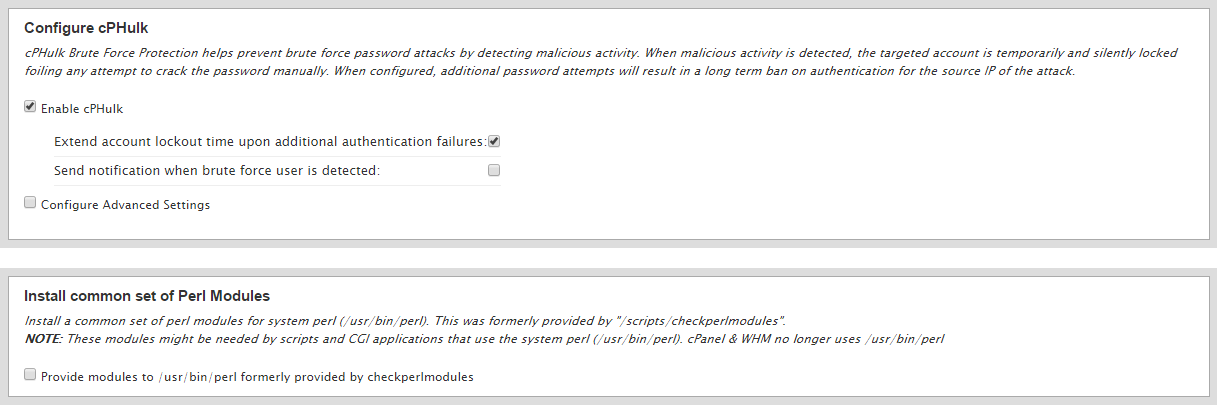 cPHulk
The last page is for Quotas. This page lets you determine if you want to use quotas or not. If you do not, you can not keep track of the website’s quotas or email quotas. Once you decide, click “Finish Setup Wizard,” and we are done with the initial setup. This will bring you to the next page called Feature Showcase.
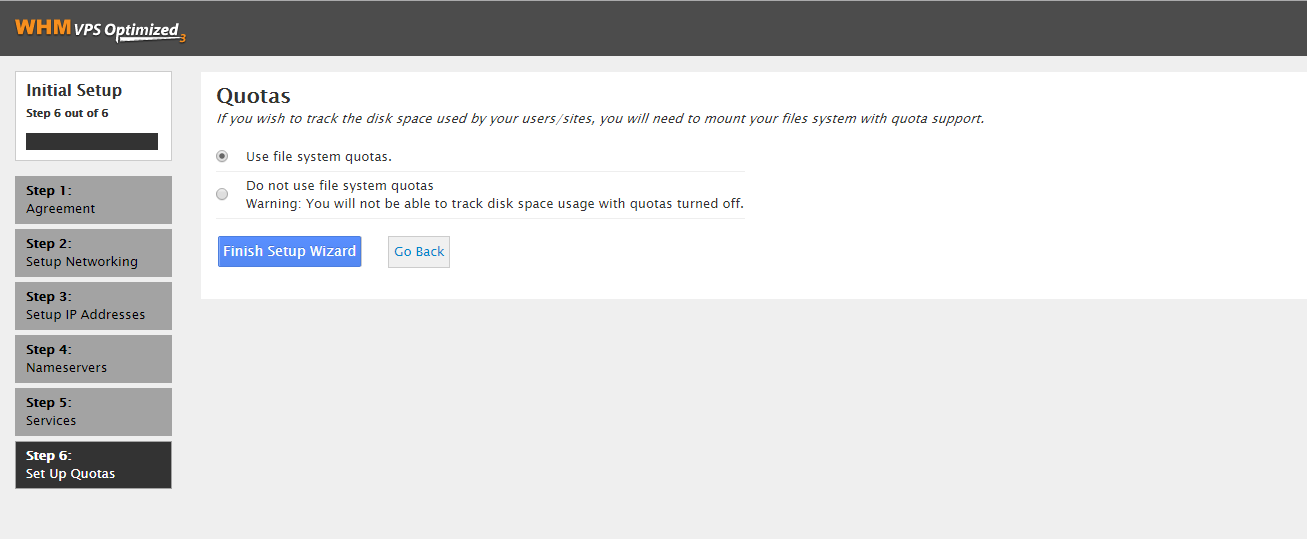 Quotes
The first section on the Feature Showcase page deals with Recommended Features. It’s recommended to keep these enabled, but it is your choice.
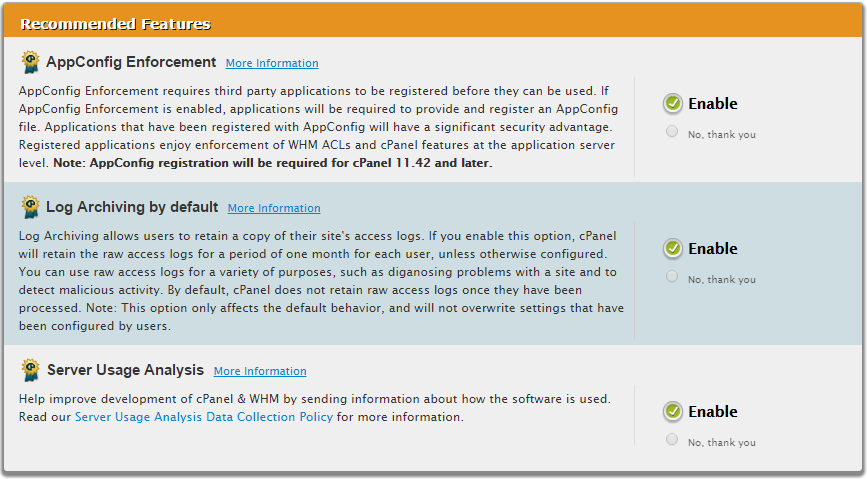 Recommended Features
After that is the New Features list. These are features you can enable or opt-out of. They mainly deal with email. If you would like to email clients to store a copy of messages, turn on the Archiving. If you would like users to use Auto-Discovery in their mail client for email settings, enable the Auto Discovery option. Query Apache for “nobody” senders is one that we highly recommend is enabled. This will allow you to track down compromised email accounts more easily. We also recommend the SMTP Restrictions options to block compromises. Trust X-PHP-Script should only be used if you’re positive no one on your system will be sending or being compromised. This should rarely be enabled. Once done, click the “Save Settings” button, and that will complete all of the configuration necessary to start using cPanel & WHM.
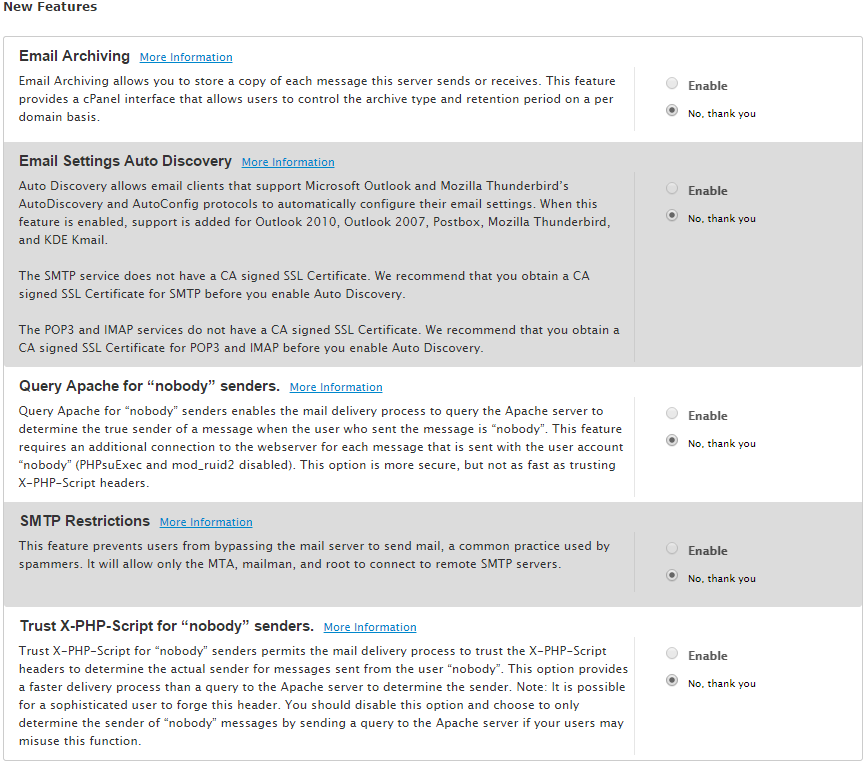 New Features
Learn more about our VPS hosting services and VPS hosting price.
* This post is for informational purposes only and does not constitute professional, legal, financial, or technical advice. Each situation is unique and may require guidance from a qualified professional.
Readers should conduct their own due diligence before making any decisions.