Talkyard is a free and open-source community discussion platform that helps you to share knowledge with your co-workers, customers, volunteers, users. It is an alternative to other discussion platforms including StackOverflow, Slack, Discourse, and Reddit. You can use it as a knowledge base, customer support, discussion forum, and much more.
In this post, we will show you how to install Talkyard Forum with Nginx on Ubuntu 18.04.
Step 1 – Install Required Dependencies
First, you will need to install some required dependencies to your server. You can install all of them with the following command:
apt-get install git curl gnupg2 unzip -y
Once all the dependencies are installed, you can proceed to the next step.
Step 2 – Download Talkyard
First, you will need to download the Talkyard from the Git Hub repository. You can download it with the following command:
git clone -b w-km2 --single-branch https://github.com/debiki/talkyard-prod-one.git talkyard
Once the download is completed, change the directory to talkyard and install the required packages with the following command:
cd talkyard
./scripts/prepare-ubuntu.sh
Step 3 – Install Docker and Docker Compose
Next, you will need to install the Docker and Docker compose to your system. You can install them by running the following script:
./scripts/install-docker-compose.sh
Once both are installed, edit the play-framework.conf file and change some required values:
nano conf/play-framework.conf
Change the following lines:
talkyard.becomeOwnerEmailAddress="[email protected]"
talkyard.hostname="talkyard.example.com"
play.http.secret.key="your-secure-key"
Save and close the file, then edit the .env file and define your database password:
nano .env
Change the following line:
POSTGRES_PASSWORD=your-database-password
Save and close the file when you are finished.
Step 4 – Copy Docker Compose File
Next, you will need to copy a desired Docker Compose file depending on how much RAM your server has. If your server has 2GB RAM, copy the following file:
cp mem/2g.yml docker-compose.override.yml
If your server has 4GB RAM, copy the following file:
cp mem/4g.yml docker-compose.override.yml
Step 5 – Install Talkyard
Now, you will need to install the Talkyard with all the required app. You can start the installation by running the following script:
./scripts/upgrade-if-needed.sh
You should get the following output:
2021-03-13T07:23:03+00:00 upgrade-script: Installing: Starting version v0.2021.08-639ccf013...
Creating network "talkyard_internal_net" with driver "bridge"
Creating talkyard_cache_1  ... done
Creating talkyard_rdb_1    ... done
Creating talkyard_search_1 ... done
Creating talkyard_app_1    ... done
Creating talkyard_web_1    ... done
2021-03-13T07:23:09+00:00 upgrade-script: Installing: Setting current version number to v0.2021.08-639ccf013...
2021-03-13T07:23:09+00:00 upgrade-script: Done. Bye.
Once the installation is completed, you can check all running containers with the following command:
docker ps
You should see the following output:
CONTAINER ID   I
MAGE                                         COMMAND                  CREATED          STATUS                         PORTS                                      NAMES
5793fefc561b   debiki/talkyard-web:v0.2021.08-639ccf013      "/bin/sh -c '/etc/ng…"   31 seconds ago   Up 28 seconds                  0.0.0.0:80->80/tcp, 0.0.0.0:443->443/tcp   talkyard_web_1
b3fee6dd28b8   debiki/talkyard-app:v0.2021.08-639ccf013      "/bin/sh -c 'rm -f /…"   32 seconds ago   Up 3 seconds                   3333/tcp, 9000/tcp, 9443/tcp, 9999/tcp     talkyard_app_1
0898dbac769d   debiki/talkyard-cache:v0.2021.08-639ccf013    "docker-entrypoint.s…"   36 seconds ago   Up 32 seconds                  6379/tcp                                   talkyard_cache_1
e583d8a4d553   debiki/talkyard-rdb:v0.2021.08-639ccf013      "/chown-logs-then-ex…"   36 seconds ago   Restarting (1) 5 seconds ago                                              talkyard_rdb_1
878e757d274d   debiki/talkyard-search:v0.2021.08-639ccf013   "/docker-entrypoint.…"   36 seconds ago   Up 33 seconds                  9200/tcp, 9300/tcp                         talkyard_search_1
Step 6 – Setup Cron Job
Next, you will need to set up a cron job to schedule auto backup and enable automatic upgrades. You can set up it by running the following scripts:
./scripts/schedule-logrotate.sh
./scripts/schedule-daily-backups.sh
./scripts/schedule-automatic-upgrades.sh
You can also check the Talkyard container log with the following command:
docker-compose logs app
docker-compose logs rdb
Step 7 – Access Talkyard
At this point, Talkyard is installed and configured. Now, open your web browser and access the URL http://talkyard.example.com. You will be redirected to the following page:
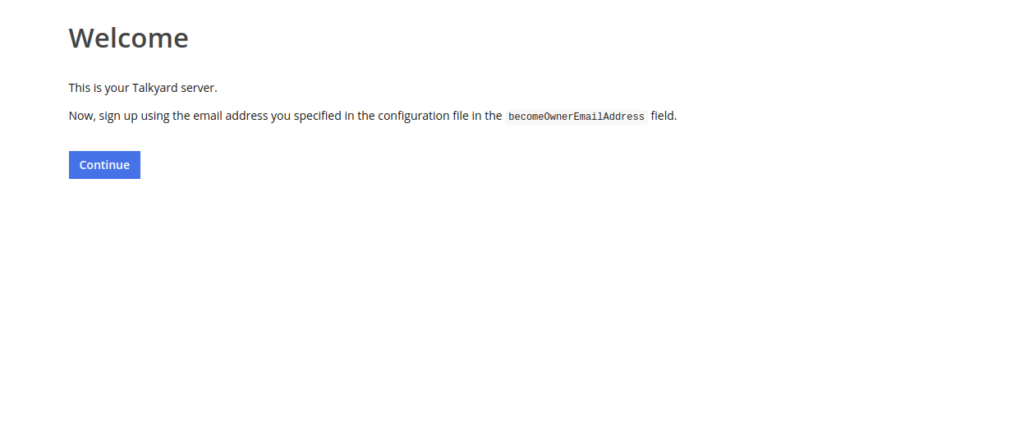
Click on the Continue button. You should see the following page:
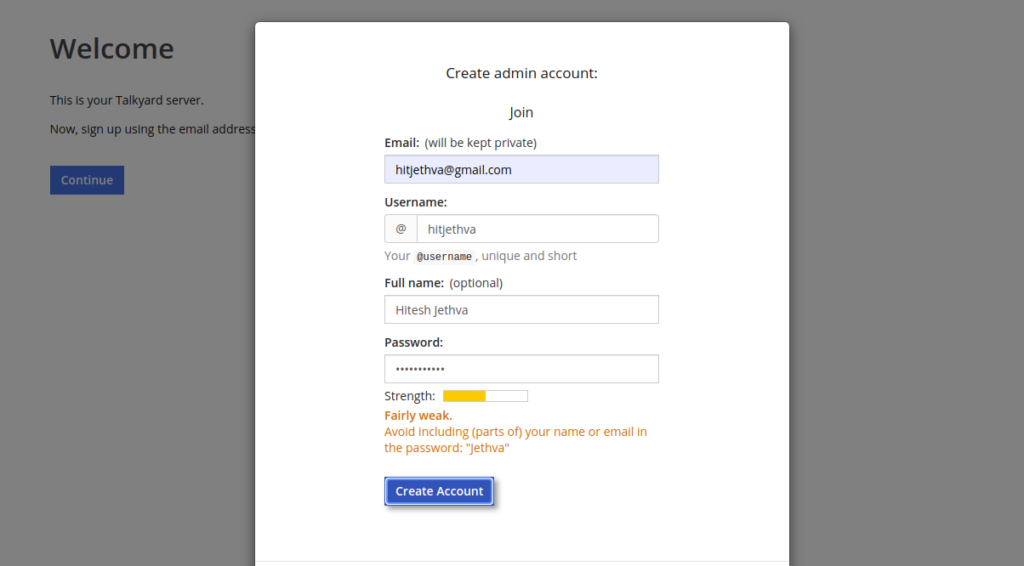
Provide your admin email, username, and password, and click on the Create Account button. You will be redirected to the following page:
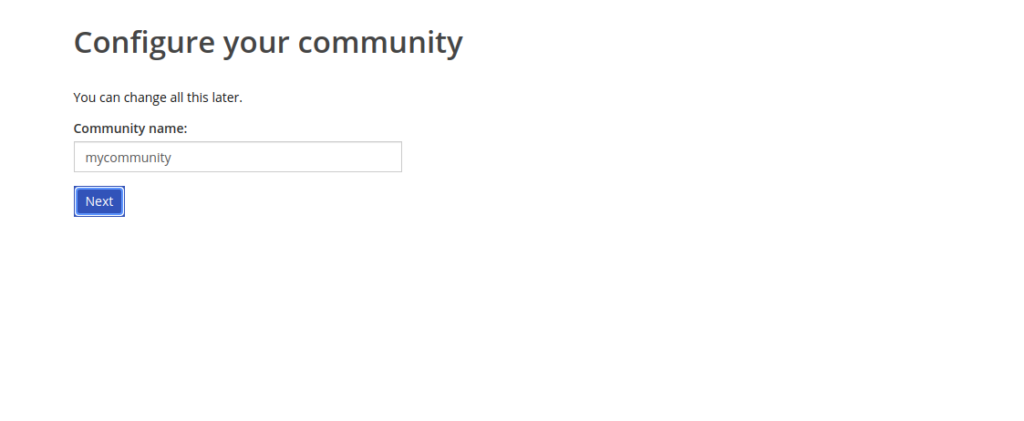
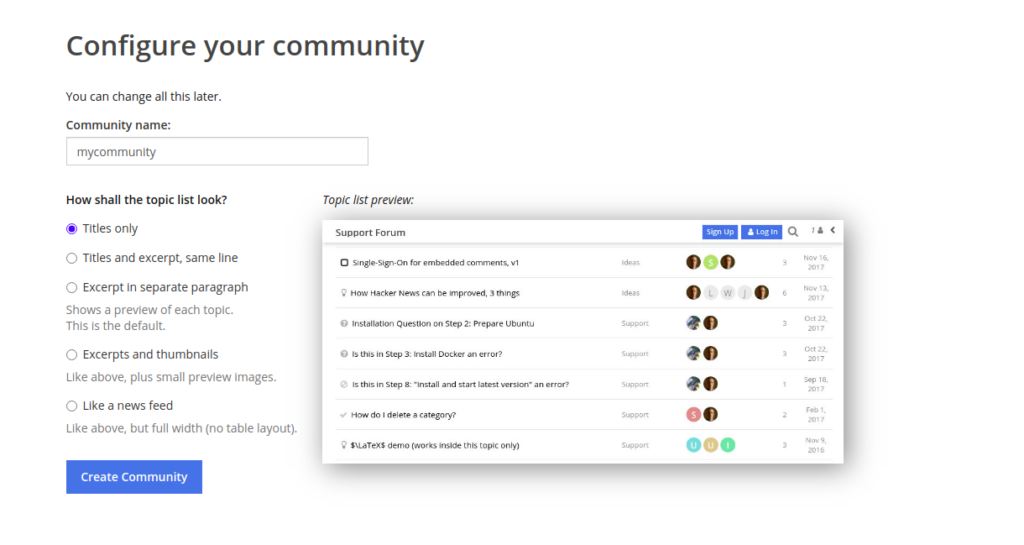
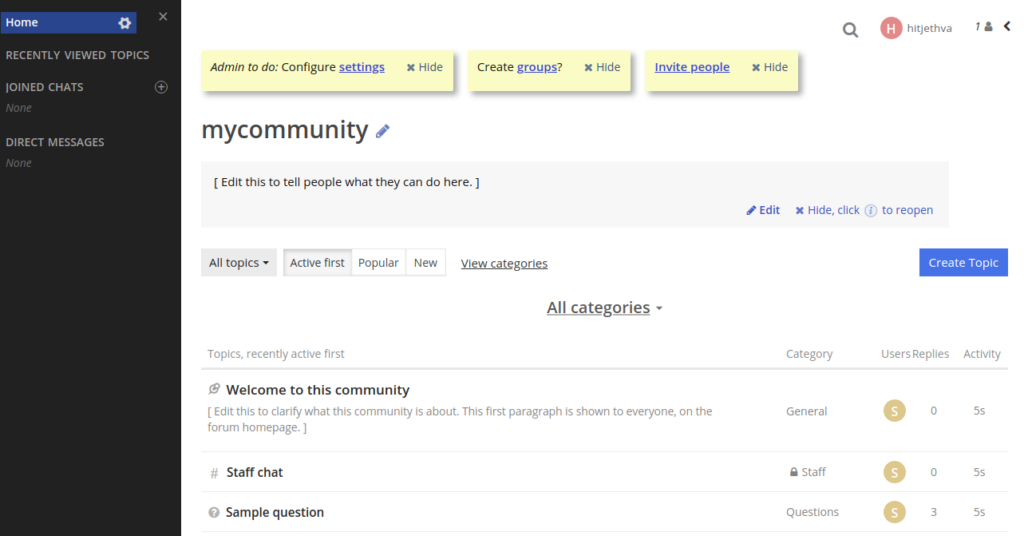
Provide your community name and click on the Next button. You should see the Talkyard dashboard on the following page:
Conclusion
Congratulations! You have successfully installed and configured Talkyard on Ubuntu 18.04. You can now create your own discussion forum with Talkyard easily using your VPS hosting account from Atlantic.Net.