Cloud IDE is a web-based integrated development platform (IDE). It is a programming environment designed for developers and comes with a code editor, a compiler, a debugger, and a graphical user interface. The main benefit of Cloud IDE is that you can access it from anywhere, from any compatible device, enabling easy installation and real-time collaboration between developer teams.
code-server is an open-source project that allows you to run Visual Studio Code on a remote server accessible directly from your browser. Visual Studio Code provides a code editor with integrated Git support, a code debugger, and smart autocompletion.
In this tutorial, we will learn how to install a code-server Cloud IDE platform on Ubuntu 20.04.
Step 1 – Install code-server IDE
First, you will need to download the latest version of the code-server from the Git Hub repository. At the time of writing this tutorial, the latest version of the code-server is v3.4.0. You can download it with the following command:
apt-get update -y
wget https://github.com/cdr/code-server/releases/download/v3.4.0/code-server-3.4.0-linux
-amd64.tar.gz
Once the download is completed, extract the downloaded file with the following command:
tar -xvzf code-server-3.4.0-linux-amd64.tar.gz
Next, move the extracted directory to the /usr/lib directory:
cp -r code-server-3.4.0-linux-amd64 /usr/lib/code-server
Next, create a symbolic link of code-server binary to the /usr/bin/ directory:
ln -s /usr/lib/code-server/bin/code-server /usr/bin/code-server
Next, create a directory to store user’s data:
mkdir /var/lib/code-server
Once you are finished, you can proceed to the next step.
Step 2 – Create a Systemd Unit File for code-server
Next, you will need to create a systemd service file to manage the code-server service. You can create it with the following command:
nano /lib/systemd/system/code-server.service
Add the following lines:
[Unit]
Description=code-server
After=nginx.service

[Service]
Type=simple
Environment=PASSWORD=secure-password
ExecStart=/usr/bin/code-server --bind-addr 127.0.0.1:8080 --user-data-dir /var/lib/code-server --
auth password
Restart=always

[Install]
WantedBy=multi-user.target
Save and close the file when you are finished. Then, reload the systemd daemon with the following command:
systemctl daemon-reload
Next, start the code-server service and enable it to start at boot with the following command:
systemctl start code-server
systemctl enable code-server
You can now verify the status of the code-server service with the following command:
systemctl status code-server
You should see the following output:
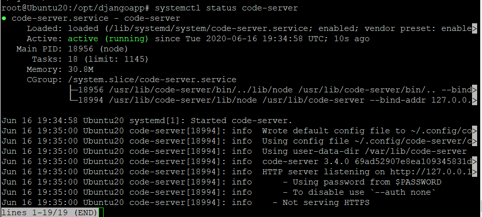
At this point, code-server is started and listening on port 8080. You can now proceed to the next step.
Step 3 – Configure Nginx as a Reverse Proxy
It is a good idea to configure Nginx as a reverse proxy to access the code-server without specifying the port 8080.
First, install the Nginx server with the following command:
apt-get install nginx -y
Once Nginx has been installed, create a new virtual host configuration file for code-server:
nano /etc/nginx/sites-available/code-cloud.conf
Add the following lines:
server_names_hash_bucket_size 64;

server {
listen 80;

server_name code.example.com;

location / {
proxy_pass http://localhost:8080/;
proxy_set_header Upgrade $http_upgrade;
proxy_set_header Connection upgrade;
proxy_set_header Accept-Encoding gzip;
}
}
Save and close the file then, activate the Nginx virtual host with the following command:
ln -s /etc/nginx/sites-available/code-cloud.conf /etc/nginx/sites-enabled/
Next, check Nginx for any syntax errors with the following command:
nginx -t
You should get the following output:
nginx: the configuration file /etc/nginx/nginx.conf syntax is ok
nginx: configuration file /etc/nginx/nginx.conf test is successful
Finally, restart the Nginx service to apply the changes:
systemctl restart nginx
Step 4 – Access code-server IDE
Now, open your web browser and type the URL http://code.example.com. You will be redirected to the code-server IDE login page:
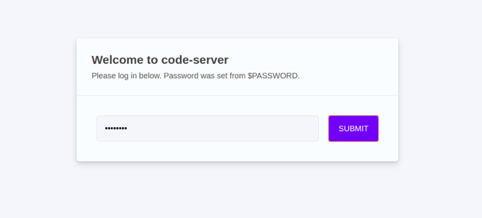
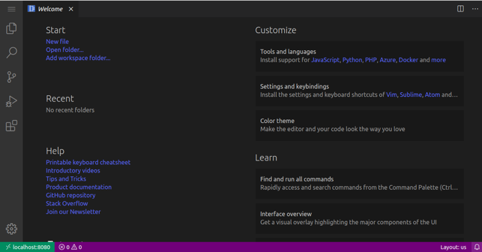
Provide your password which you set in the previous steps and click on the SUBMIT button. You should see the code-server GUI interface in the following screen:
Conclusion
Congratulations! You have successfully installed and configured code-server IDE on Ubuntu 20.04.
You can now start coding directly in Cloud IDE on your virtual private server from Atlantic.Net.
* This post is for informational purposes only and does not constitute professional, legal, financial, or technical advice. Each situation is unique and may require guidance from a qualified professional.
Readers should conduct their own due diligence before making any decisions.