Bludit is a free, open-source, file-based content management system that helps you to host a blogging website within a minute. It is written in PHP and uses flat-files to store posts and pages. You don’t need to install any database system on your system to use Bludit. It is very similar to other content management systems including Drupal, Joomla, and WordPress, and offers a rich set of features including SEO friendliness, WYSIWYG support, a flexible CSS framework, and many more.
In this tutorial, we will explain how to install and configure Bludit CMS on Ubuntu 20.04 server.
Step 1 – Install LAMP Server
First, you will need to install Nginx, PHP, and other required packages in your system. You can install all of them with the following command:
apt-get update -y
apt-get install nginx php php-cli php-fpm php-common php-mbstring php-zip php-pgsql php-sqlite3 php-curl php-gd php-mysql php-intl php-json php-opcache php-xml unzip git curl -y
The above command will also install the Apache package in your system, but it is recommended that you remove it from your system. You can remove it using the following command:
apt-get remove apache2 --purge
Next, edit the php.ini file and make some desired changes:
nano /etc/php/7.4/fpm/php.ini
Change the following values:
memory_limit = 512M
upload_max_filesize = 32M
date.timezone = Asia/Kolkata
Save and close the file, then restart the PHP-FPM service to apply the changes:
systemctl restart php7.4-fpm
Step 2 – Install Bludit CMS
First, you will need to download the latest version of Bludit from its official website. You can download it with the following command:
wget https://www.bludit.com/releases/bludit-3-13-1.zip
Once downloaded, unzip the downloaded file with the following command:
unzip bludit-3-13-1.zip
Next, move the extracted directory to the Nginx root directory:
mv bludit-3-13-1 /var/www/html/bludit
Next, change the ownership and provide necessary permissions to the bludit directory:
chown -R www-data:www-data /var/www/html/bludit
chmod -R 775 /var/www/html/bludit
Step 3 – Configure Nginx for Bludit
First, you will need to create an Nginx virtual host configuration file for Bludit. You can create it with the following command:
nano /etc/nginx/sites-available/bludit.conf
Add the following lines:
server {
listen 80;

server_name your-domain.com;
root /var/www/html/bludit;

index index.php;

location ~ \.php$ {
fastcgi_pass unix:/var/run/php/php7.4-fpm.sock;
fastcgi_index index.php;
include fastcgi.conf;
}

location / {
try_files $uri $uri/ /index.php?$args;
}

location ^~ /bl-content/tmp/ { deny all; }
location ^~ /bl-content/pages/ { deny all; }
location ^~ /bl-content/databases/ { deny all; }
}
Save and close the file, then activate the Nginx virtual host with the following command:
ln -s /etc/nginx/sites-available/bludit.conf /etc/nginx/sites-enabled/
Next, verify the Nginx for any syntax errors with the following command:
nginx -t
You should get the following output:
nginx: the configuration file /etc/nginx/nginx.conf syntax is ok
nginx: configuration file /etc/nginx/nginx.conf test is successful
Finally, restart the Nginx service to apply the configuration changes:
systemctl restart nginx
Step 4 – Access Bludit Web Interface
Now, open your web browser and access the Bludit CMS using the URL http://your-domain.com. You should see the following screen:
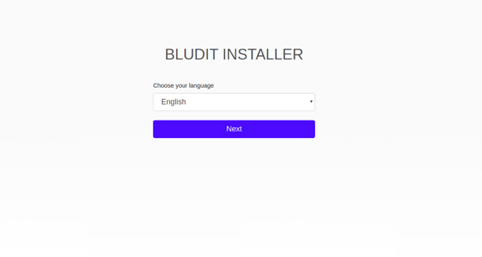
Select your desired language and click on the Next button. You should see the following screen:
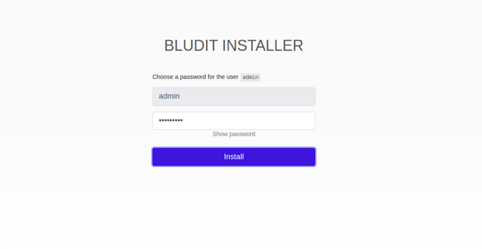
Set your admin password and click on the Install button. You should see the following screen:
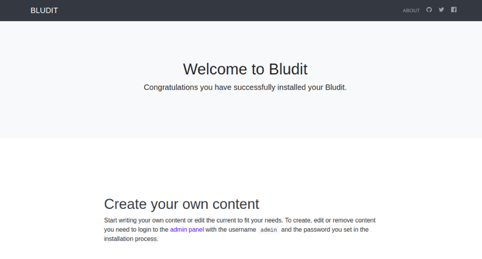
Click on the admin panel button. You should see the Bludit login screen:
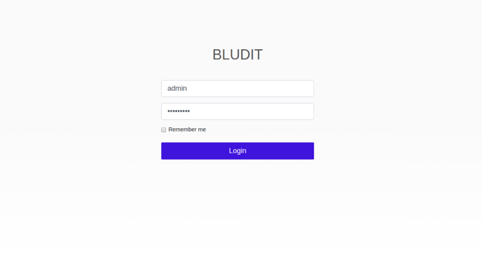
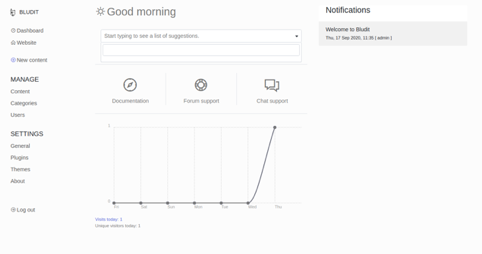
Provide your admin username, password and click on the Login button. You should see the Bludit dashboard in the following screen:
Conclusion
In the above guide, you learned how to install Bludit CMS on Ubuntu 20.04 server. You can now build your blogging website easily with Bludit dashboard on your VPS Hosting account with Atlantic.Net.
* This post is for informational purposes only and does not constitute professional, legal, financial, or technical advice. Each situation is unique and may require guidance from a qualified professional.
Readers should conduct their own due diligence before making any decisions.