Bareos, also called “Backup Archiving Recovery Open Sourced,” is an open-source software used for backing up and protecting data. It is cross-platform and supports all major operating systems including Linux, Windows, MacOS and Unix. Bareos comes with a simple and user-friendly web interface that helps you to perform backup operations through a web browser.
Bareos consists of several components, including the Backup Directory, Control Unit, Storage Daemons, and File Daemons. The Director is the controller for the other daemons, while the File Daemons are responsible for backing up the data from the client.
In this tutorial, we will learn how to install the Bareos backup application on CentOS 8.
Step 1 – Install LAMP Server
Bareos uses MariaDB or MySQL as a database backend. You will need to install the MariaDB database server, Apache and PHP in your system. You can install them with the following command:
dnf install httpd mariadb-server php php-cli php-common -y
Once all the packages are installed, start the Apache and MariaDB services and enable them to start at system reboot with the following command:
systemctl start httpd
systemctl enable httpd
systemctl start mariadb
systemctl enable mariadb
Step 2 – Install Bareos
By default, the Bareos is not available in the CentOS 8 default repository. You will need to download the Bareos repo from their official website.
You can download it with the following command:
wget -O /etc/yum.repos.d/bareos.repo http://download.bareos.org/bareos/release/latest/CentOS_8/bareos.repo
Next, install the Bareos server by running the following command:
dnf install bareos bareos-database-mysql -y
Once all the packages are installed, start all Bareos services and enable them to start at boot with the following command:
systemctl start bareos-dir
systemctl start bareos-sd
systemctl start bareos-fd

systemctl enable bareos-dir
systemctl enable bareos-sd
systemctl enable bareos-fd
Step 3 – Prepare Bareos Database
Next, you will need to create a database and table for Bareos.
First, create a database with the following command:
/usr/lib/bareos/scripts/create_bareos_database
You should get the following output:
Creating mysql database
Creating of bareos database succeeded.
Next, create a database table with the following command:
/usr/lib/bareos/scripts/make_bareos_tables
You should get the following output:
Making mysql tables

Creation of Bareos MySQL tables succeeded.
Next, grant all the privileges to the Bareos with the following command:
/usr/lib/bareos/scripts/grant_bareos_privileges
You should get the following output:
Granting mysql tables
Privileges for user bareos granted ON database bareos.
Step 4 – Install Bareos Web UI
First, you will need to install EPEL repo in your system. You can install it with the following command:
dnf install epel-release -y
Once installed, you can run the following command to install the Bareos WebUI.
dnf install bareos-webui -y
Once the installation is completed, restart the httpd and Bareos services with the following command:
systemctl restart httpd
systemctl restart bareos-dir bareos-sd bareos-fd
Next, you will need to create an admin user and password for Bareos WebUI.
To do so, login to Bareos console with the following command:
bconsole
You should get the following output:
Connecting to Director localhost:9101
 Encryption: TLS_CHACHA20_POLY1305_SHA256
1000 OK: bareos-dir Version: 19.2.7 (16 April 2020)
bareos.org build binary
bareos.org binaries are UNSUPPORTED by bareos.com.
Get official binaries and vendor support on https://www.bareos.com
You are connected using the default console
Enter a period (.) to cancel a command.
Next, run the following command to create an admin user and password:
configure add console name=admin password=admin123 profile=webui-admin
You should get the following output:
Created resource config file "/etc/bareos/bareos-dir.d/console/admin.conf":

Console {
  Name = admin
  Password = admin123
  Profile = webui-admin
}
Next, exit from the Bareos console and edit the Bareos admin configuration file:
nano /etc/bareos/bareos-dir.d/console/admin.conf
Add the “TLS Enable = No” line as shown below:
Console {
  Name = admin
  Password = admin123
  Profile = webui-admin
 TLS Enable = No

}
Save and close the file, then restart the Bareos service with the following command:
systemctl restart bareos-dir bareos-sd bareos-fd
Step 5 – Access Bareos WEB UI
Now, open your web browser and access the Bareos Web UI using the URL http://your-server-ip/bareos-webui. You will be redirected to the following page:
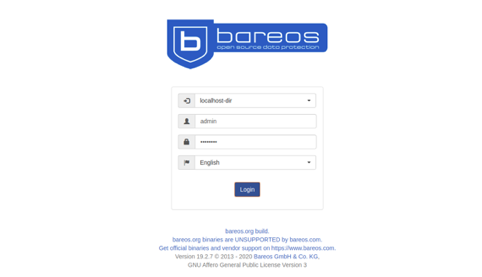
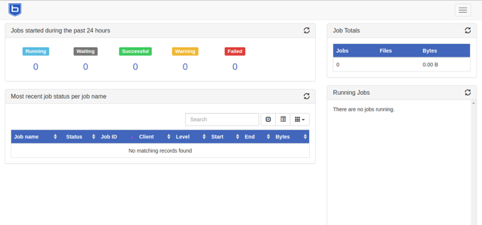
Provide your admin username, password and click on the Login button. You should see the Bareos dashboard in the following page:
Congratulations! You have successfully installed and configured Bareos backup application on CentOS 8. Now, you can add your first Bareos client and create a job for it to run on a regular basis – get started with Bareos on Atlantic.Net VPS Hosting today!
* This post is for informational purposes only and does not constitute professional, legal, financial, or technical advice. Each situation is unique and may require guidance from a qualified professional.
Readers should conduct their own due diligence before making any decisions.