Table of Contents
- Step 1 - Setup Hostname
- Step 3 - Install Chef Server
- Step 4 - Create an Administrator Account and Organization
- Step 5 - Install Chef Web Management Console
- Step 6 - Install Chef Client
- Step 7 - Configure Knife and Generate Cookbook
- Step 8 - Bootstrap a Client Node
- Step 9 - Access Chef Manage Console
- Conclusion
Chef is a powerful platform for automation, simplifying how infrastructure is managed, deployed, or configured across a network. Chef operates by transforming the infrastructure into code. The developer can then deploy or manage resources across multiple servers or nodes, but before the developer deploys the code over any other environment, they first create and test it over a workstation. Overall, Chef is one of the best tools for administering infrastructure from a workstation.
For compliance, node visibility, and workflow, Chef Automate makes available a full suite of enterprise capabilities. The software integrates with Open source products such as Habitat, InSpec, and Chef.
In this tutorial, we will show you how to install the Chef server and client on Ubuntu 20.04.
Note: The procedure uses requires two Ubuntu instances:
- One Client
- One Server
Step 1 – Setup Hostname
Before starting, you will need to set up a fully qualified hostname and hostname resolution on your Chef server.
First, set up the hostname with the following commands:
apt-get update -y
hostnamectl set-hostname chef.example.com
Next, open /etc/hosts file and bind your server IP address with hostname:
nano /etc/hosts
Add the following line:
chef-server-ip chef.example.com
Save and close the file when you are finished.
Step 3 – Install Chef Server
By default, Chef package is not available in the Ubuntu 20.04 default repository, so you will need to download it from their official website.
First, install the required dependencies by running the following command on the Chef server:
apt-get install curl wget gnupg2 -y
Next, download the Chef package with the following command:
wget https://packages.chef.io/files/stable/chef-server/13.1.13/ubuntu/18.04/chef-server-core_13.1.13-1_amd64.deb
Once the package is downloaded, install it by running the following command:
dpkg -i chef-server-core_13.1.13-1_amd64.deb
Once the package is installed, you will need to reconfigure the Chef server. You can reconfigure it with the following command:
chef-server-ctl reconfigure
You will be asked to accept the term of license as shown below:
+---------------------------------------------+
Chef License Acceptance

Before you can continue, 3 product licenses
must be accepted. View the license at
https://www.chef.io/end-user-license-agreement/

Licenses that need accepting:
* Chef Infra Server
* Chef Infra Client
* Chef InSpec

Do you accept the 3 product licenses (yes/no)?

> yes
Type yes to accept the license and hit enter to continue. Once the installation has been completed, you should get the following output:
Running handlers:
Running handlers complete
Chef Infra Client finished, 482/1032 resources updated in 04 minutes 34 seconds
Chef Server Reconfigured!
Note: The installation will take over 5 minutes
Step 4 – Create an Administrator Account and Organization
First, create a directory to store all keys.
mkdir ~/.chef_key
Next, run the following command to create an administrator account:
chef-server-ctl user-create atlanticuser Atlantic User admin@example.com 'mypassword' --filename ~/.chef_key/atlantic.pem
The above command will create an admin account with the name atlanticuser, full name “Atlantic User,” password “mypassword,” and generate the keyfile at ~/.chef_key/atlantic.pem.
Next, create an organization with the following command:
chef-server-ctl org-create atlantic "atlantic cloud" --association_user atlanticuser --filename ~/.chef_key/atlantic-org.pem
The above command will create an organization with name atlantic, full name “atlantic cloud,” associate user “atlanticuser,” and generate keyfile at ~/.chef_key/atlantic-org.pem.
You can now verify the generated keys with the following command:
ls ~/.chef_key/
You should see the following output:
atlantic.pem hitjethva.pem
Step 5 – Install Chef Web Management Console
Next, you will need to install the Chef manage in your server. Chef manage is an add-on that can be used to manage Chef server from the web-based interface.
You can install the Chef manage with the following command:
chef-server-ctl install chef-manage
Next, reconfigure the Chef server and Chef manage with the following command:
chef-server-ctl reconfigure
chef-manage-ctl reconfigure
You will be asked to accept the license agreement as shown below:
Press any key to continue.
Type 'yes' to accept the software license agreement or anything else to cancel.
yes
Type yes and hit Enter to finish the installation.
Step 6 – Install Chef Client
Next, you will need to log into the Chef client machine and install the Chef client package.
By default, the Chef client package is not available in the Ubuntu 20.04 default repository, so you will need to download it from their official website.
Run the following command to download the Chef workstation package:
wget https://packages.chef.io/files/stable/chef-workstation/20.6.62/debian/10/chef-workstation_20.6.62-1_amd64.deb
Once the package is downloaded, install it with the following command:
dpkg -i chef-workstation_20.6.62-1_amd64.deb
After installing Chef client, you will need to create a Chef repo in your system. The chef-repo directory will store your Chef cookbooks and other related files.
You can create it with the following command:
chef generate repo chef-repo
You will be asked to accept the license as shown below:
+---------------------------------------------+
Chef License Acceptance

Before you can continue, 3 product licenses
must be accepted. View the license at
https://www.chef.io/end-user-license-agreement/

Licenses that need accepting:
* Chef Workstation
* Chef Infra Client
* Chef InSpec

Do you accept the 3 product licenses (yes/no)?

> yes
Type yes and hit Enter to accept the License. You should get the following output:
Persisting 3 product licenses...
✔ 3 product licenses persisted.

+---------------------------------------------+
Generating Chef Infra repo chef-repo
- Ensuring correct Chef Infra repo file content

Your new Chef Infra repo is ready! Type `cd chef-repo` to enter it.
You can list all generated files and directories inside the Chef repo with the following command:
ls chef-repo
You should get the following output:
chefignore cookbooks data_bags LICENSE policyfiles README.md
Next, you will need to create a .chef directory to store all Knife configuration file and the .pem files that are used for RSA key pair authentication with the Chef server.
You can create it with the following command:
mkdir ~/chef-repo/.chef
Next, generate an SSH key pair with the following command:
ssh-keygen -b 4096
Don’t provide any password, just press Enter to generate an SSH key pair as shown below:
Generating public/private rsa key pair.
Enter file in which to save the key (/root/.ssh/id_rsa):
Created directory '/root/.ssh'.
Enter passphrase (empty for no passphrase):
Enter same passphrase again:
Your identification has been saved in /root/.ssh/id_rsa
Your public key has been saved in /root/.ssh/id_rsa.pub
The key fingerprint is:
SHA256:OvOCW9vNnVfs8II8TKJnRxv9vwRu5R4JqRxWPVU1rTY root@clientnode
The key's randomart image is:
+---[RSA 4096]----+
| .B|
| . +|
| . + |
| . E .|
| S o * + |
| . + B B +|
| .= . O * @ |
| ...*.oo.O.= =|
| ....ooo.oo ++|
+----[SHA256]-----+
Next, copy the generated key to the Chef server machine with the following command:
ssh-copy-id root@chef-server-ip
Next, you will need to copy all .pem files from the Chef server to the client machine. You can copy them with the following command:
scp root@chef-server-ip:~/.chef_key/*.pem ~/chef-repo/.chef/
You should get the following output:
atlantic.pem 100% 1674 2.2MB/s
00:00
hitjethva.pem 100% 1678 2.4MB/s
00:00
Step 7 – Configure Knife and Generate Cookbook
Next, you will need to configure Knife and generate cookbook on the client machine.
First, change into the repository with the command:
cd ~/chef-repo
Next, generate yourfirst cookbook with the following command:
chef generate cookbook my_cookbook
Once the cookbook is generated, create a new Knife configuration file:
nano ~/chef-repo/.chef/config.rb
Add the following lines:
current_dir = File.dirname(__FILE__)
log_level :info
log_location STDOUT
node_name 'hitjethva'
client_key "hitjethva.pem"
validation_client_name 'atlantic-validator'
validation_key "atlantic-validator.pem"
chef_server_url 'https://chef.example.com/organizations/atlantic'
cache_type 'BasicFile'
cache_options( :path => "#{ENV['HOME']}/.chef/checksums" )
cookbook_path ["#{current_dir}/../cookbooks"]
Save and close the file.
Make sure all names match with your organization name and admin username.
Next, edit the /etc/hosts file and add the fully qualified name of your Chef server.
nano /etc/hosts
Add the following line:
chef-server-ip chef.example.com
Save and close the file when you are finished.
Next, fetch the SSL certificate from the Chef server with the following command:
cd ~/chef-repo
knife ssl fetch
You should get the following output:
WARNING: Certificates from chef.example.com will be fetched and placed in your trusted_cert
directory (/root/chef-repo/.chef/trusted_certs).
Knife has no means to verify these are the correct certificates. You should
verify the authenticity of these certificates after downloading.
Adding certificate for chef_example_com in /root/chef-repo/.chef/trusted_certs/chef_example_com.crt
You can also verify the SSL with the following command:
knife ssl check
You should get the following output:
Connecting to host chef.example.com:443
Successfully verified certificates from `chef.example.com'
Step 8 – Bootstrap a Client Node
Next, you will need to install the Chef client on the node and validate the node. This allows the node to read from the Chef server and pull down and apply any needed configuration updates detected by the chef-client from the workstation.
On the Chef client machine, change the directory to .chef with the following command:
cd ~/chef-repo/.chef
Next, bootstrap the client with the following command:
knife bootstrap chef.example.com -x root -P rootpassword --node-name clientnode
Once the installation is completed, you should get the following output:
Patents: https://www.chef.io/patents
[chef.example.com] resolving cookbooks for run list: []
[chef.example.com] Synchronizing Cookbooks:
[chef.example.com] Installing Cookbook Gems:
[chef.example.com]
[chef.example.com] Compiling Cookbooks...
[chef.example.com] [2020-10-02T07:56:21+00:00] WARN: Node clientnode has an empty run list.
[chef.example.com] Converging 0 resources
[chef.example.com]
[chef.example.com] Running handlers:
Running handlers complete
Chef Infra Client finished, 0/0 resources updated in 02 seconds
You can now list all nodes with the following command:
knife client list
You should get the following output:
atlantic-validator
clientnode
Step 9 – Access Chef Manage Console
Now, open your web browser and access the Chef manage console using the URL http://chef.server-ip/login. You should see the Chef login page:
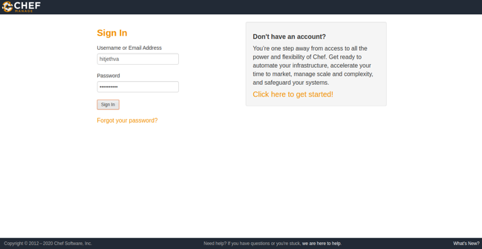
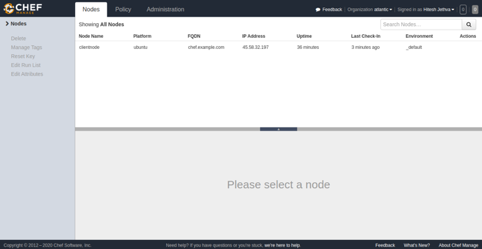
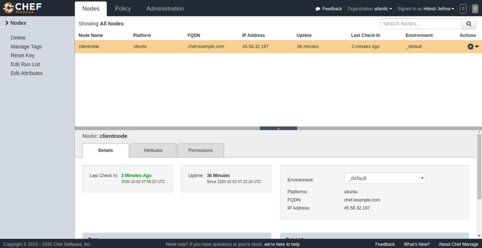
Provide your admin username and password and click on the Sign in button. You should see the Chef dashboard in the following page:
Conclusion
In the above guide, you learned how to install Chef server and client on Ubuntu 20.04 server. You also learned its components with installation and configuration settings. For more information, you can visit Chef documentation. Try out Chef on your virtual private server from Atlantic.Net!
* This post is for informational purposes only and does not constitute professional, legal, financial, or technical advice. Each situation is unique and may require guidance from a qualified professional.
Readers should conduct their own due diligence before making any decisions.