Mautic is a very popular open-source email marketing and lead management software that helps you create customized email templates and email campaigns. It is an alternative to other email service providers, like MailChimp, and can be integrated with third-party SMTP relay services, like Gmail, Mandrill, Sendgrid, and others. Mautic offers a rich set of features, including customizable dripflow programs, marketing campaigns, social media monitoring, and many more.
In this tutorial, we will show you how to install Mautic Marketing Automation Tool on Ubuntu 20.04.
Step 1 – Install Apache, MariaDB, and PHP
First, you will need to install Apache web server and MariaDB in your server. You can install them using the following command:
apt-get install apache2 mariadb-server -y
Once both packages are installed, you will also need to install PHP version 7.2 on your server.
By default, Ubuntu 20.04 ships with PHP version 7.4, so you will need to add the Ondrej PHP repository in your system.
You can add it with the following command:
apt-get install software-properties-common -y
add-apt-repository ppa:ondrej/php
apt-get update -y
Once the repository is added, install PHP with all required extensions by running the following command:
apt-get install php7.2 libapache2-mod-php7.2 php7.2-common php7.2-gmp php7.2-curl php7.2-intl
php7.2-mbstring php7.2-xmlrpc php7.2-mysql php7.2-bcmath php7.2-gd php7.2-xml php7.2-cli
php7.2-zip php7.2-imap curl git -y
After installing PHP, edit the php.ini file and change some desired settings:
nano /etc/php/7.2/apache2/php.ini
Change the following lines:
memory_limit = 512M
upload_max_filesize = 100M
max_execution_time = 360
date.timezone = America/Chicago

Save and close the file then restart Apache web service to apply the changes:
systemctl restart apache2
Step 2 – Configure Database for Mautic
First, log in to MariaDB shell with the following command:
mysql
Once logged in, create a database and user for Mautic with the following command:
CREATE DATABASE mauticdb;
CREATE USER 'mauticuser'@'localhost' IDENTIFIED BY 'password';
Next, grant all the privileges to the Mautic database with the following command:
GRANT ALL ON mauticdb.* TO 'mauticuser'@'localhost' IDENTIFIED BY 'password' WITH
GRANT OPTION;
Next, flush the privileges and exit from the MariaDB shell with the following command:
FLUSH PRIVILEGES;
EXIT;
Step 3 – Download Mautic
First, change the directory to the Apache web root directory and download the latest version of the Mautic from the Git Hub using the following command:
cd /var/www/html
git clone https://github.com/mautic/mautic.git
Once downloaded, install the Composer in your system with the following command:
curl -sS https://getcomposer.org/installer | php -- --install-dir=/usr/local/bin --filename=composer
Next, change the directory to mautic and install all PHP dependencies with the following command:
cd mautic
composer install
Next, change the ownership of the mautic to www-data and set proper permissions with the following command:
chown -R www-data:www-data /var/www/html/mautic/
chmod -R 755 /var/www/html/mautic/
Step 4 – Configure Apache for Mautic
First, create an Apache virtual host configuration file to serve Mautic.
nano /etc/apache2/sites-available/mautic.conf
Add the following lines:
<VirtualHost *:80>
ServerAdmin [email protected]
DocumentRoot /var/www/html/mautic
ServerName example.com
ServerAlias www.example.com

<Directory /var/www/html/mautic/>
Options +FollowSymlinks
AllowOverride All
Require all granted
</Directory>

ErrorLog ${APACHE_LOG_DIR}/error.log
CustomLog ${APACHE_LOG_DIR}/access.log combined

</VirtualHost>
Save and close the file, then enable the Mautic virtual host file and rewrite module with the following command:
a2ensite mautic.conf
a2enmod rewrite
Next, restart the Apache web service to apply the changes:
systemctl restart apache2
Step 5 – Access Mautic Web UI
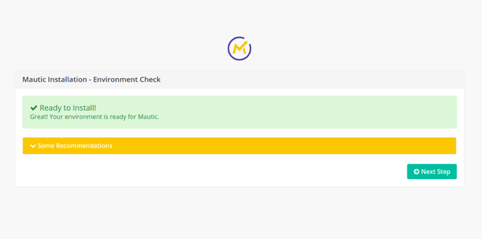
At this point, Mautic is installed. Now, open your web browser and access the Mautic web UI using the URL http://example.com. You should see the following screen:
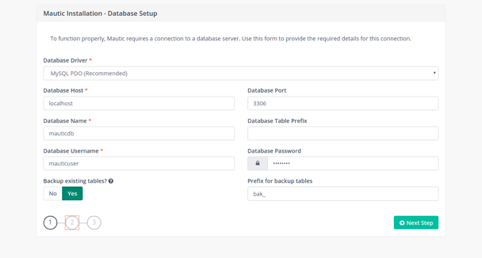
Click on the Next Step button. You should see the following screen:
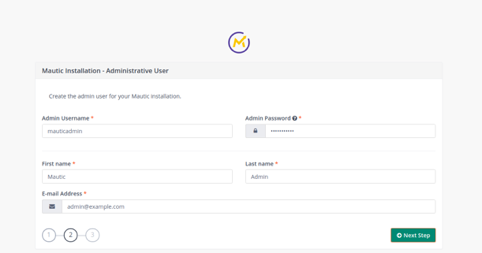
Provide your Mautic database details and click on the Next Step button. You should see the following screen:
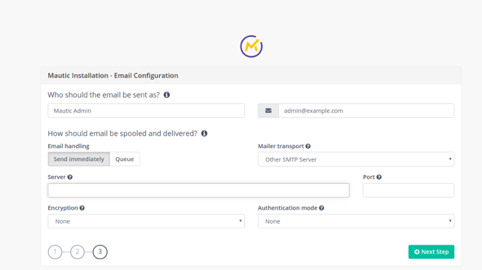
Provide your Mautic admin username, email, and password and click on the Next Step button. You should see the following screen:
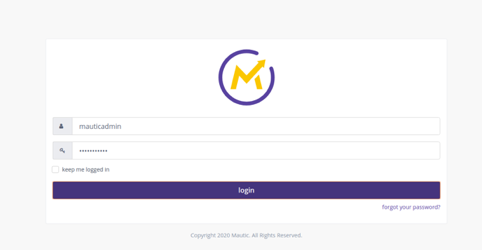
Provide your desired SMTP settings and click on the Next Step button. You will be redirected to the Mautic login screen:
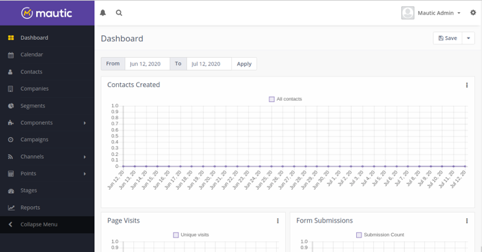
Provide your Mautic admin username and password and click on the login button. You should see the Mautic dashboard in the following screen:
Conclusion
Congratulations! You have successfully installed Mautic on Ubuntu 20.04. You can now install additional plugins to extend the functionality of Mautic and create your own email campaigns; try it out on VPS Hosting from Atlantic.Net.


