Dgraph is a free, open-source, distributed GraphQL database with a graph backend written in Go language. It is one of the most advanced graphing and multi-model NoSQL database systems available to small and large companies that process massive amounts of data. Dgraph aims to provide Google production-level scale and throughput and serve real-time user queries. It is capable of handling terabytes of structured data running on commodity hardware with low latency for real-time user queries. Dgraph is fast and highly available, offers flexible schema, distributed and transactional graphs, and much more.
In this tutorial, we will show you how to install the Dgraph database system on CentOS 8.
Step 1 – Install Dgraph
A simple and easy way to install Dgraph is to run the Dgraph auto-installation script. You can run the Dgraph installation script using the following command:
curl https://get.dgraph.io -sSf | bash
You will need to accept the terms of service to install the Dgraph in your system, as shown below:
By downloading Dgraph you agree to the Dgraph Community License (DCL) terms
shown above. An open-source (Apache 2.0) version of Dgraph without any
DCL-licensed enterprise features is available by building from the Dgraph
source code. See the source installation instructions for more info:

https://github.com/dgraph-io/dgraph#install-from-source

Do you agree to the terms of the Dgraph Community License? [Y/n] Y
Latest release version is v20.07.0.
Downloading checksum file for v20.07.0 build.
######################################################################## 100.0%##O#- # ######################################################################## 100.0%
Download complete.
Comparing checksums for dgraph binaries
Downloading https://github.com/dgraph-io/dgraph/releases/download/v20.07.0/dgraph-linux-amd64.tar.gz
######################################################################## 100.0%#=#=# ######################################################################## 100.0%
Download complete.
Inflating binaries (password may be required).
Dgraph binaries v20.07.0 have been installed successfully in /usr/local/bin.
Once Dgraph is installed, you can proceed to the next step.
Step 2 – Create a User for Dgraph
Next, you will need to create a separate user and group to run the Dgraph service. You can create them with the following command:
groupadd --system dgraph
useradd --system -d /var/run/dgraph -s /bin/false -g dgraph dgraph
Next, you will need to create directories to store Dgraph log and state files. You can create them with the following command:
mkdir -p /var/log/dgraph
mkdir -p /var/run/dgraph/{p,w,zw}
Next, change the ownership of the directory to dgraph as shown below:
chown -R dgraph:dgraph /var/{run,log}/dgraph
Step 3 – Create a Systemd Service File for Dgraph
Next, you will need to create some systemd service files to manage Dgraph.
First, create a dgraph.service file with the following command:
nano /etc/systemd/system/dgraph.service
Add the following lines:
[Unit]
Description=dgraph.io data server
Wants=network.target
After=network.target dgraph-zero.service
Requires=dgraph-zero.service

[Service]
Type=simple
ExecStart=/usr/local/bin/dgraph alpha --lru_mb 2048 -p /var/run/dgraph/p -w /var/run/dgraph/w
StandardOutput=journal
StandardError=journal
User=dgraph
Group=dgraph

[Install]
WantedBy=multi-user.target
Save and close the file when you are finished.
Next, create a dgraph-zero.service file with the following command:
nano /etc/systemd/system/dgraph-zero.service
Add the following lines:
[Unit]
Description=dgraph.io zero server
Wants=network.target
After=network.target

[Service]
Type=simple
ExecStart=/usr/local/bin/dgraph zero --wal /var/run/dgraph/zw
StandardOutput=journal
StandardError=journal
User=dgraph
Group=dgraph

[Install]
WantedBy=multi-user.target
RequiredBy=dgraph.service
Save and close the file when you are finished.
Next, create a graph-ui.service file with the following command:
nano /etc/systemd/system/dgraph-ui.service
Add the following lines:
[Unit]
Description=dgraph.io UI server
Wants=network.target
After=network.target

[Service]
Type=simple
ExecStart=/usr/local/bin/dgraph-ratel
StandardOutput=journal
StandardError=journal
User=dgraph
Group=dgraph

[Install]
WantedBy=multi-user.target
Save and close the file, then reload the systemd daemon with the following command:
systemctl daemon-reload
Next, start and enable all services to start at system reboot with the following command:
systemctl enable --now dgraph
systemctl enable --now dgraph-ui
systemctl enable --now dgraph-zero
systemctl start dgraph
systemctl start dgraph-ui
systemctl start dgraph-zero
At this point, all Dgraph services are running and listening on port 8000 and 8080. You can check them with the following command:
ss -tunelp | grep 8000
You should get the following output:
tcp6 0 0 :::8000 :::* LISTEN 990 24437 1066/dgraph-ratel

ss -tunelp | grep 8080
You should get the following output:
tcp6 0 0 :::8080 :::* LISTEN 990 24979 1083/dgraph
Step 4 – Access Dgraph Web Interface
Now, open your web browser and access the Dgraph web interface using the URL http://your-server-ip:8000. You should see the following page:
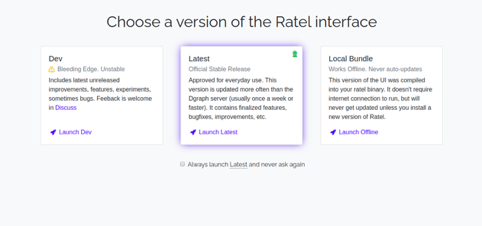
Click on the Launch Latest button. You will be redirected to the following page:
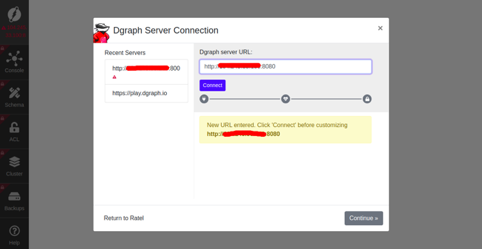
Provide your Dgraph server URL and click on the Continue button. You should see the following page:
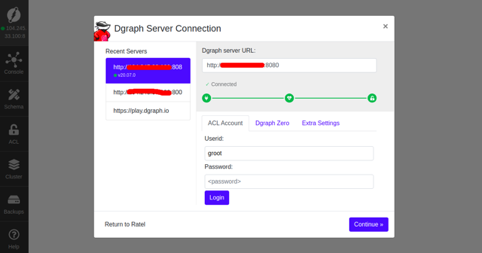
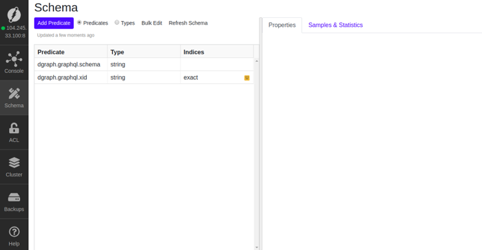
Click on the Continue button. You will be redirected to the Dgraph dashboard in the following page:
Conclusion
Congratulations! You have successfully installed Dgraph on CentOS 8. You can now start building your application with Dgraph and GraphQL on your Atlantic.Net VPS. For more information, visit the Dgraph official documentation.
* This post is for informational purposes only and does not constitute professional, legal, financial, or technical advice. Each situation is unique and may require guidance from a qualified professional.
Readers should conduct their own due diligence before making any decisions.