CSF, also called “Config Server Firewall,” is a Stateful Packet Inspection (SPI) firewall for Linux operating systems. It provides basic firewall functionality as well as other security features, including login, intrusion, and flood detection. You can also integrate CSF with DirectAdmin, cPanel, and Webmin. Using CSF, you can detect many types of attacks like port scans, SYN floods, and login brute force attacks on many services.
In this post, we will show you how to install and configure the CSF firewall on Rocky Linux 8.
Step 1 – Install CSF on Rocky Linux 8
CSF is written in Perl, so you will need to install all required Perl modules to your system. You can install all of them with the following command:
dnf install @perl perl-libwww-perl.noarch perl-LWP-Protocol-https.noarch -y
After installing all required modules, download the latest version of CSF using the following command:
wget https://download.configserver.com/csf.tgz
Once the download is completed, extract the downloaded file with the following command:
tar xzf csf.tgz
Next, navigate to the extracted directory and install CSF with the following command:
cd csf
sh install.sh
Once CSF is installed, you will get the following output:
Don't forget to:
1. Configure the following options in the csf configuration to suite your server: TCP_*, UDP_*
2. Restart csf and lfd
3. Set TESTING to 0 once you're happy with the firewall, lfd will not run until you do so

Adding current SSH session IP address to the csf whitelist in csf.allow:
Adding 27.61.171.115 to csf.allow only while in TESTING mode (not iptables ACCEPT)
*WARNING* TESTING mode is enabled - do not forget to disable it in the configuration
'lfd.service' -> '/usr/lib/systemd/system/lfd.service'
'csf.service' -> '/usr/lib/systemd/system/csf.service'
Created symlink /etc/systemd/system/multi-user.target.wants/csf.service → /usr/lib/systemd/system/csf.service.
Created symlink /etc/systemd/system/multi-user.target.wants/lfd.service → /usr/lib/systemd/system/lfd.service.
Created symlink /etc/systemd/system/firewalld.service → /dev/null.
'/etc/csf/csfwebmin.tgz' -> '/usr/local/csf/csfwebmin.tgz'

Installation Completed
Next, verify that all the required iptables modules are available.
perl /usr/local/csf/bin/csftest.pl
If everything is set up correctly, you will get the following output:
Testing ip_tables/iptable_filter...OK
Testing ipt_LOG...OK
Testing ipt_multiport/xt_multiport...OK
Testing ipt_REJECT...OK
Testing ipt_state/xt_state...OK
Testing ipt_limit/xt_limit...OK
Testing ipt_recent...OK
Testing xt_connlimit...OK
Testing ipt_owner/xt_owner...OK
Testing iptable_nat/ipt_REDIRECT...OK
Testing iptable_nat/ipt_DNAT...OK

RESULT: csf should function on this server
You can now check the CSF version using the following command:
csf -v
You will get the following output:
csf: v14.12 (generic)
*WARNING* TESTING mode is enabled - do not forget to disable it in the configuration
Step 2 – Configure CSF
By default, CSF main configuration file is located at /etc/csf/csf.conf. You will need to edit and change all settings as per your requirements:
nano /etc/csf/csf.conf
Change TESTING = “1” to TESTING = “0” and add allowed incoming and outgoing ports per your requirements:
# lfd will not start while this is enabled
TESTING = "0"

# Allow incoming TCP ports
TCP_IN = "20,21,22,25,53,80,110,143,443,465,587,993,995"

# Allow outgoing TCP ports
TCP_OUT = "20,21,22,25,53,80,110,113,443,587,993,995"
Save and close the file when you are finished, then start and enable the CSF and LFD services:
systemctl start csf lfd
systemctl enable csf lfd
You can check the status of CSF with the following command:
systemctl status csf
You should see the following output:
● csf.service - ConfigServer Firewall & Security - csf
   Loaded: loaded (/usr/lib/systemd/system/csf.service; enabled; vendor preset: disabled)
   Active: active (exited) since Wed 2021-11-17 08:41:05 UTC; 3s ago
  Process: 13236 ExecStart=/usr/sbin/csf --initup (code=exited, status=0/SUCCESS)
 Main PID: 13236 (code=exited, status=0/SUCCESS)
    Tasks: 0 (limit: 11411)
   Memory: 0B
   CGroup: /system.slice/csf.service

Nov 17 08:41:05 rockylinux csf[13236]: ACCEPT  all opt    in * out lo  ::/0  -> ::/0
Nov 17 08:41:05 rockylinux csf[13236]: LOGDROPOUT  all opt    in * out !lo  ::/0  -> ::/0
Nov 17 08:41:05 rockylinux csf[13236]: LOGDROPIN  all opt    in !lo out *  ::/0  -> ::/0
Nov 17 08:41:05 rockylinux csf[13236]: csf: FASTSTART loading DNS (IPv4)
Nov 17 08:41:05 rockylinux csf[13236]: csf: FASTSTART loading DNS (IPv6)
Nov 17 08:41:05 rockylinux csf[13236]: LOCALOUTPUT  all opt -- in * out !lo  0.0.0.0/0  -> 0.0.0.0/0
Nov 17 08:41:05 rockylinux csf[13236]: LOCALINPUT  all opt -- in !lo out *  0.0.0.0/0  -> 0.0.0.0/0
Nov 17 08:41:05 rockylinux csf[13236]: LOCALOUTPUT  all opt    in * out !lo  ::/0  -> ::/0
Nov 17 08:41:05 rockylinux csf[13236]: LOCALINPUT  all opt    in !lo out *  ::/0  -> ::/0
Nov 17 08:41:05 rockylinux systemd[1]: Started ConfigServer Firewall & Security - csf.
You can also check the ports that are open when CSF is running using the following command:
csf -p
Sample output:
Ports listening for external connections and the executables running behind them:
Port/Proto Open Conn  PID/User             Command Line                            Executable
22/tcp     4/6  1     (709/root)           /usr/sbin/sshd -D -oCiphers=aes256-g... /usr/sbin/sshd
80/tcp     4/6  -     (8954/root)          /usr/sbin/httpd -DFOREGROUND            /usr/sbin/httpd
80/tcp     4/6  -     (8957/apache)        /usr/sbin/httpd -DFOREGROUND            /usr/sbin/httpd
80/tcp     4/6  -     (8958/apache)        /usr/sbin/httpd -DFOREGROUND            /usr/sbin/httpd
80/tcp     4/6  -     (8959/apache)        /usr/sbin/httpd -DFOREGROUND            /usr/sbin/httpd
80/tcp     4/6  -     (9172/apache)        /usr/sbin/httpd -DFOREGROUND            /usr/sbin/httpd
323/udp    -/-  -     (552/chrony)         /usr/sbin/chronyd                       /usr/sbin/chronyd
Step 3 – How to Use CSF
To flush all CSF rules, run the following command:
csf -f
To reload the CSF firewall, run the following command:
csf -r
To allow incoming connections from the specific IP, run the following command:
csf -a remote-ip-address
To deny connections from the specific IP, run the following command:
csf -d remote-ip-address
You can also edit the csf.deny and csf.allow file to define the list of allowed and denied IPs on the firewall.
Step 4 – Enable CSF UI
CSF also provides a web-based interface to manage the firewall. It is disabled by default.
Before enabling CSF UI, install the required modules with the following command:
dnf install perl-IO-Socket-SSL perl-Net-SSLeay perl-IO-Socket-INET6 perl-Socket -y
Next, edit the CSF configuration file:
nano /etc/csf/csf.conf
Enable the UI, define the listening port, and set the admin username and password as shown below:
# 1 to enable, 0 to disable web ui
UI = "1"

# Set port for web UI. The default port is 6666, but
# I change this to 1025 to easy access. Default port create some issue
# with popular chrome and firefox browser (in my case)

UI_PORT = "8080"

# Leave blank to bind to all IP addresses on the server
UI_IP = ""

# Set username for authetnication
UI_USER = "admin"

# Set a strong password for authetnication
UI_PASS = "securepassword"

UI_ALLOW = "0"
Save and close the file then restart the CSF and LFD service to apply the changes:
systemctl restart lfd
systemctl restart csf
Step 5 – Access CSF UI
Now, open your web browser and access the CSF UI using the URL https://your-server-ip:8080. You should see the CSF login page:
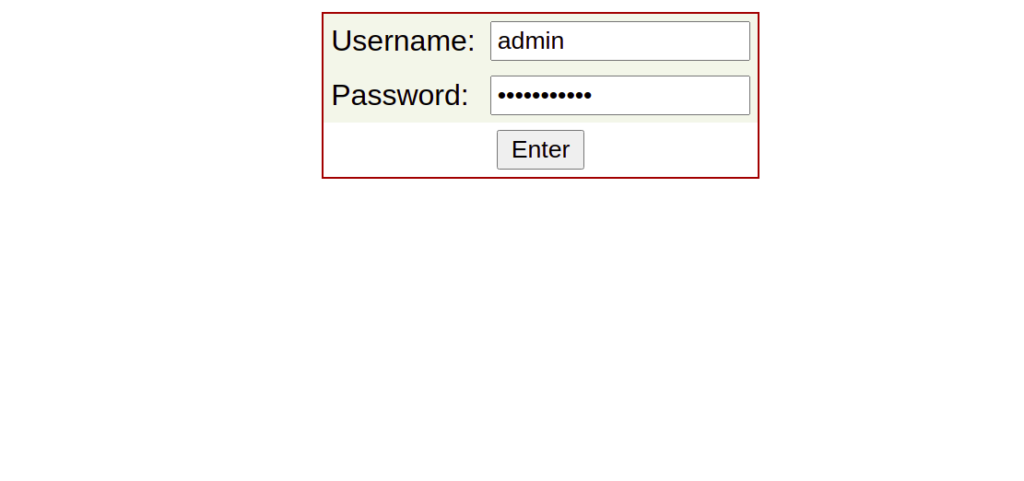
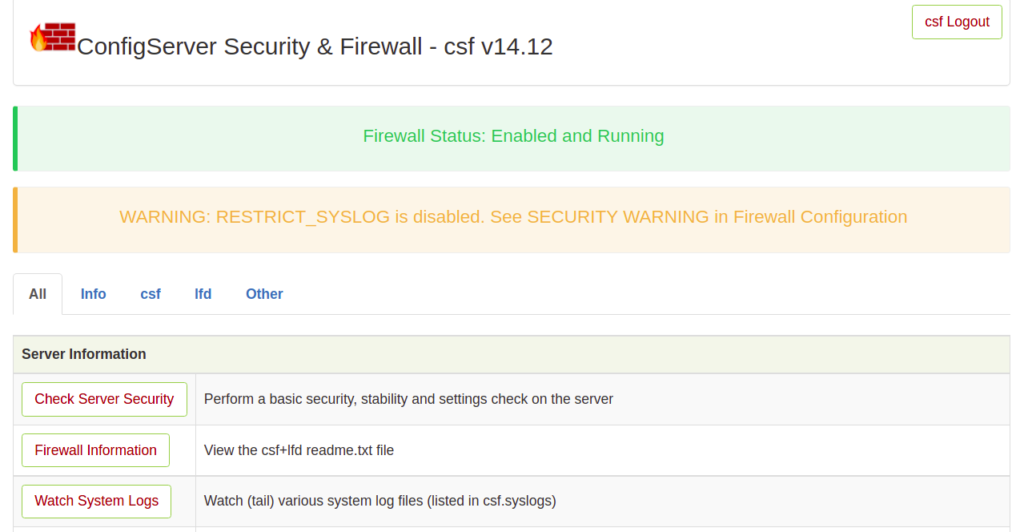
Provide your admin username and password and click on the Login button. You should see the CSF web interface on the following screen:
Step 6 – Remove CSF Firewall
If you want to remove the CSF firewall completely from your server, just run the following script:
bash /etc/csf/uninstall.sh
This will remove the CSF firewall with all files, directories, and rules created by CSF.
Conclusion
In the above guide, we explained how to install CSF and CSF UI on Rocky Linux 8. We also explained how to ban and unban specific IP addresses with CSF. You can now implement CSF on your server and secure it from various type of attacks. Try it on your VPS from Atlantic.Net!
* This post is for informational purposes only and does not constitute professional, legal, financial, or technical advice. Each situation is unique and may require guidance from a qualified professional.
Readers should conduct their own due diligence before making any decisions.