Verified and Tested 09/28/15
Introduction
In this How-To, we will walk you through the install and configuration of Drupal on CentOS 7 with Apache. Drupal is a free content management system that will facilitate the way your content is organized and managed. It has a user-friendly interface that makes customizing your content easy and simple with little effort.
Prerequisites
– You need a CentOS 7 server that is configured with a static IP address.
– You will also need to have LAMP (Linux, Apache, MySQL, PHP) installed. If your server doesn’t have LAMP installed already, see our guide here for a quick installation run through.
Installing Drupal on CentOS 7 with Apache
To get started, log in to your CentOS 7 server via SSH or Console. If you are using the Atlantic.Net VPS hosting service, note that they are setup with minimal installations to avoid having unnecessary packages from being installed and never used. If some software packages that you’re used to using aren’t installed by default, feel free to install them as needed.
Let us download wget and unzip so we can simplify this tutorial.
sudo yum install wget unzip
Before moving on, let’s make sure the system is up to date:
sudo yum update
Creating a Database and User for Drupal on CentOS 7
For Drupal to function, we must create a database in MySQL. Let us begin access MySQL with the following command:
mysql -u root -p
Now, we must first begin creating the database that Drupal will use. This can be done by running the following command, replacing yourdbname with your desired database name:
CREATE DATABASE
yourdbname
;
With the database created we must now create a user so it can access the Database. Again, this can be done by running the following command, replacing yourdrupaluser with your desired username and yourdrupalpassword with your desired password.
CREATE USER
yourdrupaluser
@localhost IDENTIFIED BY '
yourdrupalpassword
';
Now that we have a new database and database user, we must grant access to your recently created user so that it can make changes to your database. This is done by running the following command:
GRANT ALL PRIVILEGES ON
yourdbname
.* TO
yourdrupaluser
@localhost;
Additionally, we must refresh MySQL so the system can flush the newly added privileges and for the changes to take effect, then exit your session. This can be accomplished with the following commands:
FLUSH PRIVILEGES;
exit
Installing Drupal on CentOS 7
The system is now ready for us to download and install Drupal. Start by downloading the latest version from the Drupal site:
wget http://ftp.drupal.org/files/projects/drupal-7.39.zip
Next, install the necessary PHP dependencies so that Drupal can function properly after the install is completed:
yum install php-mbstring php-gd php-xml php-pear php-fpm
After we have installed the requires dependencies, we can continue with the installation of Drupal. Run the following command to unzip the Drupal package that we downloaded.
unzip drupal-7.39.zip
Since, Drupal is currently in the root directory, let us copy the folder and move it into the default httpd directory:
cp -r ~/cp -r ~/drupal-7.39/* /var/www/html
Now to finalize the configurations on the servers side, we must change the create a settings file in the sites default directory. Let’s change to that directory with the following command:
cd /var/www/html/sites/default/
Copy the default.settings.php file and rename it to settings.php with the following command:
cp -p default.settings.php settings.php
We need to modify the permissions so that the Drupal installer can edit
chmod 666 settings.php
We also need to make a files directory, do so with the following command:
mkdir files
Modify the permissions of files with the following command:
chmod 777 files
We need to restart Apache since we installed the PHP extensions.
systemctl restart httpd.service
Drupal’s Web Configuration on CentOS 7
Your server is now configured correctly to run the web-based installation by going to the following:
http://server_domain_or_IP
You will see the Drupal installation procedure’s initial page. Select the standard install.
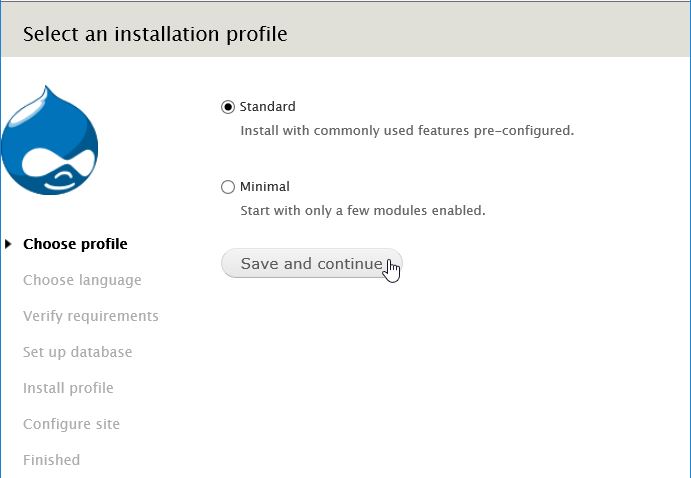
This is the Drupal’s web installation wizard on CentOS 7. Select the standard install.
Choose the language of your choice.
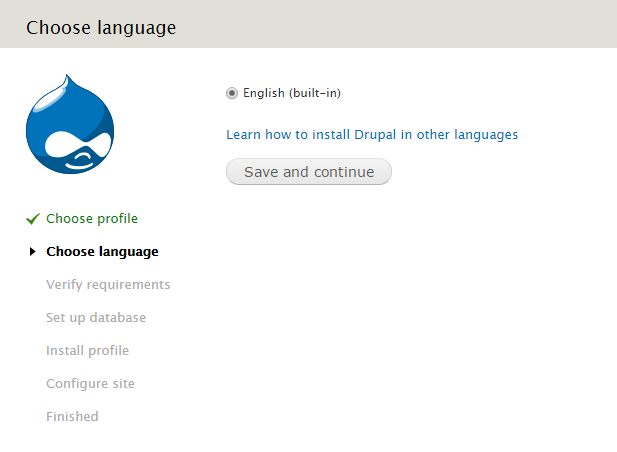
Select the language of your choice.
On the next screen, we need to enter in the Database information that we created from before. Enter the Database name, username and password, once done hit “Save an continue.”
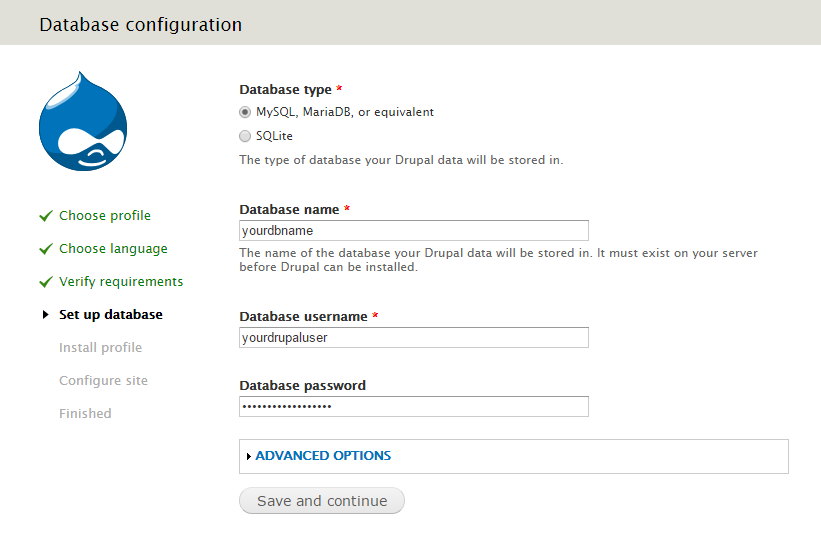
Add the MariaDB database, user and password into their designated fields.
After entering the Database info, all you need to do now is answer Drupal’s questions for your site.
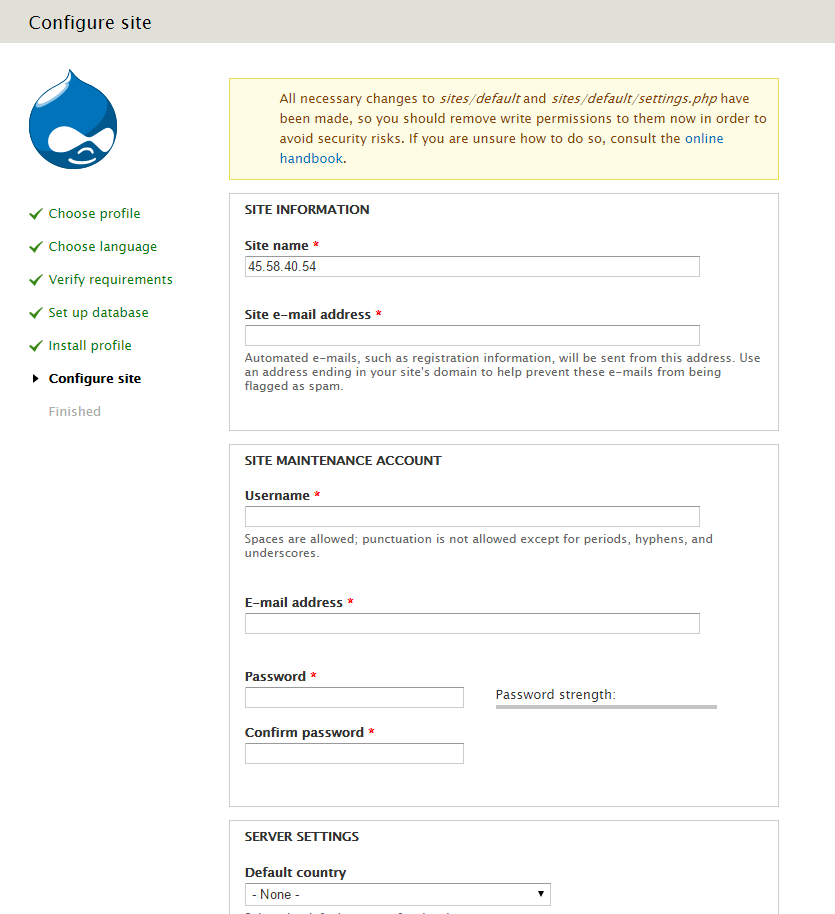
From here just follow along Drupal’s install for site information.
Whats Next?
Congratulations! You have just installed and configured Drupal with Apache on your CentOS 7 Server. Thank you for following along in this How-To and check back with us for any new updates.
Atlantic.Net
Since 1995, Atlantic.Net has been providing internet services to customers, including managed, cloud and dedicated hosting. In 20+ years of service, our solutions have been focused on providing the very best in web solutions to our valued customers!
* This post is for informational purposes only and does not constitute professional, legal, financial, or technical advice. Each situation is unique and may require guidance from a qualified professional.
Readers should conduct their own due diligence before making any decisions.