Matrix is an open-source Python project for decentralized real-time communication used for messaging and VoIP services. It allows one user to communicate with other users on a different service provider via voice-over-IP and chat. Matrix is an open standard and lightweight protocol and allows you to create your own home server, store all user personal info, and create a personal room.
In this tutorial, we will show you how to install Matrix Synapse with Nginx as a reverse proxy on Ubuntu 20.04.
Prerequisites
- A fresh Ubuntu 20.04 VPS
- A valid domain name pointed to your server IP
- A root password configured on your server
Step 1 – Install Matrix Synapse
By default, Matrix synapse package is not available in the Ubuntu 20.04 default repository, so you will need to add the Matrix repository to your system.
First, install the required dependencies with the following command:
apt-get install curl wget gnupg2 apt-transport-https -y
Once all the dependencies are installed, download and add the GPG key with the following command:
wget -qO /usr/share/keyrings/matrix-org-archive-keyring.gpg
https://packages.matrix.org/debian/matrix-org-archive-keyring.gpg
Next, add the Matrix repository to the APT with the following command:
echo "deb [signed-by=/usr/share/keyrings/matrix-org-archive-keyring.gpg]
https://packages.matrix.org/debian/ $(lsb_release -cs) main" | tee /etc/apt/sources.list.d/matrix-
org.list
Next, update the repository and install the latest version of Matrix with the following command:
apt-get update -y
apt-get install matrix-synapse-py3 -y
During the installation, you will be asked to provide your domain name as shown below:
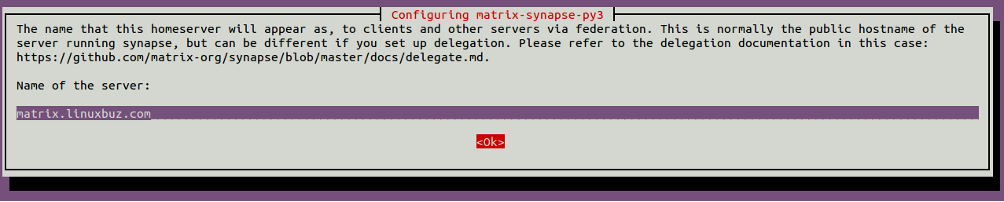
Provide your domain and click on the Ok button. You should see the following page:
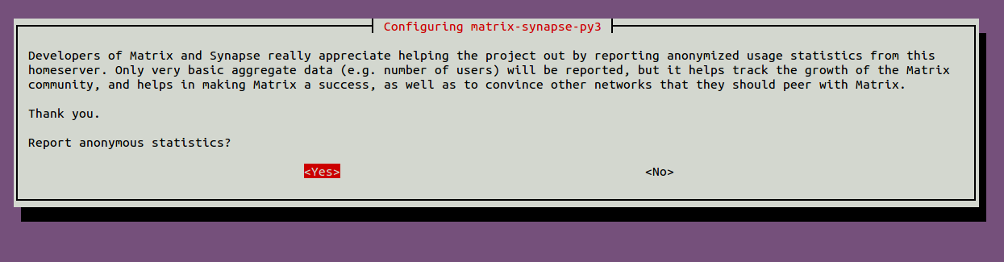
Select your desired option and hit Enter to start the installation. Once Matrix has been installed, start the Matrix service and enable it to start at system reboot with the following command:
systemctl start matrix-synapse
systemctl enable matrix-synapse
By default, Matrix synapse listens on port 8008. You can check it with the following command:
ss -tunelp | grep 8008
You should get the following output:
tcp LISTEN 0 50 127.0.0.1:8008 0.0.0.0:*
users:(("python",pid=102359,fd=13)) uid:109 ino:594551 sk:a <->
tcp LISTEN 0 50 [::1]:8008 [::]:*
users:(("python",pid=102359,fd=12)) uid:109 ino:594550 sk:d v6only:1 <->
Step 2 – Configure Matrix Synapse
The Matrix Synapse default configuration file is located at /etc/matrix-synapse/homeserver.yaml. Before editing it, create a secret password with the following command:
cat /dev/urandom | tr -dc 'a-zA-Z0-9' | fold -w 32 | head -n 1
You should get the following output:
2VHeHAwjGlMlqpEGBNMhfEbb5BOmp6qE
Next, edit the Matrix configuration file:
nano /etc/matrix-synapse/homeserver.yaml
Change the following lines:
listeners:

- port: 8008
tls: false
type: http
x_forwarded: true
bind_addresses: ['127.0.0.1']

resources:
- names: [client, federation]
compress: false

enable_registration: false
registration_shared_secret: "2VHeHAwjGlMlqpEGBNMhfEbb5BOmp6qE"
Save and close the file, then restart the Matrix synapse service to apply the changes.
systemctl restart matrix-synapse
At this point, Matrix Synapse is configured to listen on localhost.
Step 3 – Create a New Matrix User
Next, you will need to create a new user for Matrix Synapse. You can use this user on the Matrix client to connect to the Matrix server.
Run the following command to create a new user:
register_new_matrix_user -c /etc/matrix-synapse/homeserver.yaml http://localhost:8008
You will be asked to set a username and password as shown below:
New user localpart [root]: admin
Password:
Confirm password:
Make admin [no]: yes
Sending registration request...
Success!
Once the user is created, you can proceed to the next step.
Step 4 – Configure Nginx for Matrix Synapse
Next, you will need to install and configure Nginx as a reverse proxy for Matrix Synapse so you can access the Matrix Synapse from the external network using port 80.
First, install the Nginx server with the following command:
apt-get install nginx -y
Once installed, create an Nginx virtual host configuration file with the following command:
nano /etc/nginx/sites-available/matrix.conf
Add the following lines:
server {
listen 80;
server_name matrix.example.com;
location / {
proxy_pass http://localhost:8008;
proxy_set_header X-Forwarded-For $remote_addr;
}
}
Save and close the file, then enable the Nginx virtual host with the following command:
ln -s /etc/nginx/sites-available/matrix.conf /etc/nginx/sites-enabled/
Next, verify Nginx for any syntax errors with the following command:
nginx -t
You should get the following output:
nginx: the configuration file /etc/nginx/nginx.conf syntax is ok
nginx: configuration file /etc/nginx/nginx.conf test is successful
Next, restart the Nginx service to apply the changes:
systemctl restart nginx
If you get any errors, then you will need to edit the Nginx default server configuration file and set server_names_hash_bucket_size:
nano /etc/nginx/nginx.conf
Add the following line below http {:
server_names_hash_bucket_size 64;
Save and close the file, then restart the Nginx service to apply the changes:
systemctl restart nginx
Step 5 – Access Matrix Synapse
Now, open your web browser and access the Matrix Synapse web interface using the URL http://matrix.example.com/. You should see the following page:
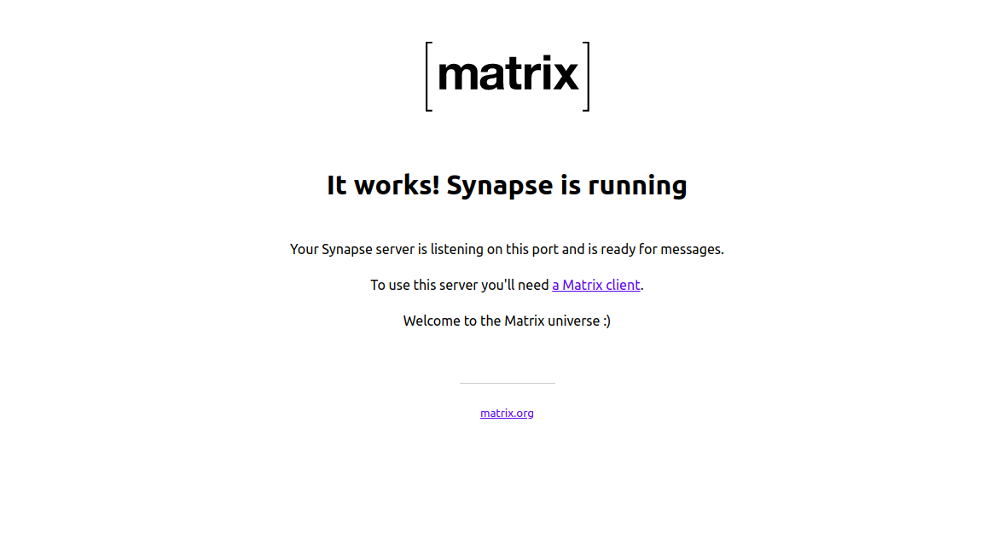
As you can see, Matrix Synapse is now running.
Conclusion
Congratulations! You have successfully installed Matrix Synapse with Nginx as a reverse proxy on Ubuntu 20.04. You can now install the Matrix client on your mobile device or desktop computer and communicate with other users. Get started with Matrix on VPS Hosting from Atlantic.Net today!
* This post is for informational purposes only and does not constitute professional, legal, financial, or technical advice. Each situation is unique and may require guidance from a qualified professional.
Readers should conduct their own due diligence before making any decisions.