EasyEngine is a collection of Linux shell scripts that makes it easier to install and manage Nginx, MariaDB, PHP and WordPress using the command line. It can be installed on any Debian-based distributions and allows you to deploy single and multisite WordPress installations, including WP Super Cache, W3 Total Cache, Redis Cache, and ngx_fastcgi_cache.
If you are a WordPress developer, then you may need to install it on several systems for testing purposes. There are several ways to install WordPress. Installing WordPress manually is a bit time-consuming process. EasyEngine is the easiest way to install WordPress automatically within a minute.
In this tutorial, we will show you how to install WordPress with EasyEngine on Ubuntu 20.04.
Step 1 – Install EasyEngine
EasyEngine provides an installer script to install EasyEngine in your system automatically. You can download and run the EasyEngine installer script by running the following command:
apt-get update -y
wget -qO ee https://rt.cx/ee4 && bash ee
This script will install Docker and all images required to host WordPress website as shown below:
Status: Downloaded newer image for easyengine/redis:v4.1.4
docker.io/easyengine/redis:v4.1.4

+-------------------+---------------------------------------------------------------------------+
| OS | Linux 5.4.0-29-generic #33-Ubuntu SMP Wed Apr 29 14:32:27 UTC 2020 x86_64 |
| Shell | /bin/bash |
| PHP binary | /usr/bin/php7.3 |
| PHP version | 7.3.23-1+ubuntu20.04.1+deb.sury.org+1 |
| php.ini used | /etc/php/7.3/cli/php.ini |
| EE root dir | phar://ee.phar |
| EE vendor dir | phar://ee.phar/vendor |
| EE phar path | /root |
| EE packages dir | |
| EE global config | |
| EE project config | |
| EE version | 4.1.5 |
+-------------------+---------------------------------------------------------------------------+
-----> Run "ee help site" for more information on how to create a site.
Next, verify the installed version of EasyEngine using the following command:
ee --version
You should get the following output:
EE 4.1.5
Next, you can list all downloaded docker images with the following command:
docker images
You should get the following output:
REPOSITORY TAG IMAGE ID CREATED SIZE
easyengine/php v4.1.6 d700893ee9a0 2 weeks ago 759MB
easyengine/postfix v4.1.5 f5ac5c1276af 6 weeks ago 475MB
easyengine/nginx v4.1.4 502705ab18a2 8 weeks ago 85.2MB
easyengine/redis v4.1.4 8df6607d58ef 8 weeks ago 104MB
easyengine/nginx-proxy v4.1.4 e62b5bc02d07 8 weeks ago 163MB
easyengine/mariadb v4.1.3 580f7d75d8d5 3 months ago 407MB
easyengine/cron v4.0.0 e86e4f2e4e9a 22 months ago 8.83MB
easyengine/mailhog v4.0.0 789b9de98747 22 months ago 19.3MB
Step 2 – Install WordPress with EasyEngine
At this point, EasyEngine is installed in your server. Now, you can use “ee site create” command followed by your domain name to install the WordPress in your system.
ee site create wordpress.example.com --wp --cache
This script will start Nginx, MariaDB, PHP, and Redis container, create a database, and configure WordPress as shown below:
Starting site creation.
Configuring project.
Creating WordPress site wordpress.example.com
Copying configuration files.
Starting site's services.
Downloading and configuring WordPress.
Moved /var/www/htdocs/wp-config.php to /var/www/wp-config.php successfully
Success: Host entry successfully added.
Checking and verifying site-up status. This may take some time.

Installing WordPress site.
Success: http://wordpress.example.com has been created successfully!
Site entry created.
Creating cron entry
Success: Cron created successfully
+--------------------+---------------------------------------------+
| Site | http://wordpress.example.com |
+--------------------+---------------------------------------------+
| Site Root | /opt/easyengine/sites/wordpress.example.com |
+--------------------+---------------------------------------------+
| Site Title | wordpress.example.com |
+--------------------+---------------------------------------------+
| WordPress Username | epic-bose |
+--------------------+---------------------------------------------+
| WordPress Password | LbWdvLk1cS7ng4iQkK |
+--------------------+---------------------------------------------+
| Alias Domains | None |
+--------------------+---------------------------------------------+
| DB Host | global-db |
+--------------------+---------------------------------------------+
| DB Name | wordpress_example_com |
+--------------------+---------------------------------------------+
| DB User | wordpress.example.com-YuhM29 |
+--------------------+---------------------------------------------+
| DB Password | qO3oq8HM5E77 |
+--------------------+---------------------------------------------+
| E-Mail | admin@wordpress.example.com |
+--------------------+---------------------------------------------+
| SSL | Not Enabled |
+--------------------+---------------------------------------------+
| Cache | Enabled |
+--------------------+---------------------------------------------+
| Proxy Cache | Off |
+--------------------+---------------------------------------------+
In the above output, you can see all the information about your WordPress website including WordPress site URL, admin username, password, database name, username, password and email address.
You can list all running containers using the following command:
docker ps
You should get the following output:
CONTAINER ID IMAGE COMMAND CREATED STATUS PORTS NAMES

c418ec63de84 easyengine/cron:v4.0.0 "/usr/bin/ofelia dae…" 20 seconds ago Up 16
seconds ee-cron-scheduler
20b5374e5ad9 easyengine/nginx:v4.1.4 "/usr/bin/openresty …" About a minute ago Up
About a minute 80/tcp wordpressexamplecom_nginx_1
5c73654233a4 easyengine/php:v4.1.6 "docker-entrypoint.s…" About a minute ago Up
About a minute 9000/tcp wordpressexamplecom_php_1
c5cb0cb15a03 easyengine/postfix:v4.1.5 "postfix start-fg" About a minute ago Up
About a minute 25/tcp wordpressexamplecom_postfix_1
f7856139ae4c easyengine/mariadb:v4.1.3 "docker-entrypoint.s…" About a minute ago
Up About a minute 3306/tcp services_global-db_1
1f1f7c7f4f22 easyengine/redis:v4.1.4 "docker-entrypoint.s…" About a minute ago Up
About a minute 6379/tcp services_global-redis_1
068ff0967f13 easyengine/nginx-proxy:v4.1.4 "/app/docker-entrypo…" 2 minutes ago
Up About a minute 0.0.0.0:80->80/tcp, 0.0.0.0:443->443/tcp services_global-nginx-proxy_1
If you forgot the WordPress login username and password, then you can run the following command to see all the information for your website:
ee site info wordpress.example.com
Step 3 – Access WordPress Website
Now, open your web browser and access your WordPress admin page using the URL wordpress.example.com/wp-admin. You should see the WordPress login page:
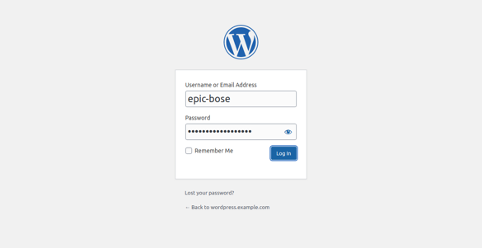
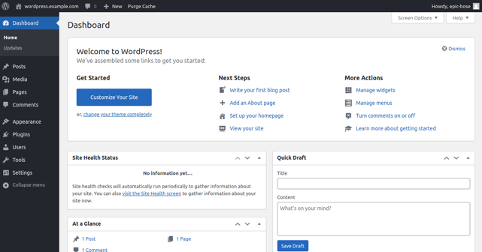
Provide your WordPress admin username, password and click on the Log in button. You should see your WordPress dashboard in the following screen:
Step 4 – Working with EasyEngine
In this section, we will show you some useful EasyEngine commands that will help you to manage the WordPress website.
To list all websites created with Easyengine, run the following command:
ee site list
You should get the following output:
+-----------------------+---------+
| site | status |
+-----------------------+---------+
| wordpress.example.com | enabled |
+-----------------------+---------+
To restart your website, run the following command:
ee site restart wordpress.example.com
You should get the following output:
nginx: the configuration file /usr/local/openresty/nginx/conf/nginx.conf syntax is ok
nginx: configuration file /usr/local/openresty/nginx/conf/nginx.conf test is successful

Restarting nginx
Restarting wordpressexamplecom_nginx_1 ... done

Restarting php
Restarting wordpressexamplecom_php_1 ... done
To disable or enable the WordPress website, run the following command:
ee site disable wordpress.example.com
ee site enable wordpress.example.com
If you want to delete your website, run the following command:
ee site delete wordpress.example.com
You should get the following output:
Are you sure you want to delete wordpress.example.com? [y/n] y
[wordpress.example.com] Docker Containers removed.
[wordpress.example.com] site root removed.
Removed database entry.
Success: Site wordpress.example.com deleted.
Conclusion
As you can see, EasyEngine is a very handy tool for system administrators or developers to automate the website deployment process. You can also install phpMyAdmin, Let’s Encrypt and many other administration utilities using EasyEngine. For more information, you can visit the EasyEngine’s official documentation page. Get started with EasyEngine on VPS Hosting from Atlantic.Net today!
* This post is for informational purposes only and does not constitute professional, legal, financial, or technical advice. Each situation is unique and may require guidance from a qualified professional.
Readers should conduct their own due diligence before making any decisions.