Pandora FMS is free and open-source monitoring software that allows you to monitor thousands of systems and devices from a central location. It is highly scalable, suitable for complex and large environments. You can monitor the status and performance of web servers, databases, routers, firewalls, and many more types of devices using Pandora FMS.
Pandora FMS uses TCP, UDP, ICMP, SNMP and HTTP protocol and agents to collect metrics from the client system. It is cross-platform and supports Windows and Linux operating systems.
In this tutorial, we will show how to install and configure Pandora FMS server on CentOS 8.
Step 1 – Install Apache and MariaDB Server
Pandora FMS runs on a web server and uses MariaDB as a database backend. Therefore, you will need to install Apache and MariaDB server in your system. You can install them with the following command:
dnf update -y
dnf install httpd mariadb-server -y
After installing both packages, start the Apache and MariaDB service and enable them to start at system reboot:
systemctl start httpd
systemctl start mariadb
systemctl enable httpd
systemctl enable mariadb
Step 2 – Create a Database for Pandora FMS
First, you will need to set the MariaDB root password. You can set it with the following command:
mysql_secure_installation
Answer all questions as shown below:
Enter current password for root (enter for none):
Set root password? [Y/n] Y
New password:
Re-enter new password:
Remove anonymous users? [Y/n] Y
Disallow root login remotely? [Y/n] Y
Remove test database and access to it? [Y/n] Y
Reload privilege tables now? [Y/n] Y
Next, log in to MariaDB with the following command:
mysql -u root -p
Provide your root password and create a database and user for Pandora FMS:
CREATE DATABASE pandora;
GRANT ALL PRIVILEGES ON pandora.* to pandora@'localhost' IDENTIFIED BY 'password';
Next, flush the privileges and exit from MariaDB with the following command:
FLUSH PRIVILEGES;
EXIT;
Step 3 – Install Pandora FMS
By default, Pandora FMS is not available in the CentOS default repository, so you will need to add the Pandora repository to your system.
You can create a Pandora repo with the following command:
nano /etc/yum.repos.d/pandorafms.repo
Add the following lines:
[artica_pandorafms]
name=CentOS6 - PandoraFMS official repo
baseurl=http://firefly.artica.es/centos7
gpgcheck=0
enabled=1
Save and close the file, then install the Pandora FMS with the following command:
dnf install pandorafms_console -y
Once the installation has been completed, give proper permissions and ownership to the pandora directory:
chown -R apache:apache /var/www/html/pandora_console/
chmod -R 775 /var/www/html/pandora_console/
Next, restart the Apache service to apply the changes:
systemctl restart httpd
Step 4 – Access Pandora FMS
Now, open your web browser and access the Pandora FMS web interface using the URL http://your-server-ip/pandora_console. You should see the following screen:
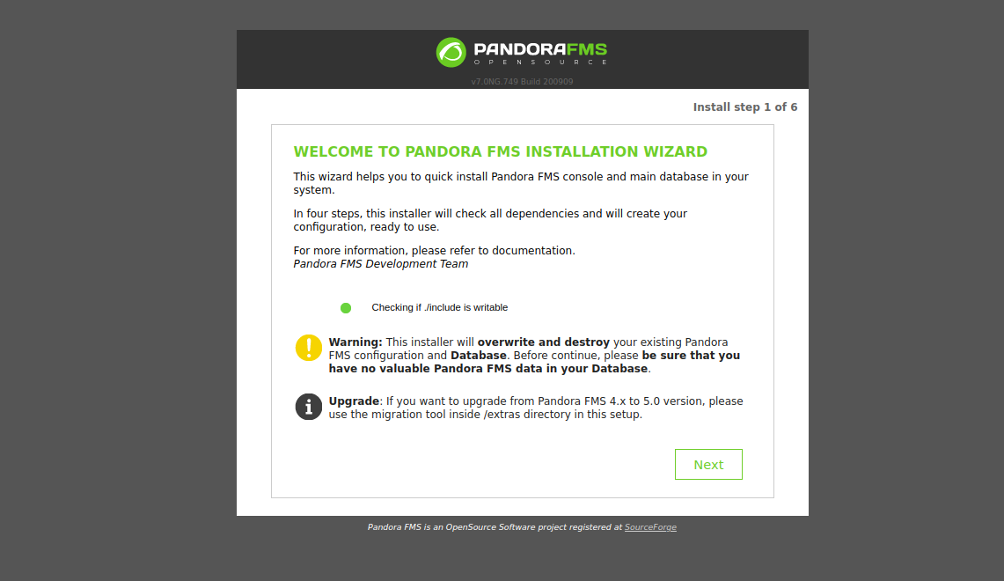
Click on the Next button. You should see the license agreement page:
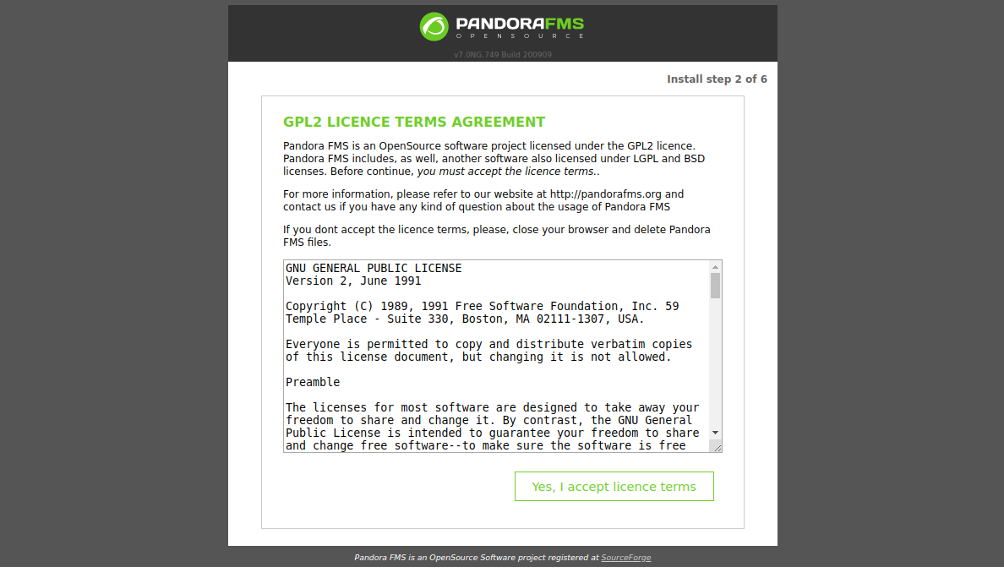
Accept the license agreement. You should see the following page:
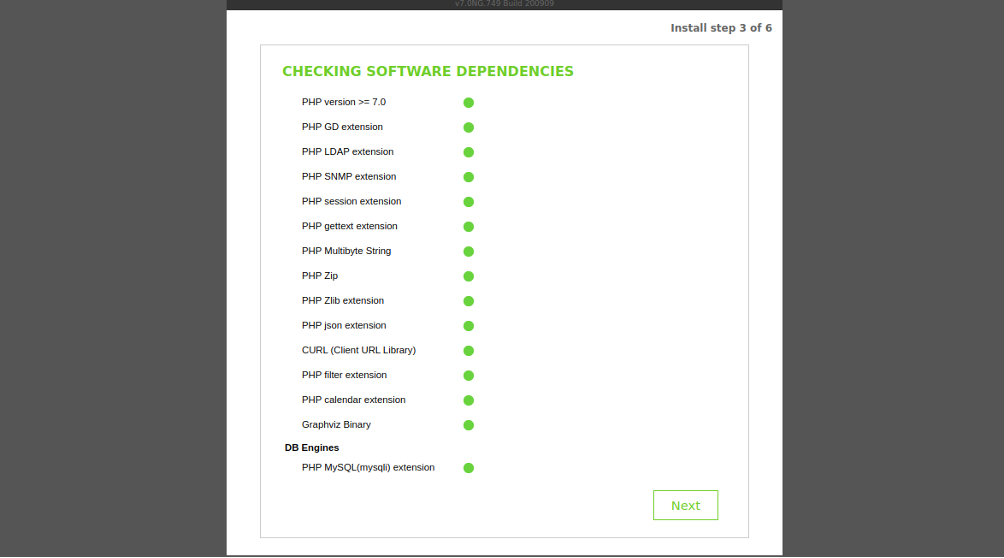
Make sure all the dependencies are installed, then click on the Next button. You should see the following page:
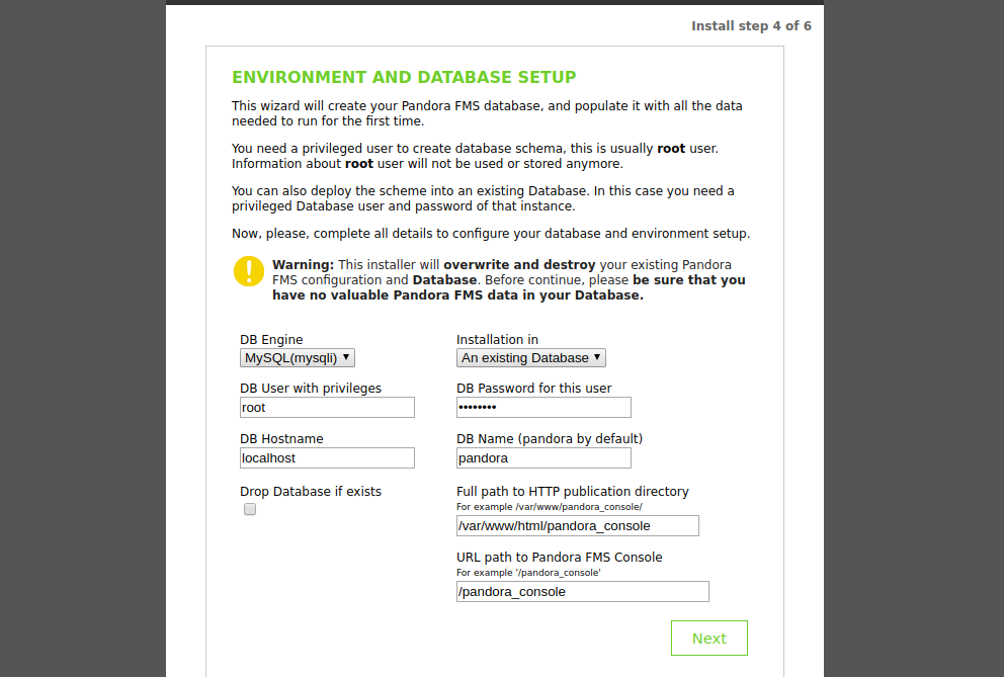
Provide your root username, MariaDB root password, database name, and the path of the application and click on the Next button. You should see the following page:
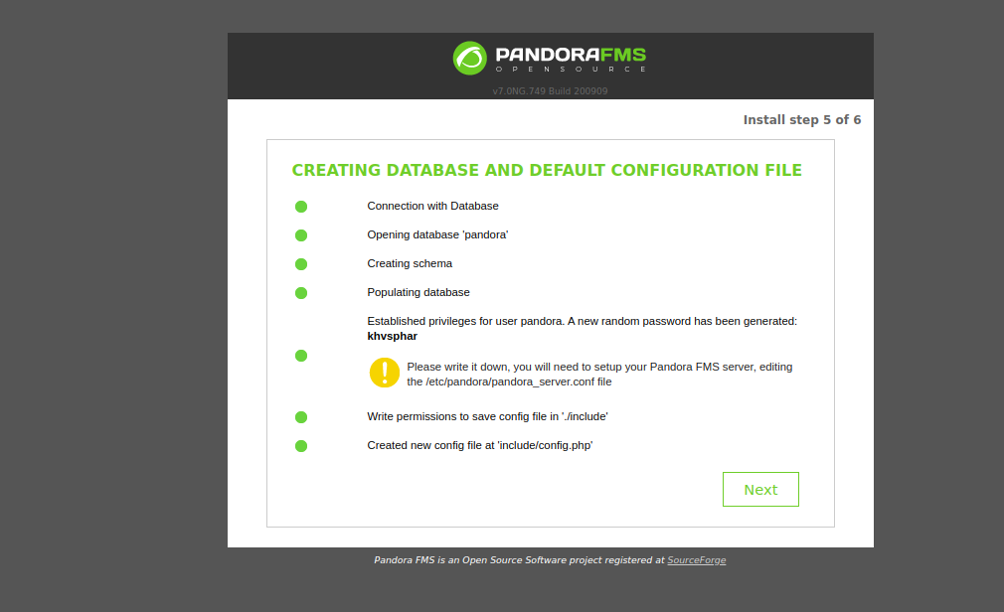
Click on the Next button. You should see the following page:
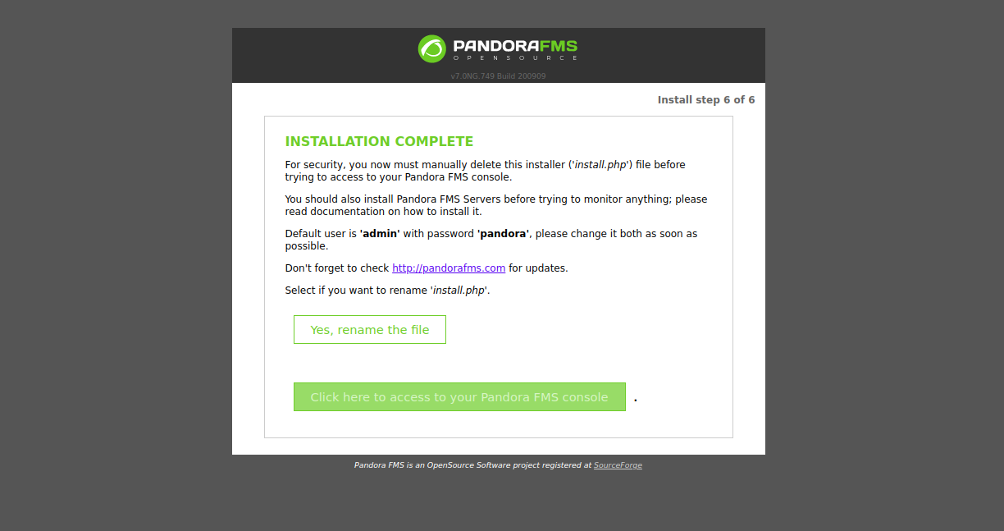
Now, open your terminal and delete the install.php file:
rm -rf /var/www/html/pandora_console/install.php
Next, edit the config.php file and define your database details:
nano /var/www/html/pandora_console/include/config.php
Change the following lines as per your database settings:
// Begin of automatic config file
$config["dbtype"] = "mysql"; //DB type (mysql, postgresql...in future others)
$config["mysqli"] = true;
$config["dbname"]="pandora"; // MySQL DataBase name
$config["dbuser"]="pandora"; // DB User
$config["dbpass"]="password"; // DB Password
$config["dbhost"]="localhost"; // DB Host
Save and close the file, then go to the Pandora web installation screen and click on the Click here to access to your Pandora FMS console. You should see the Pandora login page:
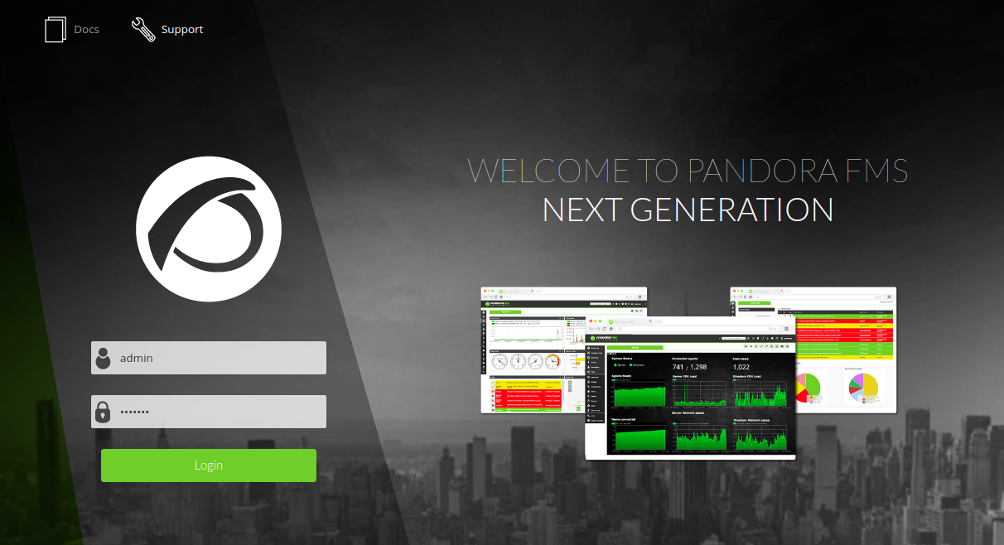
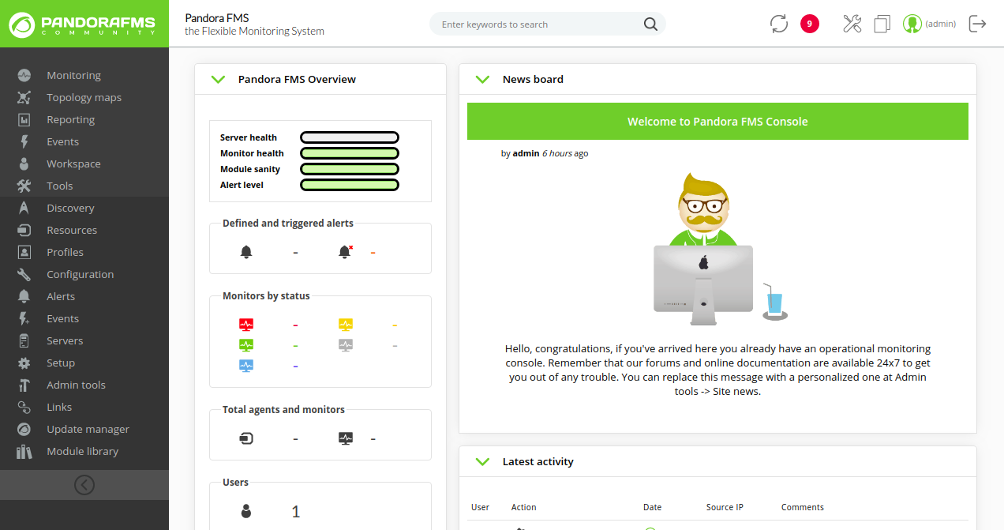
Provide the default user as admin and password as pandora and click on the Login button. You should see the Pandora FMS dashboard in the following page:
Conclusion
Congratulations! You have successfully installed and configured Pandora FMS on CentOS 8. You can now install an agent package on the client system and start monitoring from the Pandora dashboard. Get started with Pandora FMS on VPS hosting from Atlantic.Net today!
* This post is for informational purposes only and does not constitute professional, legal, financial, or technical advice. Each situation is unique and may require guidance from a qualified professional.
Readers should conduct their own due diligence before making any decisions.