Table of Contents
Verified and Tested 1/11/16
Introduction
In this tutorial, we will be covering how to perform some basic IPTables changes that will greatly help secure your server. This is done on a fresh install of CentOS 6.5 64bit in our Atlantic.Net Cloud.
Locking down your CentOS server with IPTables
Using the built in CentOS IPTables is a great way to guarantee a secure virtual private server, because it is already installed and running when the server is created. To verify this, you should just have to run the below to check the status of IPTables and it will print out its current rule sets.
service iptables status
If you are not running as the root, simply add a sudo to the front of that. We will be continuing this securing tutorial as if you are the root user.
To edit your IPTables, you would first need to go to its configuration file. In this example, we use vi however you can use whichever editor is your favorite.
vi /etc/sysconfig/iptables
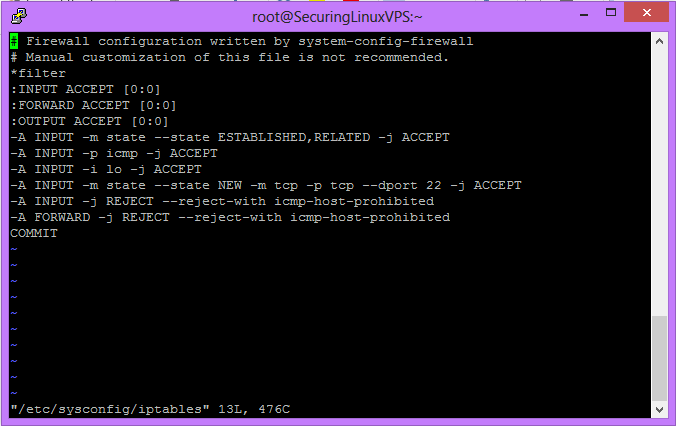
Sample /etc/sysconfig/iptables
You should get a page that looks like the above. The first thing we want to do is if you have a custom SSH port (you should if you have followed the Changing your SSH Port In CentOS (link) tutorial or have changed it yourself), change the line that states:
--dport 22
to be:
--dport yourcustomSSHport
Following our example in the custom SSH port tutorial above, the line should read:
-A INPUT -m state -state NEW -m tcp -p tcp --dport 3389 -j ACCEPT
If you don’t have a custom SSH port, you can ignore this but you should think about adding one! Next, we want to take the section that says:
:INPUT ACCEPT [0:0] and :FORWARD ACCEPT [0:0]
and make it say:
:INPUT DROP [0:0] and :FORWARD DROP [0:0]
What this does is it tells IPTables to block and drop all traffic that is not going to ports you specify to allow through. This will stop people trying to break in using services that you have running unless you have opened those ports to the public.
And that’s it! Your server is now more secure simply by changing a few things in IPTables. To have the changes take effect, you will need to save and exit the file and then run:
service iptables restart
This will cause your new rules to go into effect immediately and they’ll remain through reboots. If you want to get more restrictive with your IPtables, specifically access to SSH, you can do the following for each IP address that should be allowed through. This involves editing the SSH rule and adding more. Where it states the SSH rule we identified earlier, you want to change it to be:
-A INPUT -s IPADDR –m tcp –p tcp --dport 3389 –j ACCEPT
Where IPADDR is your IP address that you want to have SSH access to your server. If you did not set up a custom SSH port, you would want that to remain 22 and not 3389.
To allow specific ports through say for web access to your website, all you need to do is know/find the port the service runs on (or you configured it on) and it’s protocol (TCP or UDP) and allow it through. For example, website access:
-A INPUT -m tcp -p tcp --dport 80 -j ACCEPT
And now the Internet has access to the web hosting you are doing.
Keep in mind, when adding new rules to either INPUT or FORWARD sections, it is a great practice to keep the new rules lumped together with like rules. INPUTs with INPUTs and FORWARDs with FORWARDs. You will also want to make sure that any rules you add that allow a new port through are listed ABOVE any reject statements for that rule set. If they are listed after the reject lines, the rules will not take effect.
To see the output of what IPTables is doing and blocking with its rules, you can run the below. It will print out the rules you have and anything packet wise about dropping connections or allowing them through.
iptables -L -vn
To find out what all the IPTables segments mean and more information about them, please see our IPTables section (link).
Note *You can always access your server via our VNC viewer in the Cloud Portal if you lock yourself out*
Thank you for following this how-to. Please check our blog for a host of articles and how-to’s including other IPTables related posts such as How to: Basic IPTables File Configuration and How to: Basic IPTables Troubleshooting; and consider a market-leading VPS hosting server from Atlantic.Net.
* This post is for informational purposes only and does not constitute professional, legal, financial, or technical advice. Each situation is unique and may require guidance from a qualified professional.
Readers should conduct their own due diligence before making any decisions.