Apache Solr, also called “Searching On Lucene w/Replication,” is an open-source REST-API-based search platform built on Apache Lucene Framework. It is written in Java Language and designed for scalability and fault tolerance. Generally, it is used for enterprise search and analytics use cases. It has a lot of features including full-text search, hit highlighting, faceted search, real-time indexing, dynamic clustering, database integration, NoSQL features, and rich document handling. It also supports distributed, replication, sharing, clustering, and multi-node architecture.
In this post, we will show you how to install Apache Solr on Rocky Linux 10.
Step 1 – Install Java JDK
Apache Solr is written in Java, so Java must be installed on your server. If not installed, you can install it with the following command:
dnf install java-21-openjdk -y
Once installed, verify the Java version using the following command:
java --version
You should get the following output:
openjdk 21.0.8 2025-07-15 LTS
OpenJDK Runtime Environment (Red_Hat-21.0.8.0.9-1) (build 21.0.8+9-LTS)
OpenJDK 64-Bit Server VM (Red_Hat-21.0.8.0.9-1) (build 21.0.8+9-LTS, mixed mode, sharing)
You will also need to install the EPEL repository on your server. You can install it with the following command:
dnf install epel-release -y
Step 2 – Download Apache Solr
By default, Apache Solr is not included in the Rocky Linux default repository, so you will need to download it from their official website.
You can download it with the following command:
wget https://dlcdn.apache.org/solr/solr/9.9.0/solr-9.9.0.tgz
Note: Apache frequently updates SOLR, and you may get an error downloading the above version if it’s been updated since the time of writing. Please check Apache org for the latest versions.
Once Apache Solr is downloaded, download the SHA512 checksum using the following command:
wget https://downloads.apache.org/solr/solr/9.9.0/solr-9.9.0.tgz.sha512
Next, calculate the SHA512 checksum of the Apache Solr downloaded file:
gpg --print-md SHA512 solr-9.9.0.tgz.sha512
Sample output:
solr-9.9.0.tgz.sha512: 15150B7F 191FD9E8 D2C1BD8B B619DD4B 3F27AF2E 0E94B760 9031F7E7
                45A2E263 391C30F6 8865C208 AFB97CCA A9BDE6D1 6050200E 9BFCCEF6
                5F762C2E D743C242
Next, compare the hash value to the contents of the SHA512 file:
cat solr-9.9.0.tgz.sha512
Sample output:
15150b7f191fd9e8d2c1bd8bb619dd4b3f27af2e0e94b7609031f7e745a2e263391c30f68865c208afb97ccaa9bde6d16050200e9bfccef65f762c2ed743c242 *solr-8.9.0.tgz
After matching the SHA512 hashes, extract the downloaded file with the following command:
tar xzf solr-9.9.0.tgz
Step 3 – Install Apache Solr
First, move the Solr extracted directory to /opt.
mv solr-9.9.0 /opt/solr
Next, create a dedicated user for Solr.
useradd --system --home /opt/solr --shell /bin/bash solr
Next, change the ownership of /opt/solr.
chown -R solr:solr /opt/solr
Next, edit the Solr service file.
nano /opt/solr/bin/solr.in.sh
Change the following line.
SOLR_JETTY_HOST="0.0.0.0"
Next, create a systemd service file for Solr.
nano /etc/systemd/system/solr.service
Add the following lines.
[Unit]
Description=Apache Solr Service
After=network.target

[Service]
Type=forking
User=solr
Group=solr
ExecStart=/opt/solr/bin/solr start
ExecStop=/opt/solr/bin/solr stop
ExecReload=/opt/solr/bin/solr restart
Restart=on-failure
LimitNOFILE=65535

[Install]
WantedBy=multi-user.target
Next, reload the systemd daemon.
systemctl daemon-reload
Next, start and enable the Solr service.
systemctl enable solr
systemctl start solr
Next, check the status of Solr.
systemctl status solr
Output.
● solr.service - Apache Solr Service
     Loaded: loaded (/etc/systemd/system/solr.service; disabled; preset: disabled)
     Active: active (running) since Tue 2025-10-21 22:38:51 EDT; 1min 10s ago
 Invocation: 407b04904cde4b1097a7e7a3945aac80
    Process: 25232 ExecStart=/opt/solr/bin/solr start (code=exited, status=0/SUCCESS)
   Main PID: 25288 (java)
      Tasks: 44 (limit: 24809)
     Memory: 674M (peak: 694.4M)
        CPU: 9.568s
     CGroup: /system.slice/solr.service
             └─25288 java -server -Xms512m -Xmx512m -XX:+UseG1GC -XX:+PerfDisableSharedMem -XX:+ParallelRefProcEnabled -XX:MaxGCPauseMillis=250 -XX:+UseLargePages -XX:+AlwaysPreTouch >
At this point, Apache Solr is running and listens on port 8983. You can check it with the following command:
ss -altnp | grep 8983
Sample output:
LISTEN 0 50 *:8983 *:* users:(("java",pid=9970,fd=153))
Step 4 – Configure Firewall
If a firewalld firewall is installed and running on your server, then you will need to allow port 8983 through firewalld. You can enable it with the following command:
firewall-cmd --add-port=8983/tcp --permanent
Next, reload the firewall using the following command:
firewall-cmd --reload
Step 5 – Access Apache Solr
Before accessing Apache Solr, create a test collection using the following command:
su - solr -c "/opt/solr/bin/solr create -c testcollection -n data_driven_schema_configs"
Sample output:
Created new core 'testcollection'
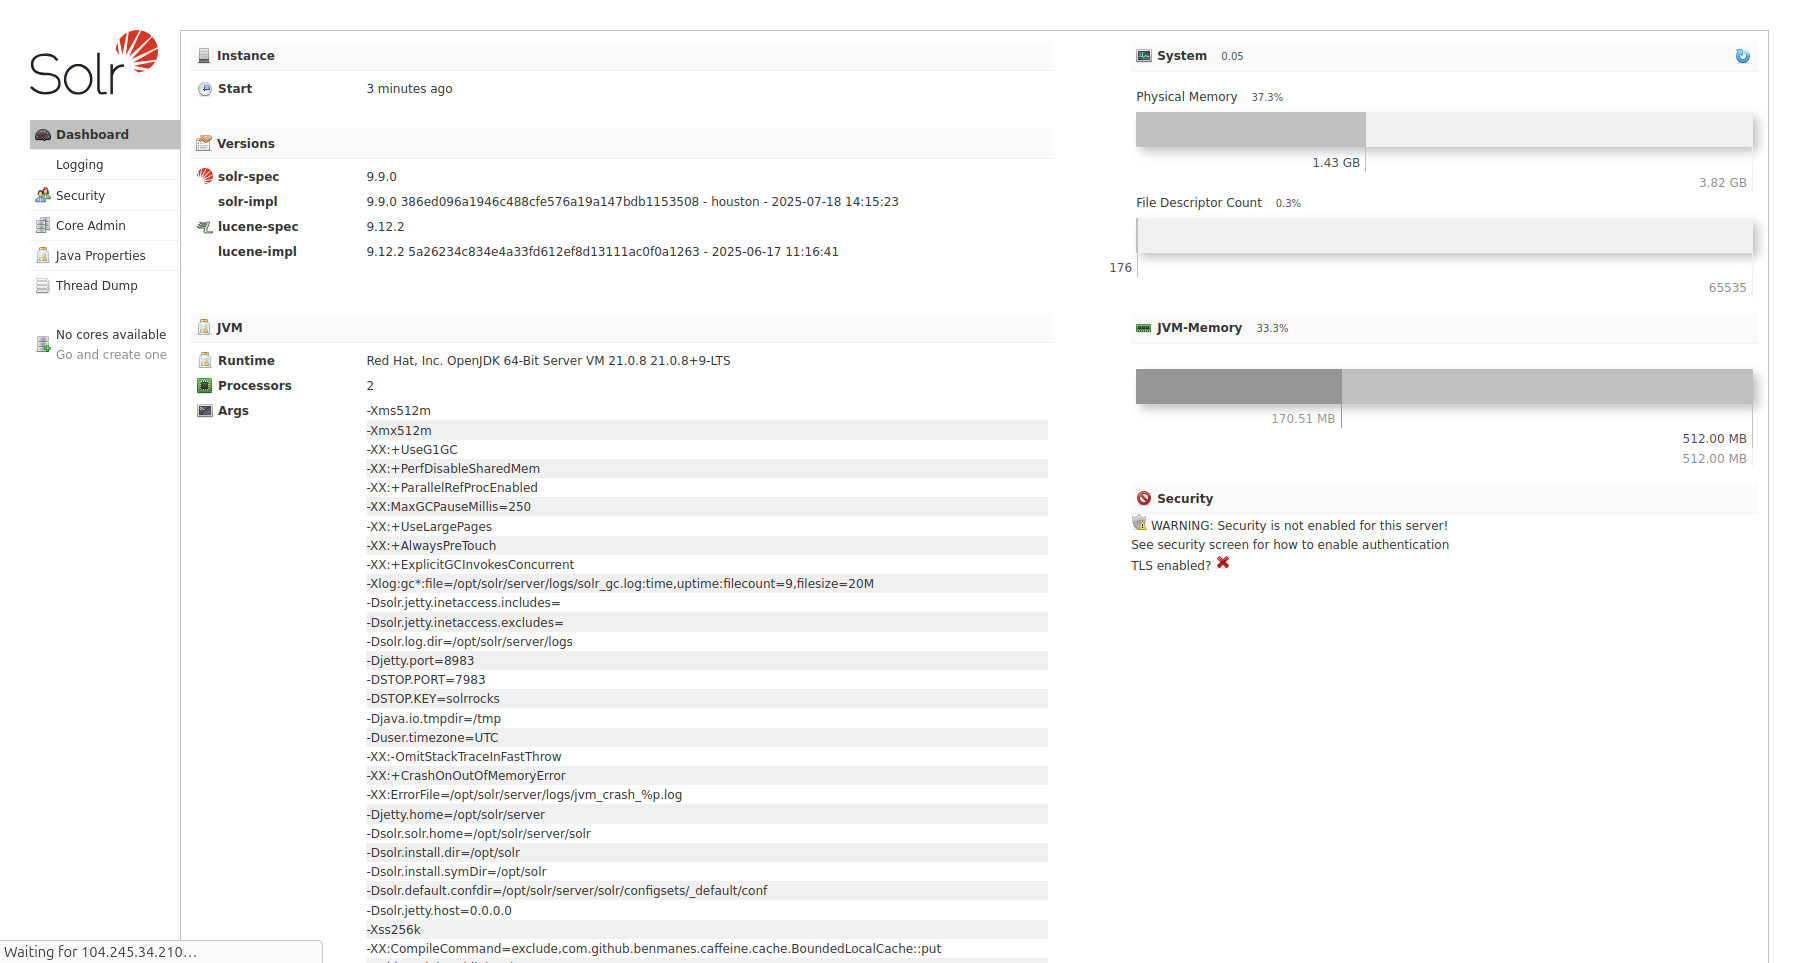
Now, open your web browser and access the Apache Solr web interface using the URL http://your-server-ip:8983. You should see the Apache Solr dashboard on the following page:
Conclusion
Congratulations! You have successfully installed Apache Solr on RockyLinux 10. You can now integrate Apache Solr with your application for search functionality. Get started on a dedicated server from Atlantic.Net today!
* This post is for informational purposes only and does not constitute professional, legal, financial, or technical advice. Each situation is unique and may require guidance from a qualified professional.
Readers should conduct their own due diligence before making any decisions.