Drupal is a free, flexible, open-source CMS software solution that allows you to build and deploy a website without any coding knowledge. It is written in PHP and uses MySQL/MariaDB as a database backend. Drupal provides a simple and powerful admin interface to manage your content, media, and other assets easier than ever before. It is very similar to other CMS platforms, such as WordPress and Joomla, and helps your organization connect with users, customers, and visitors wherever they are.
In this tutorial, we will show you how to install Drupal 11 CMS with Apache on Rocky Linux 10.
Step 1 – Install Apache and MariaDB Server
First, install the Apache web server and MariaDB database server using the following command:
dnf install httpd mariadb-server curl unzip git -y
Once both packages are installed, start the Apache and MariaDB services and enable them to start at system reboot:
systemctl start httpd
systemctl start mariadb
systemctl enable httpd
systemctl enable mariadb
Step 2 – Install PHP and Other Extensions
Next, it is recommended to install the latest version of PHP and other extensions to your server. By default, the latest version of PHP is not included in the Rocky Linux default repository, so you will need to install it from the Remi repository.
You can install the Remi repository with the following command:
dnf install epel-release -y
Next, install the PHP 8 and other extensions using the following command:
dnf install php php-curl php-mbstring php-gd php-xml php-pear php-fpm php-mysqlnd php-pdo php-opcache php-json php-zip php-soap -y
Once all the packages are installed, verify the PHP version with the following command:
php -v
Output:
PHP 8.3.19 (cli) (built: Mar 12 2025 13:10:27) (NTS gcc x86_64)
Copyright (c) The PHP Group
Zend Engine v4.3.19, Copyright (c) Zend Technologies
with Zend OPcache v8.3.19, Copyright (c), by Zend Technologies
Next, edit the php.ini file and tweak some settings:
nano /etc/php.ini
Change the following lines:
memory_limit = 256M
date.timezone = Asia/Kolkata
Save and close the file when you are finished.
Step 3 – Create a Drupal Database
Next, you will need to create a database and user for Drupal. First, connect to the MariaDB with the following command:
mysql
Once you are connected, create a database and user using the following command:
CREATE DATABASE drupaldb;
GRANT ALL ON drupaldb.* TO 'drupaluser'@'localhost' IDENTIFIED BY 'securepassword';
Next, flush the privileges and exit from the MariaDB shell:
FLUSH PRIVILEGES;
EXIT;
Step 4 – Download Drupal
First, download the latest version of Drupal from its official website using the following command:
wget https://www.drupal.org/download-latest/tar.gz -O drupal.tar.gz
Once the download is completed, extract the downloaded file with the following command:
tar xvf drupal.tar.gz
Next, move the extracted directory to the Apache root directory:
mv drupal-*/ /var/www/html/drupal
Next, create a file directory required for Drupal and copy a sample settings.php file:
mkdir /var/www/html/drupal/sites/default/files
cp /var/www/html/drupal/sites/default/default.settings.php /var/www/html/drupal/sites/default/settings.php
Next, set proper ownership and permissions on the drupal directory:
chown -R apache:apache /var/www/html/drupal
chmod -R 777 /var/www/html/drupal
Step 5 – Configure Apache for Drupal
Next, create an Apache virtual host configuration file for Drupal with the following command:
nano /etc/httpd/conf.d/drupal.conf
Add the following lines:
<VirtualHost *:80>
     ServerName drupal.example.com
     ServerAdmin [email protected]
     DocumentRoot /var/www/html/drupal/

     CustomLog /var/log/httpd/access_log combined
     ErrorLog /var/log/httpd/error_log

     <Directory /var/www/html/drupal>
            Options Indexes FollowSymLinks
            AllowOverride All
            Require all granted
            RewriteEngine on
            RewriteBase /
            RewriteCond %{REQUEST_FILENAME} !-f
            RewriteCond %{REQUEST_FILENAME} !-d
            RewriteRule ^(.*)$ index.php?q=$1 [L,QSA]
     </Directory>
</VirtualHost>
Save and close the file, then restart the Apache service to apply the changes:
systemctl restart httpd
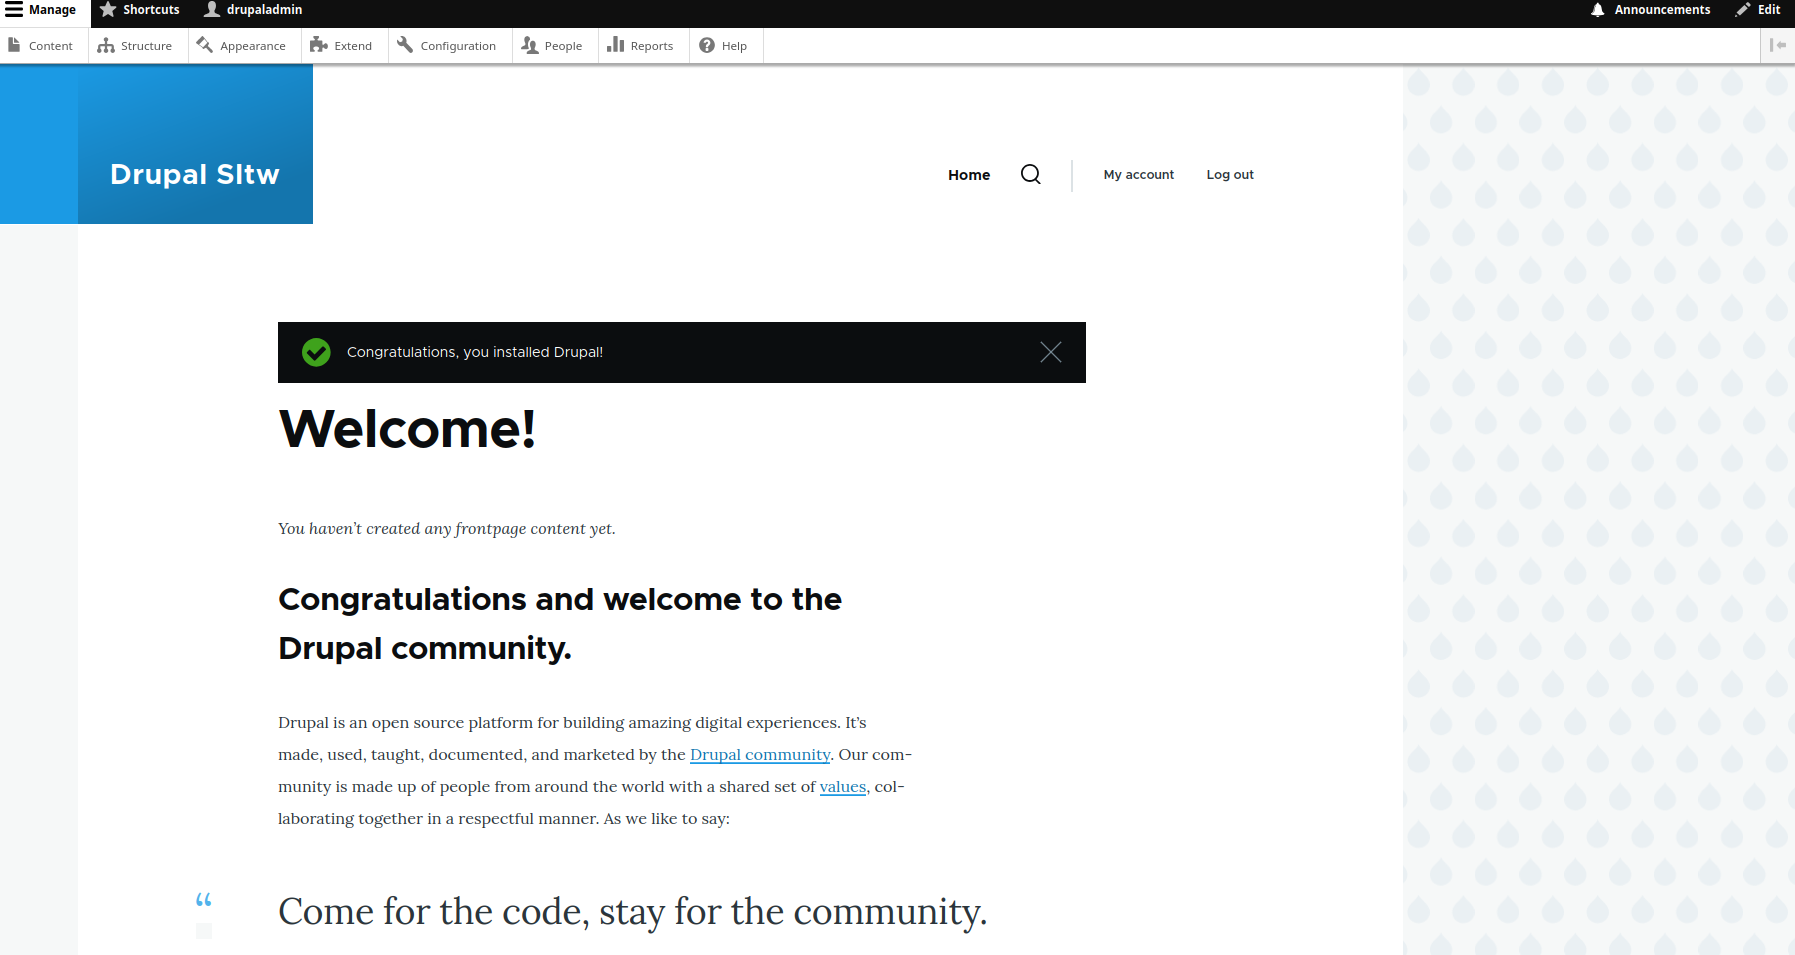
Step 6 – Access Drupal Website
Now Drupal is installed and configured. You can now access it using the URL http://drupal.example.com. You should see the following screen:
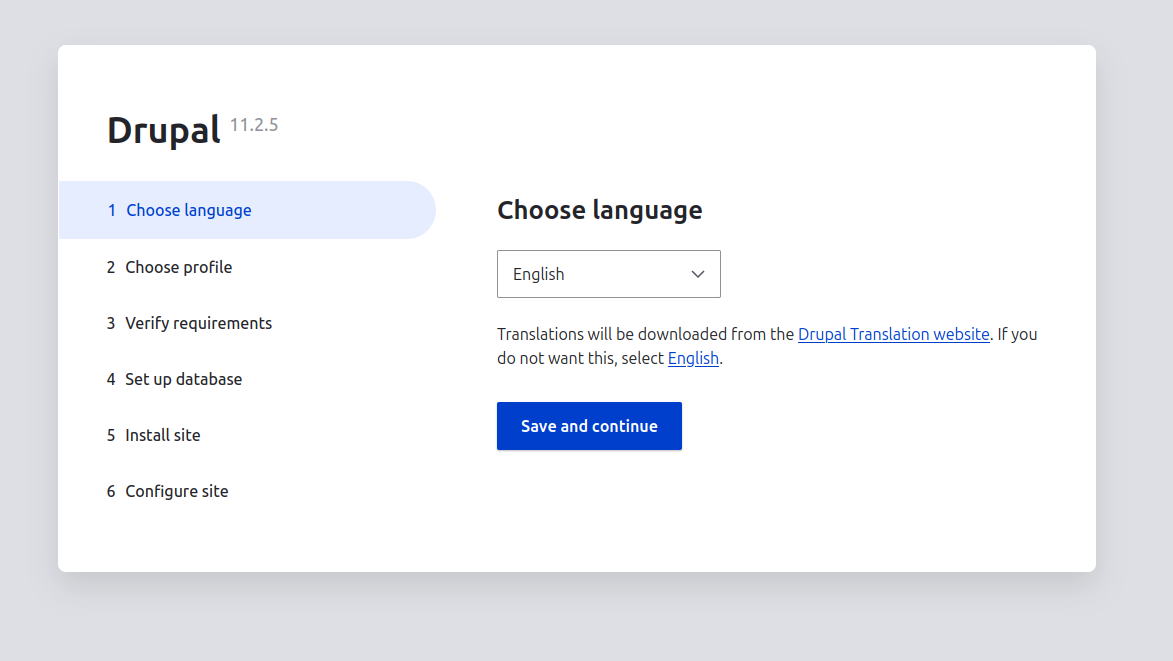
Select your Language and click on Save and continue button. You should see the following screen:
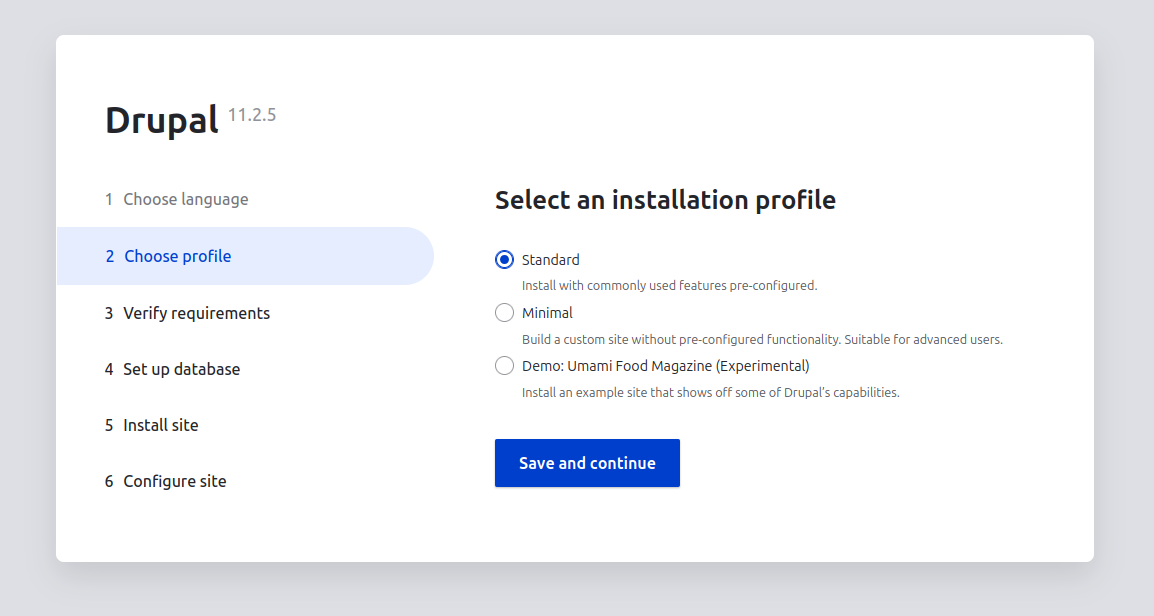
Select an installation type and click on the Save and continue button. You should see the following screen:
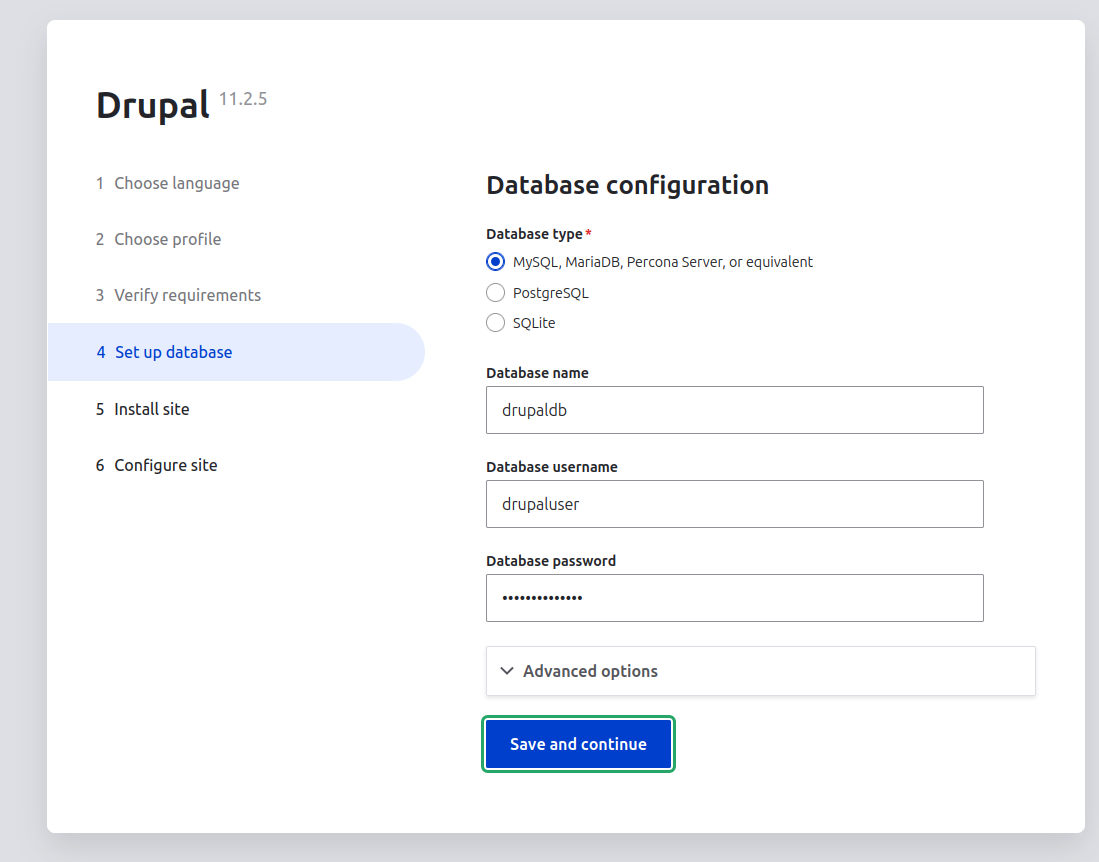
Provide your database information and click on the Save and continue button. You should see the Drupal site information on the following screen:
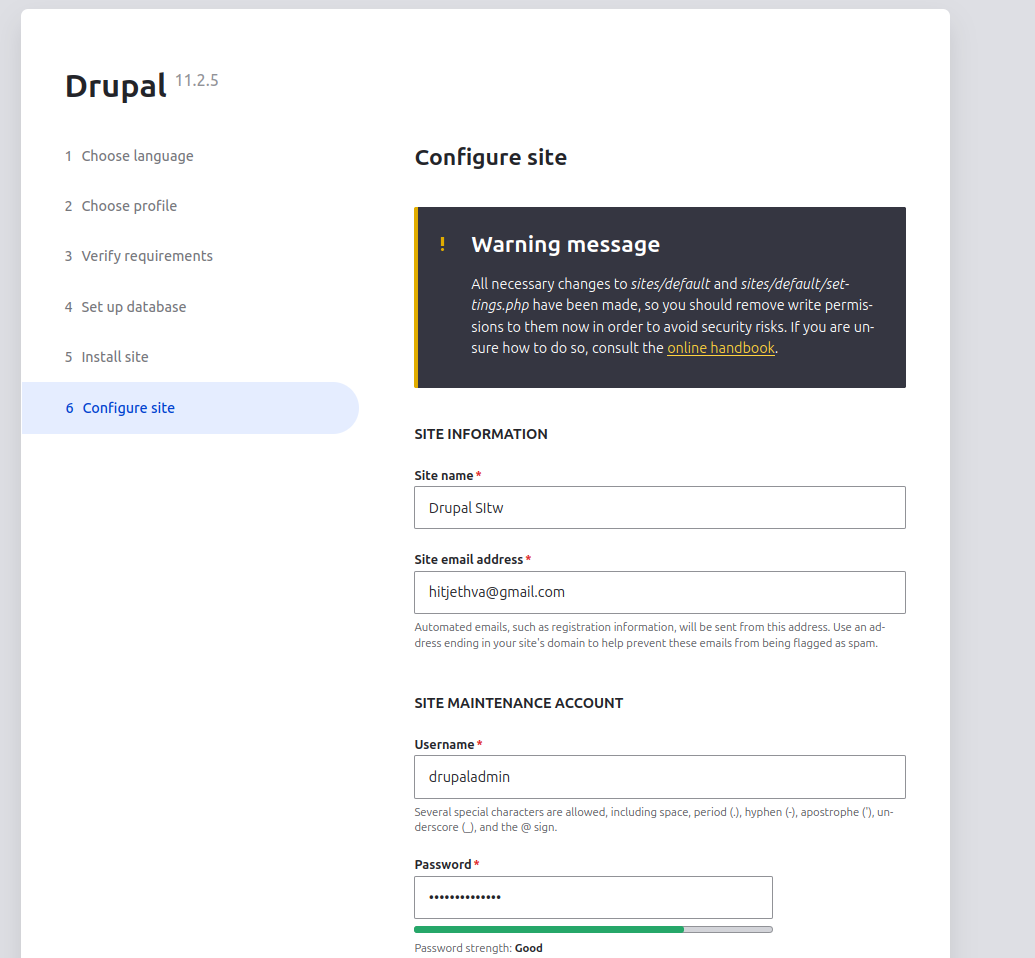
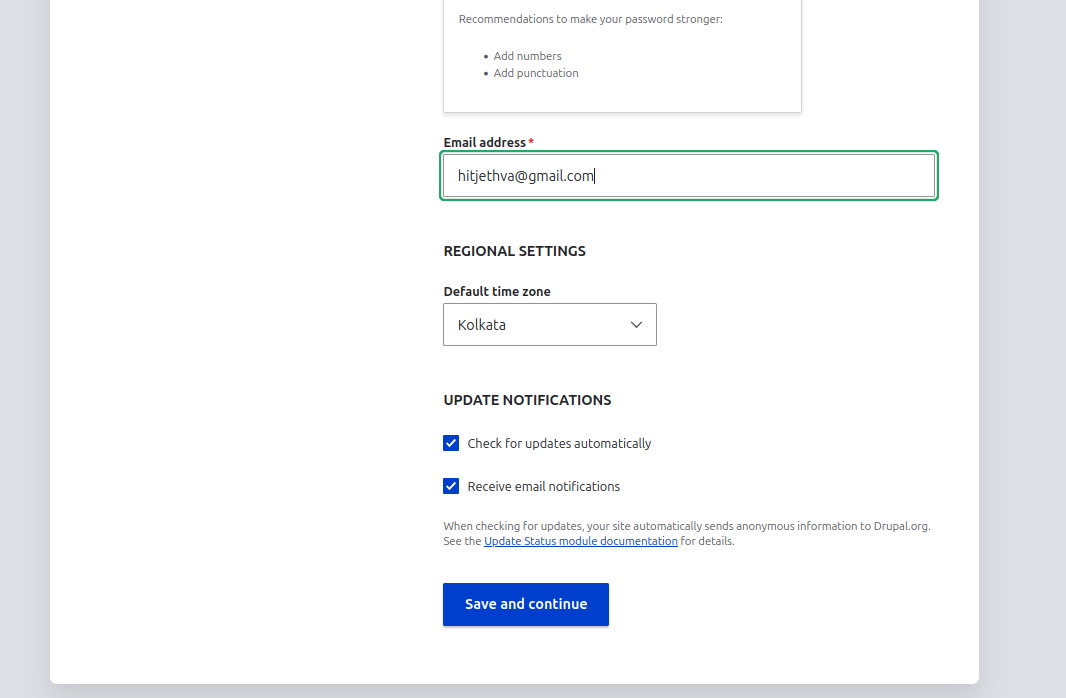
Provide your site information and click on the Save and continue button. Once the installation has been completed, you should see the Drupal dashboard on the following screen:
Conclusion
In the above guide, you learned how to install Drupal with Apache on Rocky Linux 10. You should now have enough knowledge to install Drupal on a live server easily – get started with Drupal on your Atlantic.Net dedicated server.
* This post is for informational purposes only and does not constitute professional, legal, financial, or technical advice. Each situation is unique and may require guidance from a qualified professional.
Readers should conduct their own due diligence before making any decisions.