Odoo is a group of business management software tools that include features for billing, accounting, eCommerce, CRM, warehouse, project management, and inventory management. It is designed for small and medium businesses and is available in the cloud or on-premise. It is user-friendly, scalable, customizable, flexible, and helps you manage businesses and organizations with a CMS.
In this post, we will show you how to install Odoo 18 in Rocky Linux 10.
Step 1 – Install Python packages and Odoo Dependencies
Before starting, install the EPEL repository using the following command:
dnf install epel-release -y
Once EPEL is installed, run the following command to install Python and Odoo dependencies:
dnf install python3 python3-devel git gcc git redhat-rpm-config libxslt-devel bzip2-devel openldap-devel libjpeg-devel freetype-devel -y
Next, install the wkhtmltox to render HTML into a PDF using the following command:
dnf install https://github.com/wkhtmltopdf/wkhtmltopdf/releases/download/0.12.5/wkhtmltox-0.12.5-1.centos8.x86_64.rpm
Next, enable CRB repo.
dnf config-manager --set-enabled crb
Next, install required Perl extension.
dnf install -y perl-IPC-Run
Step 2 – Install PostgreSQL
Odoo uses PostgreSQL as a database backend.
First, add PostgreSQL repo.
dnf install https://download.postgresql.org/pub/repos/yum/reporpms/EL-8-x86_64/pgdg-redhat-repo-latest.noarch.rpm
Next, install PostgreSQL with the following command.
dnf install postgresql18 postgresql18-server postgresql18-devel -y
After installing PostgreSQL, initialize the PostgreSQL database with the following command:
/usr/pgsql-18/bin/postgresql-18-setup initdb
Sample output:
WARNING: using obsoleted argument syntax, try --help
WARNING: arguments transformed to: postgresql-setup --initdb --unit postgresql
 * Initializing database in '/var/lib/pgsql/data'
 * Initialized, logs are in /var/lib/pgsql/initdb_postgresql.log
Next, start the PostgreSQL service and enable it to start at system reboot:
systemctl enable --now postgresql-18
Next, create a user for Odoo with the following command:
su - postgres -c "createuser -s odoo18"
Step 3 – Install Odoo 18
First, add an odoo user to run the Odoo service:
useradd -m -U -r -d /opt/odoo18 -s /bin/bash odoo18
Next, log in with the odoo user and download Odoo version 18 using the following command:
su - odoo18
git clone https://www.github.com/odoo/odoo --depth 1 --branch 18.0 /opt/odoo18/odoo
Next, change the directory to /opt/odoo18 and create a Python virtual environment:
cd /opt/odoo18
python3 -m venv odooenv
Next, activate the virtual environment:
source odooenv/bin/activate
Next, install the required dependencies using the following command:
pip3 install -r odoo/requirements.txt
Next, deactivate the virtual environment with the following command:
deactivate
Next, create an addons directory and exit from the odoo user with the following command:
mkdir /opt/odoo18/odoo-custom-addons
exit
Next, create an Odoo configuration file using the following command:
nano /etc/odoo18.conf
Add the following lines:
[options]
admin_passwd = secure-password
db_host = False
db_port = False
db_user = odoo18
db_password = False
addons_path = /opt/odoo18/odoo/addons, /opt/odoo18/odoo-custom-addons
Save and close the file.
Step 4 – Create an Odoo Service File
Next, you will need to create a service file to manage the Odoo service. You can create it using the following command:
nano /etc/systemd/system/odoo.service
Add the following lines:
[Unit]
Description=Odoo18
Requires=postgresql-18.service
After=network.target postgresql-18.service

[Service]
Type=simple
SyslogIdentifier=odoo18
PermissionsStartOnly=true
User=odoo18
Group=odoo18
ExecStart=/opt/odoo18/odooenv/bin/python3 /opt/odoo18/odoo/odoo-bin -c /etc/odoo18.conf
StandardOutput=journal+console

[Install]
WantedBy=multi-user.target
Save the file, then reload the systemd daemon with the following command:
systemctl daemon-reload
Next, start the enable the Odoo service using the following command:
systemctl enable --now odoo
You can check the status of the Odoo service using the following command:
systemctl status odoo
Sample output:
● odoo.service - Odoo18
     Loaded: loaded (/etc/systemd/system/odoo.service; disabled; preset: disabled)
     Active: active (running) since Tue 2025-10-21 02:43:04 EDT; 4s ago
 Invocation: a2fd6721e8bd483eaf7b9806f5de2a54
   Main PID: 3127 (python3)
      Tasks: 4 (limit: 24809)
     Memory: 89.3M (peak: 91.3M)
        CPU: 1.507s
     CGroup: /system.slice/odoo.service
             └─3127 /opt/odoo18/odooenv/bin/python3 /opt/odoo18/odoo/odoo-bin -c /etc/odoo18.conf
Step 5 – Configure Firewall
If you are using firewalls, then you will need to allow Odoo port 8069 through the firewall. You can allow it using the following command:
firewall-cmd --permanent --add-port=8069
Next, reload the firewalld to apply the changes:
firewall-cmd --reload
Step 6 – Access Odoo 18 Web UI
At this point, Odoo 18 is started and listening on port 8069. You can check it using the following command:
ss -antpl | grep 8069
Sample output:
LISTEN 0 128 0.0.0.0:8069 0.0.0.0:* users:(("python3",pid=37537,fd=3))
You can now access it using the URL http://your-server-ip:8069. You should see the following page:
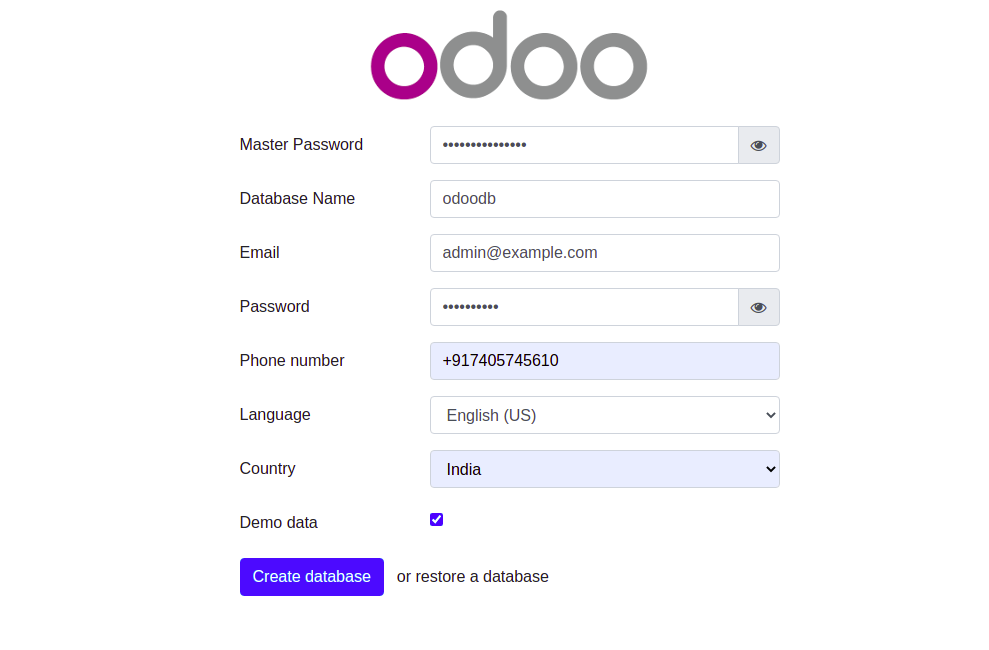
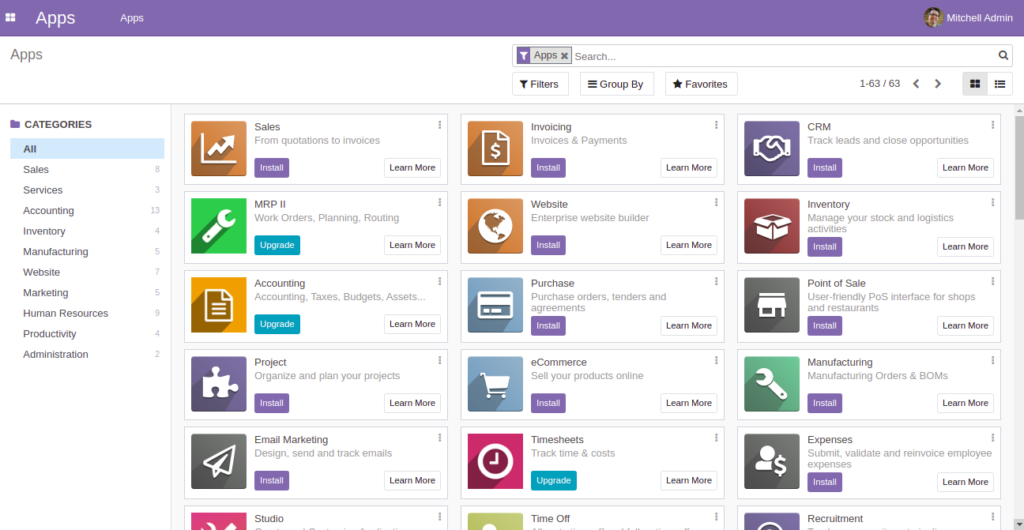
Provide your master admin password, email, password, and click on the “Create database” button. You will be redirected to the Odoo18 dashboard as shown below:
Conclusion
That’s it for now. You have successfully installed Odoo 18 on Rocky Linux 10. You can now start managing your business using the Odoo ERP. Get started on dedicated hosting from Atlantic.Net.
* This post is for informational purposes only and does not constitute professional, legal, financial, or technical advice. Each situation is unique and may require guidance from a qualified professional.
Readers should conduct their own due diligence before making any decisions.