Table of Contents
- Prerequisites
- Step 1 - Install NVIDIA Driver
- Step 2 - Install GNOME Desktop Environment
- Step 3 - Install ThinLinc Server
- Step 4 - Install and Configure VirtualGL
- Step 5 - Configure Firewall for ThinLinc Access
- Step 6 - Access ThinLinc via Web Browser and Test GPU Acceleration
- Step 7 - Access Ubuntu Desktop via ThinLinc GUI Client
- Step 8 - Access ThinLinc Control Panel
- Conclusion
ThinLinc is a remote desktop server that allows multiple users to access graphical Linux desktops from anywhere securely. It is widely used in enterprise, education, and research environments because of its stability, scalability, and flexibility.
What makes this setup even more powerful is the integration with NVIDIA GPUs and VirtualGL. By enabling GPU acceleration inside your ThinLinc sessions, you can run demanding applications like 3D visualization tools, machine learning notebooks, CAD software, and scientific simulations with smooth performance over the network.
In this tutorial, you will learn how to deploy a Linux Virtual Desktop Infrastructure (VDI) solution on an Ubuntu 24.04 GPU server using Cendio ThinLinc.
Prerequisites
Before starting with the installation, make sure your environment is ready. This will help you avoid common setup errors later.
- Ubuntu 24.04 LTS (64-bit) with NVIDIA GPU and 8 GB RAM.
- A root user or a user with sudo privileges.
Step 1 – Install NVIDIA Driver
To enable GPU acceleration inside your ThinLinc VDI, you need to install the NVIDIA driver and the CUDA toolkit on your Ubuntu 24.04 server. These components ensure that applications can leverage your GPU for 3D rendering, AI/ML workloads, and high-performance computing.
1. First, download the NVIDIA CUDA repository package and set up repository preferences.
wget https://developer.download.nvidia.com/compute/cuda/repos/ubuntu2404/x86_64/cuda-ubuntu2404.pin
mv cuda-ubuntu2404.pin /etc/apt/preferences.d/cuda-repository-pin-600
2. Download and install the local CUDA repository package.
wget https://developer.download.nvidia.com/compute/cuda/12.8.0/local_installers/cuda-repo-ubuntu2404-12-8-local_12.8.0-570.86.10-1_amd64.deb
dpkg -i cuda-repo-ubuntu2404-12-8-local_12.8.0-570.86.10-1_amd64.deb
3. Copy the GPG key.
cp /var/cuda-repo-ubuntu2404-12-8-local/cuda-*-keyring.gpg /usr/share/keyrings/
4. Update the package list.
apt-get update
5. Install the CUDA toolkit using APT.
apt-get -y install cuda-toolkit-12-8
6. Add CUDA binaries and libraries to your environment path.
echo "export PATH=/usr/local/cuda-12.8/bin${PATH:+:${PATH}}" >> ~/.bashrc
echo "export LD_LIBRARY_PATH=/usr/local/cuda-12.8/lib64${LD_LIBRARY_PATH:+:${LD_LIBRARY_PATH}}" >> ~/.bashrc
source ~/.bashrc
7. Check if your GPU is detected correctly.
nvidia-smi
Output.
+-----------------------------------------------------------------------------------------+
| NVIDIA-SMI 550.90.07              Driver Version: 550.90.07      CUDA Version: 12.4     |
|-----------------------------------------+------------------------+----------------------+
| GPU  Name                 Persistence-M | Bus-Id          Disp.A | Volatile Uncorr. ECC |
|   0  NVIDIA A40-8Q                  Off |   00000000:06:00.0 Off |                    0 |
|       1MiB /   8192MiB |      0%      Default |
+-----------------------------------------------------------------------------------------+
| Processes: No running processes found                                                   |
+-----------------------------------------------------------------------------------------+
Step 2 – Install GNOME Desktop Environment
To provide users with a graphical interface inside ThinLinc, you need a desktop environment installed on your Ubuntu 24.04 GPU server. In this guide, we will use GNOME Desktop, which is stable and widely supported.
1. Run the following command to install the complete GNOME desktop environment.
apt -y install task-gnome-desktop
This may take several minutes depending on your server’s resources and network speed, as it installs all necessary GNOME components.
2. Once the installation is complete, reboot your server to load GNOME services.
reboot
3. After reboot, create a new non-root user that will be used for ThinLinc administration and login sessions.
adduser thinadm
Set a password when prompted and fill in optional user details.
4. Add the new user to the sudo group so they can run administrative commands.
usermod -aG sudo thinadm
5. ThinLinc requires its binaries to be included in the secure path used by sudo. Edit the sudoers file.
nano /etc/sudoers
Find the Defaults secure_path line and update it to include ThinLinc paths:
Defaults secure_path="/usr/local/sbin:/usr/local/bin:/usr/sbin:/usr/bin:/sbin:/bin:/snap/bin:/opt/thinlinc/bin:/opt/thinlinc/sbin"
6. Log in as the newly created thinadm user:
su - thinadm
From here, you’ll install and configure the ThinLinc server in the next section.
Step 3 – Install ThinLinc Server
With GNOME installed, the next step is to set up Cendio ThinLinc. ThinLinc provides the VDI layer that enables multiple users to connect to your Ubuntu GPU server via browser or client.
1. Switch to your admin user (thinadm) and download the latest ThinLinc server package.
wget https://www.cendio.com/downloads/server/tl-4.19.0-server.zip
2. Unzip the downloaded file.
unzip tl-4.19.0-server.zip
3. Go to the extracted directory.
cd tl-4.19.0-server
4. Start the ThinLinc server installation.
sudo ./install-server
You will be asked to enter your user password. After successful authentication, the installation wizard will start in text mode.
[sudo] password for thinadm: Could not start GTK+. Using text mode fallback... ThinLinc server installation ============================ This program will help you install the ThinLinc software on your system. Before installing, see the platform specific notes atPlatform specific notesPress Enter to continue...
5. Press Enter to continue. The installer will list the packages to be installed.
Determining packages to install... done.

The following packages will be installed:

	 thinlinc-server_4.19.0-4116_amd64.deb

Press Enter to continue...
6. Press Enter again to start installing the package.
Performing package installation... done.

All packages were installed successfully.

Press Enter to continue...

Installation of ThinLinc completed

Before using ThinLinc, you must configure it using
/opt/thinlinc/sbin/tl-setup.
7. Type Yes and press Enter to launch the configuration wizard.
Run ThinLinc setup now [Yes/no]? Yes
8. You must accept the license to continue.
Do you accept the terms of the license agreement [yes/No]? yes
9. Choose Master as this will be the main server users connect to.
Server type
===========

Select the type of ThinLinc server to configure.

The master server is the one users will connect to. Agent servers are
used to spread the resource load when just the master server is
insufficent. If unsure, then pick Master.

Server type [Master/agent]? Master
10. The wizard will verify required libraries and binaries. Press Enter to continue and allow auto-installation of missing packages.
System check
============

Analyzing system... done.

Library and binary requirements
===============================

ThinLinc requires certain libraries and binaries to work as expected.
This system lacks one or more of these.

The necessary packages can be installed automatically by this wizard, or
you can install them manually and restart the wizard.

Press Enter to continue...
11. The local drive redirection feature requires NFS client support. Type Yes to auto-install the packages.
Network file system support
===========================

The local drive redirection feature requires that your system can act as
an NFS client.

The necessary packages can be installed automatically by this wizard, or
you can install them manually and restart the wizard.

Automatically install the necessary packages [Yes/no]? Yes
12. ThinLinc requires GTK+, PyGObject, and the Python LDAP module. Type Yes when prompted to install them automatically.
GTK+ dependency
===============

Some parts of ThinLinc require GTK+ and PyGObject to function correctly.
Your system does not have these installed.

The necessary packages can be installed automatically by this wizard, or
you can install them manually and restart the wizard.

Automatically install the necessary packages [Yes/no]? Yes


Python dependency
=================

The Python LDAP module is required for LDAP integration tools. Your
system does not have this installed.

The necessary packages can be installed automatically by this wizard, or
you can install them manually and restart the wizard.

Automatically install the necessary packages [Yes/no]? Yes
13. Set the externally reachable address for ThinLinc. In this case, use the server’s IP.
External connections
====================

ThinLinc may not be externally accessible

Externally reachable address to use

 * IP address
 * Hostname (vultr.guest)
 * Manually specified

Externally reachable address to use [ip/hostname/manual]? ip
14. Enter your email address to receive administrative alerts.
Administrator contact
=====================

ThinLinc will send administrative messages, for example license
warnings, to this email address.

Administrator email []? [email protected]
15. The ThinLinc Web Administration runs on port 1010. The default username is admin. Enter your desired password.
Web Administration
==================

The default Web Administration username is "admin". Enter the desired
password for this user, or leave unchanged to skip this step.

The ThinLinc Web Administration is running on port 1010 (https) on this
server.

Web Administration password?
16. ThinLinc requires AppArmor configuration for security. Type Yes to install it.
AppArmor
========

This system is using the AppArmor access control system. A ThinLinc
configuration needs to be loaded for some applications to operate
correctly in this environment. Would you like to install the ThinLinc
AppArmor configuration?

Install AppArmor configuration [Yes/no]? Yes
17. The wizard will configure and start all services automatically.
Configuring services and timers
===============================

Configuring and starting ThinLinc services and timers... done.

All ThinLinc services and timers have been configured and started
successfully.

Press Enter to continue...
18. Press Enter to complete the installation.
ThinLinc has been setup
=======================

The ThinLinc Web Administration is available at https://localhost:1010,
and the configuration files are located in /opt/thinlinc/etc/conf.d/.
Icons for the ThinLinc Web Access, ThinLinc Web Administration and
ThinLinc setup have been added to the menu.

Visit https://www.cendio.com/thinlinc/support for information on how to
contact us.

Press Enter to continue...
19. Check that the core services are running.
sudo systemctl status vsmserver
sudo systemctl status vsmagent
sudo systemctl status tlwebaccess
sudo systemctl status tlwebadm
At this point, ThinLinc is installed and configured. Users can already connect to GNOME sessions, but GPU acceleration is not yet enabled.
Step 4 – Install and Configure VirtualGL
.ThinLinc provides the remote desktop environment, but by default, 3D applications won’t use the GPU. To enable GPU acceleration, you’ll integrate VirtualGL with ThinLinc. VirtualGL redirects OpenGL rendering to the GPU and streams the results to remote clients, making it ideal for CAD, 3D visualization, and machine learning tools.
1. Add the VirtualGL repository and GPG key.
wget -qO- https://packagecloud.io/dcommander/virtualgl/gpgkey | sudo gpg --dearmor -o /usr/share/keyrings/virtualgl-archive-keyring.gpg
echo "deb [signed-by=/usr/share/keyrings/virtualgl-archive-keyring.gpg] https://packagecloud.io/dcommander/virtualgl/any any main" | sudo tee /etc/apt/sources.list.d/virtualgl.list
2. Update the package index.
sudo apt update
3. Install the VirtualGL package.
sudo apt install virtualgl mesa-utils
4. Check the installed version.
vglrun --version
Output.
VirtualGL v3.1.3 (Build 20250409)
5. Configure VirtualGL.
sudo /opt/VirtualGL/bin/vglserver_config
Choose the following options when prompted:
1) Configure server for use with VirtualGL (GLX + EGL back ends)
2) Unconfigure server for use with VirtualGL (GLX + EGL back ends)
3) Configure server for use with VirtualGL (EGL back end only)
4) Unconfigure server for use with VirtualGL (EGL back end only)
X) Exit

Choose: 1

WARNING: Configuring this server for use with VirtualGL will disable the
ability to log in locally with a Wayland session.

Continue?
[Y/n]Y

Restrict 3D X server access to vglusers group (recommended)?
[Y/n]Y

Restrict framebuffer device access to vglusers group (recommended)?
[Y/n]Y

Disable XTEST extension (recommended)?
[Y/n]Y
Done. You must restart the display manager for the changes to take effect.

1) Configure server for use with VirtualGL (GLX + EGL back ends)
2) Unconfigure server for use with VirtualGL (GLX + EGL back ends)
3) Configure server for use with VirtualGL (EGL back end only)
4) Unconfigure server for use with VirtualGL (EGL back end only)
X) Exit

Choose:X
6. Stop the display manager and NVIDIA service.
sudo systemctl stop gdm
sudo systemctl stop nvidia-persistenced
7. nvidia_uvm (Unified Memory) and nvidia_drm/modeset (Direct Rendering Manager) can hold onto GPU resources. VirtualGL needs clean access to the GPU for 3D acceleration over ThinLinc. So, first, you will need to unload the following modules.
sudo modprobe -r nvidia_uvm nvidia_drm nvidia_modeset nvidia
8. Start both the display manager and the NVIDIA service.
sudo systemctl start gdm nvidia-persistenced
9. Since cloud GPUs like Tesla or A40 don’t have display outputs, you need to configure a virtual display. Get the Bus ID of your GPU.
sudo nvidia-xconfig --query-gpu-info
Output.
Number of GPUs: 1

GPU #0:
  Name      : NVIDIA A40-8Q
  UUID      : GPU-5485b57b-8ec4-11f0-b9a9-33e0990b9a26
  PCI BusID : PCI:6:0:0

  Number of Display Devices: 0
10. Create an Xorg configuration for headless mode using the above Bus ID.
sudo nvidia-xconfig -a --allow-empty-initial-configuration --use-display-device=None \
--virtual=1920x1200 --busid PCI:6:0:0
11. Create the group and add your ThinLinc user (thinadm) to it.
sudo groupadd vglusers
sudo usermod -aG vglusers thinadm
12. Reboot the server to apply changes.
sudo reboot
At this point, VirtualGL is configured, and your ThinLinc sessions can run GPU-accelerated applications.
Step 5 – Configure Firewall for ThinLinc Access
ThinLinc requires several ports to be open so that remote users can connect to the server and access the web administration panel. On Ubuntu 24.04, the easiest way to manage firewall rules is with UFW (Uncomplicated Firewall).
1. By default, the ThinLinc server uses the following ports:
22 – SSH connection
300 – Web Access
9000 – ThinLinc Client Access
1010 – ThinLinc control panel access
For ThinLinc remote desktop access, you need to open these ports on your cloud server.
2. Allow all required ports.
sudo ufw allow 22
sudo ufw allow 300
sudo ufw allow 9000
sudo ufw allow 1010
3. If your firewall is disabled, enable it with the command below.
sudo ufw enable
4. List all active firewall rules.
sudo ufw status numbered
Step 6 – Access ThinLinc via Web Browser and Test GPU Acceleration
Now that ThinLinc and VirtualGL are configured, it’s time to log in remotely and confirm that your VDI solution is working with GPU acceleration.
1. Open your web browser on your local system and access the Ubuntu remote desktop using the URL https://your-server-ip:300. You will be redirected to the Ubuntu desktop login screen.

2. Enter the following details in the login screen.
Username – thinadm (or another user you created).
Password – the user’s password.
Click Login to start a GNOME desktop session inside your browser.
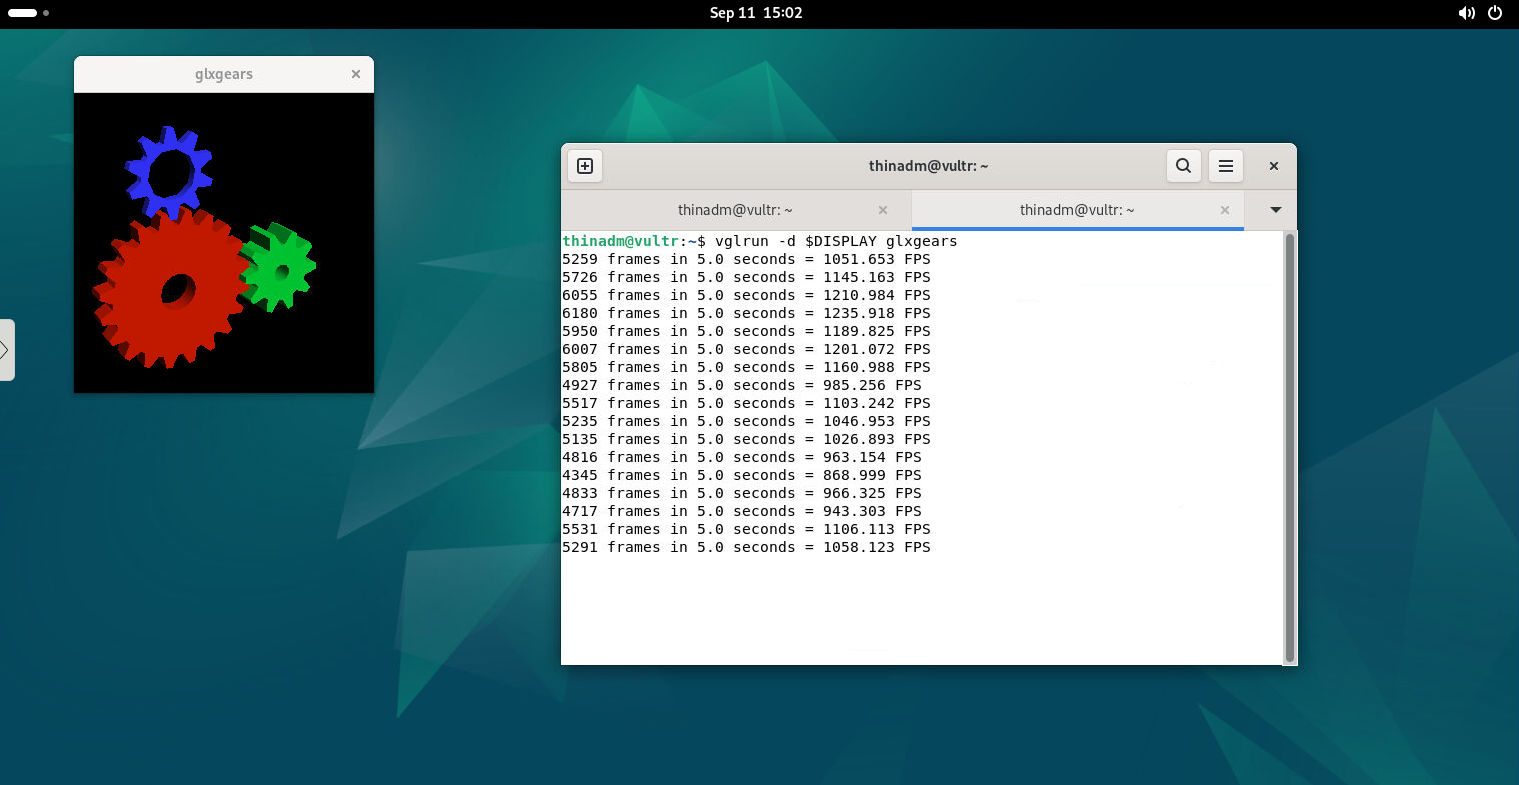
3. Once logged in, open a GNOME terminal from the ThinLinc desktop. This allows you to test applications inside the remote session.
Run a 3D test with VirtualGL to check if GPU acceleration works
vglrun -d $DISPLAY glxgears
A small window opens with three spinning gears. The terminal shows FPS (frames per second) output, proving that rendering is happening via your GPU.
You can also verify that the GPU is in use by running:
nvidia-smi
Step 7 – Access Ubuntu Desktop via ThinLinc GUI Client
While ThinLinc can be accessed through a web browser, using the ThinLinc GUI Client provides better performance, additional features (like sound redirection, media redirection), and a smoother experience over slow connections. The client is available for Linux, Windows, and macOS.
1. First, download the ThinLinc client .deb package on your local desktop machine
wget https://www.cendio.com/downloads/clients/thinlinc-client_4.19.0-4005_amd64.deb
2. Next, install the downloaded package using the apt command.
sudo apt install ./thinlinc-client_4.19.0-4005_amd64.deb
This will install the ThinLinc client on your Ubuntu machine.
3. After installation, launch the client from the Applications menu (Ubuntu Dash)
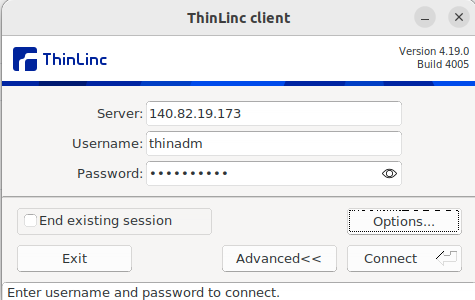
You’ll see a connection window prompting. Enter the following details.
Server – your ThinLinc server IP or hostname (e.g., your-server-ip).
Username – thinadm (or another created user).
Password – user’s login password.
Then, click Connect.
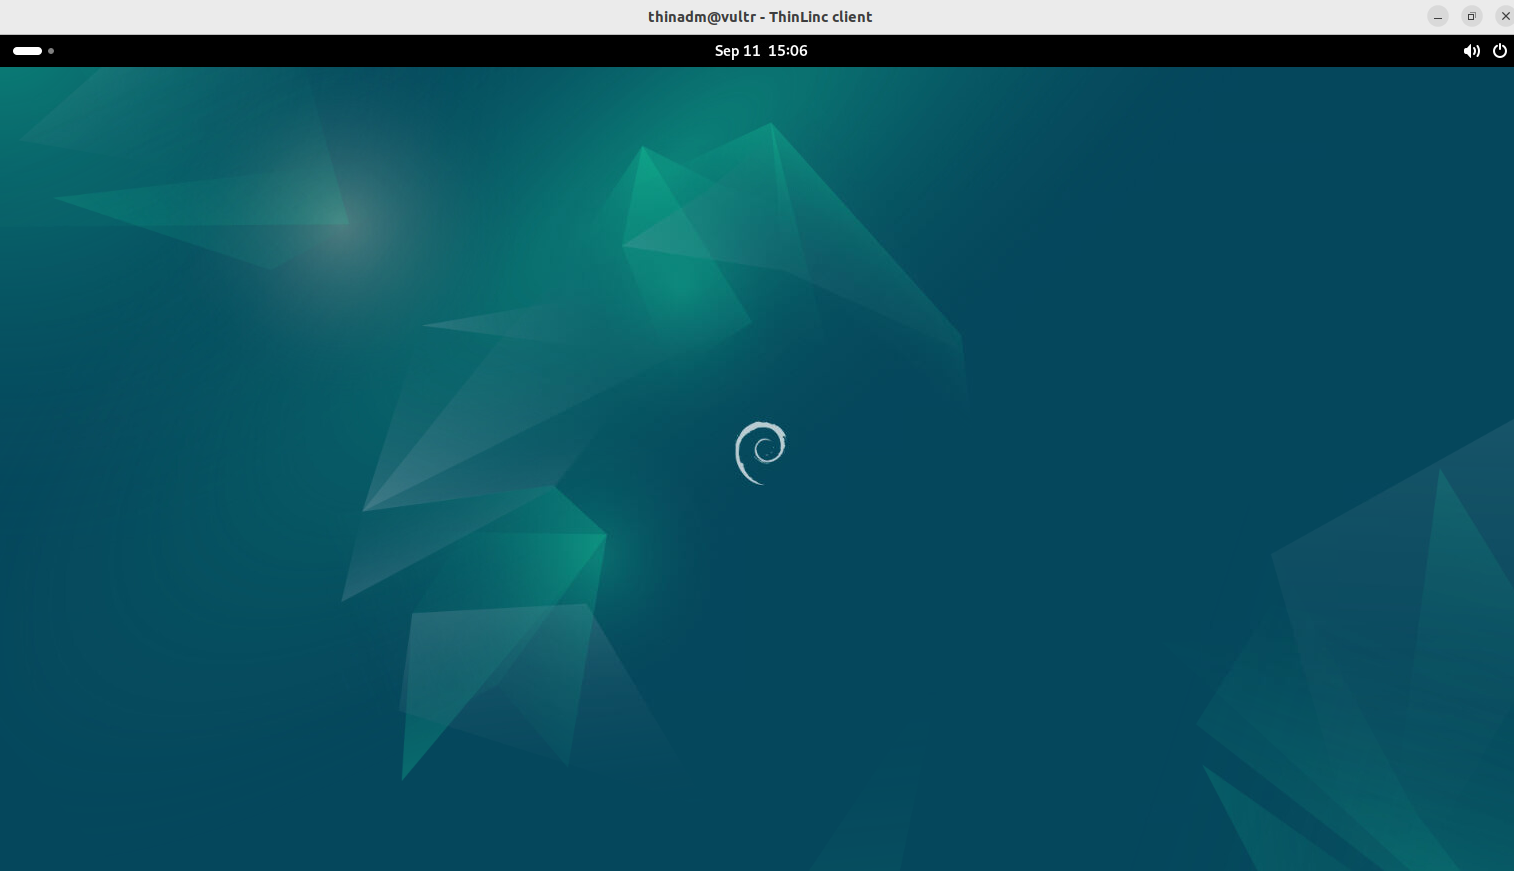
3. After successful login, the client opens a full GNOME desktop session.
Unlike the web version, the GUI client supports:
- Sound redirection – play audio on the remote server and hear it locally.
- Optimized performance – better video streaming over low-bandwidth connections.
- Clipboard support – copy/paste between local and remote desktop.
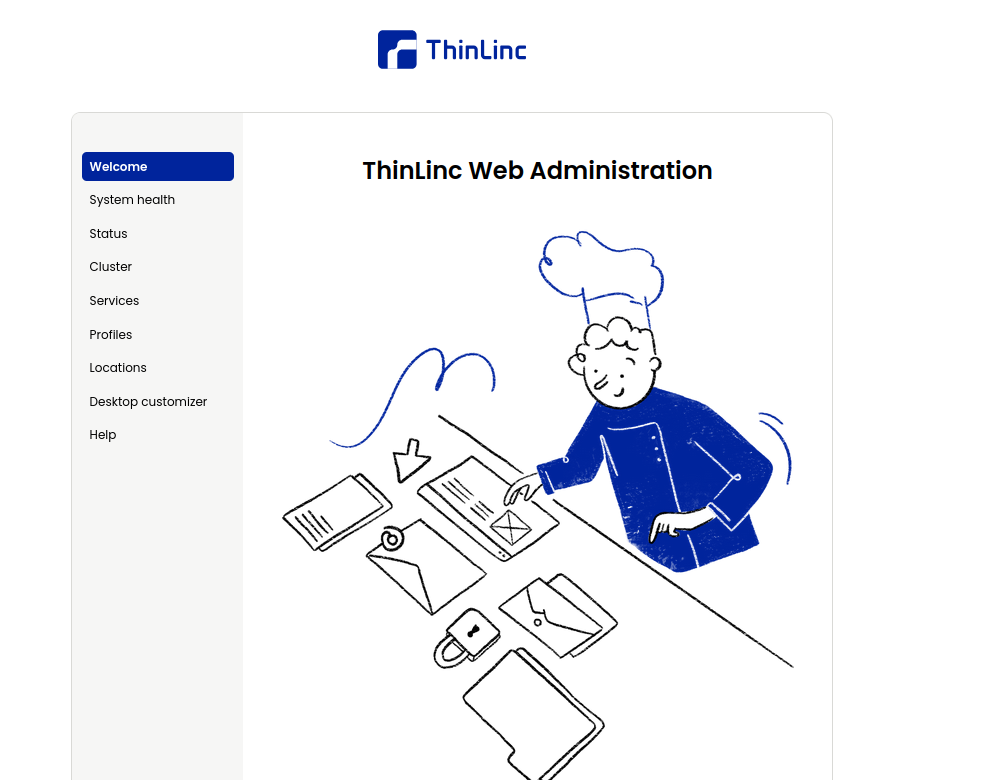
Step 8 – Access ThinLinc Control Panel
ThinLinc comes with a web-based administration panel that allows you to monitor and configure your VDI server. This is where administrators can manage users, sessions, profiles, and licenses.
1. On your local system, open a browser and go to:
https://your-server-ip:1010
You’ll be redirected to the ThinLinc Web Administration login screen.
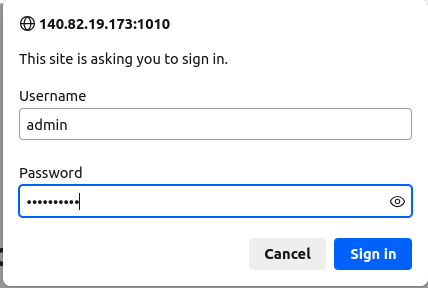
2. Enter the credentials you set during the setup wizard:
Username – admin
Password – (the one you defined during ThinLinc installation)
Click Sign in. Once logged in, you’ll see the ThinLinc Control Panel.
Conclusion
In this tutorial, you deployed a Linux Virtual Desktop Infrastructure (VDI) on an Ubuntu 24.04 GPU server using Cendio ThinLinc with VirtualGL support. This setup enables multiple users to connect to a secure remote GNOME desktop with full GPU acceleration.
You now have a complete GPU-accelerated Linux VDI environment powered by ThinLinc. Remote users can connect securely and leverage full graphics acceleration from anywhere in the world.
* This post is for informational purposes only and does not constitute professional, legal, financial, or technical advice. Each situation is unique and may require guidance from a qualified professional.
Readers should conduct their own due diligence before making any decisions.