Table of Contents
- Prerequisites
- Step 1: Install and Configure K3s
- Step 2: Install NVIDIA Container Toolkit
- Step 3: Configure Persistent Storage for MLFlow
- Step 4: Deploy MLFlow Using Helm
- Step 5: Expose MLFlow Service
- Step 6: Run the MLFlow Experiment
- Step 7: Copy Kubeconfig to the Local Machine
- Step 8: Access MLFlow UI
- Conclusion
MLFlow is a powerful, open-source platform designed to manage the entire lifecycle of machine learning (ML) development. It provides tools for tracking experiments, packaging code, and deploying models. By deploying MLFlow on a Kubernetes cluster, you can leverage scalability, reliability, and GPU support for ML workloads.
This guide provides a detailed, step-by-step walkthrough for setting up MLFlow on a Kubernetes cluster.
Prerequisites
Before starting, ensure you have the following:
- An Ubuntu 22.04 Cloud GPU Server.
- CUDA Toolkit, cuDNN and Helm Installed.
- A root or sudo privileges.
Step 1: Install and Configure K3s
K3s is a lightweight Kubernetes distribution that is ideal for quick setups. Install it using the following command:
curl -sfL https://get.k3s.io | sh -After installation, copy the K3s configuration file to your kubeconfig directory for kubectl to interact with the cluster:
cp /etc/rancher/k3s/k3s.yaml ~/.kube/configConfirm the Kubernetes cluster is up and running by checking the node status:
kubectl get nodesExpected output:
NAME     STATUS   ROLES                  AGE   VERSION
ubuntu   Ready    control-plane,master   9s    v1.31.3+k3s1
Step 2: Install NVIDIA Container Toolkit
To enable GPU support in your Kubernetes cluster, install the NVIDIA container toolkit:
1. Add the NVIDIA repository and import its GPG key:
curl -fsSL https://nvidia.github.io/libnvidia-container/gpgkey | gpg --dearmor -o /usr/share/keyrings/nvidia-container-toolkit-keyring.gpg && curl -s -L https://nvidia.github.io/libnvidia-container/stable/deb/nvidia-container-toolkit.list | sed 's#deb https://#deb [signed-by=/usr/share/keyrings/nvidia-container-toolkit-keyring.gpg] https://#g' | tee /etc/apt/sources.list.d/nvidia-container-toolkit.list2. Update and install the toolkit:
apt-get update
apt-get install -y nvidia-container-toolkit
3. Verify the installation:
nvidia-container-cli --versionOutput.
cli-version: 1.17.3
lib-version: 1.17.3
build date: 2024-12-04T09:47+00:00
4. Deploy the NVIDIA plugin to manage GPUs in your Kubernetes cluster:
kubectl apply -f https://raw.githubusercontent.com/NVIDIA/k8s-device-plugin/v0.13.0/nvidia-device-plugin.ymlStep 3: Configure Persistent Storage for MLFlow
MLFlow requires persistent storage to save experiment data and models. Create and configure a Persistent Volume (PV) and Persistent Volume Claim (PVC):
1. Create a YAML file for the PV and PVC configuration:
nano mlflow-pv-pvc.yamlAdd the following content:
apiVersion: v1
kind: PersistentVolume
metadata:
  name: mlflow-pv
  labels:
    type: local
spec:
  storageClassName: manual
  capacity:
    storage: 10Gi
  accessModes:
    - ReadWriteOnce
  hostPath:
    path: "/mnt/data"
---
apiVersion: v1
kind: PersistentVolumeClaim
metadata:
  name: mlflow-pvc
spec:
  storageClassName: manual
  accessModes:
    - ReadWriteOnce
  resources:
    requests:
      storage: 10Gi
2. Apply the configuration:
kubectl apply -f mlflow-pv-pvc.yaml3. Verify the PV and PVC:
kubectl get pvOutput.
NAME        CAPACITY   ACCESS MODES   RECLAIM POLICY   STATUS      CLAIM   STORAGECLASS   VOLUMEATTRIBUTESCLASS   REASON   AGE
mlflow-pv   10Gi       RWO            Retain           Available           manual                                   6s
kubectl get pvcOutput.
NAME         STATUS   VOLUME      CAPACITY   ACCESS MODES   STORAGECLASS   VOLUMEATTRIBUTESCLASS   AGE
mlflow-pvc   Bound    mlflow-pv   10Gi       RWO            manual                          15
Step 4: Deploy MLFlow Using Helm
1. Add the Helm chart repository for MLFlow:
helm repo add community-charts https://community-charts.github.io/helm-charts2. Update the Helm repository.
helm repo update3. Install MLFlow using Helm:
helm install atlantic community-charts/mlflowOutput.
NAME: atlantic
LAST DEPLOYED: Wed Dec 18 09:43:10 2024
NAMESPACE: default
STATUS: deployed
REVISION: 1
TEST SUITE: None
NOTES:
  Get the application URL by running these commands:
  export POD_NAME=$(kubectl get pods --namespace default -l "app.kubernetes.io/name=mlflow,app.kubernetes.io/instance=atlantic" -o jsonpath="{.items[0].metadata.name}")
  export CONTAINER_PORT=$(kubectl get pod --namespace default $POD_NAME -o jsonpath="{.spec.containers[0].ports[0].containerPort}")
  echo "Visit http://127.0.0.1:8080 to use your application"
  kubectl --namespace default port-forward $POD_NAME 8080:$CONTAINER_PORT
4. Verify that MLFlow has been successfully deployed:
kubectl get deploymentsOutput.
NAME              READY   UP-TO-DATE   AVAILABLE   AGE
atlantic-mlflow   1/1     1            1           70s
Step 5: Expose MLFlow Service
1. To make MLFlow accessible, create a service:
nano mlflow-service.yamlAdd the following configuration:
apiVersion: v1
kind: Service
metadata:
  name: mlflow-service
spec:
  selector:
    app: mlflow
  ports:
    - protocol: TCP
      port: 80
      targetPort: 5000
      nodePort: 30001  # Optional, or let Kubernetes assign a random NodePort
  type: NodePort
2. Deploy the service.
kubectl apply -f mlflow-service.yaml3. Check the services running in your cluster.
kubectl get servicesOutput.
NAME              TYPE        CLUSTER-IP      EXTERNAL-IP   PORT(S)        AGE
atlantic-mlflow   ClusterIP   10.43.183.234           5000/TCP       28m
kubernetes        ClusterIP   10.43.0.1               443/TCP        35m
mlflow-service    NodePort    10.43.158.142           80:30001/TCP   10m
Note: Note down the IP 10.43.158.142 shown in the CLUSTER-IP column.
Step 6: Run the MLFlow Experiment
1. Create a directory for your models.
mkdir Models
cd Models
2. Install the required Python packages.
pip install mlflow scikit-learn shap matplotlib3. Set environment variables.
export MLFLOW_EXPERIMENT_NAME='my-sample-experiment'
export MLFLOW_TRACKING_URI='http://10.43.158.142'
Note: Replaced 10.43.158.142 with your CLUSTER-IP shown in the previous step.
4. Create a Python script (main.py) and add your ML experiment code.
nano main.pyAdd the following code:
# Import Libraries

import os

import numpy as np
import shap
from sklearn.datasets import load_diabetes
from sklearn.linear_model import LinearRegression

import mlflow
from mlflow.artifacts import download_artifacts
from mlflow.tracking import MlflowClient

# Prepare the Training Data

X, y = load_diabetes(return_X_y=True, as_frame=True)
X = X.iloc[:50, :4]
y = y.iloc[:50]

# Train a model

model = LinearRegression()
model.fit(X, y)

# Log an explanation

with mlflow.start_run() as run:
    mlflow.shap.log_explanation(model.predict, X)

# List Artifacts

client = MlflowClient()
artifact_path = "model_explanations_shap"
artifacts = [x.path for x in client.list_artifacts(run.info.run_id, artifact_path)]
print("# artifacts:")
print(artifacts)

# Load the logged explanation

dst_path = download_artifacts(run_id=run.info.run_id, artifact_path=artifact_path)
base_values = np.load(os.path.join(dst_path, "base_values.npy"))
shap_values = np.load(os.path.join(dst_path, "shap_values.npy"))

# Show a Force Plot

shap.force_plot(float(base_values), shap_values[0, :], X.iloc[0, :], matplotlib=True)
5. Run the script.
python3 main.pyOutput.
100%|██████████████████████████████████████████████████████████████████████████████████████████████████████████████████████████████████| 50/50 [00:00<00:00, 249.00it/s]
🏃 View run persistent-frog-660 at: http://10.43.158.142/#/experiments/1/runs/e19dbaac59fe452bab13217fcc9aac49
🧪 View experiment at: http://10.43.158.142/#/experiments/1
# artifacts:
['model_explanations_shap/base_values.npy', 'model_explanations_shap/shap_values.npy', 'model_explanations_shap/summary_bar_plot.png']
Step 7: Copy Kubeconfig to the Local Machine
To manage your Kubernetes cluster remotely, copy the kubeconfig file from the server to your local machine.
1. Create a .kube directory in your local machine.
mkdir .kube2. Copy the kubeconfig file from your server.
scp root@server-ip:/root/.kube/config .kube/3. Edit the kubeconfig file.
nano .kube/configFind the following line:
server: https://127.0.0.1:6443
And replace it with the following:
server: https://your-server-ip:6443
4. Verify connectivity.
kubectl get servicesOutput.
NAME              TYPE        CLUSTER-IP      EXTERNAL-IP   PORT(S)        AGE
atlantic-mlflow   ClusterIP   10.43.183.234           5000/TCP       28m
kubernetes        ClusterIP   10.43.0.1               443/TCP        35m
mlflow-service    NodePort    10.43.158.142           80:30001/TCP   10m
Step 8: Access MLFlow UI
To access the MLFlow UI from your local machine, you will need to forward the MLFlow service on that machine.
kubectl port-forward svc/mlflow-service 8880:80Output.
Forwarding from 127.0.0.1:8880 -> 5000
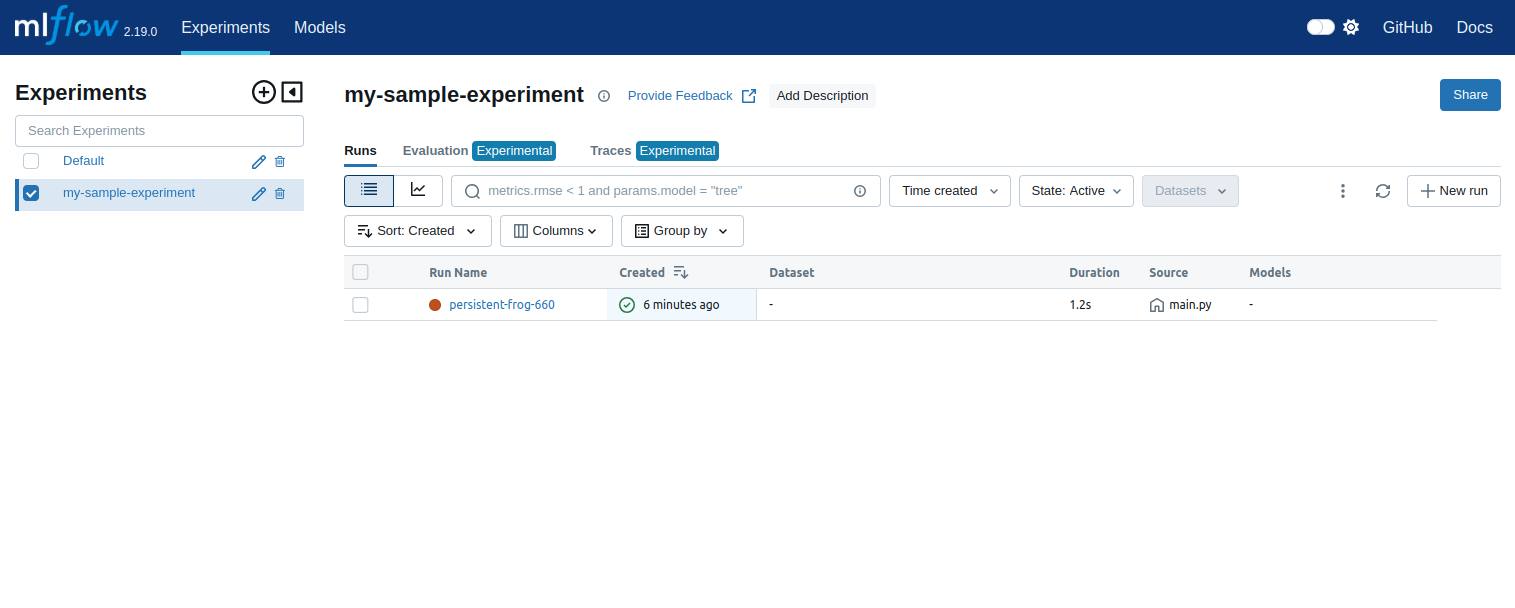
Forwarding from [::1]:8880 -> 5000Now, open your web browser and access the MLFlow UI at http://127.0.0.1:8880/#/experiments/1
Conclusion
You’ve successfully deployed MLFlow on a Kubernetes cluster, configured it for GPU support, and run a sample experiment. This setup can be extended to manage and track ML experiments for production-scale applications. Try it today on GPU hosting from Altantic.Net!
* This post is for informational purposes only and does not constitute professional, legal, financial, or technical advice. Each situation is unique and may require guidance from a qualified professional.
Readers should conduct their own due diligence before making any decisions.