
Akaunting is an open-source accounting software for small and medium-sized businesses (SMBs) and freelancers. It provides a comprehensive suite of features to manage finances, including invoicing, expense tracking, banking, and reporting. It helps organizations manage their finances effectively, streamline processes, and make informed business decisions.
In this tutorial, we will show you how to install Akaunting on Ubuntu 22.04.
Step 1 – Install LAMP Server
Akaunting requires a web server with PHP and a database. You can install the LAMP (Linux, Apache, MySQL/MariaDB, PHP) stack using the following commands:
apt install apache2 mariadb-server php libapache2-mod-php php-imagick php-common php-mysql php-gd php-bcmath php-curl php-zip php-xml php-mbstring php-bz2 php-intl unzip -y
Once the LAMP server is installed, start and enable both Apache and MariaDB services:
systemctl start apache2 mariadb
systemctl enable apache2 mariadb
Step 2 – Create a Database
Log in to the MySQL/MariaDB shell as the root user:
mysql -u root -p
Then, create a database and user for Akaunting:
create database akaunting;
create user 'akaunting'@'localhost' identified by 'yourpassword';
Next, grant all the privileges to the Akaunting database.
grant all privileges on akaunting.* to 'akaunting'@'localhost';
Finally, flush the privileges and exit from the MariaDB shell.
flush privileges;
exit;
Step 3 – Download Akaunting
Navigate to the Akaunting website and download the latest version of Akaunting.
wget -O Akaunting.zip https://akaunting.com/download.php?version=latest
Once the download is complete, extract the Akaunting files to the web server’s document root directory.
unzip Akaunting.zip -d /var/www/akaunting/
Set the correct permissions for the Akaunting files and directories:
chown www-data:www-data /var/www/akaunting/ -R
chmod -R 755 /var/www/akaunting
Step 4 – Configure Apache
Create a new virtual host configuration file for Akaunting:
nano /etc/apache2/sites-available/akaunting.conf
Add the following lines:
<VirtualHost *:80>
    ServerName akaunting.example.com
    DocumentRoot /var/www/akaunting/

    <Directory /var/www/akaunting/>
       DirectoryIndex index.php
       Options +FollowSymLinks
       AllowOverride All
       Require all granted
    </Directory>

    ErrorLog ${APACHE_LOG_DIR}/akaunting.error.log
    CustomLog ${APACHE_LOG_DIR}/akaunting.access.log combined

</VirtualHost>
Enable the Akaunting site and rewrite module.
a2ensite akaunting.conf
a2enmod rewrite
Finally, restart the Apache service:
systemctl restart apache2
Step 5 – Perform Akaunting Web-based Installation
Open your web browser and navigate to the URL http://akaunting.example.com. You will see the Akaunting language selection page:
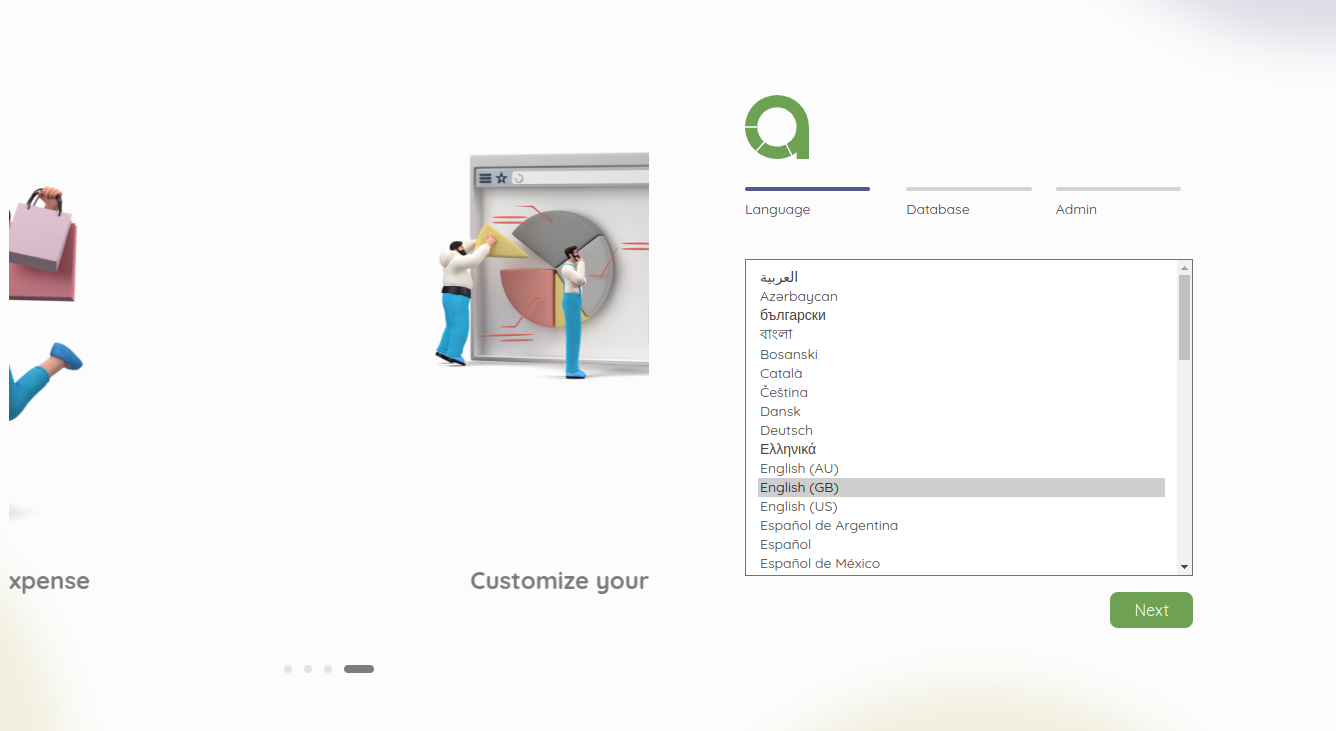
Select your language and click on Next. You will see the database configuration page:
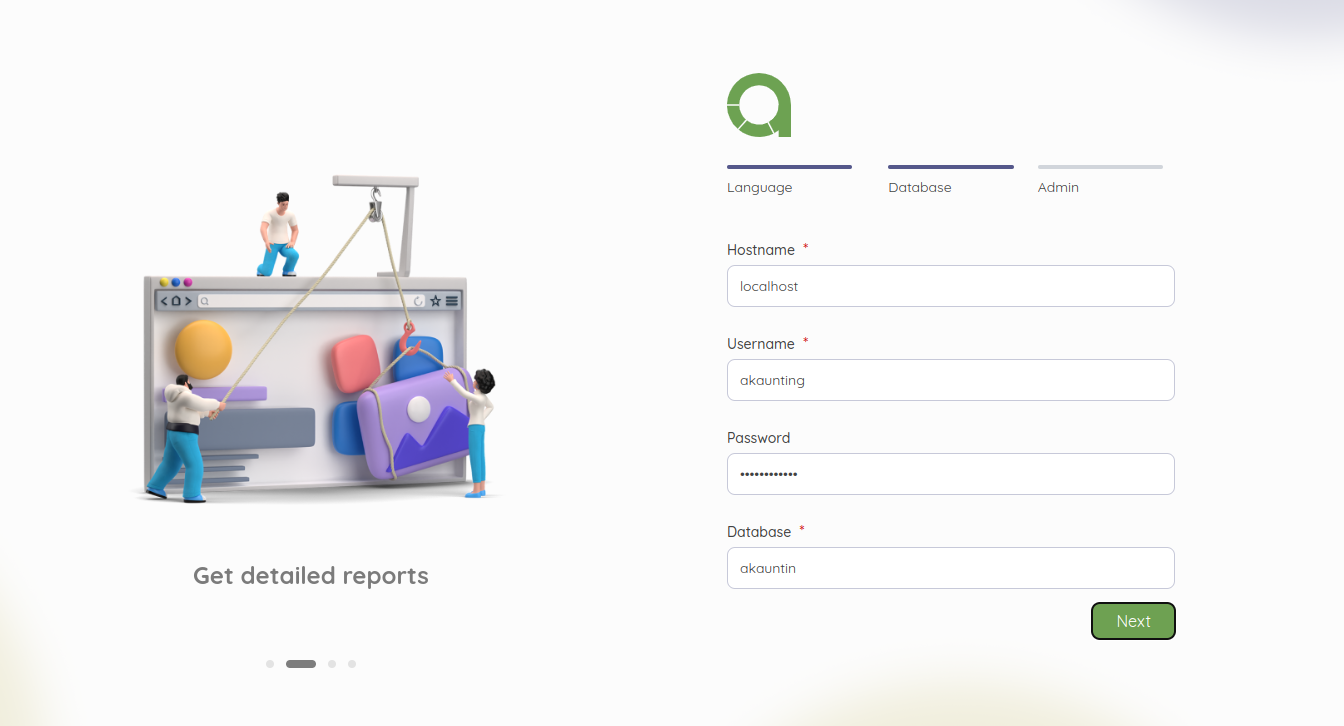
Define your database settings and click on Next. You will see the admin user creation page:
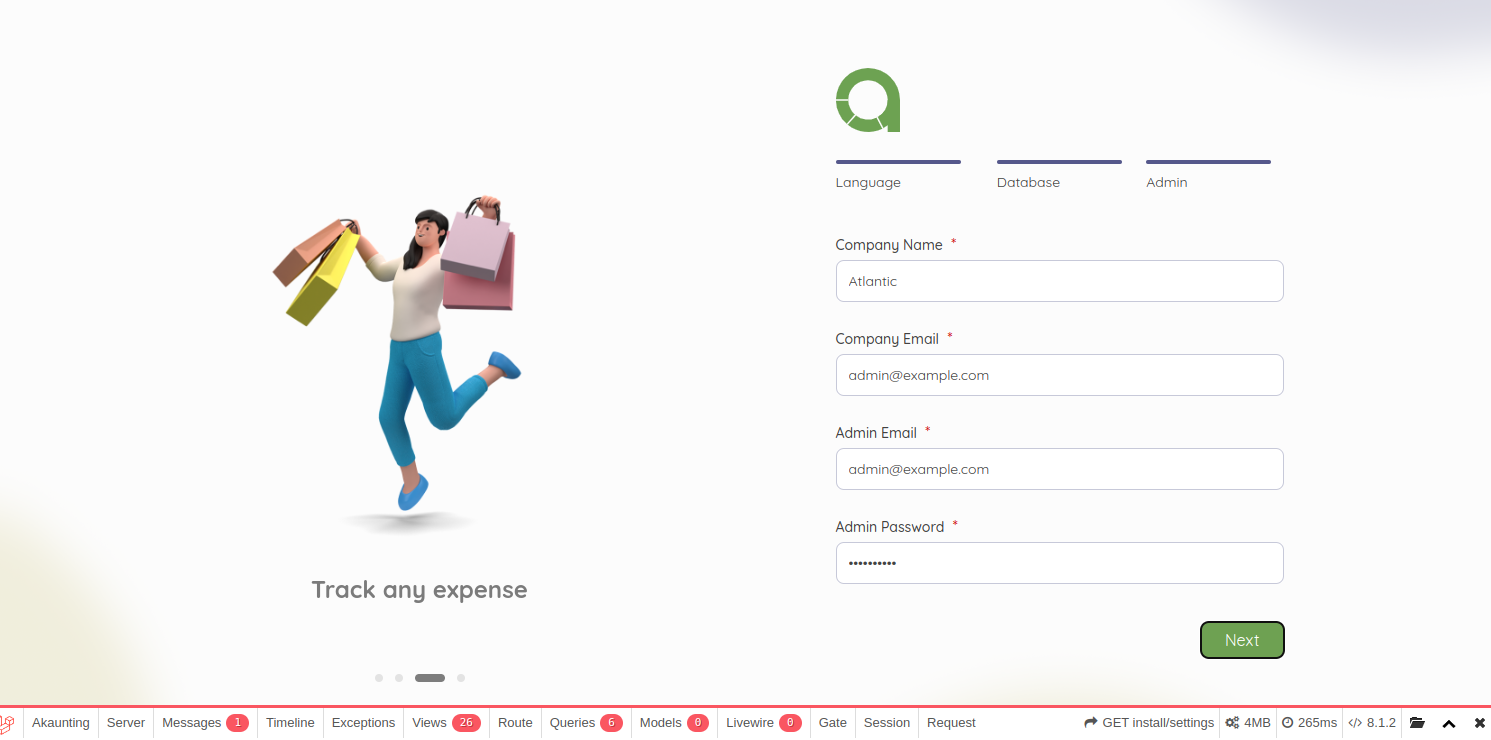
Provide your admin user, password, and email and click on Next. You will see the Akaunting login page:
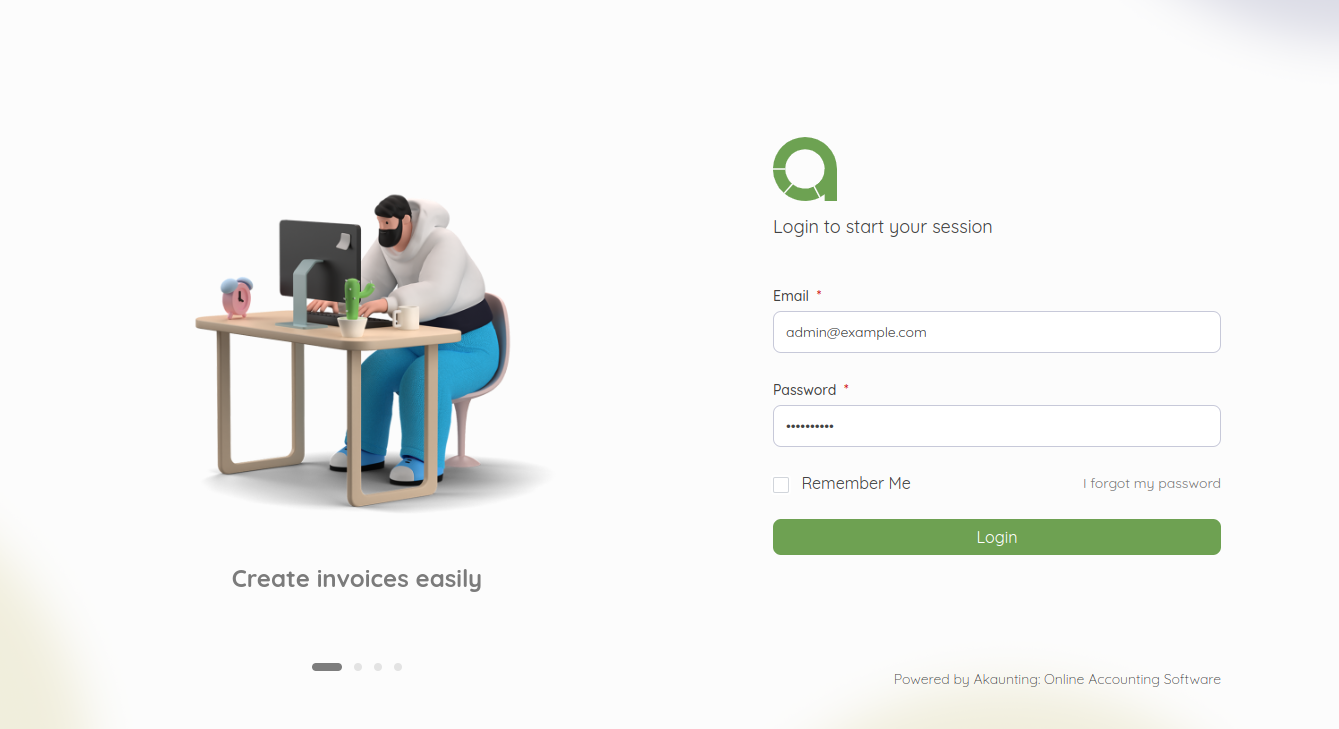
Enter your admin username and password and click on Login. You will see the following page:
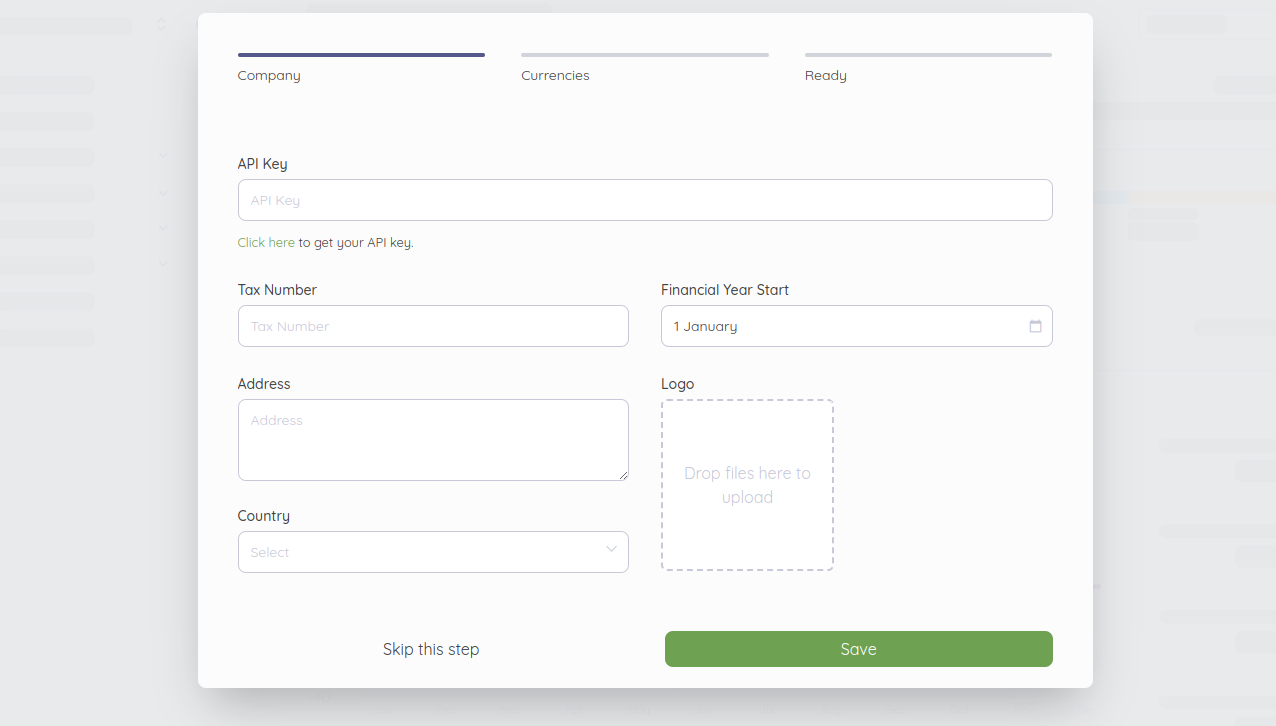
Provide all required information and click on Save. You will see the currency page:
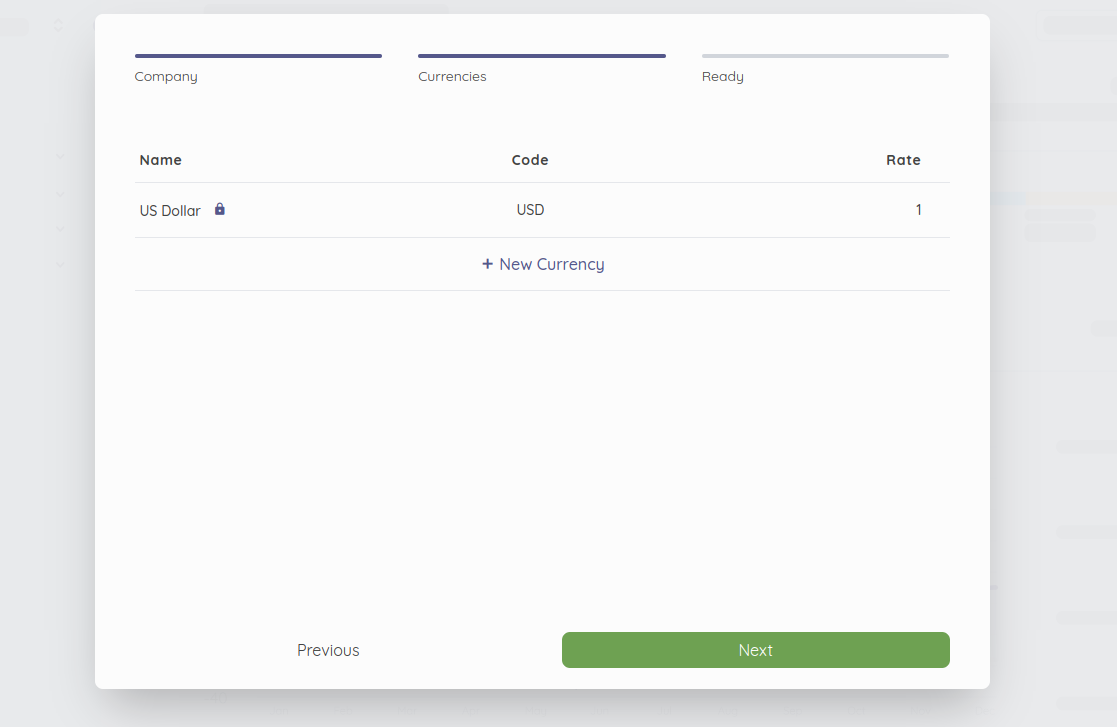
Add your new currency and click on Next. You will see the following page:
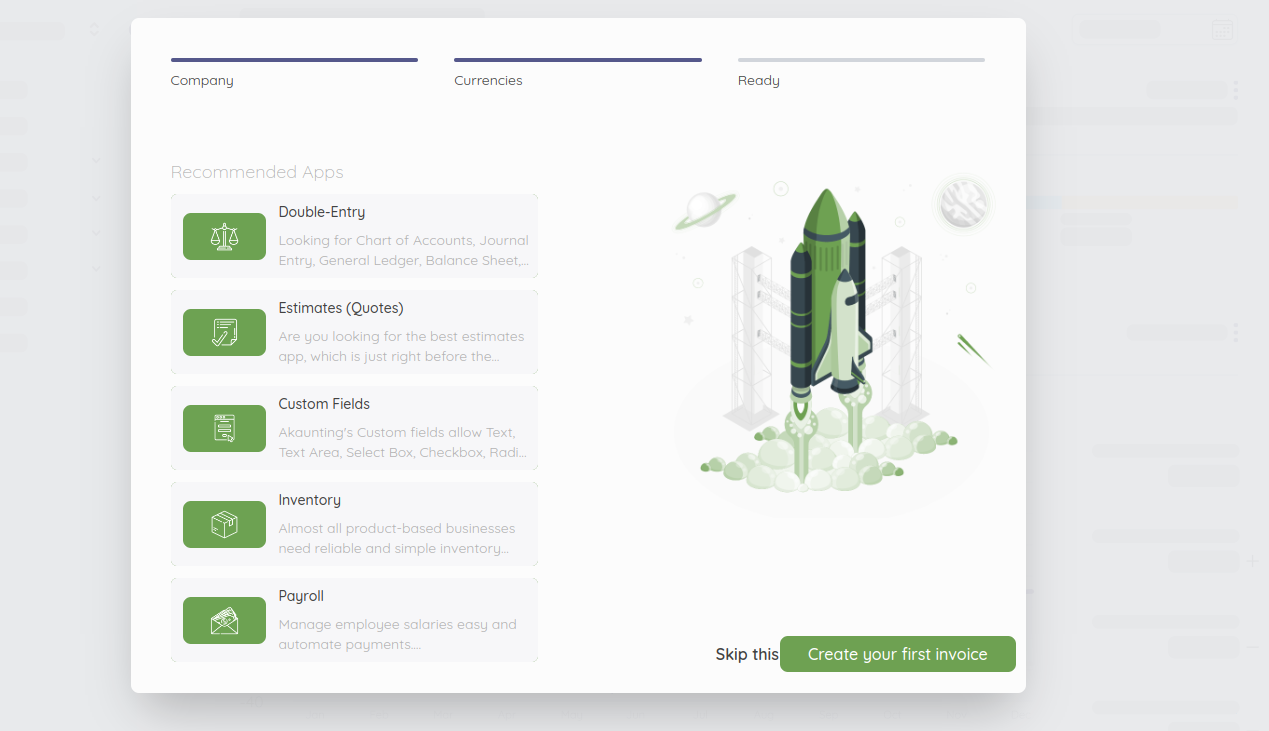
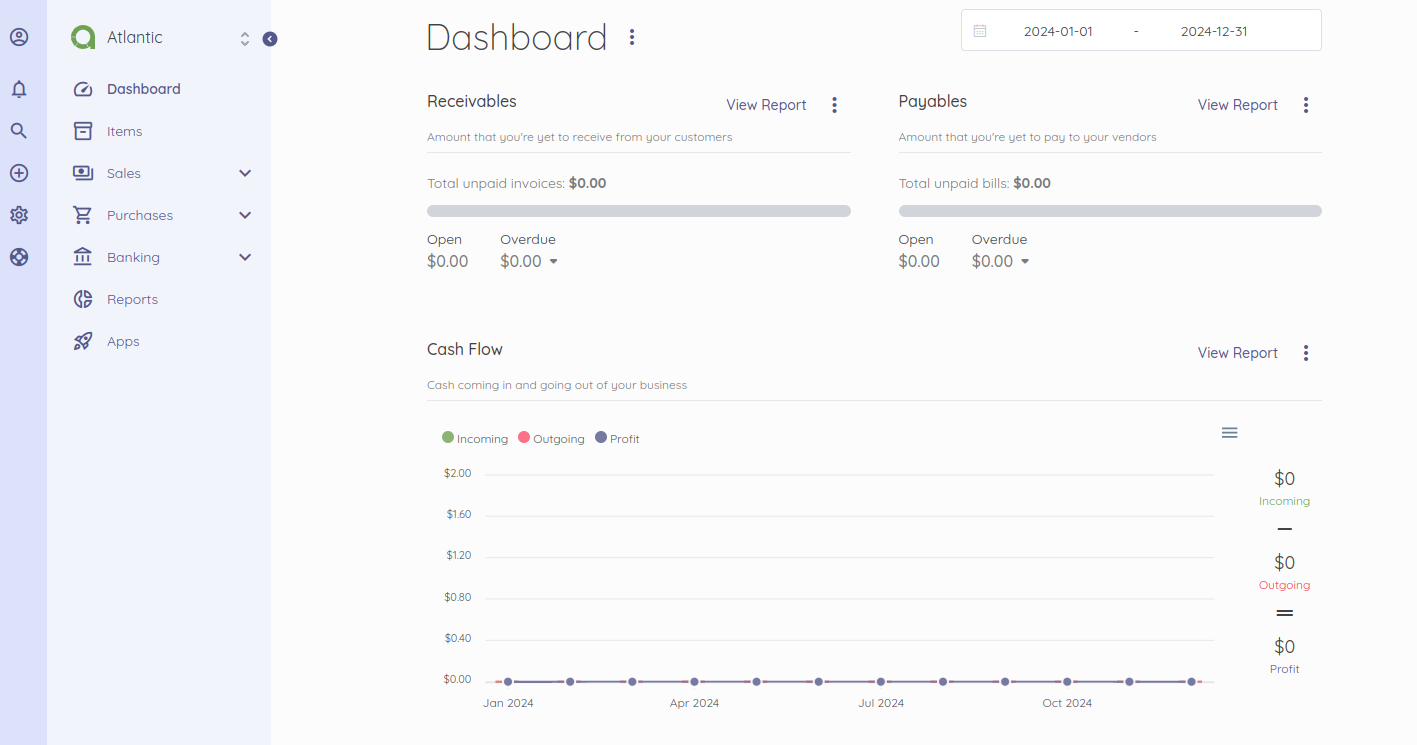
Click on Skip this. You will see the Akaunting dashboard on the following page.
Conclusion
This tutorial explained how to install Akaunting on Ubuntu 22.04 with Apache. By deploying Akaunting on Ubuntu, you gain control over your financial data while benefiting from the security, stability, and flexibility of the Ubuntu platform. Whether you’re tracking expenses, managing invoices, or generating financial reports, Akaunting provides the tools to streamline your accounting processes and make informed decisions. You can now host your own Akaunting software on a dedicated server hosting by Atlantic.Net!

Written by
Hitesh Jethva is a regular contributor to the Atlantic.Net blog. With over 15 years of experience in Linux and open-source technologies, he founded Linux Buz, a website dedicated to Linux enthusiasts.