RabbitMQ is a free and open-source message broker software solution designed for applications that need to support legacy protocols, such as STOMP and MQTT. It is written in Erlang and can be used in implementing AMQP on modern operating systems. RabbitMQ receives messages from publishers and routes them to consumers. It provides your application with a common platform to send and receive messages. Currently, RabbitMQ is used worldwide by both small startups and large organizations.
In this post, we will show you how to install the RabbitMQ server on Rocky Linux 10.
Step 1 – Install Required Repositories
Before starting, you will need to install EPLE, Erlang, and RabbitMQ repositories to your server.
First, install the EPEL repository using the commands given below:
dnf update -y

dnf install epel-release curl -y
Next, import the RabbitMQ GPG keys.
rpm --import https://github.com/rabbitmq/signing-keys/releases/download/3.0/rabbitmq-release-signing-key.asc
rpm --import https://github.com/rabbitmq/signing-keys/releases/download/3.0/cloudsmith.rabbitmq-erlang.E495BB49CC4BBE5B.key
rpm --import https://github.com/rabbitmq/signing-keys/releases/download/3.0/cloudsmith.rabbitmq-server.9F4587F226208342.key
Next, create a repo for RabbitMQ.
nano /etc/yum.repos.d/rabbitmq.repo
Add the following lines.
[rabbitmq_server]
name=RabbitMQ Repository
baseurl=https://packagecloud.io/rabbitmq/rabbitmq-server/el/9/\$basearch
enabled=1
gpgcheck=1
gpgkey=https://packagecloud.io/rabbitmq/rabbitmq-server/gpgkey

[rabbitmq_erlang]
name=RabbitMQ Erlang Repository
baseurl=https://packagecloud.io/rabbitmq/erlang/el/9/\$basearch
enabled=1
gpgcheck=1
gpgkey=https://packagecloud.io/rabbitmq/erlang/gpgkey
Also Read
How to Install Anaconda Python on Rocky Linux 8
Step 2 – Install Erlang and RabbitMQ
Now, install both Erlang and RabbitMQ.
dnf install erlang rabbitmq-server -y
Once the RabbitMQ server is installed, start and enable the RabbitMQ service with the following command:
systemctl start rabbitmq-server
systemctl enable rabbitmq-server
Now, check the status of RabbitMQ.
systemctl status rabbitmq-server
Output.
● rabbitmq-server.service - RabbitMQ broker
     Loaded: loaded (/usr/lib/systemd/system/rabbitmq-server.service; disabled; preset: disabled)
     Active: active (running) since Fri 2025-10-17 03:33:15 EDT; 6s ago
 Invocation: b6ffb30996df42d08ebbf11fdbac52cd
   Main PID: 18149 (beam.smp)
      Tasks: 28 (limit: 24809)
     Memory: 110.5M (peak: 117.5M)
        CPU: 3.479s
     CGroup: /system.slice/rabbitmq-server.service
             ├─18149 /usr/lib64/erlang/erts-14.2.5.4/bin/beam.smp -W w -MBas ageffcbf -MHas ageffcbf -MBlmbcs 512 -MHlmbcs 512 -MMmcs 30 -pc unicode -P 1048576 -t 5000000 -stbt db -zd>
             ├─18162 erl_child_setup 32768
             ├─18185 sh -s disksup
             ├─18187 /usr/lib64/erlang/lib/os_mon-2.9.1/priv/bin/memsup
             ├─18188 /usr/lib64/erlang/lib/os_mon-2.9.1/priv/bin/cpu_sup
             ├─18189 /usr/lib64/erlang/erts-14.2.5.4/bin/inet_gethost 4
             ├─18190 /usr/lib64/erlang/erts-14.2.5.4/bin/inet_gethost 4
             ├─18199 /usr/lib64/erlang/erts-14.2.5.4/bin/epmd -daemon
             └─18224 /bin/sh -s rabbit_disk_monitor
Also Read
How to Install PostgreSQL 14 in Rocky Linux 8
Step 3 – Configure RabbitMQ
By default, RabbitMQ uses a guest user to connect from localhost. It is recommended to create an admin user and set a password to secure RabbitMQ.
To create an admin user, run the following command:
rabbitmqctl add_user admin
Sample output:
Adding user "admin" ...
Password:
Next, assign administrator permissions to the admin user with the following command:
rabbitmqctl set_user_tags admin administrator
You can now verify the created user using the following command:
rabbitmqctl list_users
You will get the following output:
Listing users ...
user	tags
admin	[administrator]
guest	[administrator]
To add a new vhost, run the following command:
rabbitmqctl add_vhost /new_vhost
To list all vhosts, run the following command:
rabbitmqctl list_vhosts
You will get the following output:
Listing vhosts ...
name
/
/new_vhost
Next, provide admin user permissions on vhosts using the following command:
rabbitmqctl set_permissions -p /new_vhost admin ".*" ".*" ".*"
Step 4 – Enable RabbitMQ Web UI
RabbitMQ provides a web interface to manage the RabbitMQ. However, it is disabled by default.
To enable the RabbitMQ web UI, run the following command:
rabbitmq-plugins enable rabbitmq_management
You will get the following output:
Enabling plugins on node rabbit@rockylinux:
rabbitmq_management
The following plugins have been configured:
  rabbitmq_management
  rabbitmq_management_agent
  rabbitmq_web_dispatch
Applying plugin configuration to rabbit@rockylinux...
The following plugins have been enabled:
  rabbitmq_management
  rabbitmq_management_agent
  rabbitmq_web_dispatch

started 3 plugins.
Next, restart the RabbitMQ service to apply the changes.
systemctl restart rabbitmq-server
You can check the status of RabbitMQ using the following command:
rabbitmqctl status
You will get the following output:
Status of node rabbit@rockylinux ...
Runtime

OS PID: 19057
OS: Linux
Uptime (seconds): 12
Is under maintenance?: false
RabbitMQ version: 3.9.11
Node name: rabbit@rockylinux
Erlang configuration: Erlang/OTP 24 [erts-12.2] [source] [64-bit] [smp:1:1] [ds:1:1:10] [async-threads:1] [jit]
Erlang processes: 363 used, 1048576 limit
Scheduler run queue: 1
Cluster heartbeat timeout (net_ticktime): 60

Plugins

Enabled plugin file: /etc/rabbitmq/enabled_plugins
Enabled plugins:
Step 5 – Access RabbitMQ Web UI
At this point, the RabbitMQ web UI is started and listens on port 15672. You can check it using the following command:
ss -antpl | grep 15672
You will get the following output:
LISTEN 0 128 0.0.0.0:15672 0.0.0.0:* users:(("beam.smp",pid=19057,fd=35))
Now, open your web browser and access the RabbitMQ web UI using the URL http://your-server-ip:15672. You should see the RabbitMQ login page:
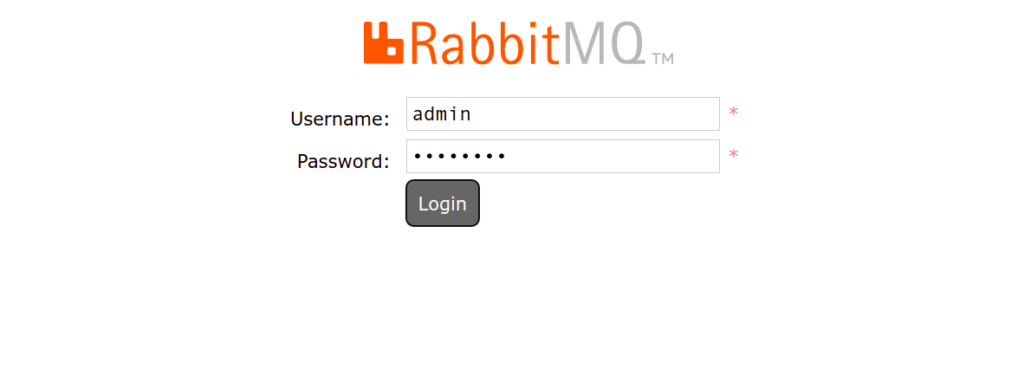
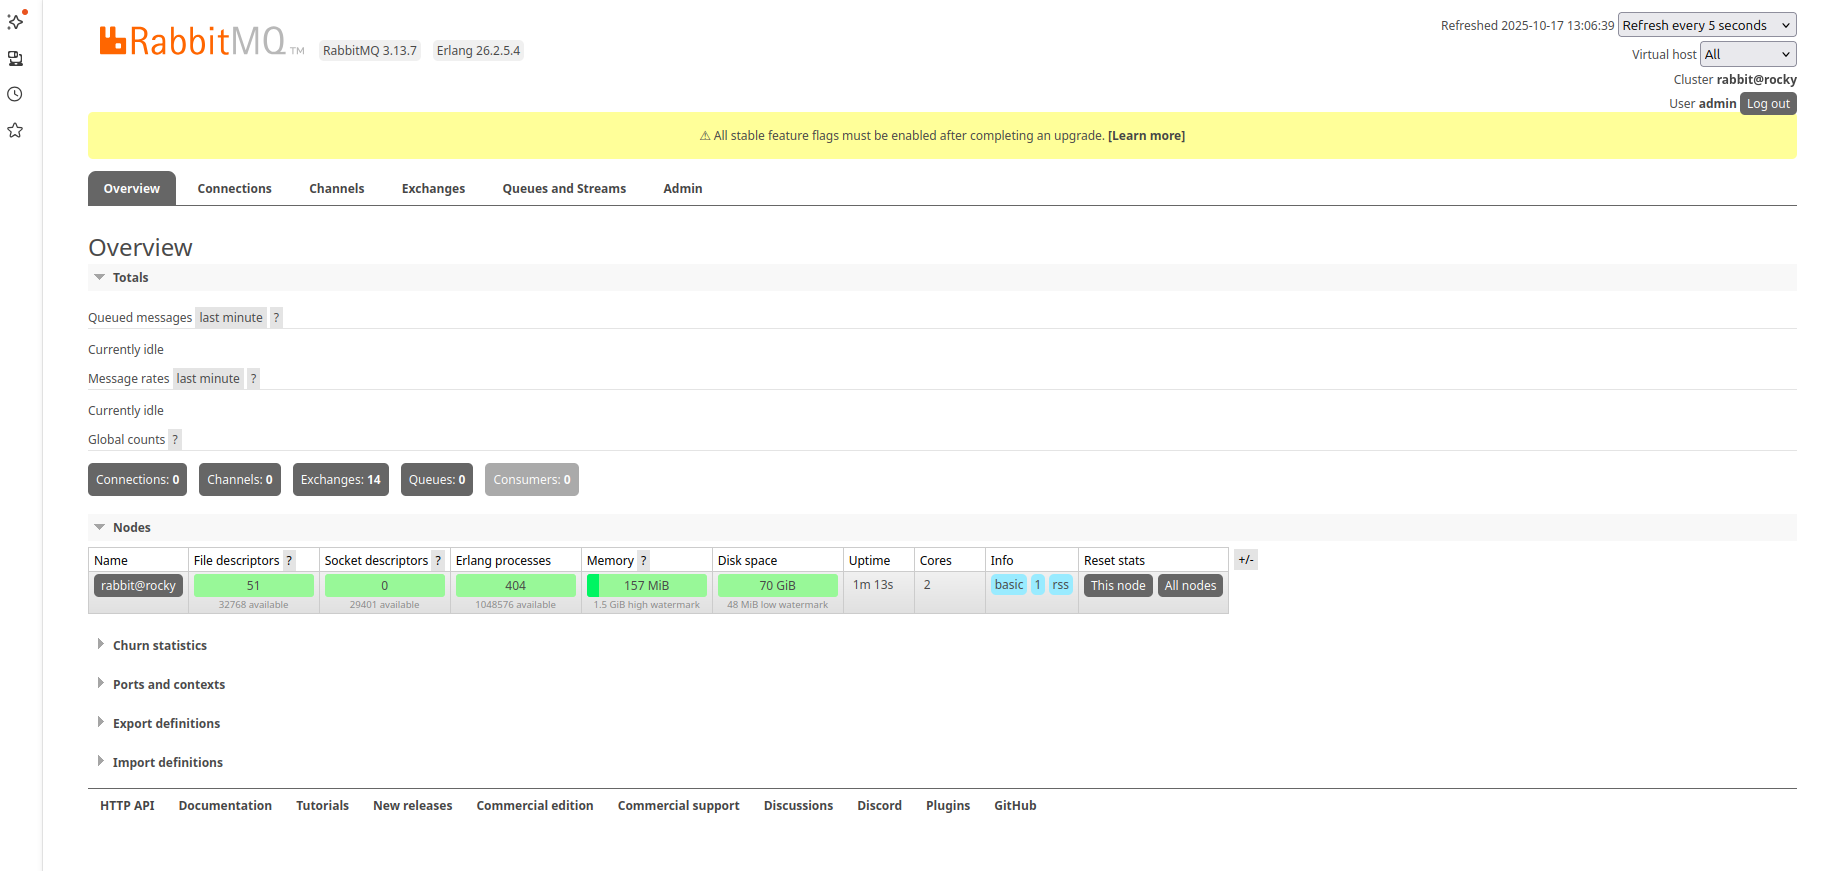
Provide your admin username, password and click on the Login button. You should see the RabbitMQ dashboard on the following page:
Conclusion
In this post, we explained how to install and configure the RabbitMQ server on Rocky Linux 10. We also explained how to enable the RabbitMQ web UI and set an admin password. Hopefully, this guide will help you to install the RabbitMQ server in the production environment. Try it on dedicated hosts from Atlantic.Net!
* This post is for informational purposes only and does not constitute professional, legal, financial, or technical advice. Each situation is unique and may require guidance from a qualified professional.
Readers should conduct their own due diligence before making any decisions.