Caching is the process of storing copies of files in a cache so that future requests for that file can be accessed more quickly. Varnish is a free, open-source, powerful HTTP engine and reverse HTTP proxy used by more than 3.4 million websites. It stores the incoming page requests in memory and serves the same page request directly from Varnish cache instead of going straight to the web server.
This will speed up the performance of your website significantly. Varnish has its own configuration language (VCL) to write policies on incoming requests such as back-end servers, ACLs, responses, and more.
In this tutorial, we will learn how to set up Varnish caching with Apache on CentOS 8. We will set up Apache to listen on port 8080 and work as a backend server, then configure Varnish to listen on default HTTP port 80.
Step 1 – Install Varnish Cache
By default, the Varnish package is available in the CentOS 8 system. You can install it by just running the following command:
dnf update -y
dnf install varnish -y
After installing Varnish, start the Varnish service and enable it to start after system reboot with the following command:
systemctl start varnish
systemctl enable varnish
Next, verify the status of Varnish with the following command:
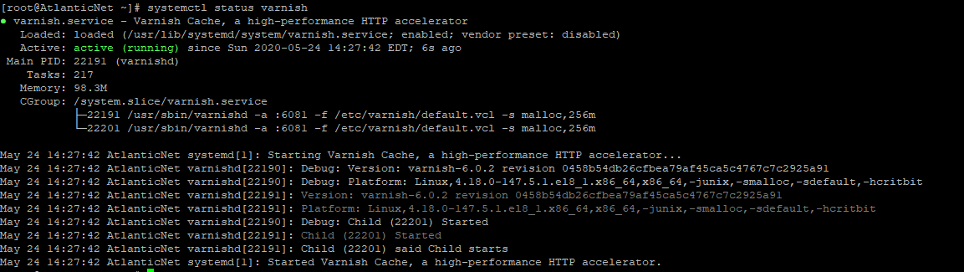
systemctl status varnish
You should get the following output:
By default, Varnish listens on port 6081. You can verify it using the following command:
netstat -ltnp | grep 6081
You should get the following output:
tcp        0      0 0.0.0.0:6081            0.0.0.0:*               LISTEN      1508/varnishd
tcp6       0      0 :::6081                 :::*                    LISTEN      1508/varnishd
Step 2 – Install and Configure Apache
Next, you will need to install the Apache webserver and configure it to work with the Varnish cache.
First, install the Apache server with the following command:
dnf install httpd -y
After installing the Apache webserver, you will need to change the Apache web server listening port from 80 to 8080.
You can do it by editing the file /etc/httpd/conf/httpd.conf.
nano /etc/httpd/conf/httpd.conf
Find the following line:
Listen 80
And replace it with the following line:
Listen 8080
Save and close the file, then start the Apache service and enable it to start after system reboot:
systemctl start httpd
systemctl enable httpd
Next, copy the sample index.html page to the Apache default document root directory:
cp /usr/share/httpd/noindex/index.html.en-US /var/www/html/index.html
Note: If you are using Virtual hosting, then configure the relevant configuration file.
Step 3 – Configure Varnish to Work with Apache
By default, Varnish is configured to listen on port 6081, so you will need to configure it to listen on port 80. You can configure it by editing varnish.service configuration file:
nano /usr/lib/systemd/system/varnish.service
Find the following line:
ExecStart=/usr/sbin/varnishd -a :6081 -f /etc/varnish/default.vcl -s malloc,256m
And replace it with the following line:
ExecStart=/usr/sbin/varnishd -a :80 -f/etc/varnish/default.vcl -s malloc,256m
Save and close the file, then reload the systemd daemon with the following command:
systemctl daemon-reload
Next, restart Varnish service to apply the changes:
systemctl restart varnish
Step 4 – Configure Apache as a Backend Server for Varnish
Next, you will need to configure Apache as a backend server for the Varnish proxy.
You can configure it by editing the file /etc/varnish/default.vcl:
nano /etc/varnish/default.vcl
Uncomment the following lines if commented:
backend default {
.host = "127.0.0.1";
.port = "8080";
}


Save and close the file when you are finished.
Note: Change the line 127.0.0.1 with your Apache server IP address if your Apache server resides on the other host. Change the port 8080 with a port number of your Apache server.
Step 5 – Verify Varnish Cache
At this point, the Varnish cache is configured to work with the Apache webserver. It’s time to test whether caching is working or not.
You can test it using the curl command:
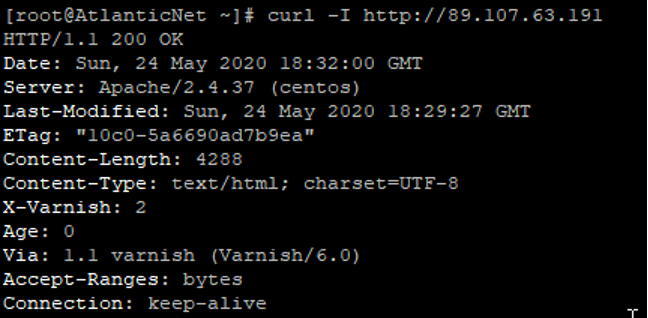
curl -I http://your-server-ip
You should get the HTTP header information in the following output:
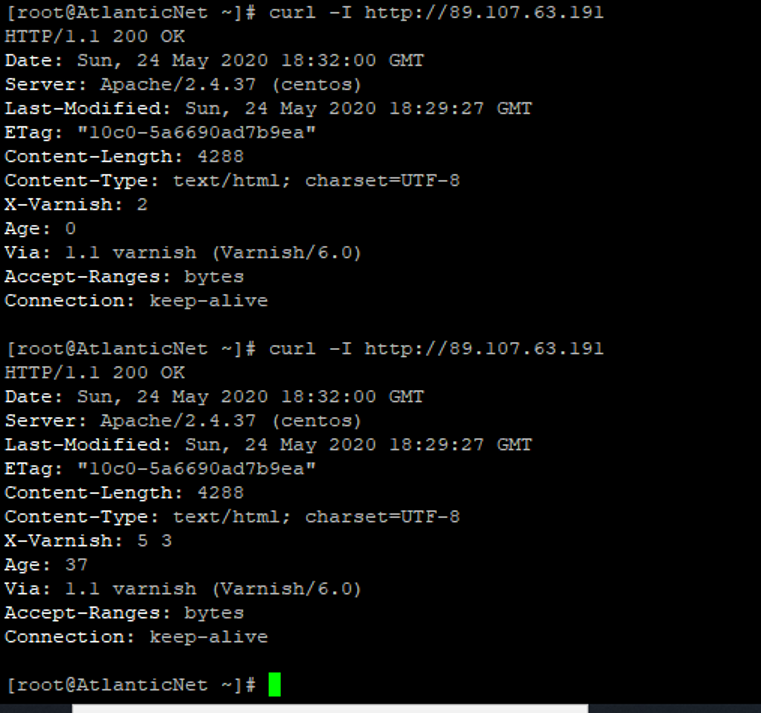
Next, run the command again:
curl -I http://your-server-ip
You should get the Varnish cached response in the Age header:
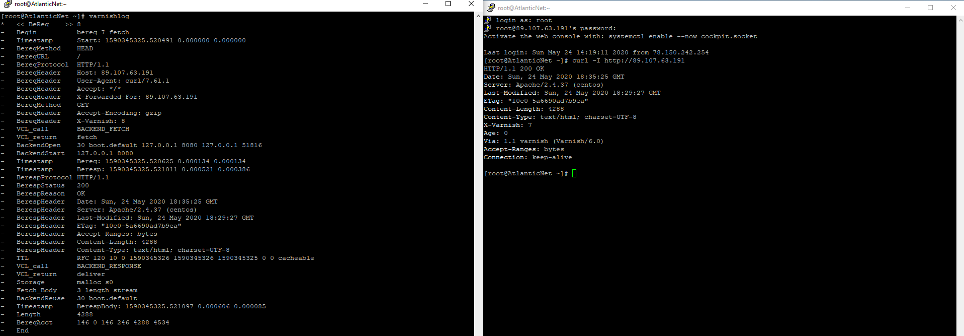
You can also test the varnish cache using varnishlog command with curl command to view Varnish activity as it happens:
varnishlog
You should get an output similar to the following:
Conclusion
Congratulations! You have successfully installed and configured Varnish cache with Apache web server on CentOS 8. Your website should now load faster because Varnish will retrieve the most frequently requested content from the cache memory. Try out Varnish on dedicated server hosting from Atlantic.Net!
* This post is for informational purposes only and does not constitute professional, legal, financial, or technical advice. Each situation is unique and may require guidance from a qualified professional.
Readers should conduct their own due diligence before making any decisions.