Privoxy is a web proxy service that acts as a non-caching web proxy. It works as a mediator between a user and the Internet. When the user accesses the Internet, the web browser sends a request to Privoxy to get the objects or pages, then Privoxy filters the user request per the proxy configuration and gives the result to the end user. Generally, a Privoxy server is used for privacy and security and to improve efficiency through its advanced caching features.
In this post, we will show you how to install a Privoxy proxy server on Oracle Linux 10.
Step 1 – Install Privoxy Server
By default, the Privoxy package is not included in the Oracle Linux default repo, so you will need to compile it from the source.
First, install the required packages using the following command:
dnf install -y gcc make autoconf automake pcre2-devel zlib-devel openssl-devel wget
Next, download the latest version of Privoxy.
wget https://sourceforge.net/projects/ijbswa/files/Sources/4.0.0%20%28stable%29/privoxy-4.0.0-stable-src.tar.gz
Next, extract the downloaded file.
tar -xvf privoxy-4.0.0-stable-src.tar.gz
Next, navigate to the extracted directory:
cd privoxy-4.0.0-stable
Next, compile the Privoxy with the following command:
autoheader
autoconf
./configure
make
make install
Step 2 – Configure Privoxy Proxy
By default, the Privoxy server listens on port 8118 on the localhost, so you will need to configure it to listen to your server’s IP address.
To do so, edit the Privoxy configuration file:
nano /usr/local/etc/privoxy/config
Find the following line:
listen-address 127.0.0.1:8118
Change it with the following line:
listen-address your-server-ip:8118
Next, create a user for Privoxy.
useradd --system --no-create-home --shell /sbin/nologin privoxy
Next, give necessary permissions:
chown -R privoxy:privoxy /usr/local/etc/privoxy
chown -R privoxy:privoxy /usr/local/var/log/privoxy
chown -R privoxy:privoxy /var/log/privoxy
Save and close the file, then start the Privoxy service with the following command:
/etc/init.d/privoxy start
You can also verify the Privoxy listening port using the following command:
ss -antpl | grep 8118
You will get the following output:
LISTEN 0 128 208.117.86.131:8118 0.0.0.0:* users:(("privoxy",pid=30046,fd=7))
Step 3 – Configure Web Browser to Use Privoxy Proxy
After installing the Privoxy server, you will need to test it. To test it, you must configure your web browser to use the Privoxy server.
First, go to the client system, open your Firefox web browser => and click on Edit => Preferences. You should see the following page:
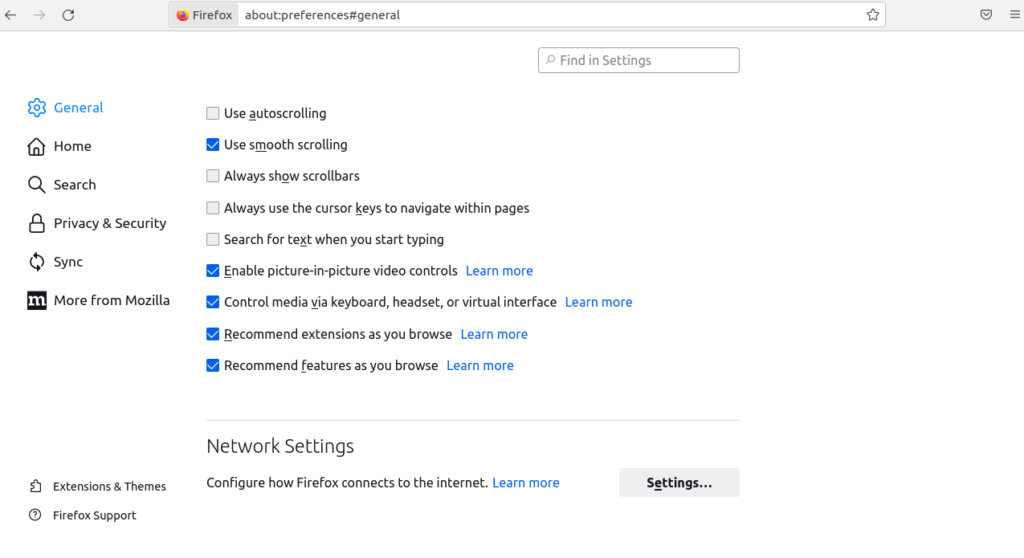
Now, click on Network Settings => Settings. You should see the following page:
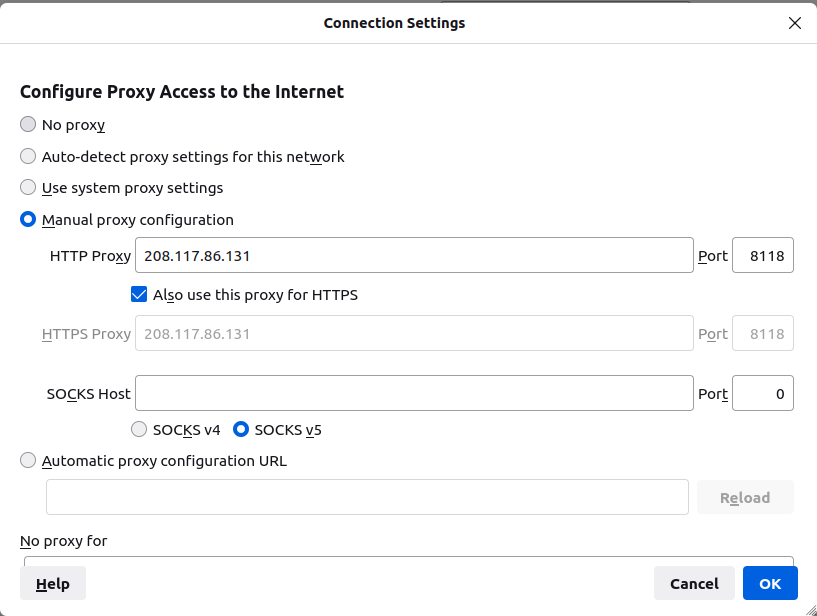
Now, provide your Privoxy server IP and port and click on the Ok button to save the changes.
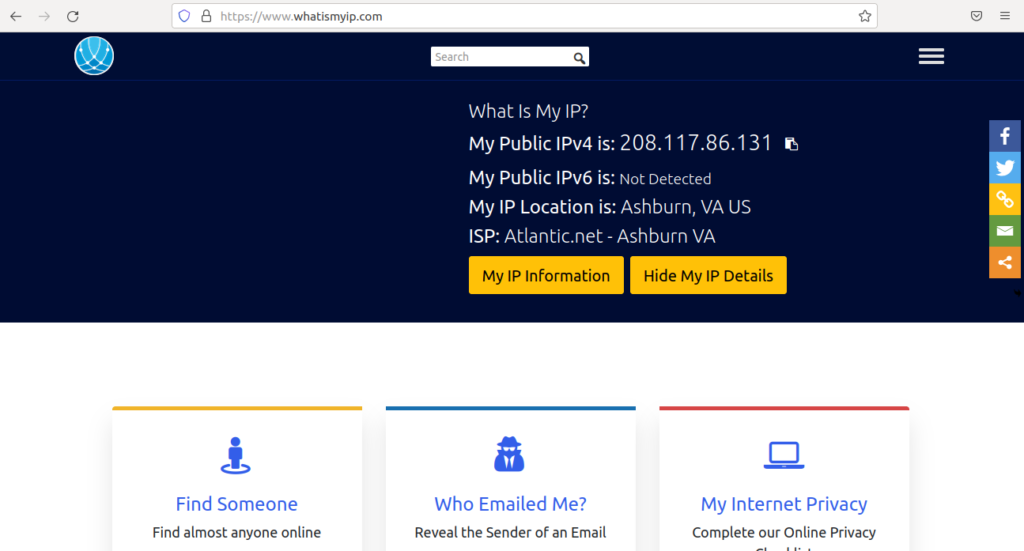
Now, open your web browser and access the URL https://www.whatismyip.com to check your public IP address. If everything is fine, you should see your Privoxy server IP on the following page:
Conclusion
Congratulations! You have successfully installed and configured the Privoxy server on your Oracle Linux 10 virtual private server. You can now use some advanced filters on the Privoxy server and block your desired content. Get started with Privoxy on VPS hosting from Atlantic.Net!
* This post is for informational purposes only and does not constitute professional, legal, financial, or technical advice. Each situation is unique and may require guidance from a qualified professional.
Readers should conduct their own due diligence before making any decisions.