Jenkins is an open-source, Java-based continuous integration and continuous delivery tool that makes the development process easier. It helps developers to effectively test and deploy code. Continuous integration is a development practice where every developer commits their code changes to the central repository. Continuous delivery is the second part of this development process where code changes are tested and deployed to production automatically.
In this tutorial, we will learn how to install Jenkins on CentOS 8.
Step 1 – Install Java
Jenkins is a Java-based software and requires Java version 8, so Java must be installed on your server. If not installed, you can install it by running the following command:
yum update -y
yum install java-1.8.0-openjdk-devel -y
After installing Java, verify the Java version with the following command:
java -version
You should get the following output:
openjdk version "1.8.0_265"
OpenJDK Runtime Environment (build 1.8.0_265-b01)
OpenJDK 64-Bit Server VM (build 25.265-b01, mixed mode)
Step 2 – Install Jenkins
By default, Jenkins is not available in the CentOS standard repository, so you will need to add the Jenkins official repository to your system.
First, add the Jenkins repository with the following command:
wget -O /etc/yum.repos.d/jenkins.repo https://pkg.jenkins.io/redhat-stable/jenkins.repo
Next, import the Jenkins key with the following command:
rpm --import https://pkg.jenkins.io/redhat-stable/jenkins.io.key
Next, install the Jenkins by running the following command:
yum install jenkins
Once the Jenkins is installed, start the Jenkins service and enable it to start at system reboot with the following command:
systemctl start jenkins
systemctl enable jenkins
You can also verify the status of Jenkins with the following command:
systemctl status jenkins
You should get the following output:
-
jenkins.service - LSB: Jenkins Automation Server
Loaded: loaded (/etc/rc.d/init.d/jenkins; generated)
Active: active (running) since Sat 2020-10-17 03:41:00 EDT; 19s ago
Docs: man:systemd-sysv-generator(8)
Process: 39242 ExecStart=/etc/rc.d/init.d/jenkins start (code=exited, status=0/SUCCESS)
Tasks: 42 (limit: 25014)
Memory: 429.2M
CGroup: /system.slice/jenkins.service
└─39265 /etc/alternatives/java -Dcom.sun.akuma.Daemon=daemonized -
Djava.awt.headless=true -DJENKINS_HOME=/var/lib/jenkins -jar /usr>
Oct 17 03:40:59 centos systemd[1]: Starting LSB: Jenkins Automation Server...
Oct 17 03:40:59 centos runuser[39249]: pam_unix(runuser:session): session opened for user jenkins by (uid=0)
Oct 17 03:41:00 centos runuser[39249]: pam_unix(runuser:session): session closed for user jenkins
Oct 17 03:41:00 centos jenkins[39242]: Starting Jenkins [ OK ]
Oct 17 03:41:00 centos systemd[1]: Started LSB: Jenkins Automation Server.
Step 3 – Access Jenkins
At this point, Jenkins is started and listening on port 8080. Now, open your web browser and access the Jenkins web interface using the URL http://your-server-ip:8080. You will be redirected to the following page:
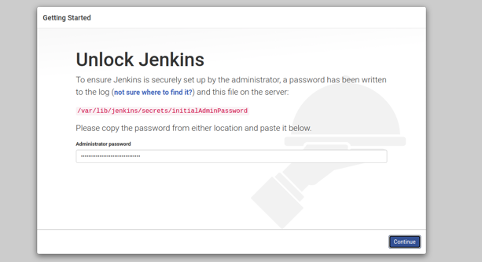
The Jenkins password will be automatically generated during the installation. You can print it with the following command:
cat /var/lib/jenkins/secrets/initialAdminPassword
You should see the Jenkins password in the following output:
819d86d763024eacb9154f7697593eab
Type the password on the screen and click on the Continue button. You should see the following screen:

Click on the Install suggested plugins panel to start the installation process. You should see the following screen:
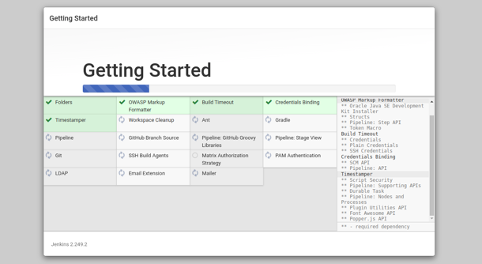
Once the installation has been completed, you should see the following screen:
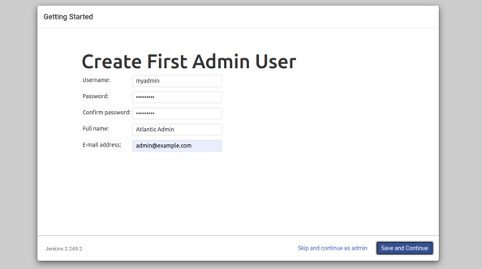
Provide your admin username, password, and email and click on the Save and Continue button.
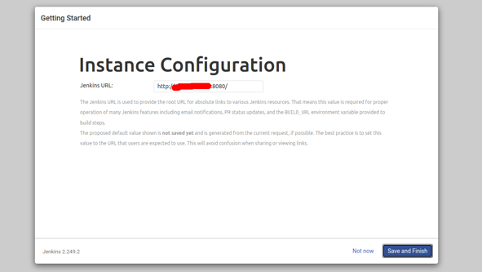
Provide your Jenkins URL and click on the Save and Finish button. You should see the following screen:
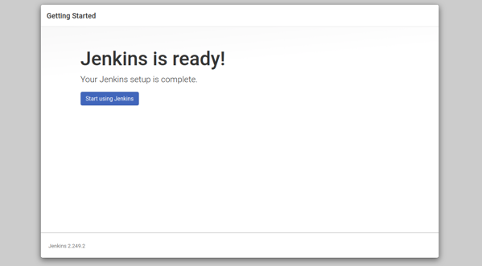
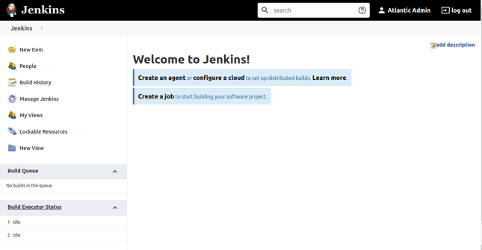
Click on the Start using Jenkins button. You should see the Jenkins dashboard in the following screen:
Conclusion
Congratulations! You have successfully installed Jenkins on CentOS 8. You can now explore Jenkins and start creating your first software project. Get started with Jenkins on VPS Hosting from Atlantic.Net today!
* This post is for informational purposes only and does not constitute professional, legal, financial, or technical advice. Each situation is unique and may require guidance from a qualified professional.
Readers should conduct their own due diligence before making any decisions.