LEMP is a collection of four open-source software components that are used together to host a website on the Internet. In the LEMP stack, L represents the Linux operating system, E represents the Nginx web server, M represents the MariaDB/MySQL database server, and P represents the PHP programming language. As all the components are open-source in the LEMP stack, it is used in highly-scaled applications across the web.
In this post, we will show you how to install a LEMP stack on Oracle Linux 10.
Step 1 – Install Nginx Web Server on Oracle Linux 10
Nginx is the first component of the LEMP stack. By default, the Nginx package is included in the Oracle Linux 10 default repository. You can install it using the following command:
dnf install nginx -y
Once Nginx is installed, start the Nginx service and enable it to start at system reboot.
systemctl start nginx
systemctl enable nginx
You can also verify the status of Nginx with the following command:
systemctl status nginx
To verify the Nginx version, run the following command:
nginx -v
You should see the following output:
nginx version: nginx/1.26.3
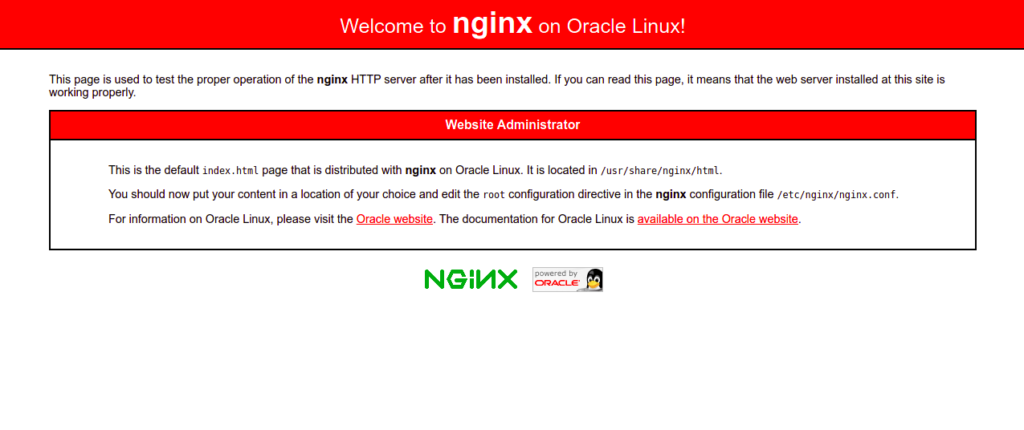
Now, open your web browser and type the URL http://your-server-ip. You should see the Nginx default page on the following screen:
Also Read
How to Install and Configure Nginx Web Server on Oracle Linux 8
Step 2 – Install MariaDB Database Server on Oracle Linux 10
MariaDB is an open-source database server used to store website content. By default, MariaDB is included in the Oracle Linux 10 default repository. You can install it using the following command:
dnf install mariadb-server mariadb -y
Once MariaDB is installed, start the MariaDB service and enable it to start at system reboot:
systemctl start mariadb
systemctl enable mariadb
You can check the status of MariaDB using the following command:
systemctl status mariadb
You will get the following command:
● mariadb.service - MariaDB 10.11 database server
     Loaded: loaded (/usr/lib/systemd/system/mariadb.service; disabled; preset: disabled)
     Active: active (running) since Sun 2025-12-28 01:30:07 EST; 2 days ago
 Invocation: bd2ec2682b7d423bbeb559f48272cc49
       Docs: man:mariadbd(8)
             https://mariadb.com/kb/en/library/systemd/
   Main PID: 40092 (mariadbd)
     Status: "Taking your SQL requests now..."
      Tasks: 8 (limit: 24812)
     Memory: 350.9M (peak: 351.8M)
        CPU: 26.513s
     CGroup: /system.slice/mariadb.service
             └─40092 /usr/libexec/mariadbd --basedir=/usr
You can also verify the MariaDB version with the following command:
mysqladmin -V
You should see the following output:
mysqladmin Ver 10.0 Distrib 10.11.11-MariaDB, for Linux on x86_64
Now, you will need to secure the MariaDB installation. You can secure it with the following command:
mysql_secure_installation
You will be asked to set a root password as shown below:
Enter current password for root (enter for none):
OK, successfully used password, moving on...

Setting the root password ensures that nobody can log into the MariaDB
root user without the proper authorisation.

Set root password? [Y/n] Y
New password:
Re-enter new password:
Password updated successfully!
Reloading privilege tables..
 ... Success!
Next, you will be asked to remove anonymous users as shown below:
By default, a MariaDB installation has an anonymous user, allowing anyone
to log into MariaDB without having to have a user account created for
them.  This is intended only for testing, and to make the installation
go a bit smoother.  You should remove them before moving into a
production environment.

Remove anonymous users? [Y/n] Y
Type Y and press Enter. You will be asked to disallow root login remotely:
 ... Success!

Normally, root should only be allowed to connect from 'localhost'.  This
ensures that someone cannot guess at the root password from the network.

Disallow root login remotely? [Y/n] Y
Type Y and press the Enter key. You will be asked to remove the test database:
 ... Success!

By default, MariaDB comes with a database named 'test' that anyone can
access.  This is also intended only for testing, and should be removed
before moving into a production environment.

Remove test database and access to it? [Y/n] Y
Press Y and press the Enter key. You will be asked to reload the privileges table:
 - Dropping test database...
 ... Success!
 - Removing privileges on test database...
 ... Success!

Reloading the privilege tables will ensure that all changes made so far
will take effect immediately.

Reload privilege tables now? [Y/n] Y
Type Y and press the Enter key to secure MariaDB.
 ... Success!

Cleaning up...

All done!  If you've completed all of the above steps, your MariaDB
installation should now be secure.

Thanks for using MariaDB!
Also Read
How to Install and Use MySQL Workbench
Step 3 – Install PHP on Oracle Linux 10
By default, the latest version of PHP is available in the Oracle Linux 10 main repository.
You can install PHP with other required extensions using the following command:
dnf install php php-fpm php-gd php-mysqlnd php-cli php-opcache -y
Next, edit the PHP-FPM default configuration file and change the user from apache to nginx:
nano /etc/php-fpm.d/www.conf
Change the following lines:
user = nginx
Group = nginx
Save and close the file, then start the PHP-FPM service and enable it to start at system reboot:
systemctl start php-fpm
systemctl enable php-fpm
Step 4 – Create a Sample Website with Nginx
In this section, we will show you how to host a simple website using an Nginx virtual host. First, create a directory to store website content:
mkdir -p /var/www/html/website
Next, change the ownership and permissions of the website using the following command:
chown -R nginx:nginx /var/www/html/website
chmod -R 755 /var/www/html/website
Next, create a simple PHP page using the following command:
nano /var/www/html/website/info.php
Add the following PHP code:
<?php
phpinfo();
?>
Save and close the file, then create an Nginx virtual host configuration file:
nano /etc/nginx/conf.d/website.conf
Add the following lines:
server {
    listen  80;

    server_name website.example.com;

    location / {
        root  /var/www/html/website/;
        index  info.php;
        try_files $uri $uri/ =404;
    }

    error_page  500 502 503 504  /50x.html;
    location = /50x.html {
        root  /usr/share/nginx/html;
    }

location ~ \.php$ {
        fastcgi_split_path_info ^(.+\.php)(/.+)$;
        fastcgi_pass   unix:/run/php-fpm/www.sock;
        fastcgi_index  info.php;
        fastcgi_param  SCRIPT_FILENAME $document_root$fastcgi_script_name;
        include        fastcgi_params;
    }

}
Save and close the file, then edit the Nginx main configuration file:
nano /etc/nginx/nginx.conf
Add the following line after the line http {:
server_names_hash_bucket_size 64;
Save and close the file, then verify the Nginx configuration using the following command:
nginx -t
You should see the following output:
nginx: the configuration file /etc/nginx/nginx.conf syntax is ok
nginx: configuration file /etc/nginx/nginx.conf test is successful
Next, restart the Nginx service to apply the configuration:
systemctl restart nginx
Step 5 – Verify Nginx Website
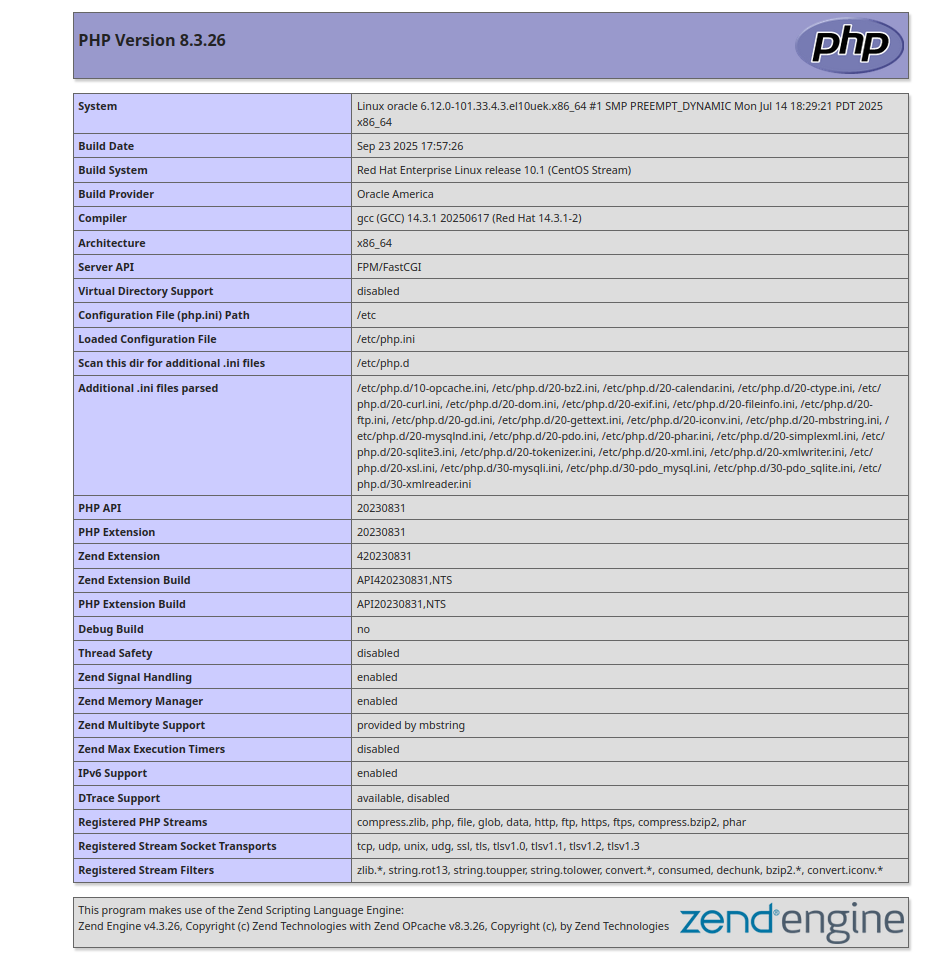
Now, open your web browser and type the URL http://website.example.com. You should see the PHP page on the following screen:
Conclusion
In this post, we learned how to install the LEMP server on Oracle Linux 10. You can now use Nginx virtual hosting feature to host multiple websites on a single machine. Try it on VPS hosting from Atlantic.Net!
* This post is for informational purposes only and does not constitute professional, legal, financial, or technical advice. Each situation is unique and may require guidance from a qualified professional.
Readers should conduct their own due diligence before making any decisions.