Checkmk is a monitoring software written in Python and C++. This self-contained tool combines with Nagios and its add-ons and can be used for monitoring your infrastructure and services. Checkmk works in client-server architecture, meaning you must install Checkmk agent on each computer that you want to monitor. With Checkmk, you can monitor web servers, database servers, and cloud infrastructure such as, Azure, AWS and more.
In this tutorial, we will show you how to install and use the Checkmk monitoring server on Ubuntu 20.04.
Step 1 – Install Checkmk
By default, Checkmk is not included in the Ubuntu default repository, so you will need to download Checkmk package from its official website:
First, download the Checkmk with the following command:
wget https://download.checkmk.com/checkmk/1.6.0p20/check-mk-raw-
1.6.0p20_0.focal_amd64.deb
Once the download is completed, install the downloaded package with the following command:
dpkg -i check-mk-raw-1.6.0p20_0.focal_amd64.deb
Next, run the following command to install the required dependencies for Checkmk.
apt-get install -f
Once the installation has been completed, run the following command to list all commands available with Checkmk:
omd
You should get the following output:
Usage (called as root):

omd help Show general help
omd setversion VERSION Sets the default version of OMD which will be used by new sites
omd version [SITE] Show version of OMD
omd versions List installed OMD versions
omd sites Show list of sites
omd create SITE Create a new site (-u UID, -g GID)
omd init SITE Populate site directory with default files and enable the site
omd rm SITE Remove a site (and its data)
omd disable SITE Disable a site (stop it, unmount tmpfs, remove Apache hook)
omd enable SITE Enable a site (reenable a formerly disabled site)
omd mv SITE NEWNAME Rename a site
omd cp SITE NEWNAME Make a copy of a site
omd update SITE Update site to other version of OMD
omd start [SITE] [SERVICE] Start services of one or all sites
omd stop [SITE] [SERVICE] Stop services of site(s)
omd restart [SITE] [SERVICE] Restart services of site(s)
omd reload [SITE] [SERVICE] Reload services of site(s)
omd status [SITE] [SERVICE] Show status of services of site(s)
omd config SITE ... Show and set site configuration parameters
omd diff SITE ([RELBASE]) Shows differences compared to the original version files
omd su SITE Run a shell as a site-user
omd umount [SITE] Umount ramdisk volumes of site(s)
omd backup SITE [SITE] [-|ARCHIVE_PATH] Create a backup tarball of a site,
writing it to a file or stdout
omd restore [SITE] [-|ARCHIVE_PATH] Restores the backup of a site to an
existing site or creates a new site
omd cleanup Uninstall all Check_MK versions that are not used by any site.

General Options:
-V <version> set specific version, useful in combination with update/create
omd COMMAND -h, --help show available options of COMMAND
Step 2 – Create a Monitoring Instance
Next, you will need to create a monitoring instance for testing purposes. You can create it using the omd tool:
omd create myserver
You will should see the following output:
Adding /opt/omd/sites/myserver/tmp to /etc/fstab.
Creating temporary filesystem /omd/sites/myserver/tmp...OK
Restarting Apache...OK
Created new site myserver with version 1.6.0p20.cre.

The site can be started with omd start myserver.
The default web UI is available at http://ubuntu2004/myserver/

The admin user for the web applications is cmkadmin with password: RCDM5jQG
(It can be changed with 'htpasswd -m ~/etc/htpasswd cmkadmin' as site user.
)
Please do a su - myserver for administration of this site.
Note: Please remember the checkmk username and password from the above output. You will need it to access the Checkmk dashboard.
Next, start the server with the following command:
omd start myserver
You should get the following output:
Starting mkeventd...OK
Starting rrdcached...OK
Starting npcd...OK
Starting nagios...OK
Starting apache...OK
Initializing Crontab...OK
You can verify the status of the server with the following command:
omd status
You should get the following output:
Doing 'status' on site myserver:
mkeventd: running
rrdcached: running
npcd: running
nagios: running
apache: running
crontab: running
-----------------------

Overall state: running
To check the omd version, run the following command:
omd version
Output:
OMD - Open Monitoring Distribution Version 1.6.0p20.cre
You can also see your all monitoring instances with the following command:
omd sites
Output:
SITE VERSION COMMENTS
myserver 1.6.0p20.cre default version
Step 3 – Access Checkmk Web Interface
Now, open your web browser and access the Checkmk web interface using the URL http://your-server-ip/myserver. You will be redirected to the Checkmk login page:
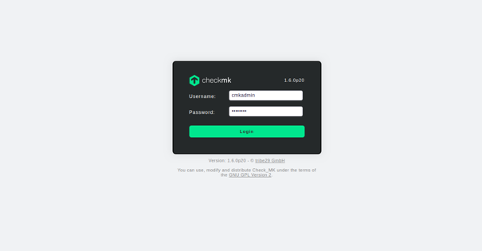
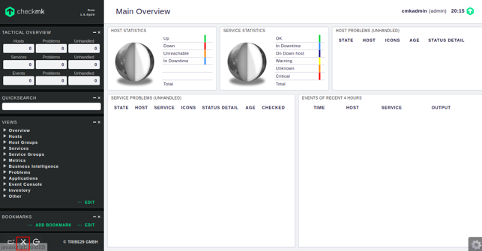
Provide your Checkmk username, password and click on the Login button. You should see the Checkmk dashboard in the following screen:
It is a good idea to change the default Checkmk password. Click on the WATO – Configuration in the left side and you should see the following screen:
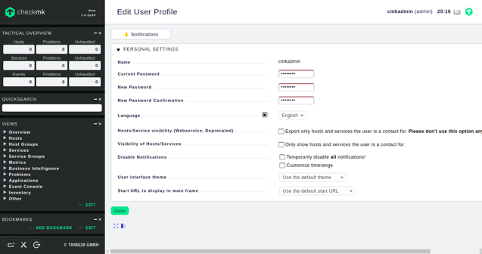
Set your new password and click on the Save button to change the password.
Step 4 – Create a Monitoring Host
Before starting, you will need to download and install the Checkmk monitoring agent on the server.
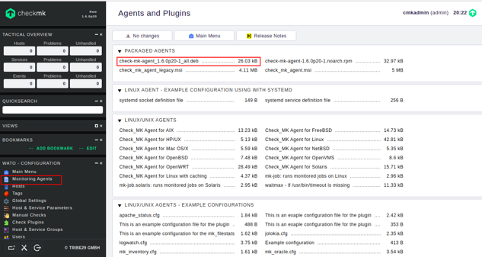
In the WATO – Configuration menu, click on the Monitoring Agents, you should see agent packages for all operating systems in the following page:
Pick the package for Ubuntu and download it with the following command:
wget http://45.58.38.223/myserver/check_mk/agents/check-mk-agent_1.6.0p20-1_all.deb
Once downloaded, install the agent package with the following command:
dpkg -i check-mk-agent_1.6.0p20-1_all.deb
Once the agent package is installed, you can verify it with the following command:
check_mk_agent | less
You should get the following output:
<<<check_mk>>>
Version: 1.6.0p20
AgentOS: linux
Hostname: ubuntu2004
AgentDirectory: /etc/check_mk
DataDirectory: /var/lib/check_mk_agent
SpoolDirectory: /var/lib/check_mk_agent/spool
PluginsDirectory: /usr/lib/check_mk_agent/plugins
LocalDirectory: /usr/lib/check_mk_agent/local
<<<df>>>
In the WATO – Configuration menu, click on the Hosts button. You should see the following page:
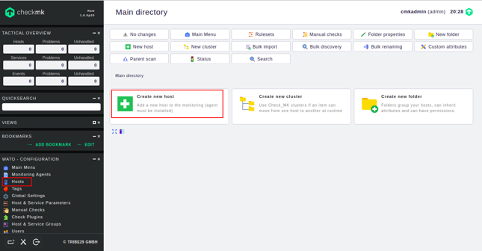
Click on the Create new host button. You should see the following page:
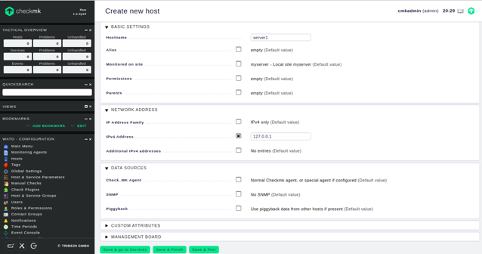
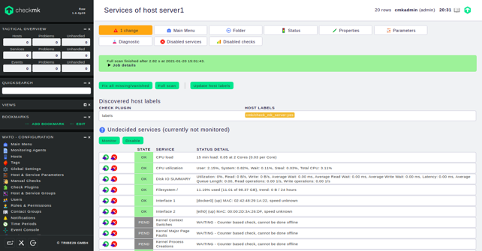
Provide all required information and click on the Save and go to Services button. You should see all services in the following page:
Conclusion
Congratulations! You have successfully installed and configured a Checkmk monitoring server on Ubuntu 20.04. You can now install Checkmk agents on the remote machines and start monitoring from the Checkmk web interface. Try it today using a dedicated server from Atlantic.Net!
* This post is for informational purposes only and does not constitute professional, legal, financial, or technical advice. Each situation is unique and may require guidance from a qualified professional.
Readers should conduct their own due diligence before making any decisions.