TinyProxy is a lightweight and small-footprint Proxy server designed for Linux-based operating systems. It is fast, configurable, and also can be used as a reverse proxy. It offers an access control feature that helps you to block and unblock specific websites. It is an ideal solution for use cases such as embedded deployments requiring a full-featured HTTP proxy.
In this post, we will show you how to install TinyProxy on Arch Linux.
Step 1 – Configure Repository
By default, the default repository is outdated in Arch Linux, so you will need to modify the default mirror list. You can do it by editing the mirror list configuration file:
nano /etc/pacman.d/mirrorlist
Remove all lines and add the following lines:
## Score: 0.7, United States
Server = http://mirror.us.leaseweb.net/archlinux/$repo/os/$arch
## Score: 0.8, United States
Server = http://lug.mtu.edu/archlinux/$repo/os/$arch
Server = http://mirror.nl.leaseweb.net/archlinux/$repo/os/$arch
## Score: 0.9, United Kingdom
Server = http://mirror.bytemark.co.uk/archlinux/$repo/os/$arch
## Score: 1.5, United Kingdom
Server = http://mirrors.manchester.m247.com/arch-linux/$repo/os/$arch
Server = http://archlinux.dcc.fc.up.pt/$repo/os/$arch
## Score: 6.6, United States
Server = http://mirror.cs.pitt.edu/archlinux/$repo/os/$arch
## Score: 6.7, United States
Server = http://mirrors.acm.wpi.edu/archlinux/$repo/os/$arch
## Score: 6.8, United States
Server = http://ftp.osuosl.org/pub/archlinux/$repo/os/$arch
## Score: 7.1, India
Server = http://mirror.cse.iitk.ac.in/archlinux/$repo/os/$arch
## Score: 10.1, United States
Server = http://mirrors.xmission.com/archlinux/$repo/os/$arch
Save and close the file, then update all the package indexes with the following command:
pacman -Syu
Step 2 – Install TinyProxy
By default, the TinyProxy package is included in the Arch Linux main repository. You can simply install it with the following command.
pacman -S tinyproxy
Once the TinyProxy is installed on your server, you can proceed to the next step.
Step 3 – Configure TinyProxy
Next, you will need to edit the TinyProxy main configuration file and modify it as per your requirements.
You can edit it with the following command.
nano /etc/tinyproxy/tinyproxy.conf
Change the following configurations.
Port 8888
Listen your-server-ip
LogFile "/var/log/tinyproxy/tinyproxy.log"
PidFile "/var/run/tinyproxy/tinyproxy.pid"
BasicAuth user password
Allow client-machine-ip
Save and close the file, then create a log directory and file with the following command.
mkdir /var/log/tinyproxy
touch /var/log/tinyproxy/tinyproxy.log
Next, start and enable the TinyProxy service with the following command.
systemctl start tinyproxy
systemctl enable tinyproxy
You can now verify the status of TinyProxy using the following command.
systemctl status tinyproxy
You should see the following output.
● tinyproxy.service - Tinyproxy Web Proxy Server
     Loaded: loaded (/usr/lib/systemd/system/tinyproxy.service; disabled; preset: disabled)
     Active: active (running) since Sat 2023-03-04 03:40:34 UTC; 3min 53s ago
    Process: 64007 ExecStart=/usr/bin/tinyproxy -c /etc/tinyproxy/tinyproxy.conf (code=exited, status=0/SUCCESS)
   Main PID: 64009 (tinyproxy)
      Tasks: 1 (limit: 2362)
     Memory: 1.4M
     CGroup: /system.slice/tinyproxy.service
             └─64009 /usr/bin/tinyproxy -c /etc/tinyproxy/tinyproxy.conf

Mar 04 03:40:34 archlinux tinyproxy[64009]: Added basic auth user : user
Mar 04 03:40:34 archlinux tinyproxy[64009]: Setting "Via" header to 'tinyproxy'
Mar 04 03:40:34 archlinux tinyproxy[64009]: Reloading config file finished
Mar 04 03:40:34 archlinux tinyproxy[64009]: listen_sock called with addr = '69.28.85.116'
Mar 04 03:40:34 archlinux tinyproxy[64009]: trying to listen on host[69.28.85.116], family[2], socktype[1], proto[6]
Mar 04 03:40:34 archlinux tinyproxy[64009]: listening on fd [0]
Mar 04 03:40:34 archlinux tinyproxy[64009]: Now running as group "tinyproxy".
Mar 04 03:40:34 archlinux tinyproxy[64009]: Now running as user "tinyproxy".
Mar 04 03:40:34 archlinux tinyproxy[64009]: Setting the various signals.
Mar 04 03:40:34 archlinux tinyproxy[64009]: Starting main loop. Accepting connections.
At this point, TinyProxy is installed and listens on port 8888. You can check it with the following command.
ss -antpl | grep tinyproxy
You should see the following output.
LISTEN 0 0 69.28.85.116:8888 0.0.0.0:* users:(("tinyproxy",pid=64009,fd=0))
Step 4 – Define Proxy Setting on Web Browser
Next, you will need to configure your web browser and define your proxy server. Go to the client machine, open the Firefox browser, and click on the settings. You should see the following screen.
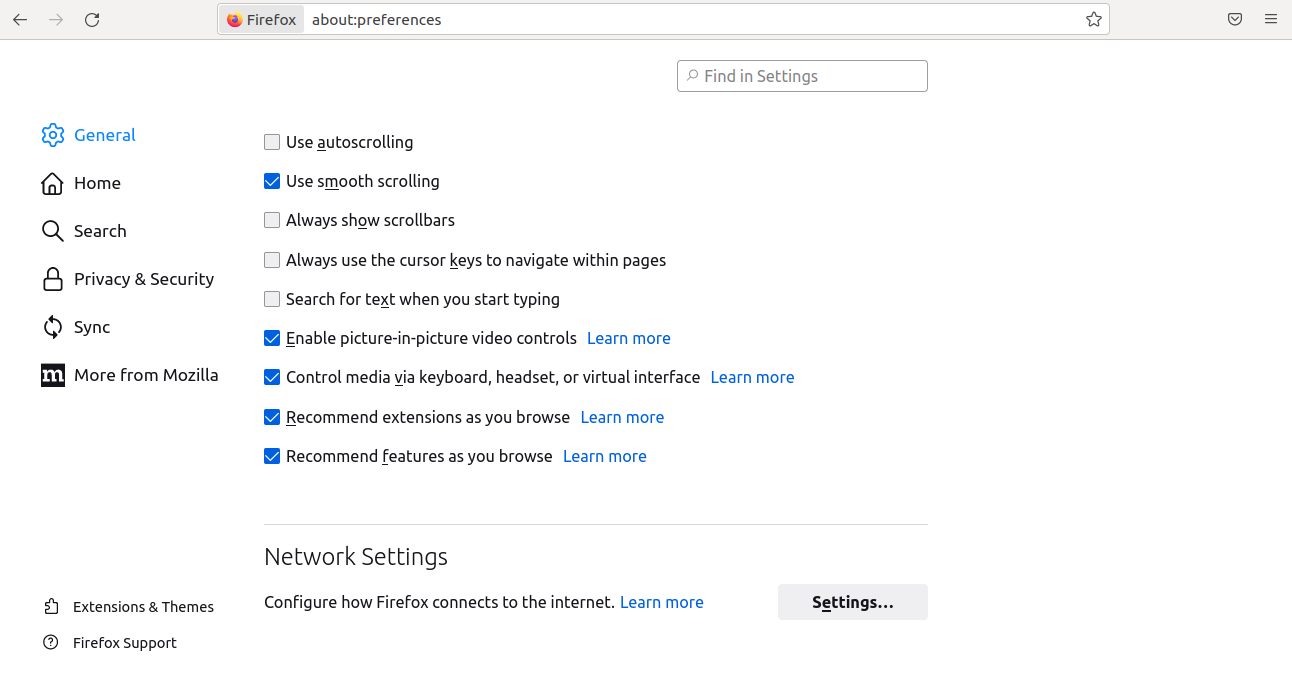
Now, click on the settings under the Network Settings. You should see the proxy setting screen.
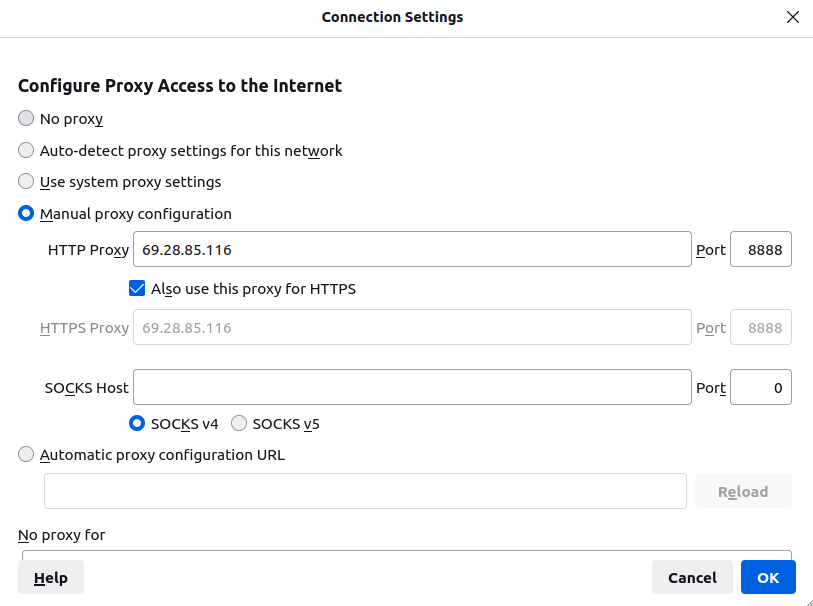
Define your TinyProxy server IP, Port, and click on the Ok button.
Now, type the URL https://whatismyipaddress.com/ in your web browser. You will be asked to provide a username and password.
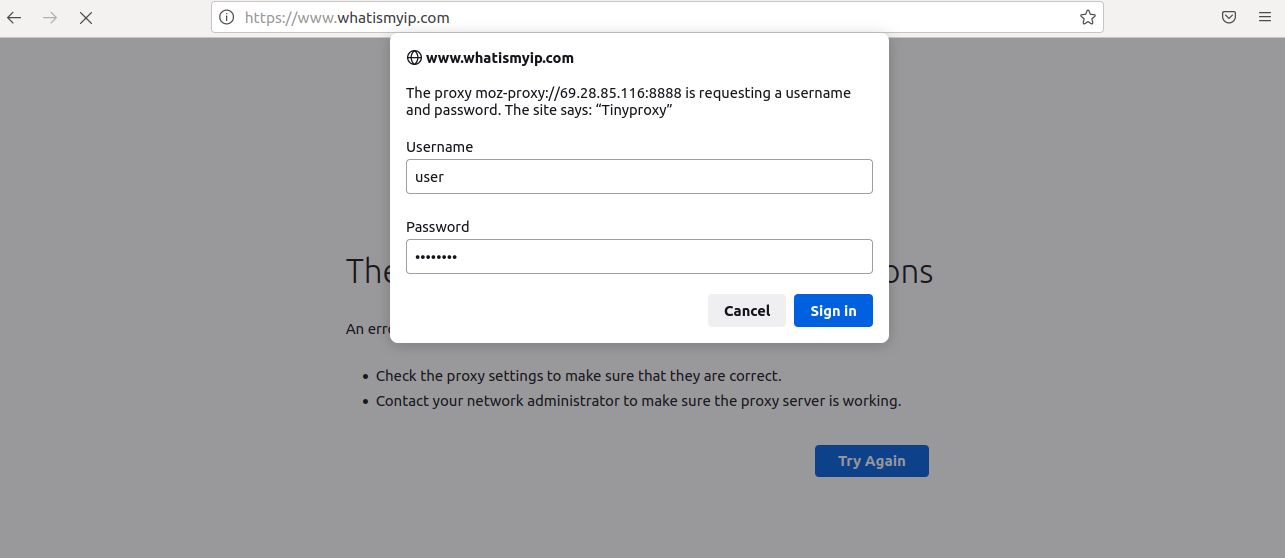
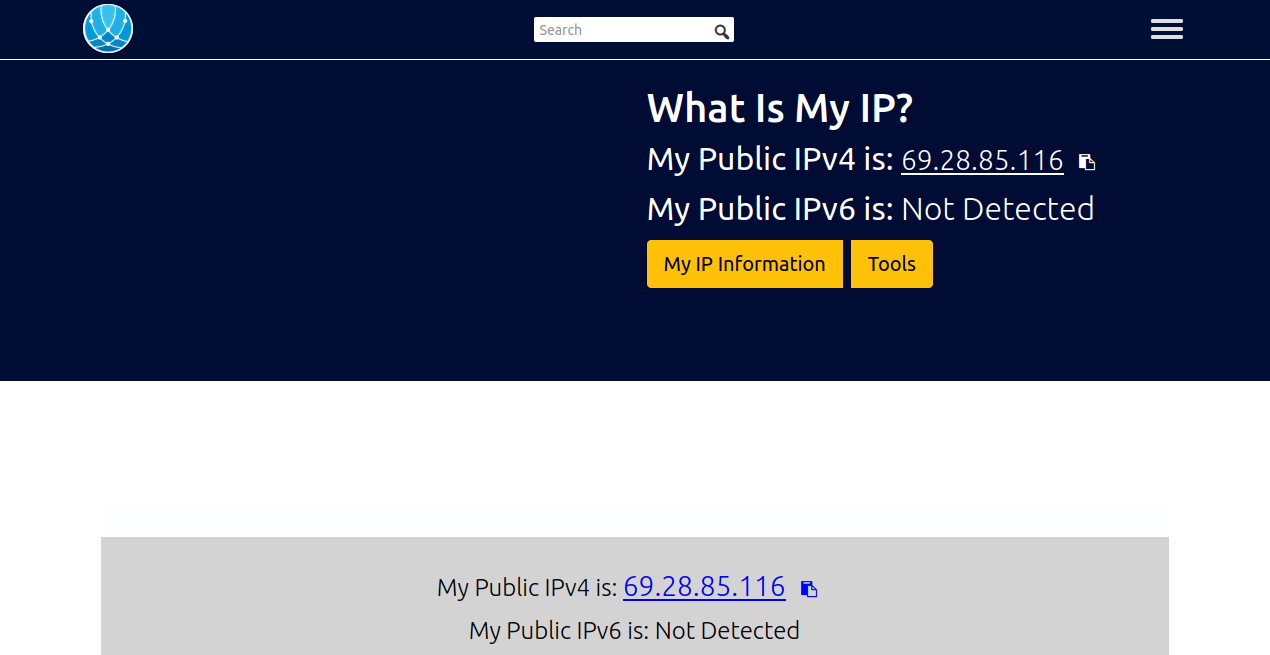
Provide your username and password and click on the Sign in button to authentic TinyProxy. You should see your server IP on the following screen.
Conclusion
In this tutorial, we explained how to install TinyProxy and configure it on Arch Linux. You can now use TinyProxy to browse the Internet anonymously. You can also deploy TinyProxy on dedicated server hosting from Atlantic.Net!
* This post is for informational purposes only and does not constitute professional, legal, financial, or technical advice. Each situation is unique and may require guidance from a qualified professional.
Readers should conduct their own due diligence before making any decisions.