In today’s AI-driven world, automatically recognizing a person’s age and gender from an image has numerous real-world applications. From targeted advertising to audience analysis and security systems, age and gender detection is increasingly valuable.
In this tutorial, we’ll build a gender and age detection system using Machine Learning on an Ubuntu 24.04 server. We will also create a Flask-based web interface that allows users to upload an image and view the predicted age and gender.
Prerequisites
- An Ubuntu 24.04 server with an NVIDIA GPU.
- A non-root user with sudo privileges.
- NVIDIA drivers installed.
Step 1: Set Up a Python Environment
1. Install required Python packages.
apt install python3-pip python3-venv2. Create a virtual environment for your project.
python3 -m venv venv3. Activate the virtual environment.
source venv/bin/activate4. Install Python libraries for AI and Web development
pip install scikit-learn opencv-python flask tensorflow kerasStep 2: Prepare Pre-trained Models
In this section, we will download the face, age, and gender detection models needed for inference. For this project, we’ll use OpenCV’s pre-trained Age and Gender models.
1. First, create a directory to store all models.
mkdir -p model2. Navigate to the model directory.
cd model3. Download all required models.
wget https://raw.githubusercontent.com/spmallick/learnopencv/master/AgeGender/opencv_face_detector.pbtxt
wget https://raw.githubusercontent.com/spmallick/learnopencv/master/AgeGender/opencv_face_detector_uint8.pb
wget https://raw.githubusercontent.com/spmallick/learnopencv/master/AgeGender/age_deploy.prototxt
wget https://raw.githubusercontent.com/eveningglow/age-and-gender-classification/5b60d9f8a8608cdbbcdaaa39bf28f351e8d8553b/model/age_net.caffemodel
wget https://raw.githubusercontent.com/spmallick/learnopencv/master/AgeGender/gender_deploy.prototxt
wget https://raw.githubusercontent.com/eveningglow/age-and-gender-classification/master/model/gender_net.caffemodel
4. Change back to the main directory.
cd ..Step 3: Write the Age and Gender Detection Script
Here, you create a Python script that loads the models and predicts age and gender from face images.
1. Create a file detect.py.
nano detect.pyAdd the following code.
import cv2

# Load models
face_model = "model/opencv_face_detector_uint8.pb"
face_proto = "model/opencv_face_detector.pbtxt"
age_model = "model/age_net.caffemodel"
age_proto = "model/age_deploy.prototxt"
gender_model = "model/gender_net.caffemodel"
gender_proto = "model/gender_deploy.prototxt"

age_list = ['(0-2)', '(4-6)', '(8-12)', '(15-20)',
            '(25-32)', '(38-43)', '(48-53)', '(60-100)']
gender_list = ['Male', 'Female']

# Load networks
face_net = cv2.dnn.readNet(face_model, face_proto)
age_net = cv2.dnn.readNet(age_model, age_proto)
gender_net = cv2.dnn.readNet(gender_model, gender_proto)

def detect_face(img):
    blob = cv2.dnn.blobFromImage(img, 1.0, (300, 300),
                                 [104, 117, 123], swapRB=False)
    face_net.setInput(blob)
    detections = face_net.forward()
    h, w = img.shape[:2]
    faces = []

    for i in range(detections.shape[2]):
        confidence = detections[0, 0, i, 2]
        if confidence > 0.7:
            box = detections[0, 0, i, 3:7] * \
                  [w, h, w, h]
            (x1, y1, x2, y2) = box.astype("int")
            faces.append((x1, y1, x2-x1, y2-y1))
    return faces

def predict_age_gender(img_path):
    frame = cv2.imread(img_path)
    faces = detect_face(frame)
    if len(faces) == 0:
        return "No face detected!", None

    results = []
    for (x, y, w, h) in faces:
        face_img = frame[y:y+h, x:x+w].copy()
        blob = cv2.dnn.blobFromImage(face_img, 1.0, (227, 227),
                                     (78.4263377603, 87.7689143744, 114.895847746),
                                     swapRB=False)

        # Predict Gender
        gender_net.setInput(blob)
        gender_preds = gender_net.forward()
        gender = gender_list[gender_preds[0].argmax()]

        # Predict Age
        age_net.setInput(blob)
        age_preds = age_net.forward()
        age = age_list[age_preds[0].argmax()]

        results.append((gender, age))
    return results[0]  # Return first detected face
Step 4: Create the Flask Web App
This step builds a web server using Flask that can accept image uploads and return predictions.
1. Create a Flask application.
nano app.pyAdd the following code.
from flask import Flask, render_template, request
import os
from detect import predict_age_gender

app = Flask(__name__)
UPLOAD_FOLDER = 'static/uploads'
app.config['UPLOAD_FOLDER'] = UPLOAD_FOLDER

os.makedirs(UPLOAD_FOLDER, exist_ok=True)

@app.route('/', methods=['GET', 'POST'])
def index():
    result = None
    filename = None
    if request.method == 'POST':
        if 'file' not in request.files:
            return 'No file uploaded', 400
        file = request.files['file']
        if file.filename == '':
            return 'No selected file', 400
        if file:
            filename = os.path.join(app.config['UPLOAD_FOLDER'], file.filename)
            file.save(filename)
            result = predict_age_gender(filename)

    return render_template('index.html', result=result, filename=filename)

if __name__ == '__main__':
    app.run(host="0.0.0.0", port=5000, debug=True)
Step 5: Create the HTML Template
You’ll now design a simple user interface that allows users to upload images and view the results.
Create a folder called ‘templates’ and inside it, create an index.html file.
mkdir templates
nano templates/index.html
Add the following code.
<!DOCTYPE html>
<html lang="en">
<head>
    <meta charset="UTF-8">
    <title>Gender and Age Detection</title>
</head>
<body>
    <h2>Upload an Image for Age and Gender Detection</h2>
    <form method="post" enctype="multipart/form-data">
        <input type="file" name="file" accept="image/*" required>
        <input type="submit" value="Upload">
    </form>

    {% if filename %}
        <h3>Uploaded Image:</h3>
        <img src="{{ filename }}" alt="Uploaded Image" width="300">
    {% endif %}

    {% if result %}
        <h3>Prediction:</h3>
        <p><strong>Gender:</strong> {{ result[0] }}</p>
        <p><strong>Age:</strong> {{ result[1] }}</p>
    {% endif %}
</body>
</html>
Step 6: Run the Flask App
Finally, this step starts the Flask web server, allowing you to access your app from a browser.
python3 app.pyAccess your Flask app at http://server-ip:5000.
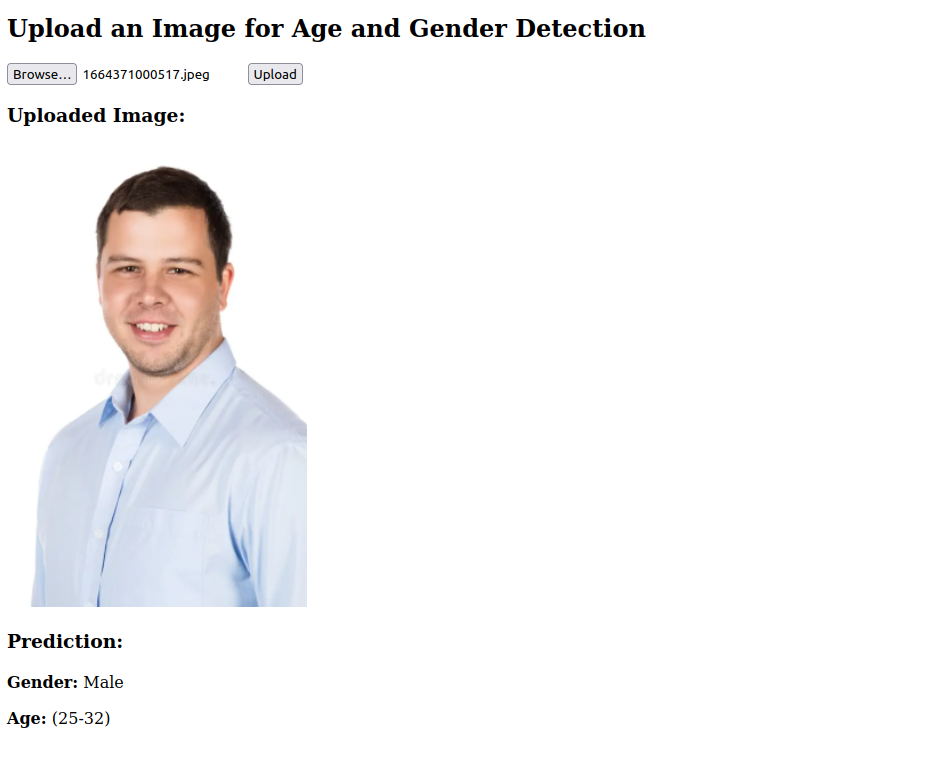
You’ll see a simple page where you can upload a face image, and it will show the predicted gender and age!
Conclusion
In this project, we built a Gender and Age Detection app using Machine Learning models on an Ubuntu 24.04 server and created a Flask web interface for easy interaction. You can enhance this project further by integrating it with a live camera feed or deploying it online.
* This post is for informational purposes only and does not constitute professional, legal, financial, or technical advice. Each situation is unique and may require guidance from a qualified professional.
Readers should conduct their own due diligence before making any decisions.