CodeIgniter is a free and open-source PHP MVC Framework used for building websites in PHP. It is a very powerful framework that allows you to easily create full-featured web applications. CodeIgniter provides a set of useful libraries used for performing various operations like sending emails, uploading files, managing sessions, and more. Lightweight but powerful, CodeIgniter enables developers to write their applications much more quickly.
In this tutorial, we will explain how to install the CodeIgniter PHP Framework on Debian 10.
Step 1 – Install LAMP Stack
First, you will need to install the Apache web server, MariaDB server, PHP, and other required packages in your system. You can install all of them by running the following command:
apt-get install apache2 mariadb-server libapache2-mod-php php php-cli php-mysql php-zip php-gd php-mbstring php-curl php-xml php-pear php-bcmath unzip git wget nano -y
Once all the packages are installed, start the Apache and MariaDB services and enable them to start at system reboot with the following command:
systemctl start apache2
systemctl start mariadb
systemctl enable apache2
systemctl enable mariadb
Step 2 – Configure the MariaDB Database
Next, you will need to create a database and user for CodeIgniter. First, log in to MySQL shell with the following command:
mysql
Once logged in, create a user and database with the following command:
CREATE USER 'codeigniter'@'localhost' IDENTIFIED BY 'password';
CREATE DATABASE codeigniterdb;
Next, grant all the privileges to the codeigniter database with the following command:
GRANT ALL ON codeigniterdb.* to 'codeigniter'@'localhost';
Next, flush the privileges and exit from the MariaDB console with the following command:
FLUSH PRIVILEGES;
EXIT;
Step 3 – Install and Configure CodeIgniter
First, download the latest version of CodeIgniter from the Git repository with the following command:
wget https://github.com/bcit-ci/CodeIgniter/archive/3.1.11.zip
Once downloaded, unzip the downloaded file to the Apache web root directory:
unzip 3.1.11.zip
mv CodeIgniter-3.1.11 /var/www/codeigniter
Next, change the directory to /var/www/codeigniter and edit the database configuration file:
cd /var/www/codeigniter
nano application/config/database.php
Define your database settings as shown below:
$db['default'] = array(
        'dsn'   => '',
        'hostname' => 'localhost',
        'username' => 'codeigniter',
        'password' => 'password',
        'database' => 'codeigniterdb',
        'dbdriver' => 'mysqli',
        'dbprefix' => '',
Save and close the file then edit the config.php file and define your application URL:
nano application/config/config.php
Change the following line with your desired domain name:
$config['base_url'] = 'codeigniter.example.com';
Save and close the file then give proper ownership and permission with the following command:
chown -R www-data:www-data /var/www/codeigniter
chmod -R 755 /var/www/codeigniter
Once you are done, you can proceed to the next step.
Step 4 – Configure Apache for CodeIgniter
Next, you will need to create an Apache virtual host configuration file to serve the CodeIgniter application.
You can create it with the following command:
nano /etc/apache2/sites-available/codeigniter.conf
Add the following lines:
<VirtualHost *:80>
    ServerName codeigniter.example.com
    ServerAdmin [email protected]
    DocumentRoot /var/www/codeigniter
    ErrorLog /var/log/apache2/codeigniter-error_log
    CustomLog /var/log/apache2/codeigniter-access_log combined
    <Directory /var/www/codeigniter>
            Require all granted
    </Directory>
</VirtualHost>
Save and close the file, then enable the virtual host configuration file with the following command:
a2ensite codeigniter.conf
Next, restart the Apache service to apply the changes:
systemctl reload apache2
Step 5 – Access CodeIgniter
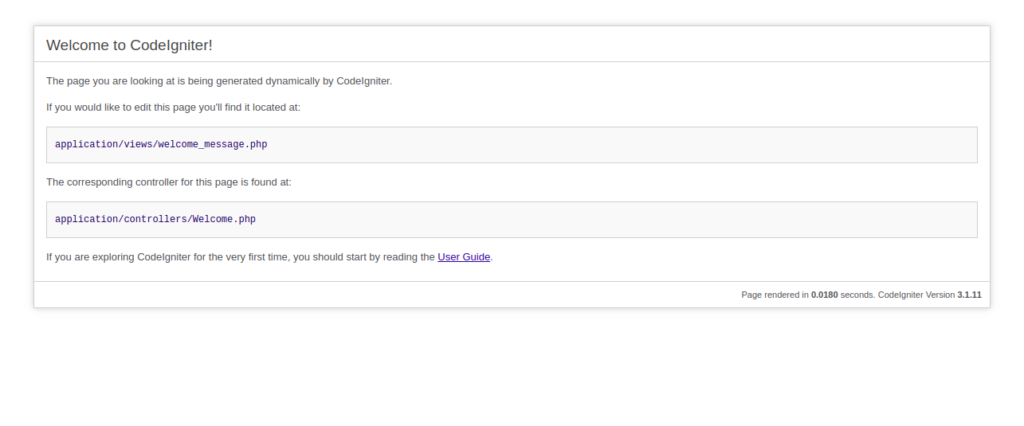
At this point, CodeIgniter is installed and configured with Apache. Now, open your web browser and access the URL http://codeigniter.example.com. You should see your CodeIgniter application in the following screen:

Conclusion
Congratulations! You have successfully installed CodeIgniter Framework with Apache on Debian 10. For more information about how to use this PHP web application framework visit the CodeIgniter documentation page. Get started with CodeIgniter today on a Debian 10 VPS with VPS Hosting from Atlantic.Net!
