Verified and Tested 06/15/15
Introduction
This how-to will help you with your FAMP installation in FreeBSD 10 so that you can successfully run a high available stable platform for your web environment. FAMP is simply a software bundle that consists of 4 components that work together to form a powerful web server. However, in this setup, the acronyms are as follows: FreeBSD (F) is the platform’s core, which will sustain the other components. Apache (A) is used for the web service. MySQL (M) is used for database management, and PHP (P) is used as the programming language.
Prerequisites
You need a FreeBSD server that is configured with a static IP address. If you do not have a server already, you can visit our VPS hosting options page and spin a new server up in under 30 seconds.
Install FAMP on FreeBSD 10
To get started, log in to your FreeBSD server via SSH or through the VNC Console here. Atlantic.Net Cloud servers are set up as minimal installations to avoid having unnecessary packages from being installed and never used. If some software packages that you’re used to using aren’t installed by default, feel free to install them as needed. Let us download nano so we can simplify this tutorial.
pkg install nano
Let’s make sure that your server is fully up-to-date so we can complete the preparation.
freebsd-update fetch
freebsd-update install
We can continue the process and install FAMP on your server with the server up-to-date.
Install Apache on FreeBSD 10
Begin by installing Apache with the following command:
pkg install apache24
Enable and start the Apache service with the following commands:
sysrc apache24_enable=yes
service apache24 start
To edit the main Apache configuration file for one or many websites according to your preference, they are configured in the following directory:
nano /usr/local/etc/apache24/httpd.conf
To verify and test the installation, create/edit the test HTML file in the following directory with the command below:
nano /usr/local/www/apache24/data/index.html
Insert/replace the following code in the HTML file, then save and exit:
<html>
<title>CONGRATULATIONS</title>
<body>
<h2>You have just installed Apache on your FreeBSD Server</h2>
</body>
</html>
You can now verify that Apache is installed correctly by typing http:// and your IP address on your browser(http:// YOUR.IP.ADD.RESS ). To get your server’s IP Address, enter the following command:
ifconfig vtnet0 | grep "inet " | awk '{ print $2 }'
 This is the test page created to verify Apache was installed correctly in FreeBSD
Restart the Apache service so the changes can take effect on your system.
service apache24 restart
Install MySQL on FreeBSD 10
We then would like to continue by installing MySQL. After running the following MySQL, command hit enter to select y to confirm your installation by tapping Enter.
pkg install mysql55-server
Enable and start the MySQL service with the following commands:
sysrc mysql_enable=yes
service mysql-server start
To ensure the security of the default settings of MySQL, continue with the command below:
mysql_secure_installation
Note: When prompted with “Enter current password for root,” hit enter for none then Y(Yes) to set the MYSQL password. You will then be prompted with a series of questions. Just type Y for yes on all of them. See the screenshot below:
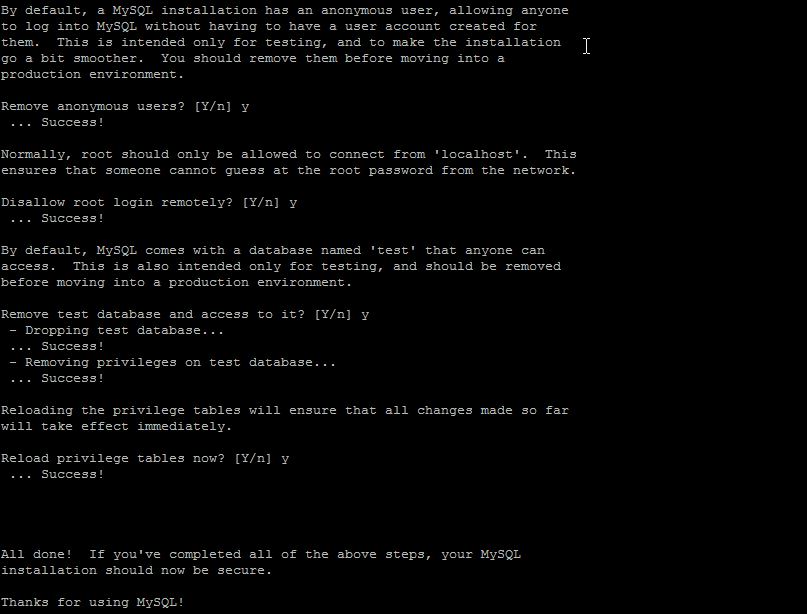 This is the secure installation of the screen when installing MySql on a FreeBSD FAMP Stack server
Install PHP on FreeBSD 10
Finally, we will conclude with the FAMP Stack by installing PHP and configuring it to work with Apache.
pkg install mod_php56 php56-mysql php56-mysqli
With PHP installed, we can begin the preparation to configure it with Apache. Copy the sample PHP configuration file to the correct location.
cp /usr/local/etc/php.ini-production /usr/local/etc/php.ini
Then run the following command to refresh the new changes to the system.
rehash
Update the Apache Configuration file with the following command:
nano /usr/local/etc/apache24/httpd.conf
Locate the DirectoryIndex line and add index.php to the existing index.html, so Apache reads the PHP files. The line should look like the following:
 This is how the Apache output should look after adding index.php to the DirectoryIndex line
(note: use the Ctrl+w in nano to search DirectoryIndex)
Add the following lines at the bottom of the configuration file so Apache can function PHP information accordingly.
<FilesMatch "\.php$">
    SetHandler application/x-httpd-php
</FilesMatch>
<FilesMatch "\.phps$">
    SetHandler application/x-httpd-php-source
</FilesMatch>
Fantastic! You can now save the file and restart Apache, so all your configurations take effect.
service apache24 restart
To verify and test the installation, create a test PHP file in the following directory with the command below:
nano /usr/local/www/apache24/data/info.php
Insert the following PHP code in the empty file, then save and exit:
<?php phpinfo(); ?>
Restart the Apache HTTP service one last time, so all the changes take effect.
service apache24 restart
You can now verify that PHP is installed correctly by typing the following on your browser.
http:// YOUR.IP.ADD.RESS/info.php
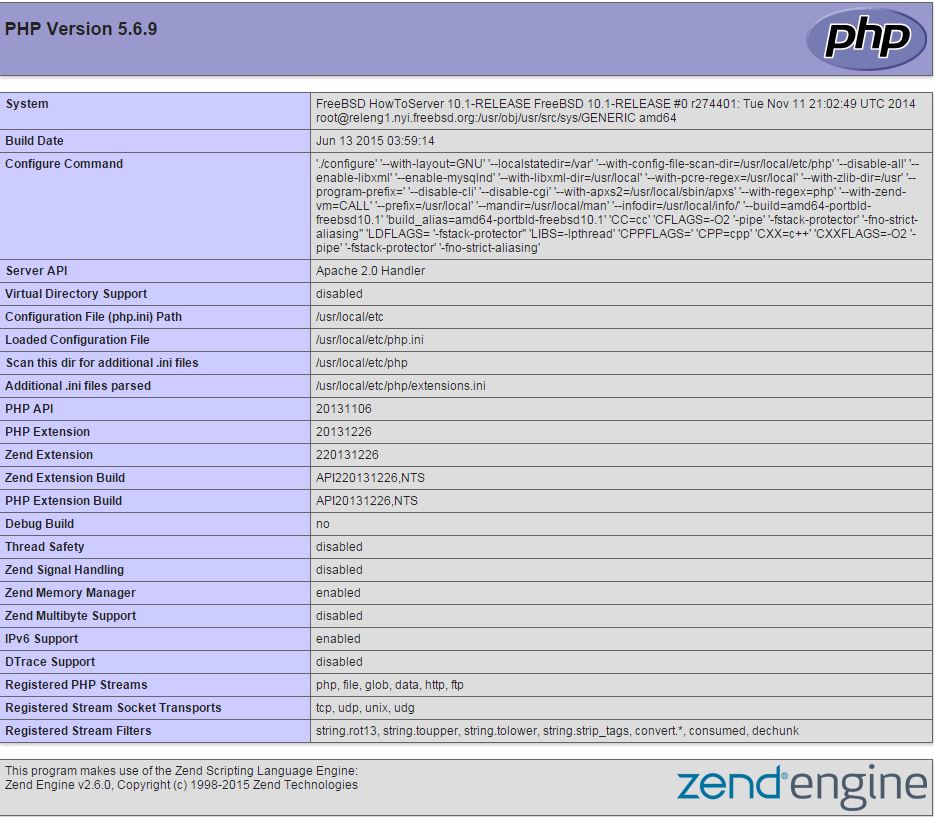 After installing PHP on a FAMP Stack FreeBSD server, this is the default page.
What Next?
Congratulations! You now have a server with a FAMP Stack platform for your web environment. Thank you for following along, and feel free to check back with us for further updates or learn more about services from Atlantic.Net, like VPS hosting.
* This post is for informational purposes only and does not constitute professional, legal, financial, or technical advice. Each situation is unique and may require guidance from a qualified professional.
Readers should conduct their own due diligence before making any decisions.