Verified and Tested 02/28/2015
Introduction
This how-to will show you how to add an additional IP address to Windows Server 2012. Many services on a server might ask for or require an additional public IP address to work correctly, such as creating private name servers, websites with SSLs, email generation, splitting services to different public IPs.
Prerequisites
You must first reserve and assign an additional public IP to your Windows Server 2012. For that guide, please visit 0ur tutorials page.
Adding an additional Public IP address to Windows Server 2012
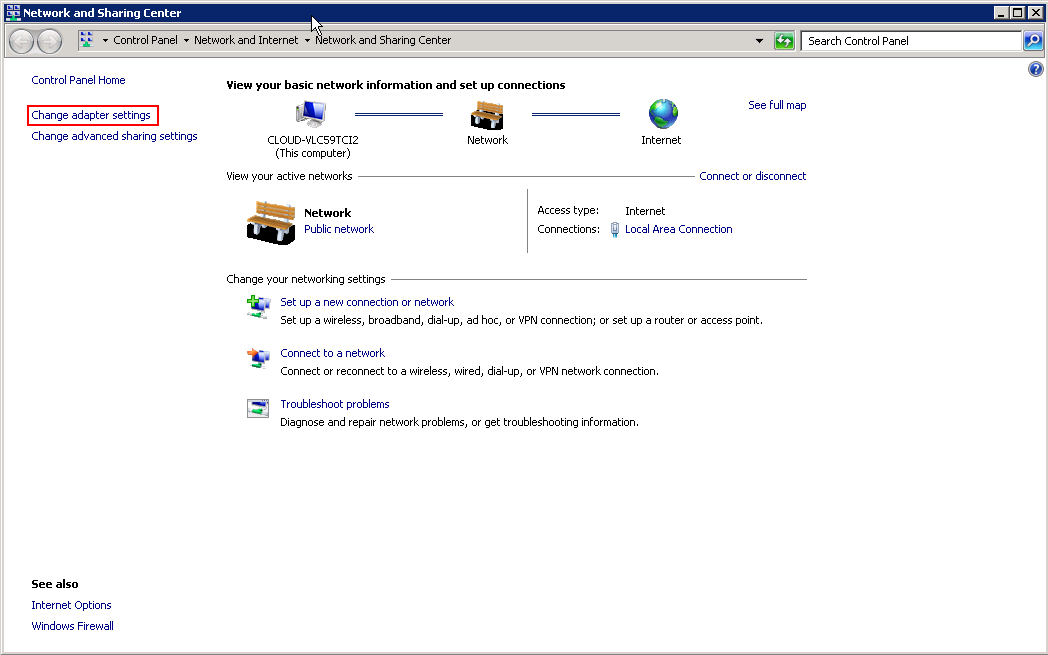
Now, you want to log into your server. Open up the Networking and Sharing Center so we can edit the Network Interface. For that guide, please visit How to open network sharing center windows server 2012
Make sure to click on “Change adapter settings” if you have not done so already.
 Change adapter settings
Click on Local Area Connection. Notice it highlights blue and adds some options in the above line. Let’s click on “Change settings of this connection.”
 Control Panel: Network Connection
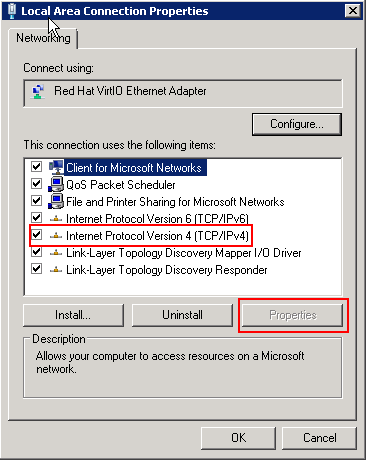
Now double click on “Internet Protocol Version 4 (TCP/IPv4)”. If you do not like to double click, then select it and click “Properties.”
 Internet Protocol Version 4 (TCP/IPv4)
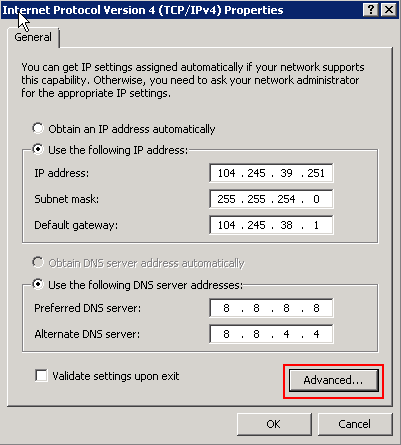
Since this is an additional IP address, we are going to click on “Advanced.”
 Internet Protocol Version 4 (TCP/IPv4)
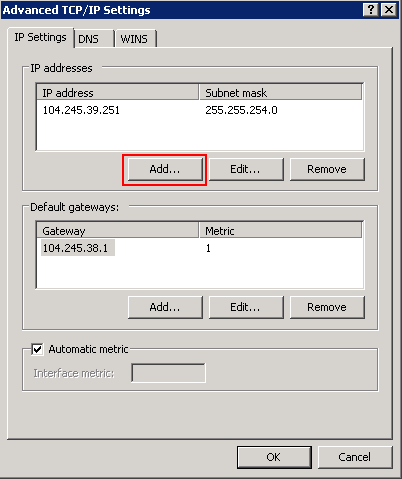
We are almost done. Now under the top section “IP addresses” click “Add…”.
 IP Settings
Now, we are going to use the info that was provided in the Public IP section for the IP we reserved and Assigned.
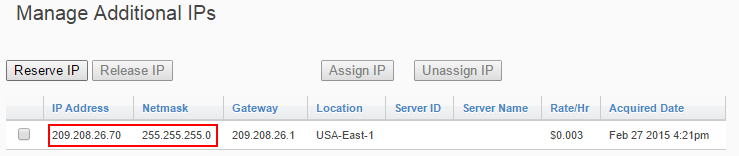 Manage Additional IPs
 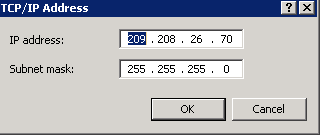 IP Address
Press OK four times to return you to the Network Connections screen. Now, you can check to see if it is configured correctly. Right-click on Local Area Connection, click on Status, Click on Details…, and look at the multiple IPv4 Addresses and the Subnet mask for each one.
 Status
Learn more about Atlantic.Net’s VPS hosting services and VPS hosting price.
* This post is for informational purposes only and does not constitute professional, legal, financial, or technical advice. Each situation is unique and may require guidance from a qualified professional.
Readers should conduct their own due diligence before making any decisions.