
The precious data saved on your Atlantic.Net cloud VPS needs a reliable and resilient backup solution. Backups are a critical part of data retention, and we highly recommend that our customers invest in backups to ensure that in the event of server corruption or malware you are able to restore with minimal downtime and data loss.
At Atlantic.Net, we are advocates of the 3-2-1 backup strategy. To enable this approach, the Atlantic.Net Cloud Platform (ACP) is built to highly redundant architecture. Not only is the backup storage protected by RAID at a disk-level, but the entire environment is protected at the hardware layer. We are so confident in the safety of your data that we offer an industry-leading 100% SLA Agreement.
Want to know more about the 3-2-1 backup strategy? Check out this article on our blog.
How to Enable Backups
While backups are not enabled by default, enabling them is super simple. Backups can be enabled when provisioning and deploying a server or can be added to any existing Cloud Server that might already be running.
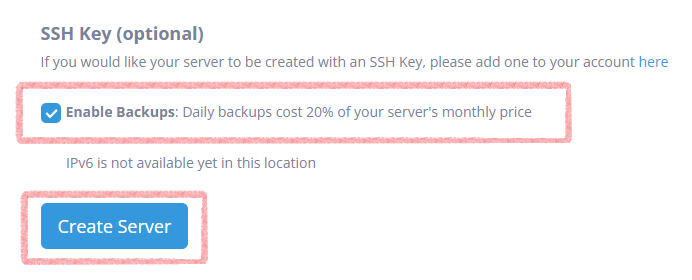
NOTE: Daily backups cost 20% of your server’s monthly price. For example, if you have a G.34GB general-purpose cloud server that costs $20 per month, the backups will cost $2 per month.
Enable Cloud Backups on New Servers
- Log in to the Atlantic.Net Cloud Console – https://cloud.atlantic.net/.
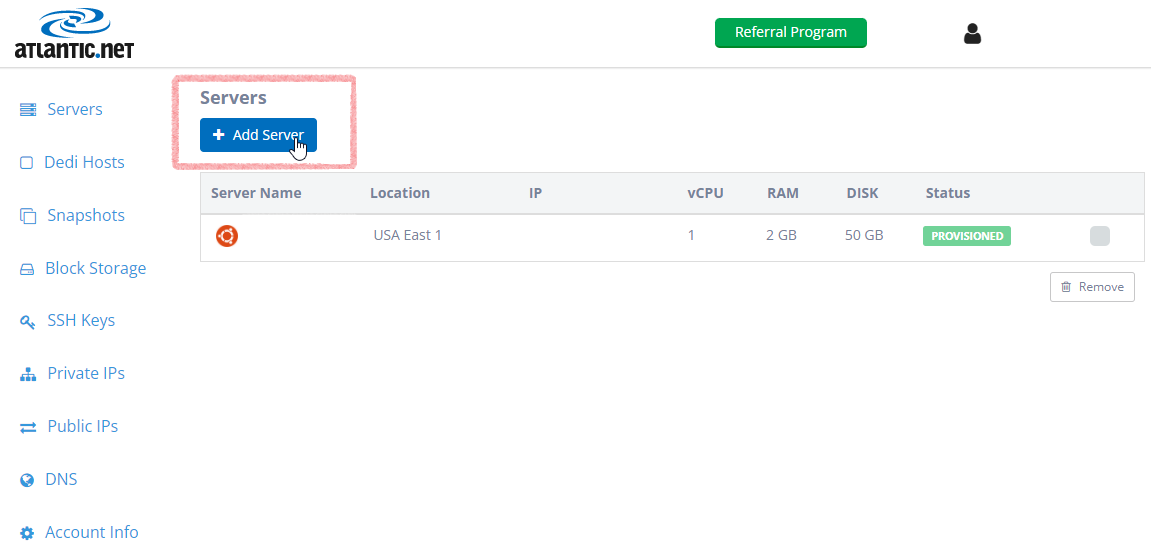
- Navigate to Servers > Add Server.
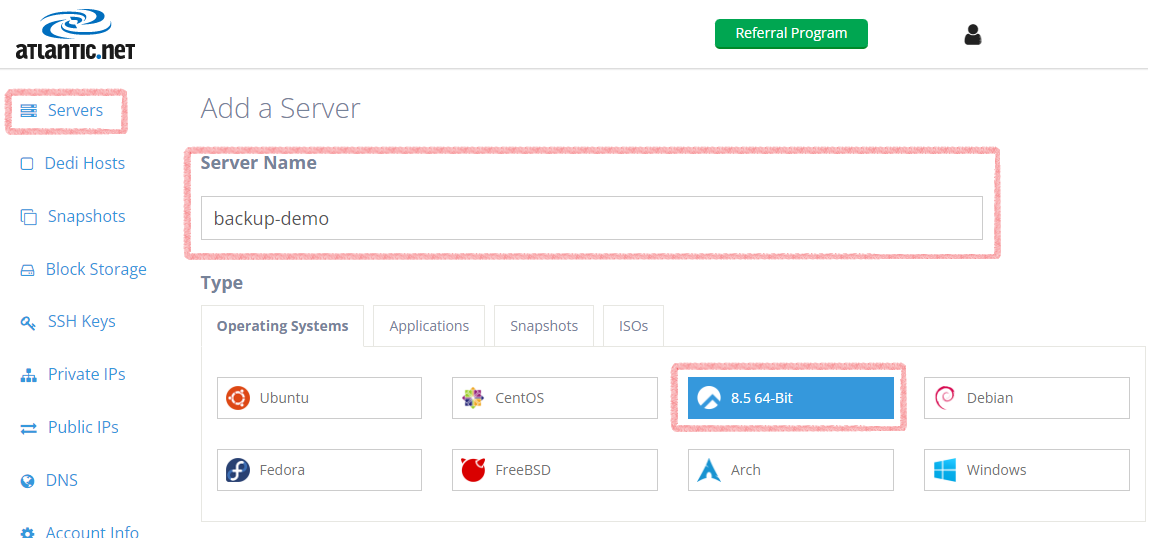
- Fill out the Server Name > choose the Operating System type.
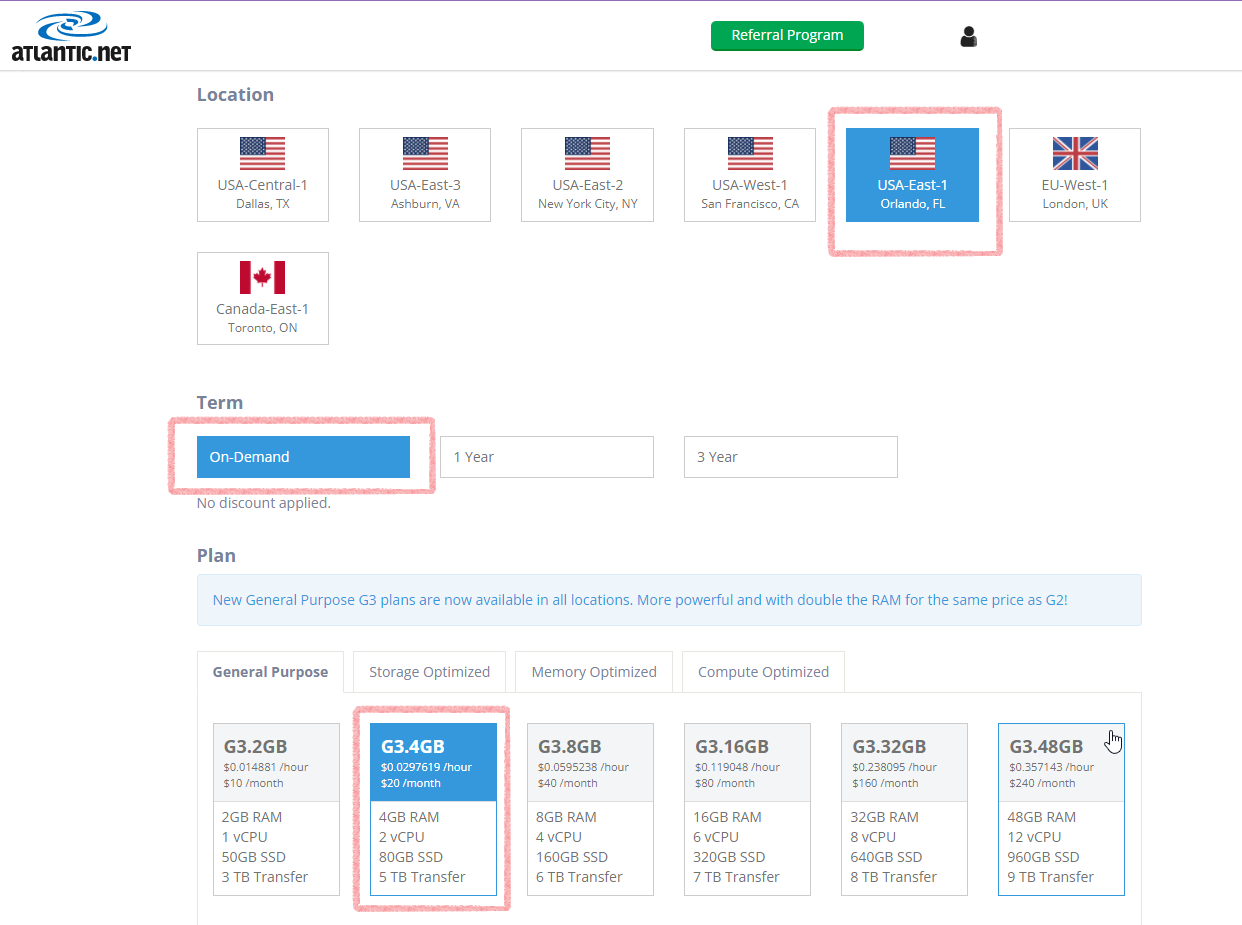
- Choose a Location > Select a Term > Choose a server Plan.
- Important: At the bottom of the page, tick the check box for enabling backups and click Create Server.
- After the server has finished provisioning, check the backup status and you will see it enabled.

Enable Cloud Backups on Existing Servers
If you already have an existing server, the process is simple.
- Log into the Atlantic.Net Cloud Console – https://cloud.atlantic.net/
- Select the server you want to add a Cloud Backup to.
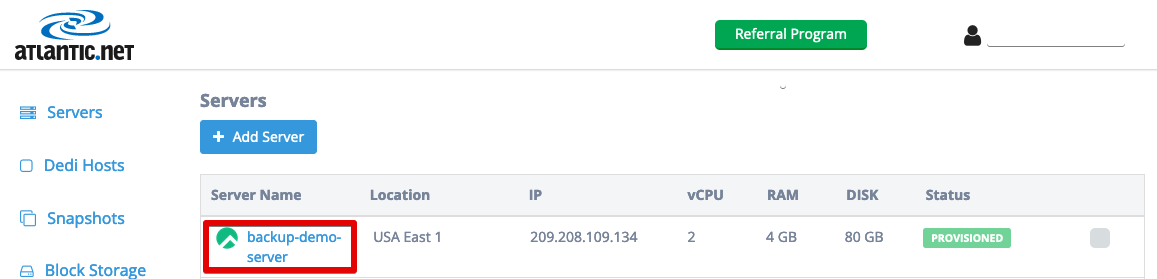
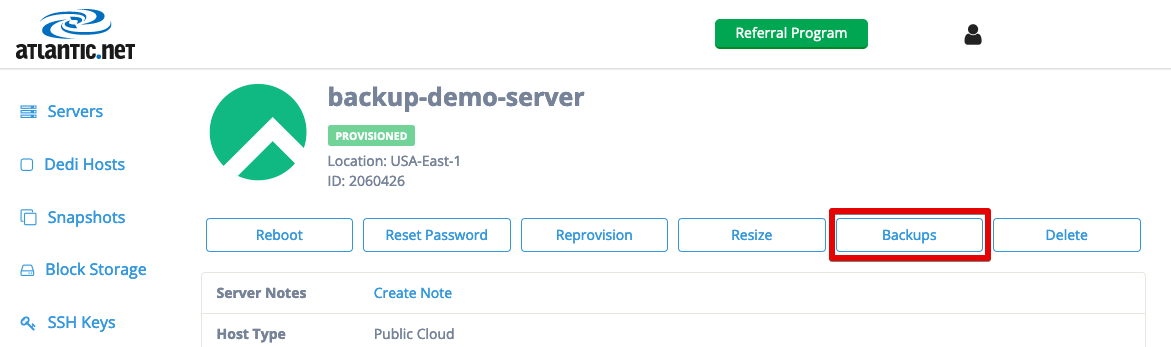
- From the Server Information page, locate and press the backups button.
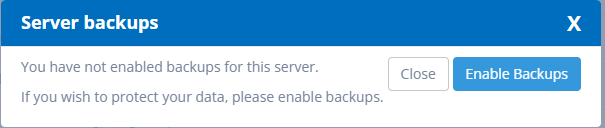
- A prompt will appear. Select Enable Backups.
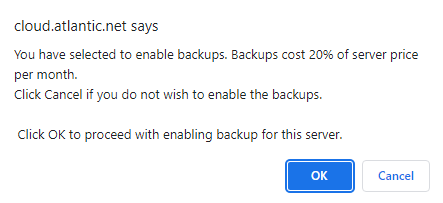
- Another prompt will appear that confirms the 20% charge for backups. Click OK if you agree to the charges.
- That’s it! Your backups are now enabled. The server will back up at the next backup run. A backup occurs every 24 hours on each Atlantic.Net Cloud VPS.
Need Help with a Restore?
ACP cloud backups have 2 restore options.
- File Level Recovery
- Full System Store
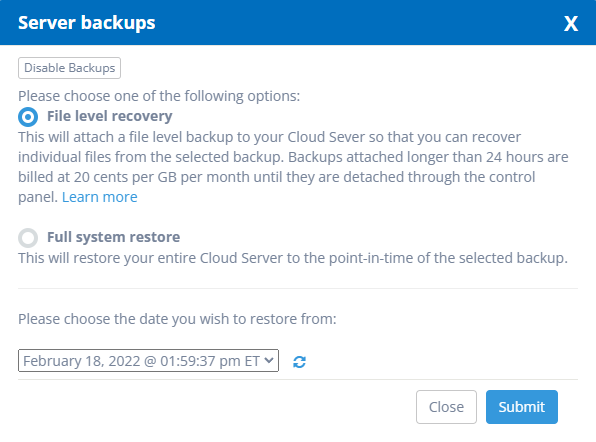
How to Complete a File-Level Recovery
For information on how to complete a file-level restore, please check this procedure that gives you a detailed end-to-end process to follow.
How to Complete a Full System Restore
- Log in to the Atlantic.Net Cloud Console – https://cloud.atlantic.net/.
- Select the server you want to restore.
- From the Server Information page, locate and press the Backups button.
- Select Full System Restore and choose the date you want to restore to, then click Submit.
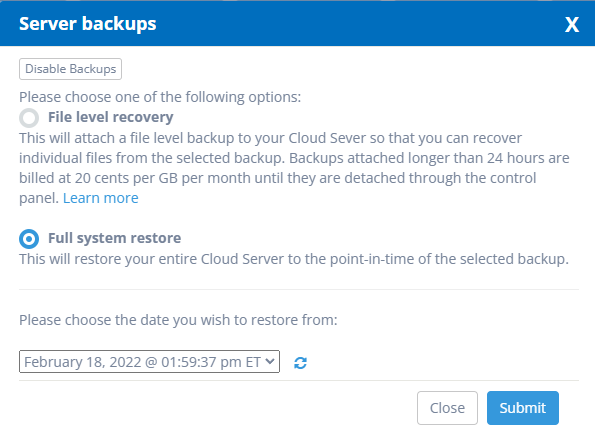
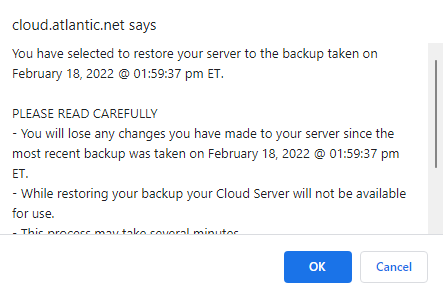
- You will be greeted by the following prompt. Click OK to proceed.
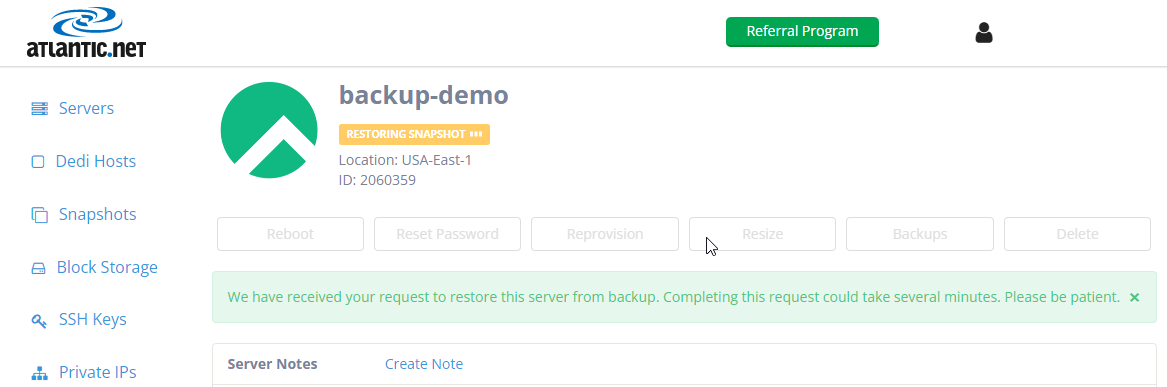
- It will typically only take a few moments to recover the server. It depends on how big the backups are and the rate of change on the server.

Written by
Alexander Wise is Content Editor for Atlantic.Net. He has over 15 years of experience in editing, copywriting, and managing content.