Introduction
The Network and Sharing Center is one of the most important tools in Windows Server. You use it to manage network adapters, change IP addresses, configure DNS, and troubleshoot connectivity issues.
In this guide, you’ll learn how to open the Network and Sharing Center in Windows Server 2008, 2012, 2016, 2019, 2022, and 2025, using the easiest and fastest methods for each version.
This tutorial focuses on practical steps, not theory, so you can get where you need to go without confusion.
What Is the Network and Sharing Center?
The Network and Sharing Center is the central place where you can:
-
View active network connections
-
Open Network Connections (Ethernet adapters)
-
Change IPv4 and IPv6 settings
-
Configure DNS and gateway values
-
Diagnose network problems
Most administrators open it when they need to edit network interfaces, especially on servers with static IP addresses.
Opening the Network and Sharing Center in Windows Server
There are many different ways to do this; however, I will share some of the easiest ways. Feel free to comment about this guide if you know another easy way that I overlooked!
Method 1: Using the Network Tray Icon (Quickest Way)
Most Servers will have the Network Monitor icon visible by default.
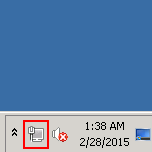
Sample Tray Icon
Right-click this and then click on “Open Network and Sharing Center.”
Method 2: Using the Start Screen (Recommended)
1. For Windows Server 2008, 2012 and 2016
The next option is to use search from the Start Screen. Click on the Start Screen button, and type one of the main words, “Network,” “Sharing,” “Center.” “Center” will have the fewest options that pop up, so it would be your best bet, but any one of these will work. Note that what you start to type will appear in the top right of the window.
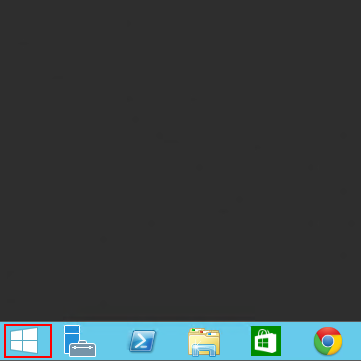
Start Button

Search
2. For Windows Server 2019 and 2022
Microsoft changed the workflow in newer versions. You now start from Ethernet Settings.
-
Click the Search bar on the taskbar
-
Type Ethernet Settings
-
Open Ethernet Settings
-
Click Network and Sharing Center
This method works the same way on both Server 2019 and Server 2022.
3. For Windows Server 2025
Windows Server 2025 continues the modern Settings-based approach.
-
Click the Search bar
-
Type Ethernet Settings
-
Open Ethernet Settings
From here, you can manage adapters or navigate to advanced network options.
Method 3: Using Server Manager (Direct Access to Network Connections)
If you already have the Server Manger open, then you can bypass the Network and Sharing Center. Click on Local Server, which you see highlighted below.
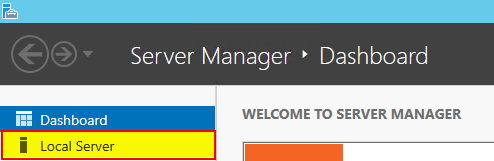
Server Manager Dashboard
Then you can click on the networking information. It is a link that will take you directly to the “Network Connections” page.
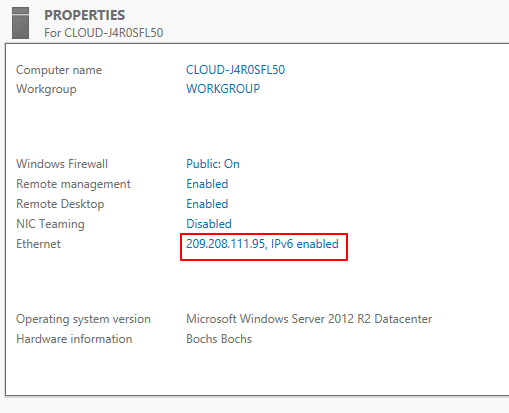
Server Manager properties
Final Thoughts
Although Microsoft has changed the interface over the years, the Network and Sharing Center remains essential for Windows Server administration.
Once you know the correct path for your server version, you can reach your network settings in seconds instead of clicking through menus.
If you manage VPS or dedicated servers, this is one of those shortcuts you’ll use almost daily—so it’s worth remembering.
Thank you for following along, and feel free to check back with us for further updates or learn more about our reliable VPS hosting servers and VPS hosting price.
* This post is for informational purposes only and does not constitute professional, legal, financial, or technical advice. Each situation is unique and may require guidance from a qualified professional.
Readers should conduct their own due diligence before making any decisions.