Introduction
Rsync is a great way to synchronize files between servers or move files between servers without needing FTP. It connects two servers via the SSH protocol, allowing for the transfer of data between them. The rsync daemon, covered later in this article, uses its own protocol and runs on a specified port. Below we’ll go over the basics; copying between servers, copying to/from rsync daemons, and keeping files in sync with each other on different servers.
Prerequisites
– 2 Linux servers that both have rsync installed.
– The server initiating the transfer must be able to access the receiving server’s SSH port (or rsync port if connecting to a rsync daemon).
– The user needs to have permission to use rsync (the examples below will be run as the root user).
Basics of Rsync
Rsync can push files to another server or pull files from another server. The difference between the two is in the syntax. If you specify your local file first, it will initiate a push. If you specify your remote host first, it will initiate a pull. Let’s see the exact type of syntax below.
rsync [-options] SOURCE user@x.x.x.x:DESTINATION
Pull:
rsync [-options] user@x.x.x.x:SOURCE DESTINATION
The [-options] are all the different options that can be used. Some I’ll reference and explain in examples below. For a full list of all the options, review the manual page.
SOURCE stands for the /directory/path/to/the/file/or/directory which will be copied.
DESTINATION stands for the /directory/path/to/the/new/location on the receiving host.
The user@ is the user on the remote host for rsync to connect with.
x.x.x.x stands for the IP address of the remote host. It can also be a hostname if you have DNS configured.
Now, say you need to specify a port outside of the default port 22 for rsync to connect to. You would do this with the option -e. See the example below (replace PORT it with the port number you need to connect to).
Push:
rsync [-other options] -e 'ssh -p PORT' SOURCE user@x.x.x.x:DESTINATION
Pull:
rsync [-other options] -e 'ssh -p PORT' user@x.x.x.x:SOURCE DESTINATION
Simple File Transfer Examples
First, we will initiate a push of a .txt file from one server to another.
rsync /home/simple.txt root@x.x.x.x:/home
This command will copy the file simple.txt from our local server to our remote server’s /home directory.
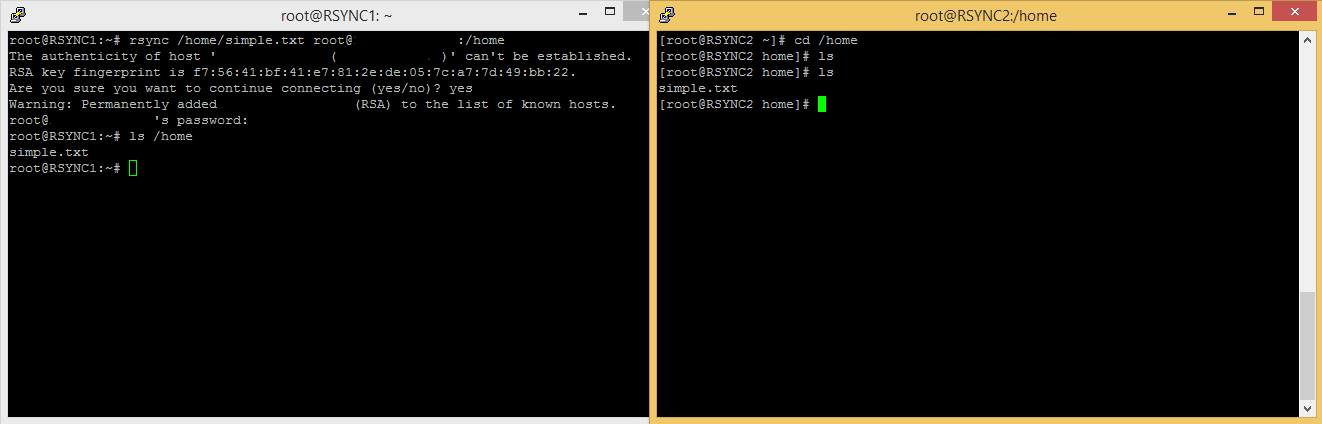 Rsync Transfer between two servers.
On the right, we did an ls before the rsync and then again after it was run, so we can see the file was copied.
Here is an example of a pull:
rsync root@x.x.x.x:/home/pullme.txt /home
The file pullme.txt is on the remote server (x.x.x.x) in the /home directory. This command will copy the file to the local server’s /home directory.
You can push/pull any single file you specify using this method. Now, let’s get into directories.
Directory File Transfer
Moving a directory is simple. Add the -d option, and it will move only the directory. If you want to move the directory and its contents, use -r instead to recursively copy over all files and subfolders. While we’re at it, let’s tack on the -t option. This option will copy the date and time that the file was last changed. Using -t is good for keeping accurate records of when a file was last edited. These options will work with pushing or pulling.
In the below example, I have moved the pullme.txt file into a /transfer_me directory. I have also created the directory /simple (which contains the file simple.txt) inside /transfer_me. I then pushed the /transfer_me directory to the remote server.
rsync -rt /home/transfer_me root@x.x.x.x:/home
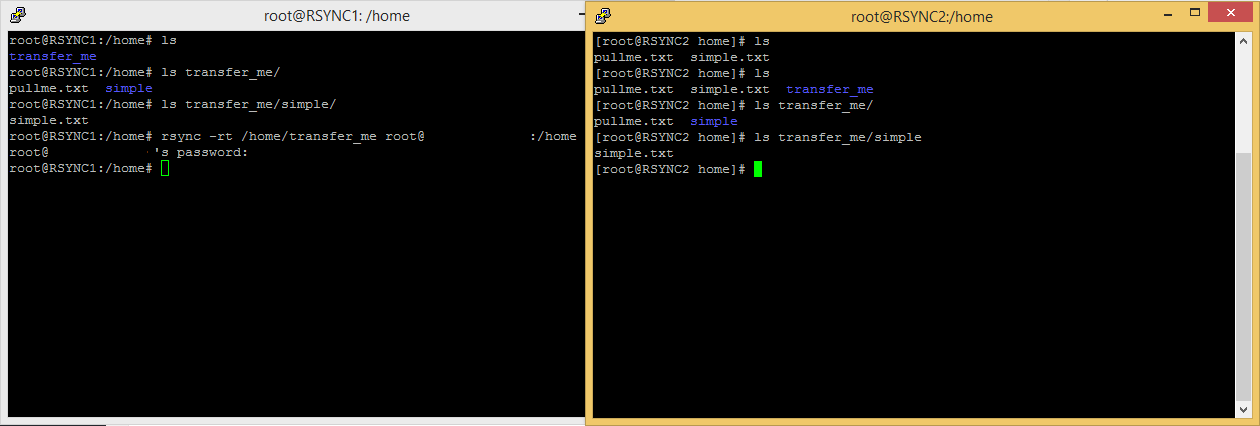
As you can see, the remote (receiving) folder contains all the subdirectories and files that the local folder did on the initiating server.
Connecting to an Rsync Daemon
This section requires a server running a rsync daemon. To test these instructions out, see our article on setting up a rsync daemon.
Now that we’ve gone over basic file/directory transferring with rsync, we can go over connecting to a rsync daemon. An rsync daemon runs constantly on a server, so you can push to and/or pull from that server’s assigned rsync daemon directory at any time. There are two formats for pulling and pushing to a rsync daemon.
Pull:
rsync [-options] rsync://user@x.x.x.x[:PORT]SOURCE DESTINATION
Pull (note the double colons after the IP address/hostname):
rsync [-options] user@x.x.x.x::SOURCE DESTINATION
Push:
rsync [-options] SOURCE rsync://user@x.x.x.x[:PORT]DESTINATION
Push (note the double colons after the IP address/hostname):
rsync [-options] SOURCE user@x.x.x.x::DESTINATION
See below how I pulled from the rsync daemon (the use of port number 873 below is redundant since that’s the default rsync daemon connection port–I include it to demonstrate how you would format the command if you had set up a non-default port on your rsync daemon):
rsync -rt rsync://root@x.x.x.x:873/files/ /home/pulledfromdaemon
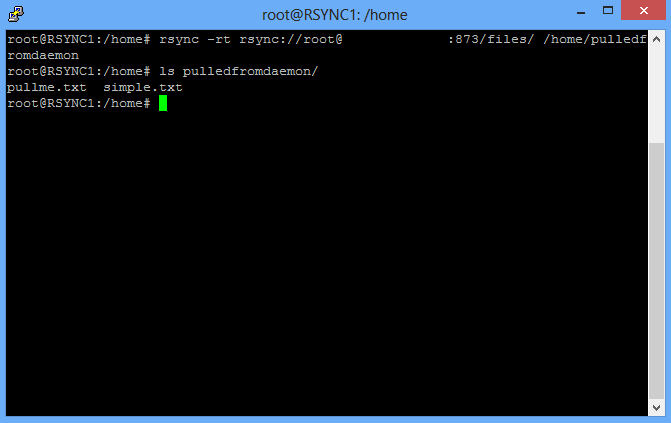
Here, files is the module name. Since we’re pulling everything in that directory (pullme.txt and simple.txt) We leave it at the module name for the source.
Syncing Files with Rsync
Now we’ll discuss how to sync files. You can perform a sync with a single rsync command with the right options. You can put this command in a script or cron job to run on demand or automatically. The command varies if you are pushing or pulling or using the daemon, but the options remain the same.
rsync -rtu --delete SOURCE root@x.x.x.x:/DESTINATION
In this example, pay attention to the -rtu --delete options. We have already discussed the -r and -t options–recursive copy and time stamp copy. The -u option tells rsync to update only different/changed/added files from the SOURCE to the DESTINATION. The option --delete will remove any files from DESTINATION that the SOURCE may no longer have. With this (and other options, like -l for symlinks) you can keep directories in multiple locations up to date with the source.
You can now rsync files between servers, rsync daemons, and keep files synced with each other easily. Thank you for following this how-to! Please check back here for more updates, or take a look at the many services we offer, including VPS hosting.
Learn more about our VPS hosting services and Virtual private servers.
* This post is for informational purposes only and does not constitute professional, legal, financial, or technical advice. Each situation is unique and may require guidance from a qualified professional.
Readers should conduct their own due diligence before making any decisions.