Table of Contents
- Prerequisites
- Step 1 - Set Up the Hostname
- Step 2 - Install Apache, MariaDB and PHP
- Step 3 - Install Let’s Encrypt SSL Certificate
- Step 4 - Install and Configure Postfix
- Step 5 - Install and Configure Dovecot
- Step 6 - Configure Dovecot to Use Let's Encrypt SSL
- Step 7 - Install and Configure Roundcube
- Step 8 - Access Roundcube Webmail
- Conclusion
Setting up your own mail server on Linux VPS is an important task for any Linux system administrator. Postfix is one of the most widely used and easiest mail server solutions available. It is a free, open-source, and powerful Mail Transfer Agent (MTA) that can be used to send and receive email. By default, Postfix is the default MTA software on all Linux distributions.
Dovecot is an open-source IMAP and POP3 email server that can act as a mail storage server. It is used to deliver and retrieve emails to and from local mailboxes.
Roundcube is a web-based IMAP email client that can read emails stored by Dovecot on virtual mailboxes. It provides all features you expect from an email client including MIME support, multiple sender identities, spell checking, folder manipulation, and many more.
In this tutorial, we will show you how to set up a full-featured Mail server with Postfix, Dovecot and Roundcube on Ubuntu 20.04 VPS.
Prerequisites
- A fresh Ubuntu 24.04 VPS.
- A valid domain name pointed to your VPS IP address. In this tutorial, we will use email.example.com.
- A & MX records for your server.
Note: You can refer to the Atlantic DNS Guide to manage the DNS records.
Step 1 – Set Up the Hostname
Next, you will need to set the hostname of your server. In this case, we will set the hostname to mail.example.com, as shown below:
hostnamectl set-hostname email.example.com
Next, open /etc/hosts file and bind your server IP address with the hostname:
nano /etc/hosts
Add the following line:
your-server-ip email.example.com email
Save and close the file. Then, run the following command to apply the configuration changes:
hostname -f
Step 2 – Install Apache, MariaDB and PHP
Roundcube requires Apache, MariaDB and PHP to be installed on your server. You can install them with the following command:
apt-get install apache2 mariadb-server php libapache2-mod-php php-mysql -y
After installing all the required packages, you will need to enable the Apache rewrite module for Roundcube to work. You can enable it with the following command:
a2enmod rewrite
Next, reload the Apache service to apply the changes:
systemctl restart apache2
Step 3 – Install Let’s Encrypt SSL Certificate
Next, you will need to install the Let’s Encrypt Free SSL certificate on your server to configure your mail server with TLS.
First, install the Certbot client in your server with the following command:
add-apt-repository ppa:certbot/certbot
apt-get update -y
apt-get install python-certbot-apache -y
Next, download the Let’s Encrypt Free SSL certificate for your domain email.example.com with the following command:
certbot certonly --apache -d email.example.com
This command will download the certificate in the /etc/letsencrypt/live/email.example.com/ directory.
Step 4 – Install and Configure Postfix
Next, let’s start to install a Postfix mail server with the following command:
apt-get install postfix
You will be redirected to the following screen:
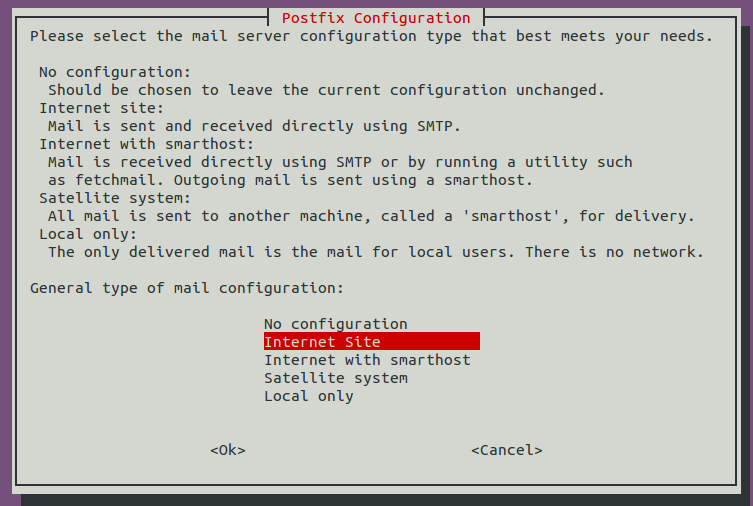
Select Internet Site and press TAB and Enter to continue. You should see the following screen:
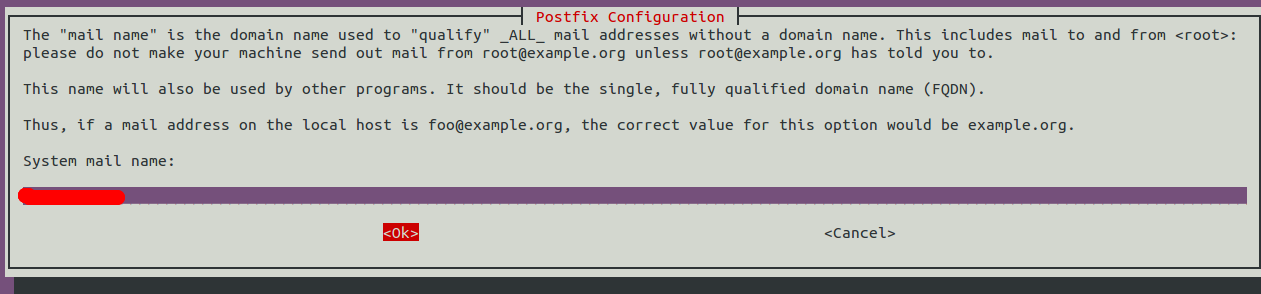
Provide your domain name and hit Tab and Enter to finish the installation.
The default Postfix configuration file is located at /etc/postfix/main.cf. Before configuring Postfix, it is recommended to back up this file:
mv /etc/postfix/main.cf /etc/postfix/main.cf.bak
Next, create a new Postfix configuration file as shown below:
nano /etc/postfix/main.cf
Add the following lines:
# GENERAL SETTINGS
smtpd_banner = $myhostname ESMTP $mail_name
biff = no
append_dot_mydomain = no
readme_directory = no
# SMTP SETTINGS
smtp_use_tls=yes
smtp_tls_security_level = may
smtp_tls_session_cache_database = btree:${data_directory}/smtp_scache
# SMTPD SETTINGS
smtpd_use_tls=yes
smtpd_tls_security_level = may
smtpd_tls_session_cache_database = btree:${data_directory}/smtpd_scache
smtpd_tls_cert_file=/etc/letsencrypt/live/email.example.com/fullchain.pem
smtpd_tls_key_file=/etc/letsencrypt/live/email.example.com/privkey.pem
smtpd_relay_restrictions = permit_mynetworks, permit_sasl_authenticated,  reject_unauth_destination
# SASL SETTINGS
smtpd_sasl_auth_enable = yes
smtpd_sasl_type = dovecot
smtpd_sasl_path = private/auth
# VIRTUAL MAIL BOX AND LMTP SETTINGS
virtual_transport = lmtp:unix:private/dovecot-lmtp
virtual_mailbox_domains = /etc/postfix/virtual_mailbox_domains
# OTHER SETTINGS
myhostname = email.example.com
myorigin = /etc/mailname
mydestination =  localhost.$mydomain, localhost
relayhost =
mynetworks = 127.0.0.0/8 [::ffff:127.0.0.0]/104 [::1]/128
mailbox_size_limit = 0
recipient_delimiter = +
inet_interfaces = all
inet_protocols = all
alias_maps = hash:/etc/aliases
alias_database = hash:/etc/aliases
Save and close the file.
Next, you will need to define your domain in the /etc/postfix/virtual_mailbox_domains file:
nano /etc/postfix/virtual_mailbox_domains
Add the following line:
example.com #domain
Save and close the file then create another file:
nano /etc/mailname
Add your FQDN.
email.example.com
Next, convert the file to a format that Postfix can understand with the following command:
postmap /etc/postfix/virtual_mailbox_domains
Next, edit the Postfix master configuration file:
nano /etc/postfix/master.cf
Uncomment the following line:
submission inet n - y - - smtpd
Save and close the file when you are finished.
Step 5 – Install and Configure Dovecot
Next, you will need to install Dovecot with other required packages. You can install them using the following command:
apt-get install dovecot-core dovecot-imapd dovecot-pop3d dovecot-lmtpd -y
Next, you will need to define the Dovecot mail location to communicate with Postfix and virtual mailbox domains. You can define it by editing /etc/dovecot/conf.d/10-mail.conf file:
nano /etc/dovecot/conf.d/10-mail.conf
Find the following line:
mail_location = mbox:~/mail:INBOX=/var/mail/%u
And replace it with the following:
mail_location = maildir:/var/mail/vhosts/%d/%n
Save and close the file.
Next, create the Dovecot vhosts directory and the sub-directory for your domain name.
mkdir /var/mail/vhosts
mkdir /var/mail/vhosts/example.com
Next, create a vmail user and a group, and assign the ownership of the directories to the vmail user.
groupadd -g 5000 vmail
useradd -r -g vmail -u 5000 vmail -d /var/mail/vhosts -c "virtual mail user"
chown -R vmail:vmail /var/mail/vhosts/
Next, edit the Dovecot master configuration file and enable IMAP and POP3 secure services:
nano /etc/dovecot/conf.d/10-master.conf
Find the following lines:
inet_listener imaps {
    #port = 993
    #ssl = yes
  }
And replace them with the following:
inet_listener imaps {
    port = 993
    ssl = yes
  }
On the same file, find the following lines:
inet_listener pop3s {
    #port = 995
    #ssl = yes
  }
And replace them with the following:
inet_listener pop3s {
    port = 995
    ssl = yes
  }
Next, find the following lines:
service lmtp {
unix_listener lmtp {
#mode = 0666
}
And replace them with the following:
service lmtp {
unix_listener /var/spool/postfix/private/dovecot-lmtp {
mode = 0600
user = postfix
group = postfix
}
Next, find the following lines:
service  auth {
  # Postfix smtp-auth
  #unix_listener /var/spool/postfix/private/auth {
  #  mode = 0666
  #}
}
And replace them with the following:
service auth {
...
#Postfix smtp-auth
unix_listener /var/spool/postfix/private/auth {
mode = 0666
user=postfix
group=postfix
}
Save and close the file when you are finished.
Next, set up the Dovecot authentication process by editing the file /etc/dovecot/conf.d/10-auth.conf:
nano /etc/dovecot/conf.d/10-auth.conf
Uncomment the following line:
disable_plaintext_auth = yes
On the same file, find the following line:
auth_mechanisms = plain
And replace it with the following:
auth_mechanisms = plain login
Next, comment out the following line to disable the default Dovecot behaviour for authenticating users.
#!include auth-system.conf.ext
Next, uncomment the following line to enable password file configuration.
!include auth-passwdfile.conf.ext
Save and close the file when you are finished.
Next, edit the /etc/dovecot/conf.d/auth-passwdfile.conf.ext file:
nano /etc/dovecot/conf.d/auth-passwdfile.conf.ext
Change the file as shown below:
passdb {
  driver = passwd-file
  args = scheme=PLAIN username_format=%u /etc/dovecot/dovecot-users
}
userdb {
driver = static
args = uid=vmail gid=vmail home=/var/mail/vhosts/%d/%n
}
Save and close the file.
Next, create a password file for the user you want to assign an email account:
nano /etc/dovecot/dovecot-users
Add the following lines:
admin@example.com:admin@123
Save and close the file.
Step 6 – Configure Dovecot to Use Let’s Encrypt SSL
Next, you will need to configure Dovecot to work with SSL. You can do it by editing the file /etc/dovecot/conf.d/10-ssl.conf:
nano /etc/dovecot/conf.d/10-ssl.conf
Find the following line:
ssl = yes
Replace it with the following:
ssl = required
Next, find the following lines:
#ssl_cert = </etc/dovecot/dovecot.pem
#ssl_key = </etc/dovecot/private/dovecot.pem
And replace them with the following:
ssl_cert = </etc/letsencrypt/live/email.example.com/fullchain.pem
ssl_key = </etc/letsencrypt/live/email.example.com/privkey.pem
Save and close the file when you are finished, then restart the Postfix and Dovecot services to apply the configuration changes:
systemctl restart postfix
systemctl restart dovecot
Step 7 – Install and Configure Roundcube
By default, Roundcube is available in the Ubuntu 24.04 default repository. You can install it by just running the following command:
apt-get install roundcube
During the installation, you will be prompted to configure the database. Choose your desired option and hit Enter to finish the installation.
Next, you will need to configure the Apache virtual host for Roundcube. You can do it by editing the file /etc/apache2/sites-enabled/000-default.conf:
nano /etc/apache2/sites-enabled/000-default.conf
Change the file as shown below:
<VirtualHost *:80>
        Alias /mail /usr/share/roundcube

        ServerAdmin webmaster@localhost
        DocumentRoot /var/www/html
        ErrorLog ${APACHE_LOG_DIR}/error.log
        CustomLog ${APACHE_LOG_DIR}/access.log combined

</VirtualHost>
Save and close the file, then restart the Apache web service to apply the changes:
systemctl restart apache2
Step 8 – Access Roundcube Webmail
Now, open your web browser and type the URL hhttp://email.example.com/mail. You will be redirected to the Roundcube login page:
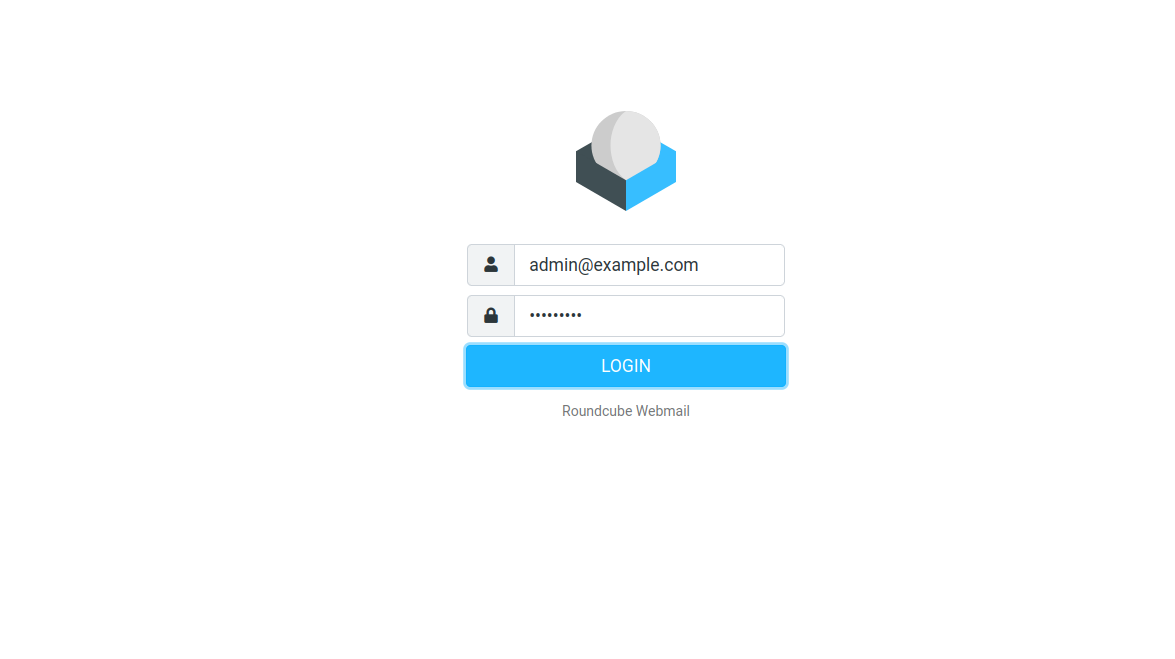
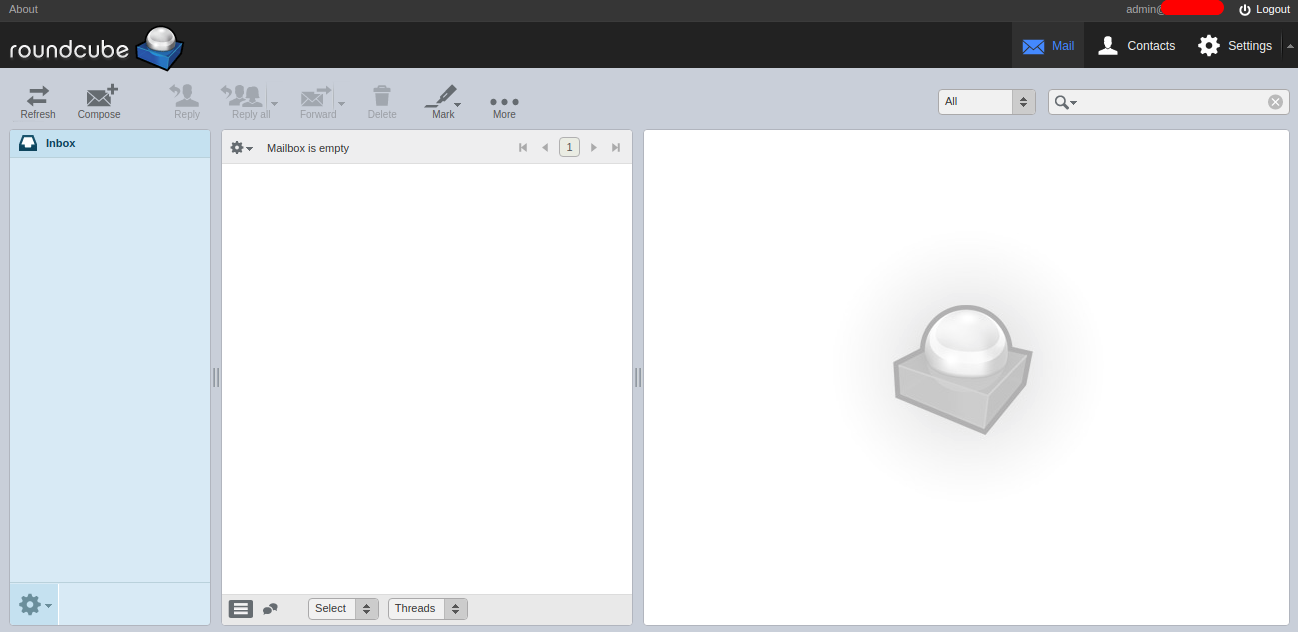
Provide your username and password which you have defined in the Dovecot password file and click on the Login button. You should see the Roundcube default dashboard in the following page:
Conclusion
Congratulations! You have successfully installed and configured a mail server with Postfix, Dovecot and Roundcube. You can now send and receive email from the Roundcube webmail dashboard. Ready to get started with Postfix, Dovecot and Roundcube? Try it out on a VPS Hosting account from Atlantic.Net today!
Learn more about our VPS hosting services and Virtual private servers.
* This post is for informational purposes only and does not constitute professional, legal, financial, or technical advice. Each situation is unique and may require guidance from a qualified professional.
Readers should conduct their own due diligence before making any decisions.