Introduction
This How-To will walk you through Configuring Windows Server 2012 R2 NIC Teaming to a Hyper-V Virtual Machine.
NIC Teaming is the name Microsoft gives for the process of combining multiple network interface controllers (NICs) for speed, redundancy, or both.
Prerequisites
– A Windows Server 2012 R2 server with the Hyper-V role installed.
– Minimum 2 NIC cards installed on your server.
Configuring Windows Server 2012 R2 NIC Teaming
Open the Server Manager. Right-click on Hyper-V and select Configure NIC Teaming.
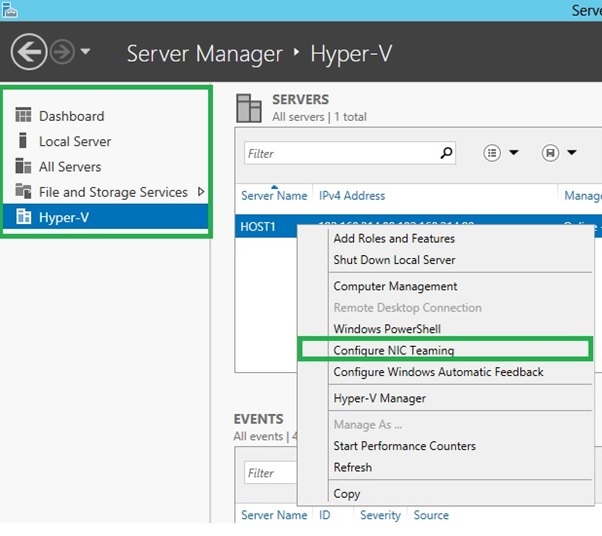
Server Manager: Hyper-V
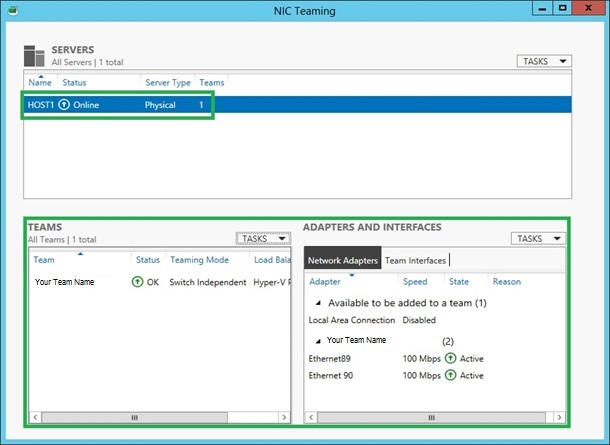
Locate the Task drop-down and select New Team. (Note: You will see the available NICs in the Adapters and Interfaces section).
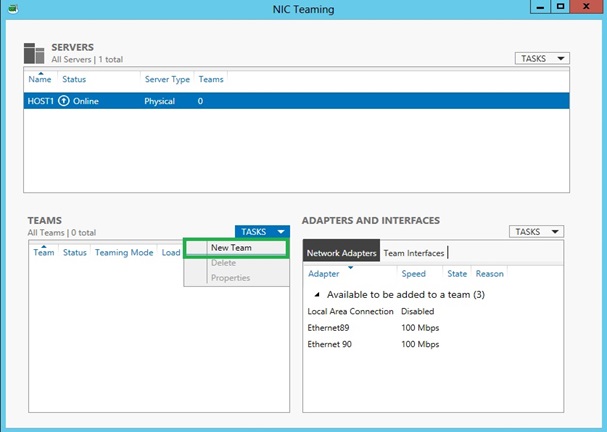
NIC Teaming
For Team Name, please type the name that you want to set it up as. Check the NIC cards that you want to team. In the additional properties drop-down, change the Load Balancing Mode to Hyper-V Port. (Note: Teaming Mode should be defaulted to “Switch Independent,” and Standby Adapter should be defaulted to “None(all adapters Active).”
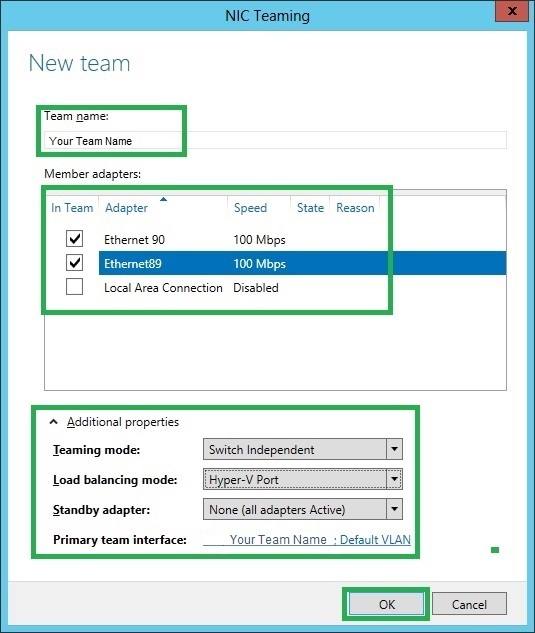
New Team
You will get a red Fault alert on the status. Don’t worry, it will come right up shortly and change to a green OK status.
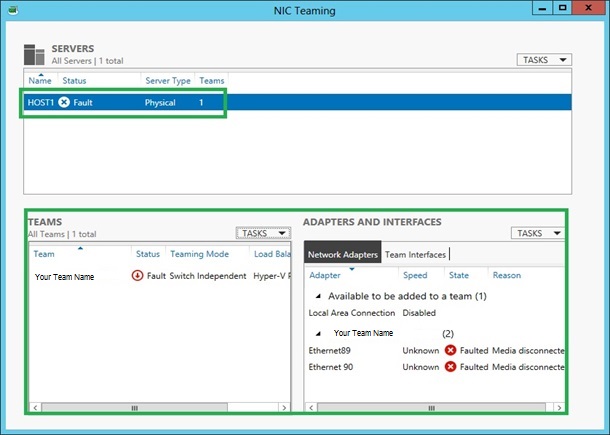
Team Status
Team status
Click on the Team Interface tab. Right-Click on your Team Name and select Properties.
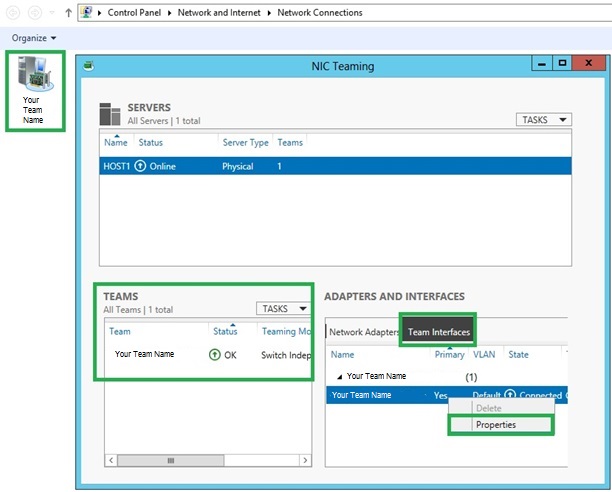
Team interface properties
In the Properties, you should see the Description set to “Microsoft Network Adapter Multiplexor Driver.” In the VLAN membership, verify that the Default option is selected and click OK.
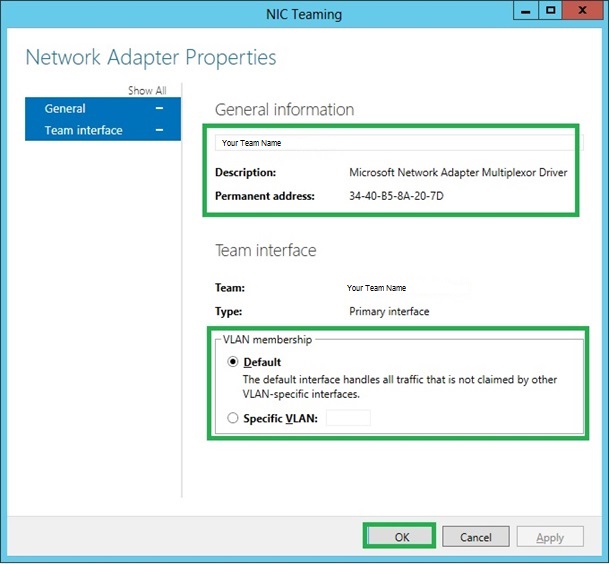
General Properties.
Go to Control Panel. Click Network and Internet. Click Network Connections and Right-Click on Your Team Name. Activate the “Microsoft Network Adapter Multiplexor Protocol (If it is not already checked).
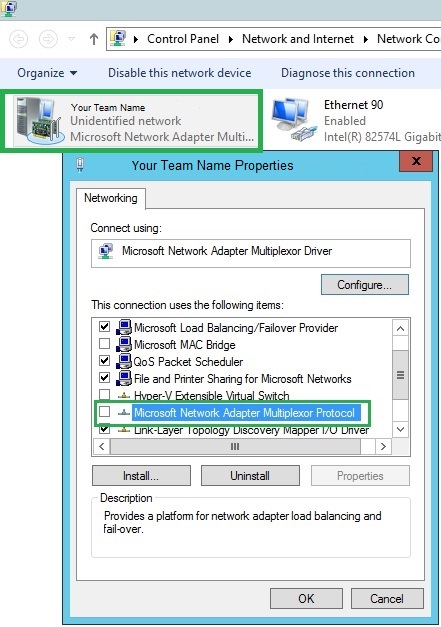
Team Properties
Go back to the Server Manager. Right-click on your server and select Hyper-V Manager. Select the Virtual Switch Manager. Click Create Virtual Switch.
Create a Name for the Virtual Switch. Select External Network, and click on the Microsoft Network Adapter Multiplexor Driver. Verify that the “Enable virtual LAN identification for management operating system” is checked. Then Click Apply and OK.
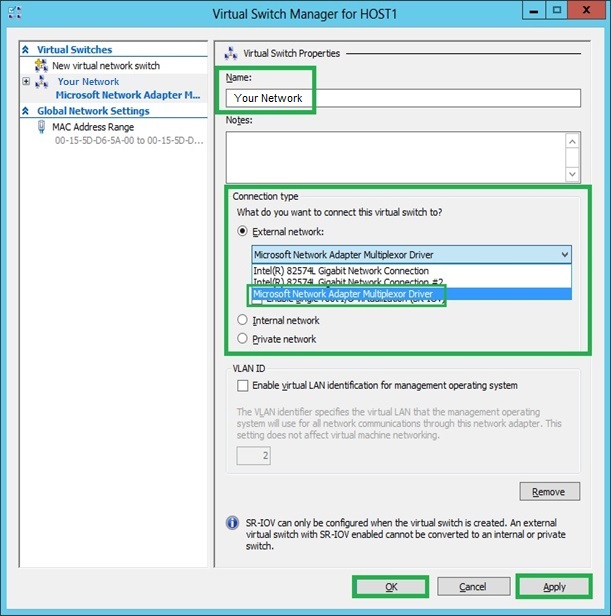
Virtual Switch
Verify that NIC Teaming is working correctly. Unplug one of the Network Cables on the NIC and notice that the server will remain with the network connection. Plug the Network Cable back and try it with the other Network Cable. (Note: You can also open up the command prompt while having one of the Network Cables disconnected and PING the Server. You will get a reply from the server with no problem).
Congratulations! You have just Configured Windows Server 2012 R2 NIC Teaming to a Hyper-V Virtual Machine. Thank you for following along in this How-To and check back with us for any new updates, or find out more about dedicated server hosting and VPS hosting from Atlantic.Net.
* This post is for informational purposes only and does not constitute professional, legal, financial, or technical advice. Each situation is unique and may require guidance from a qualified professional.
Readers should conduct their own due diligence before making any decisions.