Portainer is a lightweight, free, open-source Docker management UI that allows you to manage your Docker container from a web browser. It provides a simple and user-friendly web interface to build and manage containers, images, networks, volumes, registries, services, and nodes. Portainer is a handy tool for users who don’t know the Linux command line.
This post will show you how to install Portainer Docker UI on Debian. This procedure is compatible with Debian 11 and Debian 12.
Step 1 – Install Docker CE
Before installing Portainer, Docker CE must be installed on your server. You can install Docker CE by following the below steps:
apt-get update -y
First, install the required dependencies using the following command:
apt-get install apt-transport-https ca-certificates curl gnupg2 software-properties-common
Next, add the Docker CE repository with the following command:
curl -fsSL https://download.docker.com/linux/debian/gpg | gpg --dearmor -o /usr/share/keyrings/docker-archive-keyring.gpg
echo "deb [arch=$(dpkg --print-architecture) signed-by=/usr/share/keyrings/docker-archive-keyring.gpg] https://download.docker.com/linux/debian \
  $(lsb_release -cs) stable" | tee /etc/apt/sources.list.d/docker.list > /dev/null
Next, update the repository and install Docker CE with the following command:
apt-get update -y
apt-get install docker-ce docker-ce-cli containerd.io -y
Once Docker is installed, verify the Docker installation using the following command:
docker version
You should see the following output:
Client: Docker Engine - Community
Version: 28.4.0
API version: 1.51
Go version: go1.24.7
Git commit: d8eb465
Built: Wed Sep 3 20:57:37 2025
OS/Arch: linux/amd64
Context: default
Step 2 – Install Docker Compose
You will also need to install Docker Compose to your system. First, download the latest version of Docker Compose binary using the following command:
wget https://github.com/docker/compose/releases/download/v2.39.2/docker-compose-linux-x86_64
Next, copy the downloaded binary to the system path:
cp docker-compose-linux-x86_64 /usr/local/bin/docker-compose
Next, set executable permissions to the Docker Compose binary:
chmod +x /usr/local/bin/docker-compose
Next, verify the Docker Compose installation using the following command:
docker-compose --version
You should see the following output:
Docker Compose version v2.39.2
Step 3 – Install Portainer UI
First, create a volume to store Portainer data using the following command:
docker volume create portainer_data
Next, run the following command to download the Portainer image from the Docker Hub registry, create a container, and expose the container on port 9000:
docker run -d -p 8000:8000 -p 9000:9000 --name=portainer --restart=always -v /var/run/docker.sock:/var/run/docker.sock -v portainer_data:/data portainer/portainer
You should see the following output:
Unable to find image 'portainer/portainer:latest' locally
latest: Pulling from portainer/portainer
94cfa856b2b1: Pull complete
49d59ee0881a: Pull complete
a2300fd28637: Pull complete
Digest: sha256:fb45b43738646048a0a0cc74fcee2865b69efde857e710126084ee5de9be0f3f
Status: Downloaded newer image for portainer/portainer:latest
69d06a5c41851cc85df1924aa77566d2f38978faad5c27f52e089af8a0dc931e
You can verify the running container using the following command:
docker ps
You should see the following output:
CONTAINER ID   IMAGE                 COMMAND        CREATED          STATUS          PORTS                                                                                  NAMES
69d06a5c4185   portainer/portainer   "/portainer"   12 seconds ago   Up 11 seconds   0.0.0.0:8000->8000/tcp, :::8000->8000/tcp, 0.0.0.0:9000->9000/tcp, :::9000->9000/tcp   portainer
Step 4 – Access Portainer UI
Now, open your web browser and access the Portainer UI using the URL http://your-server-ip:9000. You should see the following page:
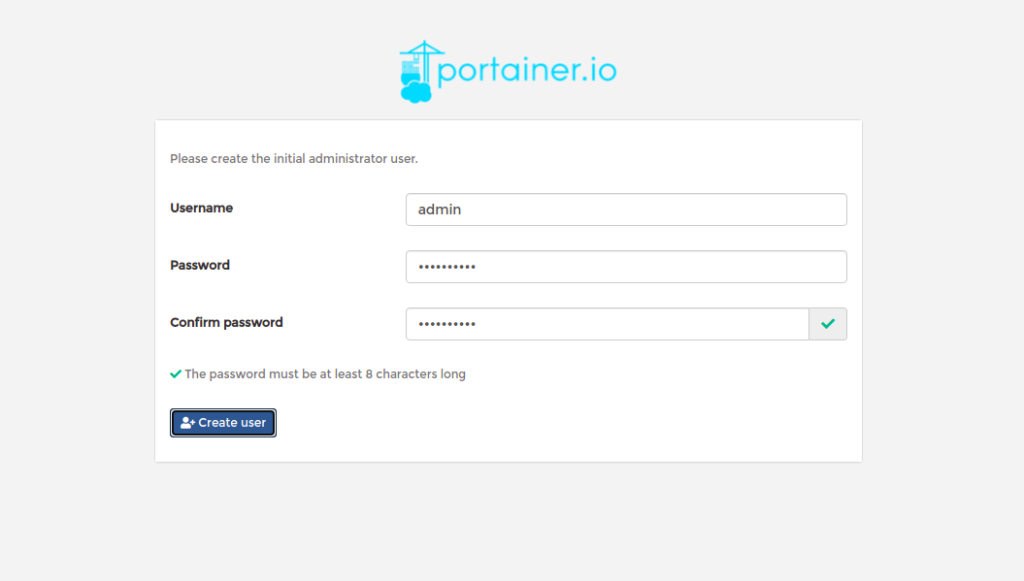
Set your admin user and password and click on the Create user button. You will be asked to select the Docker environment that you want to manage:
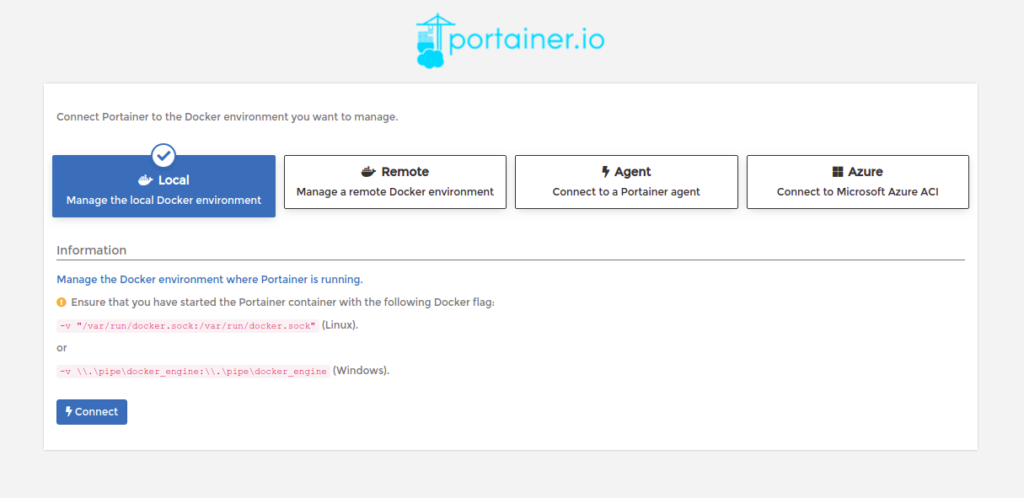
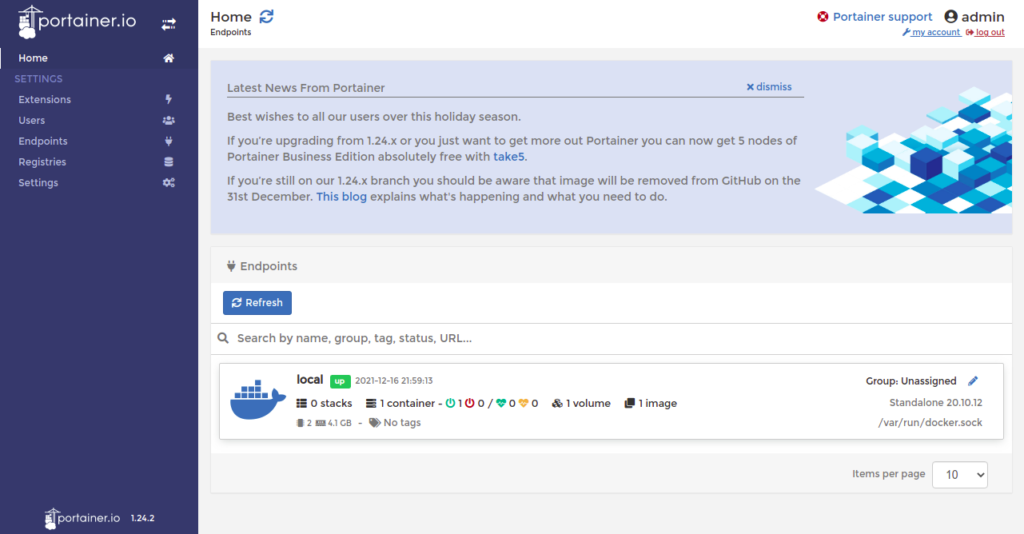
Select the local environment and click on the Connect button. You should see the Portainer UI on the following page:
Conclusion
Congratulations! You have successfully installed Portainer UI on Debian 11. You can now create, deploy, and manage Docker containers from a web browser. Try it on dedicated hosting from Atlantic.Net!
* This post is for informational purposes only and does not constitute professional, legal, financial, or technical advice. Each situation is unique and may require guidance from a qualified professional.
Readers should conduct their own due diligence before making any decisions.