
To connect OpenClaw or Hermes to OpenAI, Anthropic, or OpenRouter, create an API key with your chosen provider, save it as an environment variable, and select a supported model in the agent’s configuration. OpenClaw uses provider names such as openai, anthropic, and openrouter. Hermes uses openai-api for direct OpenAI access, anthropic for Claude models, and openrouter for models routed through OpenRouter. After saving the credentials, restart the agent service and send a simple test prompt to confirm the connection.
OpenClaw and Hermes Agent are self-hosted AI agent platforms. They handle conversations, tools, workflows, and integrations, but they do not supply the underlying language model. You must connect them to an external inference provider before they can generate responses or complete agent tasks.
The setup requires three components:
- An active OpenAI, Anthropic, or OpenRouter account.
- A valid API key or supported OAuth login.
- A model selected in OpenClaw or Hermes.
The main configuration difference is the provider identifier. OpenClaw uses openai for direct OpenAI models, while Hermes uses openai-api. OpenRouter model names also follow different formats in each agent. Using the wrong provider name or model prefix can cause authentication errors or “model not found” messages.
This tutorial covers installation, API-key storage, model selection, connection testing, provider switching, and common errors for both platforms.
Before You Start
Create an API key for every provider you plan to use.
For OpenAI, create a project API key in the OpenAI Platform. For Anthropic, create a key under Settings => API keys in the Claude Console. For OpenRouter, create a key from the OpenRouter keys page.
Treat each key as a password:
- Do not paste keys into public repositories.
- Do not place keys in browser-side code.
- Store keys in environment variables or the agent’s protected credentials file.
- Use separate keys for separate machines or deployments.
- Rotate a key immediately if it appears in logs, screenshots, or source control.
OpenAI specifically recommends the OPENAI_API_KEY environment variable name and warns against sharing keys or committing them to code.
The examples below use placeholders such as YOUR_OPENAI_KEY. Replace them locally. Never publish the completed commands.
Connect OpenClaw to OpenAI, Anthropic, or OpenRouter
In this section, you will learn how to connect OpenClaw to OpenAI, Anthropic and OpenRouter.
1. Connect OpenClaw to OpenAI
OpenClaw supports two OpenAI authentication paths:
- A Platform API key with usage-based billing.
- ChatGPT/Codex OAuth for eligible subscription access.
Use an API key for servers, shared automations, and environments where predictable service authentication matters.
Method 1: Use the OpenAI onboarding flow
Open your terminal and export the OpenAI API key in your current shell:
export OPENAI_API_KEY="YOUR_OPENAI_KEY"Then run the command below to start the onboarding process.
openclaw onboard --auth-choice openai-api-keyYou will be asked to select Setup mode.
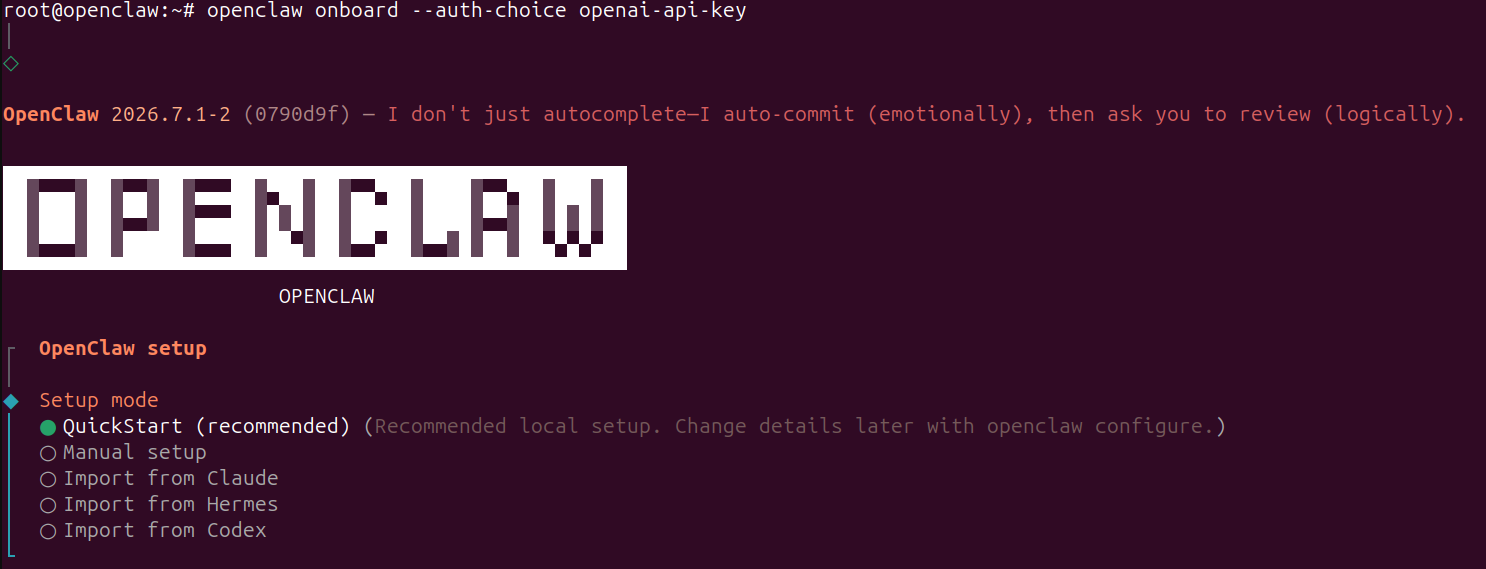
Select QuickStart and hit Enter. You will be asked to use an existing OpenAI API key.

Select Yes and hit Enter to complete the remaining process.
Now, list the OpenAI models available to your account:
openclaw models list --provider openaiYou will see all OpenAI models below:
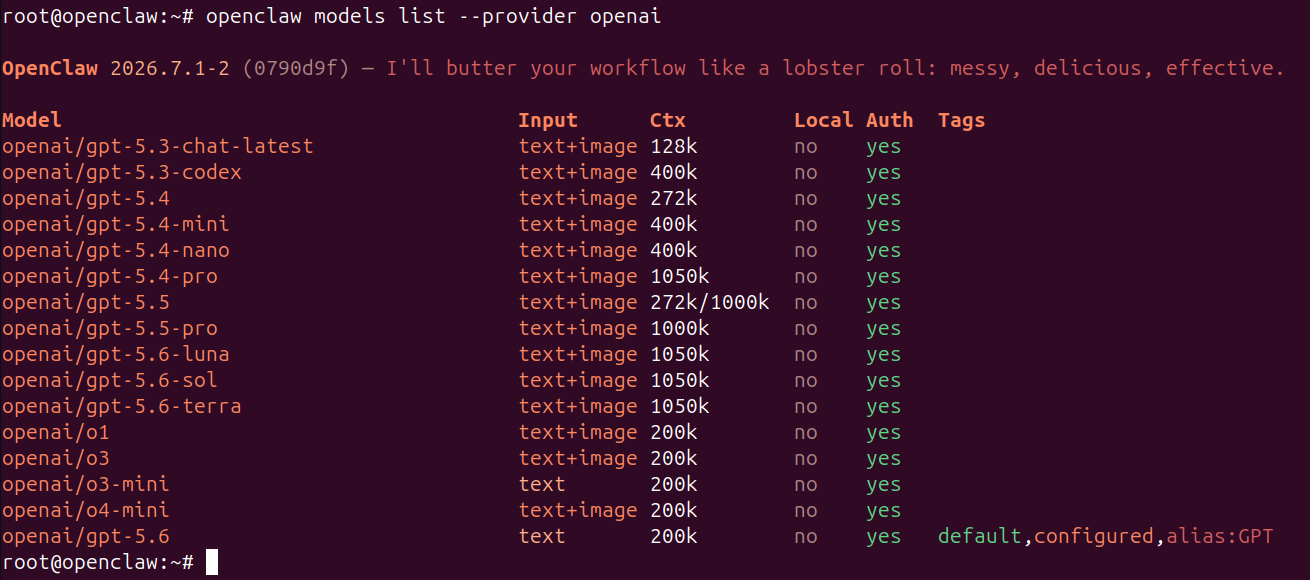
Select a model from the above list and set it default model:
openclaw models set openai/gpt-5.6At the time of writing, fresh direct-API setups may use openai/gpt-5.6. Account access can vary, so the output of openclaw models list –provider openai should take precedence over a copied model name. OpenClaw does not silently downgrade an unavailable model.
Method 2: Use OpenAI OAuth
Run the OpenAI login flow:
openclaw models auth login --provider openaiFor a remote machine that cannot receive a browser callback, use device-code authentication:
openclaw models auth login --provider openai --device-codeThe above command generates a verification URL and device code. Open the displayed verification URL in any browser, enter the device code, sign in to your OpenAI account, and approve access. Then run openclaw models list –provider openai to confirm authentication and select an available model.
2. Connect OpenClaw to Anthropic
The most predictable Anthropic setup uses an ANTHROPIC_API_KEY.
First, export your Anthropic API key :
export ANTHROPIC_API_KEY="YOUR_ANTHROPIC_KEY"Next, start the onboarding process.
openclaw onboard --anthropic-api-key "$ANTHROPIC_API_KEY"You will be asked to select Setup mode.
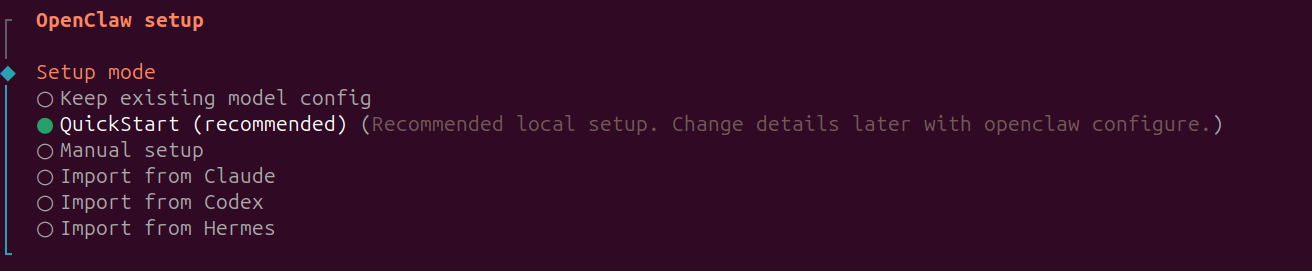
Select QuickStart and hit Enter. You will be asked to select a model provider.
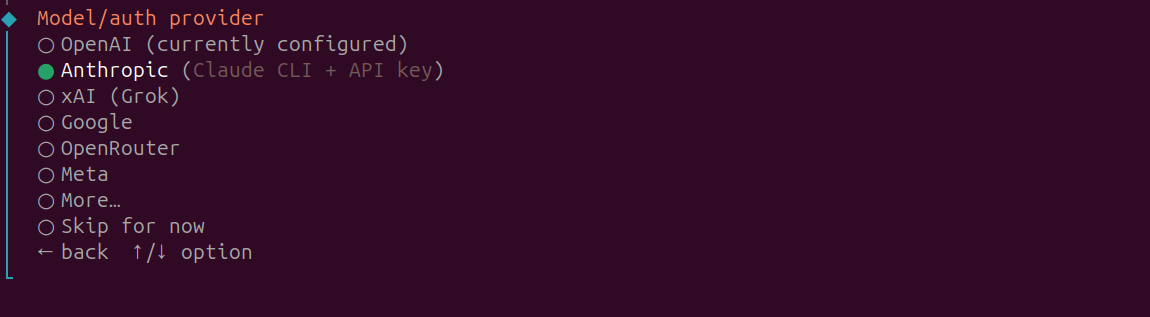
Select Anthropic and hit Enter. You will be asked to select auth method.
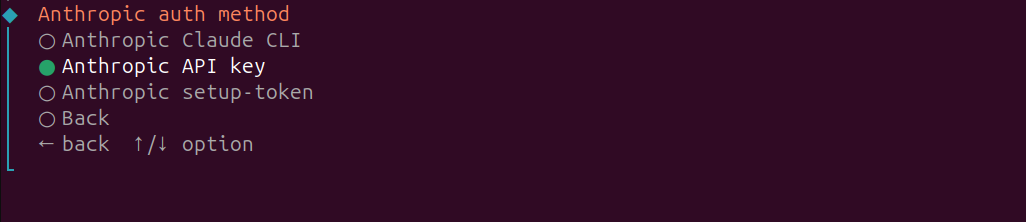
Select Anthropic API key and hit Enter. You will be asked to select the Anthropic model.
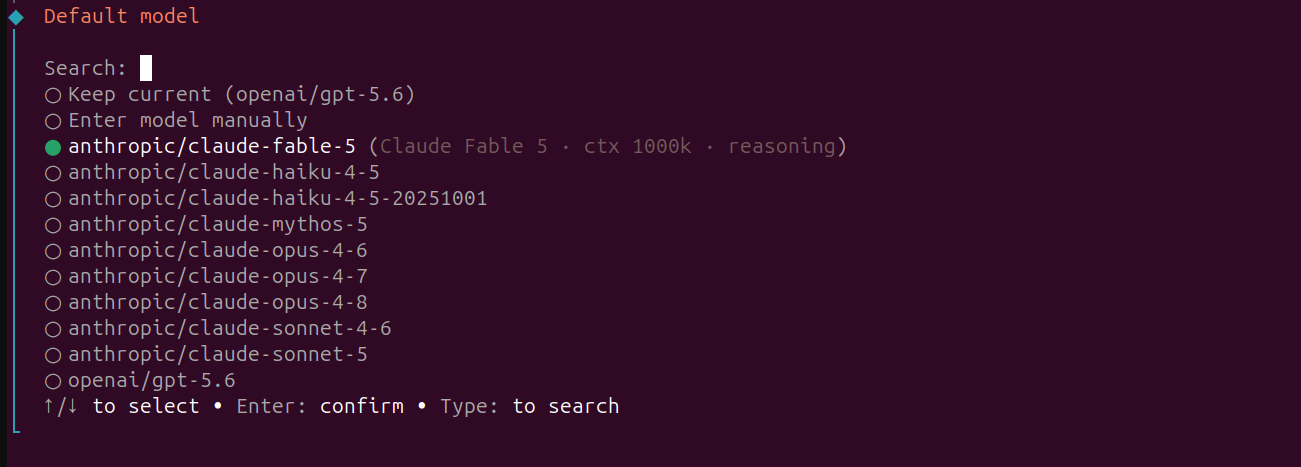
Select any model from the provided list and hit Enter to complete the remaining process.
You can also list the available models with:
openclaw models list --provider anthropicOutput:
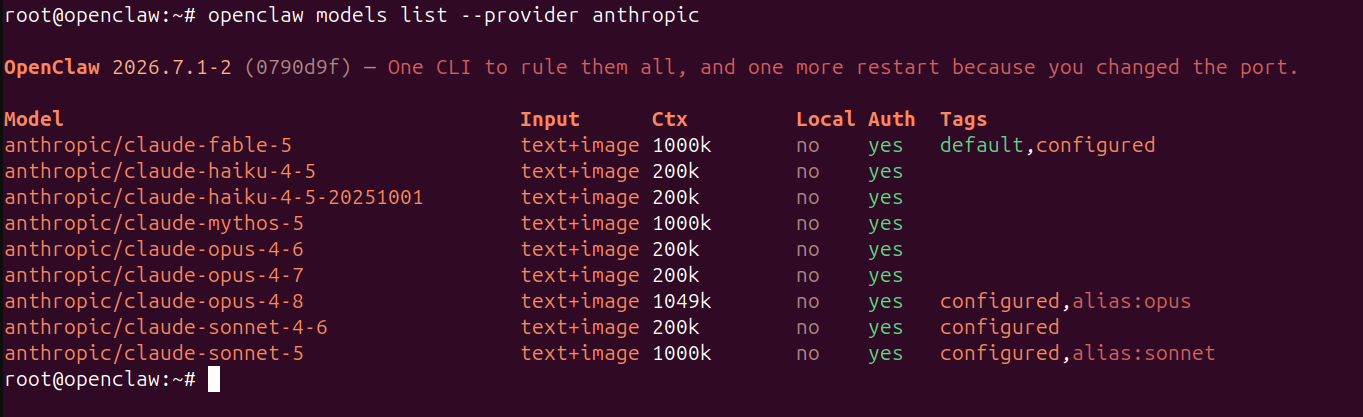
To change the Anthropic model, choose a model from the above output and run below command.
openclaw models set anthropic/claude-sonnet-5OpenClaw can refresh its Anthropic catalog from the provider’s Models API when an API key is present. This means newer supported models may appear without requiring a manual OpenClaw configuration change.
OpenClaw can also reuse a Claude CLI login on the same host. That route depends on the installed Claude CLI, the account’s current subscription rules, and Anthropic’s policies for programmatic use. For shared or long-running automation, the OpenClaw documentation recommends direct API-key authentication because billing is easier to track.
To verify the model setup, run the below command.
openclaw models status3. Connect OpenClaw to OpenRouter
OpenRouter is useful when you need several model vendors behind one key. OpenClaw supports both OpenRouter OAuth and manual API-key setup. Its default OpenRouter selection is openrouter/auto.
Method 1: Use OpenRouter API key
First, export the OpenRouter API key:
export OPENROUTER_API_KEY="YOUR_OPENROUTER_KEY"Next, run the onboarding process.
openclaw onboard --auth-choice openrouter-api-keyYou will be asked to select Setup mode.
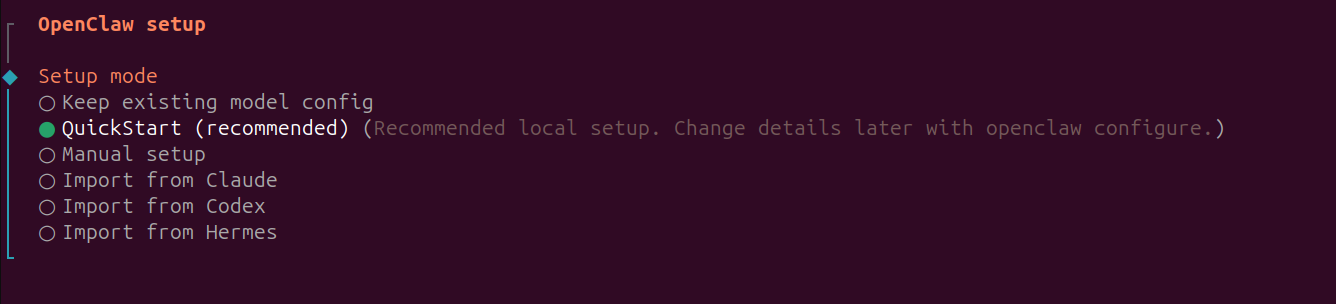
Select QuickStart and hit Enter. You will be asked to use an existing OpenRouter API key.

Select Yes and hit Enter to complete the remaining process.
To list all available OpenRouter models, run:
openclaw models list --provider openrouterYou will see the list shown below:

Now, select any model from the above list and set it as the default model.
openclaw models set openrouter/autoOr select a specific model:
openclaw models set openrouter/<provider>/<model>The extra openrouter/ prefix belongs to OpenClaw. For example, an upstream OpenRouter model slug such as anthropic/example-model becomes: openrouter/anthropic/example-model
OpenClaw resolves these references against OpenRouter’s live model catalog.
To verify the provider, run:
openclaw models statusMethod 2: Use OpenRouter OAuth
Run OpenRouter auth flow:
openclaw onboard --auth-choice openrouter-oauthOpenClaw opens a browser authorization flow. On a remote host, it prints a login address and asks you to paste the final redirect address.
Connect Hermes to OpenAI, Anthropic, or OpenRouter
In this section, you will learn how to connect Hermes agent to OpenAI, Anthropic and OpenRouter.
1. Connect Hermes to OpenAI
For direct OpenAI API access, Hermes uses the provider identifier openai-api.
First, add the OpenAI API key to Hermes’ environment file:
hermes config set OPENAI_API_KEY your-openai-keyRun the model configuration wizard.
hermes modelYou will be asked to select a provider.
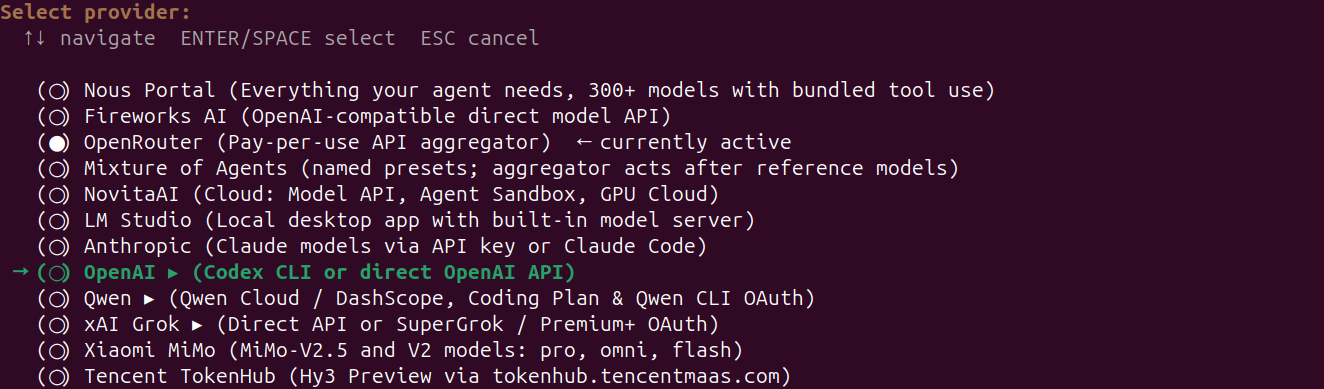
Choose OpenAI and hit Enter enter. You will be asked to select auth method.

Select OpenAI API and hit Enter.

Type K and hit Enter to keep the existing OpenAI API key. You will be asked to select default model.
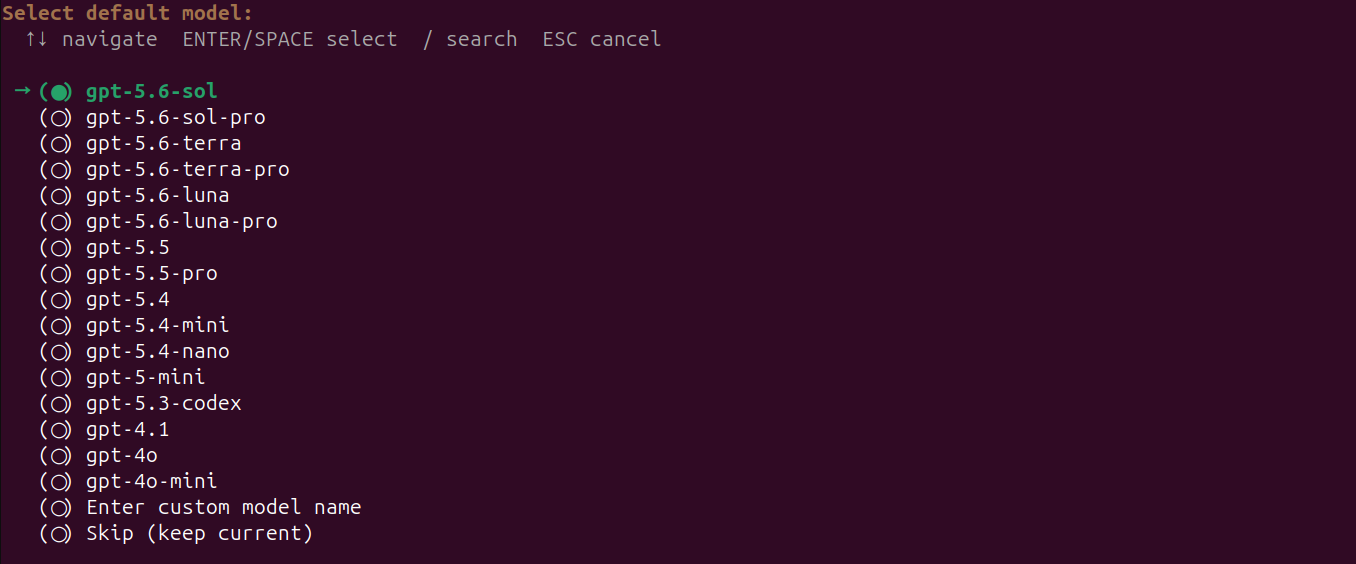
Select any model from the above list and hit Enter to complete the process
You can test a specific selection from the command line:
hermes chat --provider openai-api --model YOUR_OPENAI_MODELTo make it permanent, inspect or edit ~/.hermes/config.yaml:
model:
provider: "openai-api"
default: "YOUR_OPENAI_MODEL"
2. Connect Hermes to Anthropic
First, add the Anthropic API key to Hermes’ environment file:
hermes config set ANTHROPIC_API_KEY your-anthropic-keyThen, run the model configuration wizard.
hermes modelYou will be asked to select a provider.
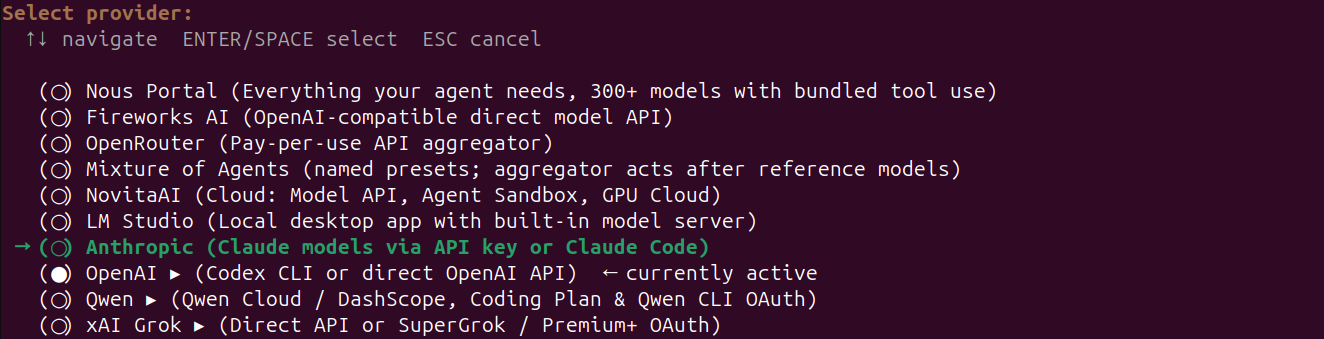
Select Anthropic from the list above and press Enter. You will be asked to choose Anthropic credentials.

Select existing credentials and hit Enter. You will be asked to select a model.
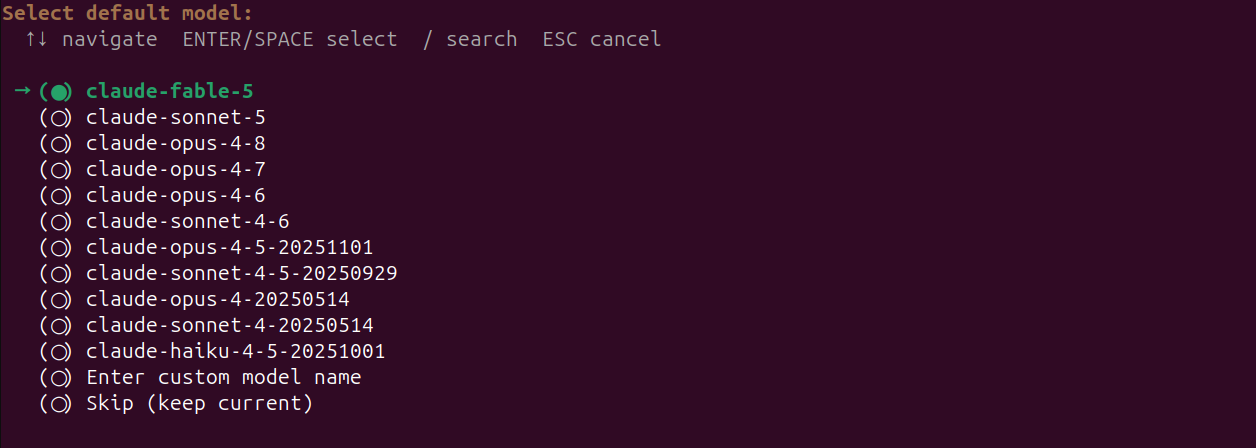
Select any model from the provided list and hit Enter to complete the process.
You can also test the provider directly:
hermes chat --provider anthropic --model claude-sonnet-4-6The model name above is an example documented by Hermes. Use the live model picker when a newer model is available.
A permanent configuration looks like this:
model:
provider: "anthropic"
default: "claude-sonnet-4-6"
Hermes also supports Anthropic OAuth and existing Claude Code credentials. Its current documentation places account restrictions on that route and recommends ANTHROPIC_API_KEY when the required subscription access is unavailable. Direct API-key requests use the Anthropic organization associated with the key.
2. Connect Hermes to OpenRouter
First, add the OpenRouter API key to the Hermes environment.
hermes config set OPENROUTER_API_KEY sk-or-your-keyNext, run the model configuration wizard.
hermes modelYou will be asked to select a provider.
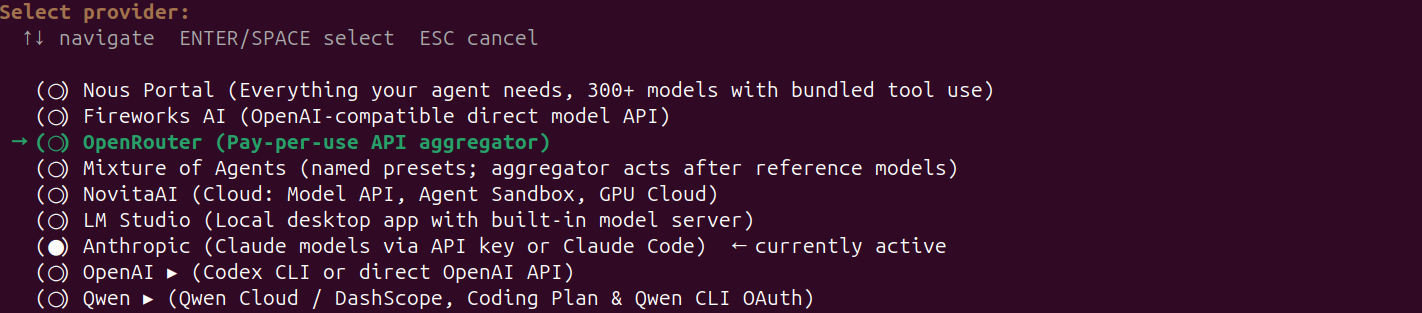
Choose OpenRouter and hit Enter.

Type K and hit Enter to keep the existing OpenRouter API key. You will be asked to select OpenRouter Model.
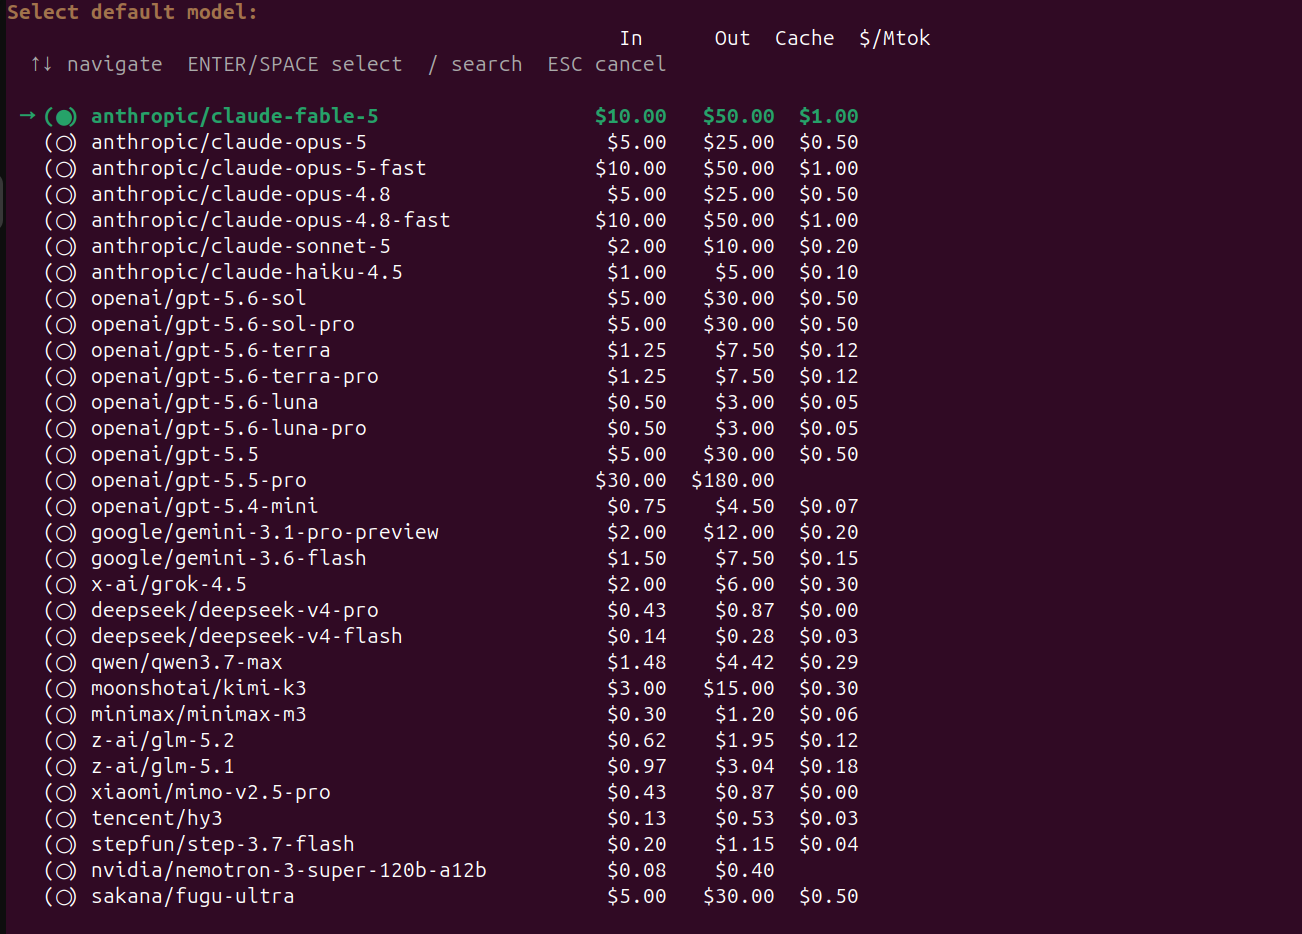
Select any model and press Enter.
Test OpenRouter model directly, using
hermes chat --provider openrouter --model anthropic/YOUR_MODEL_SLUGUnlike OpenClaw, Hermes does not require an extra leading openrouter/ in the upstream model slug passed to a normal OpenRouter provider call. The provider is already supplied separately as –provider openrouter.
A permanent configuration may look like:
model:
provider: "openrouter"
default: "anthropic/YOUR_MODEL_SLUG"
OpenRouter exposes a large catalog that also contains non-chat models. Hermes therefore shows a curated set of agent-capable models instead of blindly presenting every catalog entry.
Switch Providers Without Reinstalling
In OpenClaw, change the default model with:
openclaw models set openai/YOUR_MODELopenclaw models set anthropic/YOUR_MODELopenclaw models set openrouter/autoCheck the active configuration using:
openclaw models statusIn Hermes, run the full configuration wizard to switch the provider:
hermes modelInside an active Hermes conversation, switch among providers that are already configured:
/modelHermes saves the primary model in ~/.hermes/config.yaml. Existing open chat tabs or sessions may continue using the model they started with, so begin a new session when testing a permanent provider change.
Common Connection Errors
“API key not found”
Confirm that the key is available to the actual agent process, not only your interactive shell.
For OpenClaw running as a daemon, place persistent variables in:
~/.openclaw/.envThen restart the Gateway:
openclaw gateway restartFor Hermes, place provider keys in:
~/.hermes/.envThen start a new Hermes process.
OpenClaw’s documentation notes that system services may not inherit variables exported from a terminal session.
“Model not found” or “model unavailable”
Model names change, and account access differs.
For OpenClaw:
openclaw models list --provider openaiopenclaw models list --provider anthropicFor Hermes:
hermes modelSelect a model from the live list instead of copying an old identifier from a blog post.
HTTP 401
A 401 response usually means the key is missing, invalid, revoked, or sent to the wrong provider endpoint.
Check that:
- An OpenAI key is not stored as ANTHROPIC_API_KEY.
- An OpenRouter key is not being sent to the direct OpenAI endpoint.
- No trailing spaces or quote characters were saved with the key.
- The key belongs to an active project or organization.
HTTP 429
A 429 response usually indicates a rate limit, exhausted credits, or an account-level spending limit. Anthropic applies both spend limits and rate limits at the organization level.
Check the provider’s usage and billing console before changing agent configuration.
Hermes keeps using the previous provider
Exit the current conversation and run:
hermes modelConfirm the model.provider and model.default values in ~/.hermes/config.yaml
The YAML file is Hermes’ source of truth for the selected provider, model, and endpoint.
Final Verification Checklist
Before adding messaging channels, tools, scheduled jobs, or autonomous actions, verify the base model connection:
- The agent starts without credential warnings.
- The provider appears in the model-status output.
- A plain text prompt returns a response.
- The selected model matches the intended provider.
- Usage appears in the correct provider account.
- The API key is absent from shell history, source control, and screenshots.
- The daemon or gateway still works after a restart.
- A new session uses the newly selected model.
Configure one provider first. Test it with a basic conversation. Add secondary providers or failover rules only after the primary route works. This isolates credential, model, endpoint, and billing problems before they become harder to diagnose.

Written by
Hitesh Jethva is a regular contributor to the Atlantic.Net blog. With over 15 years of experience in Linux and open-source technologies, he founded Linux Buz, a website dedicated to Linux enthusiasts.