
OpenClaw is a self-hosted AI agent that connects a language model to practical tools, files, messaging channels, and automation workflows. Depending on the integrations you enable, the agent can answer chat messages, organize an inbox, interact with external services, run code, and perform tasks from Telegram, Discord, WhatsApp, or the browser-based Control UI.
You can run OpenClaw on a local Linux machine, dedicated Ubuntu server, VPS, Oracle Cloud instance, or another cloud platform. This guide walks through two primary deployment methods: Atlantic.Net’s OpenClaw Marketplace application and a manual Ubuntu 24.04 installation. It also covers Docker, onboarding, model providers, API keys, the OpenClaw gateway, Telegram, Discord, security, updates, and troubleshooting.
Because an agent may read files, execute commands, use tools, and interact with external systems, a dedicated terminal environment, virtual machine, or cloud server is safer than installing it on a personal laptop containing sensitive data. Docker provides environment isolation and reproducibility, although a standard host installation is usually simpler for beginners.
Method 1: Install With Atlantic.Net’s OpenClaw Marketplace Application
First, sign in to the Atlantic.net cloud control panel.
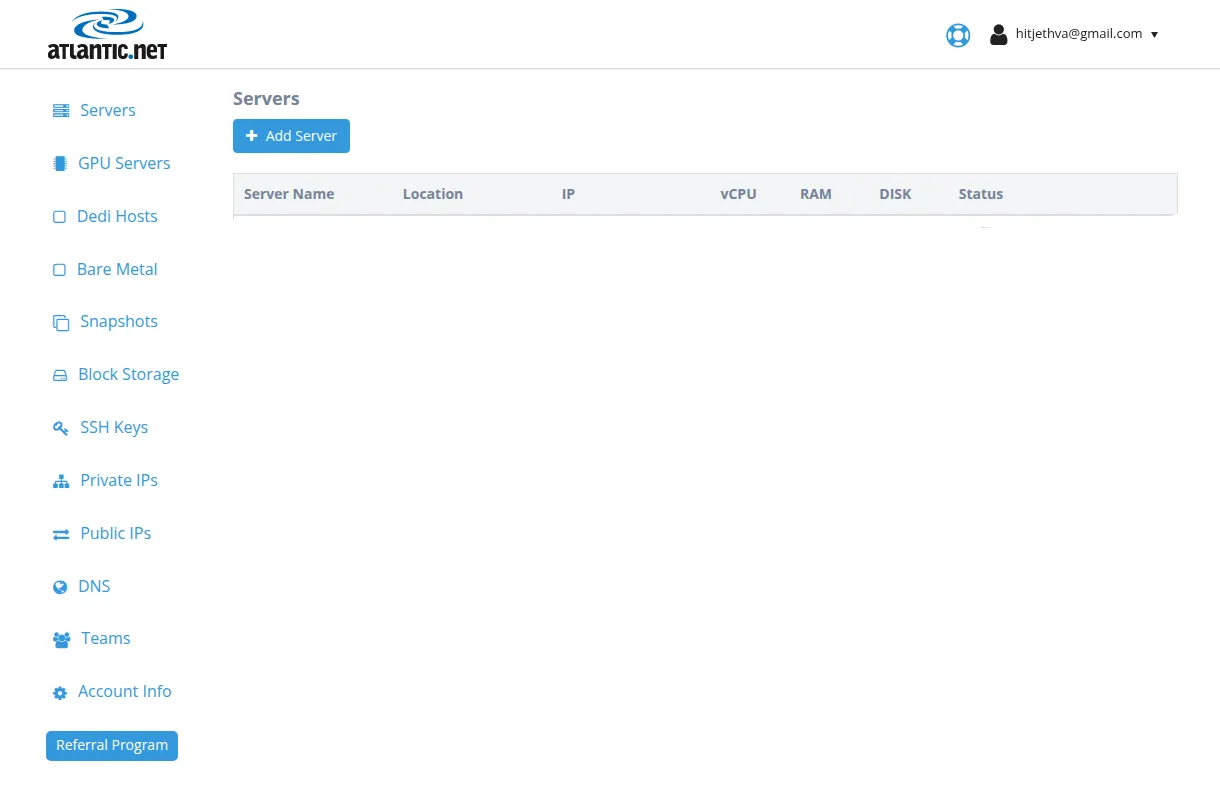
Go to Servers and click Add Server.
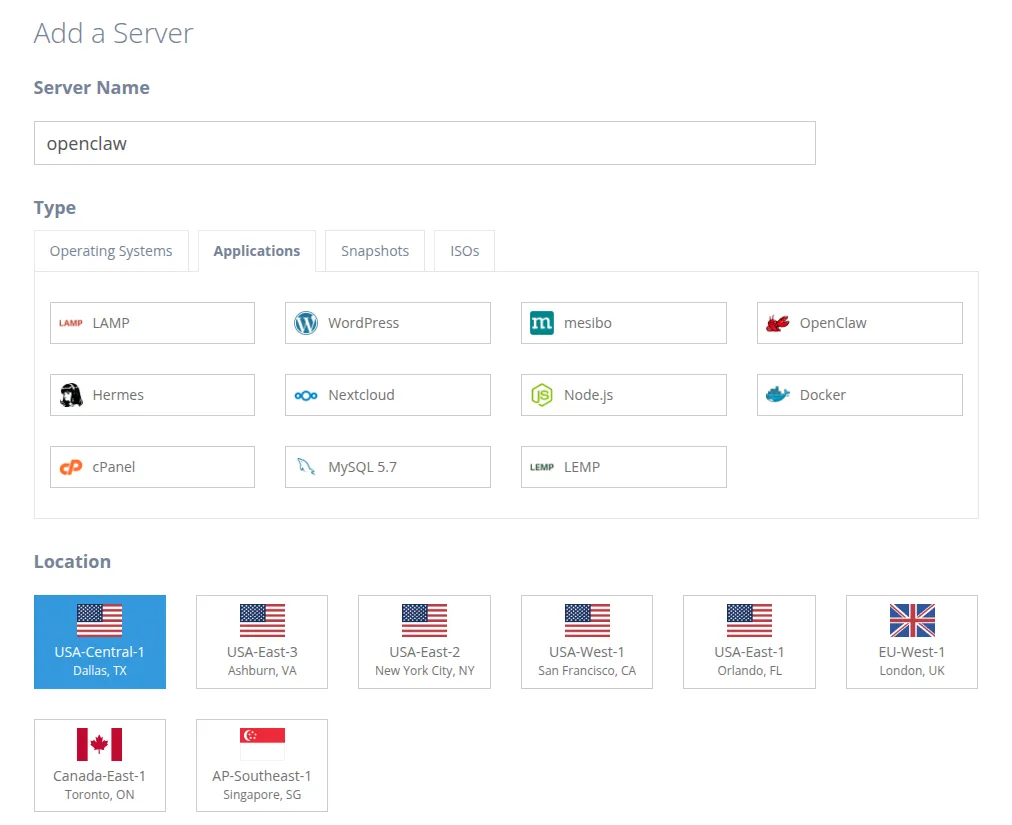
Define your server name in the Server.
Name field, click the Application tab, select OpenClaw, then select the nearest data center location.
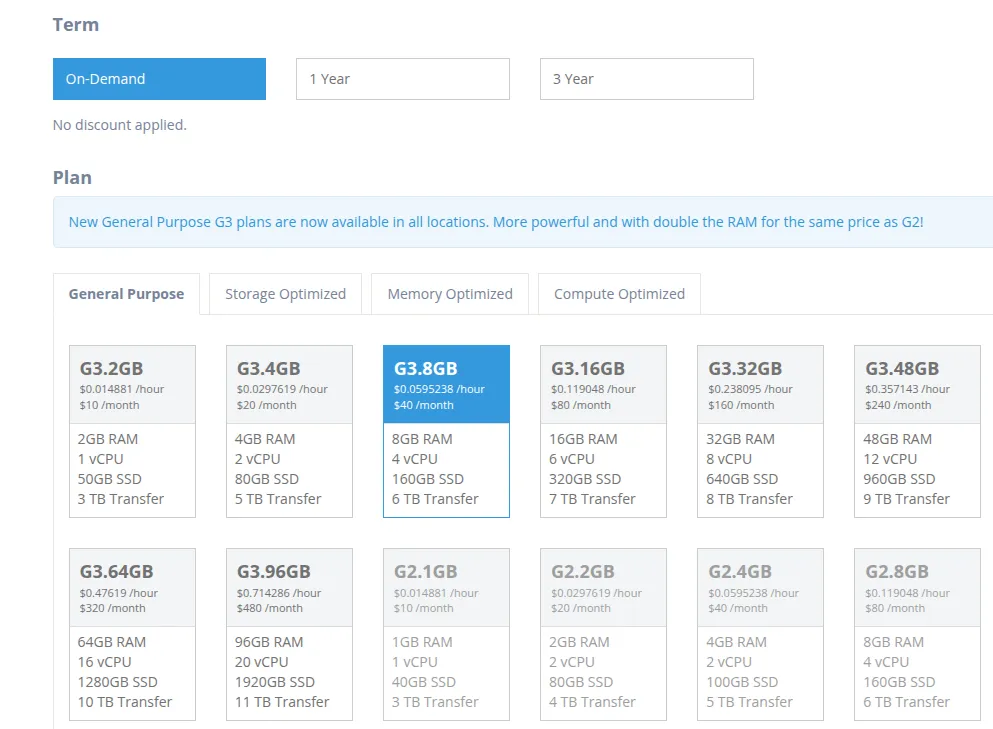
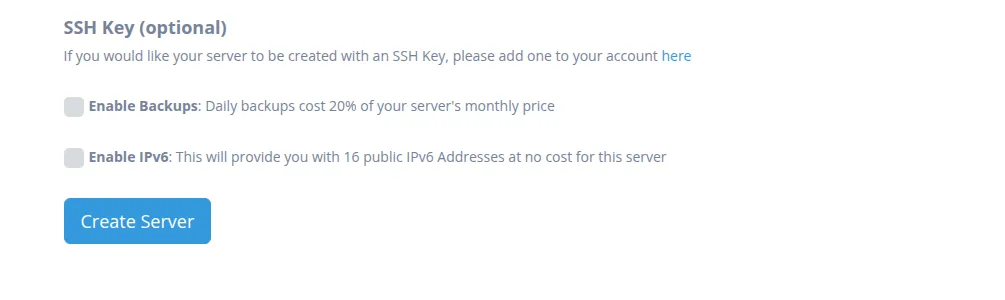
Select Term and Plan, then click Create Server. Once the Server is provisioned, you should see the image below.
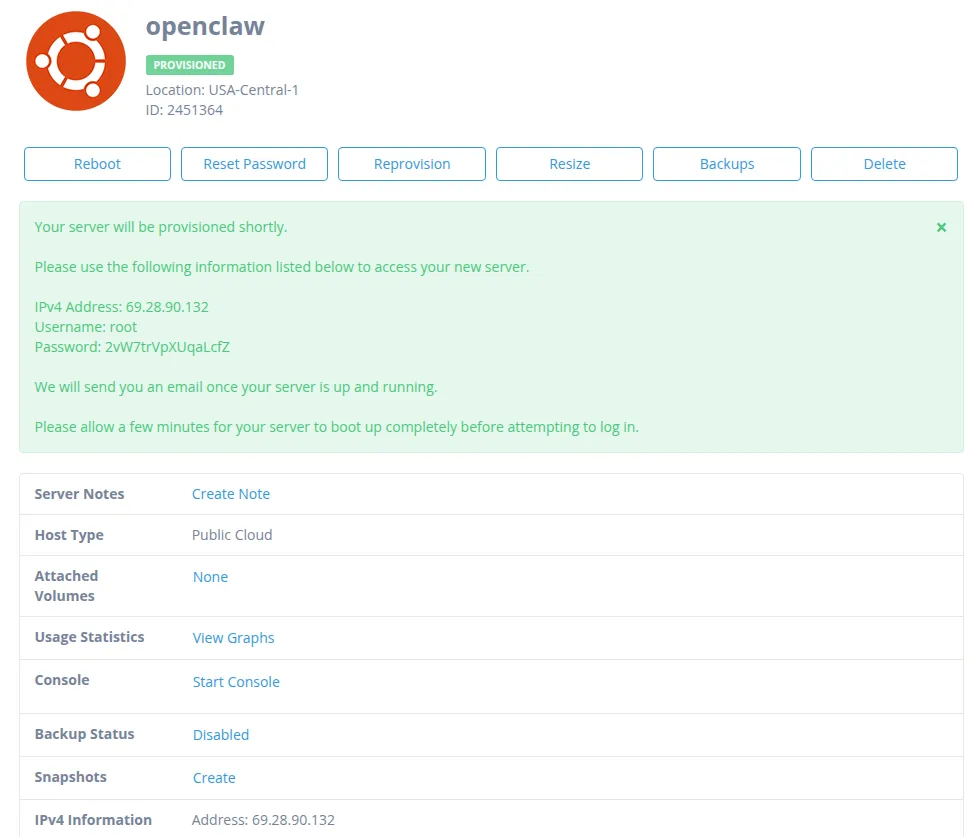
The control panel displays the public IP address and initial login credentials.
Now, open a terminal from your local machine and connect to the OpenClaw instance via SSH using the above credentials:
ssh root@YOUR_SERVER_IPYou will see a welcome message indicating that OpenClaw is already installed. It recommends completing the initial setup with openclaw onboard –install-daemon.
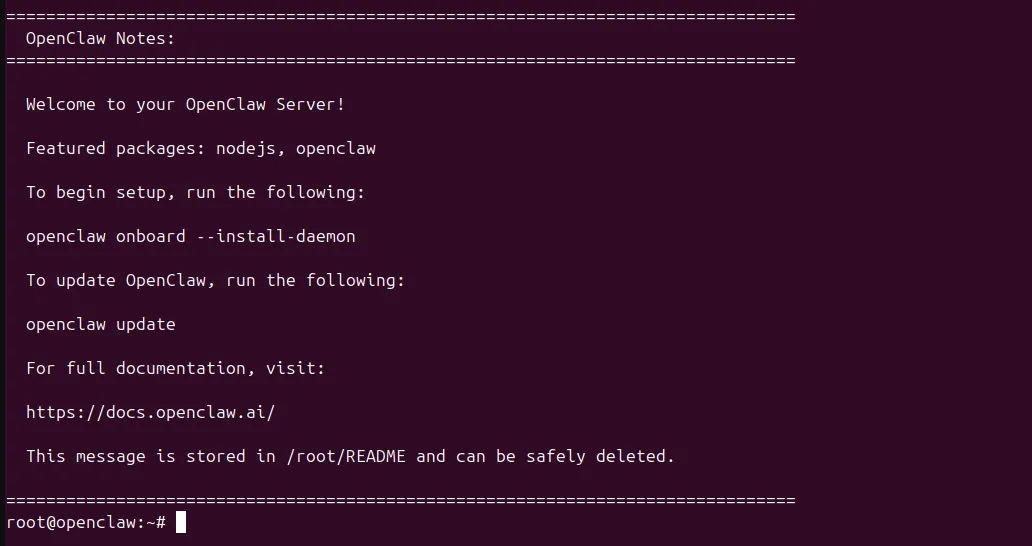
Run The OpenClaw Onboarding Wizard
For a Marketplace installation, you may update the package before onboarding:
openclaw update
openclaw --version
Start the wizard and install the background daemon:
openclaw onboard --install-daemonThe wizard walks through model authentication, workspace creation, gateway configuration, channels, skills, and optional tools. QuickStart normally takes only a few minutes, although provider sign-in, downloads, channel pairing, and optional plugins can extend the process.
Step 1: Accept The Security Disclaimer
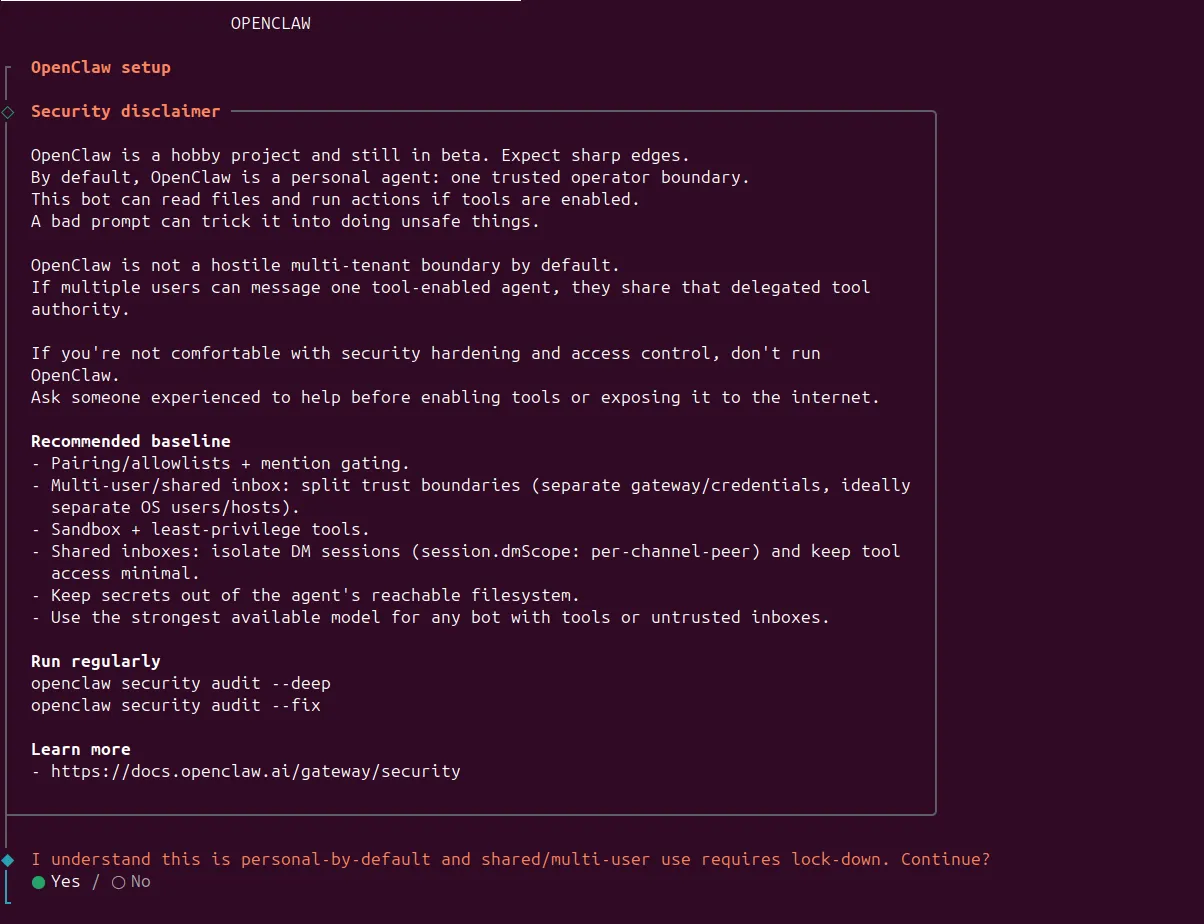
Read the warning carefully. OpenClaw may access files and run tools when those capabilities are enabled. Select Yes and press Enter.
Step 2: Select Quickstart

Choose Quickstart for a standard local gateway configuration.
Step 3: Choose A Model Provider
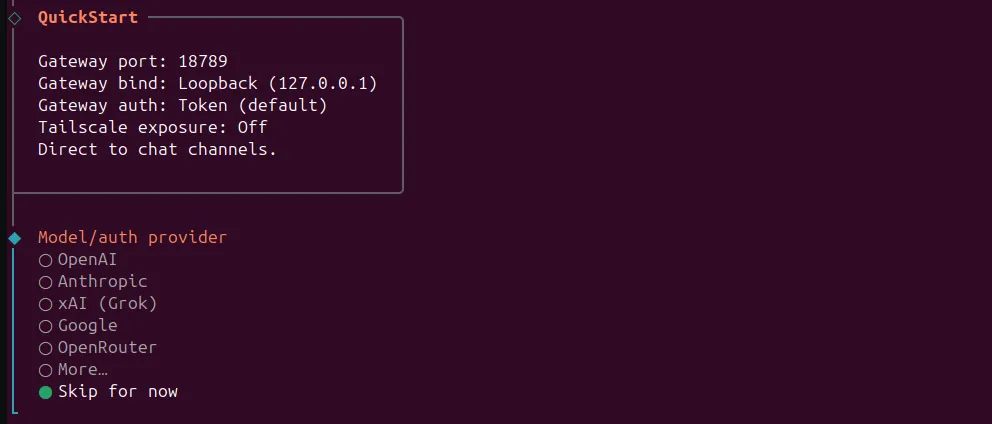
Select OpenAI, Anthropic, Google, xAI, OpenRouter, or another supported provider. You may also choose Skip for now. You can complete the onboarding process without API keys, but the agent cannot produce normal AI answers until model access is configured.

When asked for a default model, select Keep
Current or enter a supported model manually.
Step 4: Configure A Channel
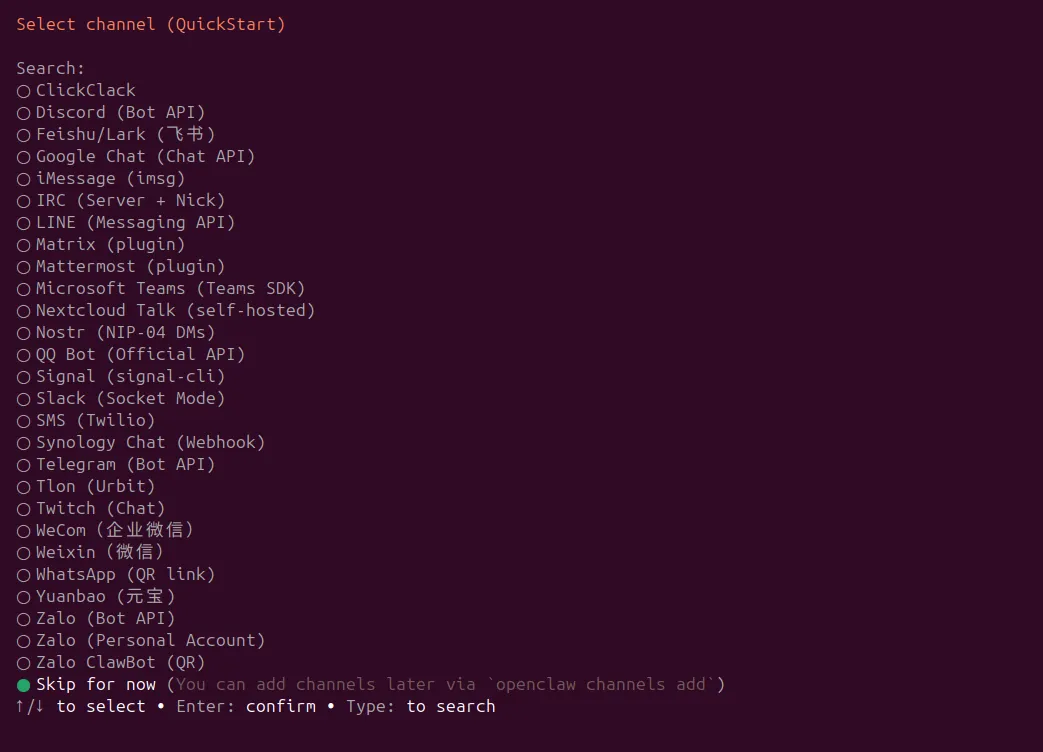
Choose a channel such as Telegram or Discord, or select Skip for now. You can add channels later using openclaw configure or openclaw channels add.
Step 5: Configure Web Search And Skills
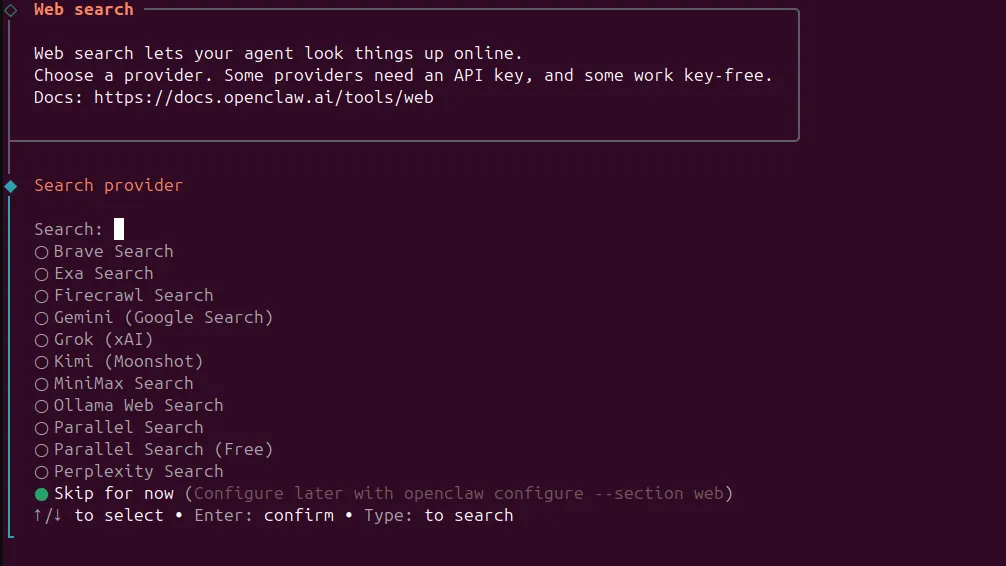
Choose a search provider or select Skip for now.
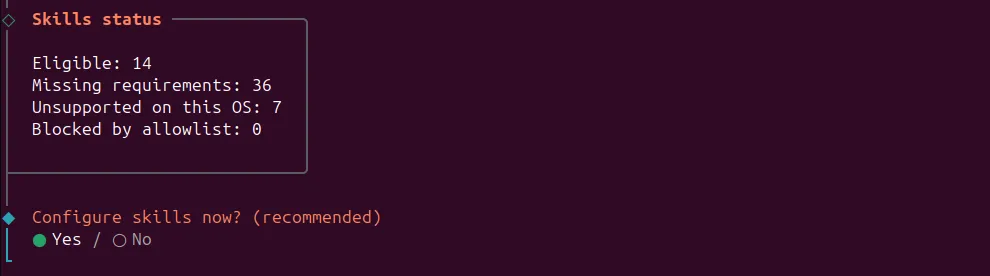
When the wizard asks whether to configure skills, select Yes. Review the missing dependencies and install only the tools you need.
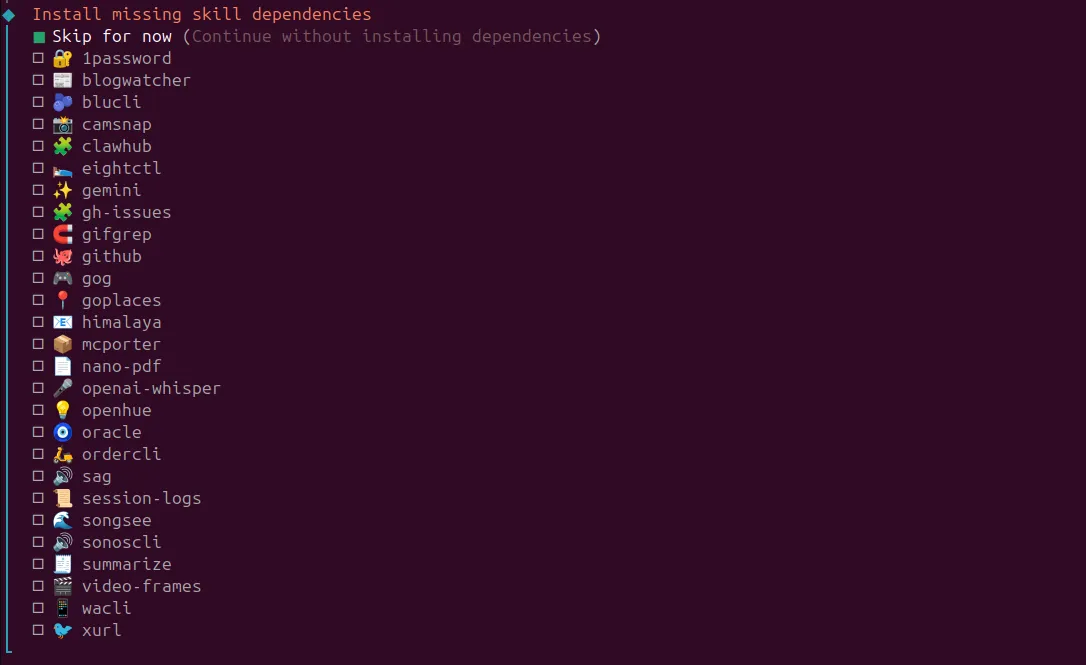
Selecting Skip for now is appropriate when you want to complete the base installation first.
The wizard may prompt for Google, OpenAI, or ElevenLabs API keys required by optional skills.



Select No when you do not use the related service.
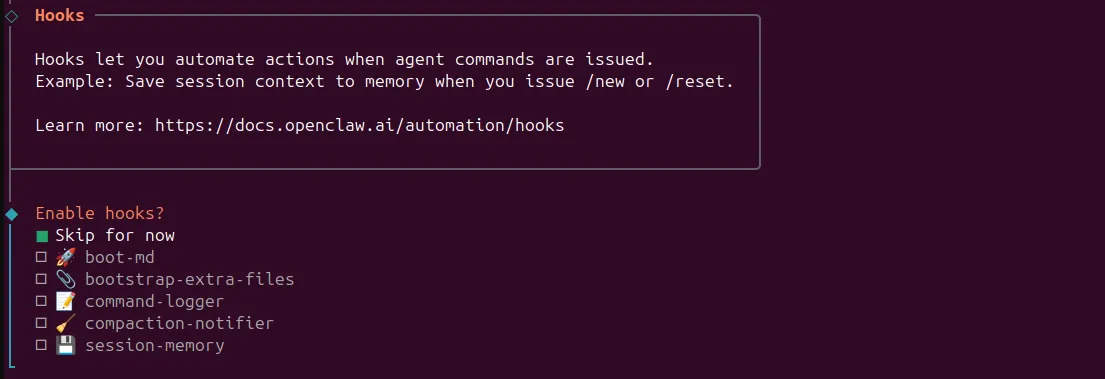
It may also offer hooks such as command logging, session memory, boot files, and notifications. You can select Skip for now and enable them later.
Step 6: Hatch The Agent
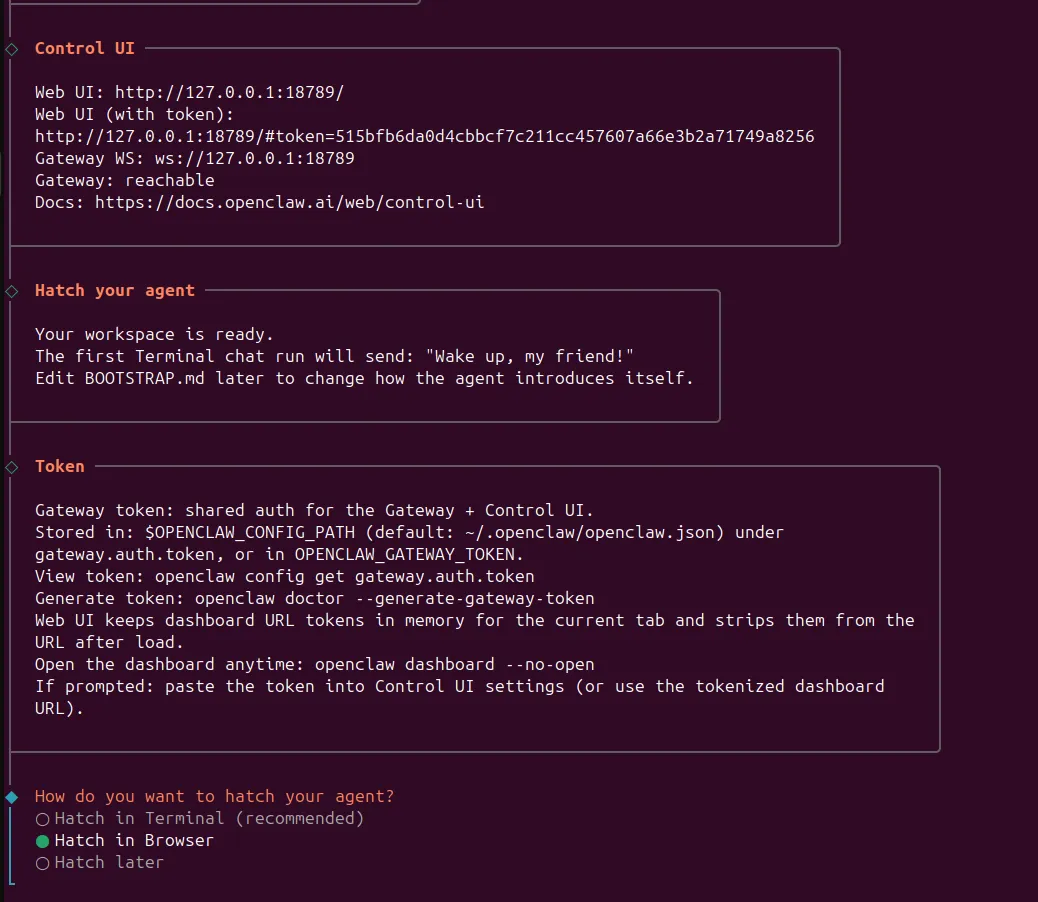
The Control UI screen displays the local web URL, WebSocket address, and authentication information.
Choose Hatch in Browser and press Enter. After onboarding finishes, the Dashboard ready screen displays the local browser URL.
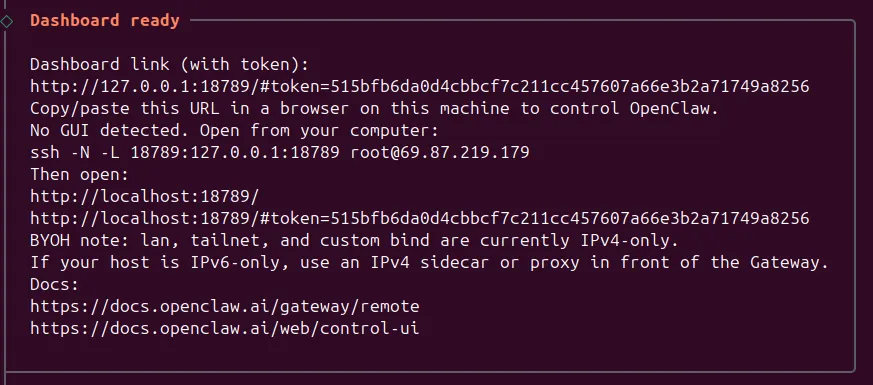
Note the OpenClaw web URL shown in the image above; you will need it later when you access OpenClaw.
Verify The OpenClaw Gateway
The gateway manages sessions, channels, authentication, tools, and agent state. Verify it after onboarding.
openclaw gateway statusYou should see the OpenClaw gateway listening on port 18789. This is the standard verification step before opening the dashboard.
You can also run a complete installation and configuration check.
openclaw doctoropenclaw doctor checks gateway health, channels, plugins, skills, model routing, configuration migrations, and local state.
Apply supported repairs.
openclaw doctor --fixFollow logs in real time:
openclaw logs --followUse these commands when the web interface does not load, the agent does not answer, the gateway fails to start, a provider reports an authentication error, or a Telegram or Discord channel does not connect.
Access The OpenClaw Control UI Securely
If you have installed OpenClaw on a local machine, run the command below.
openclaw dashboardThis launches the browser-based Control UI.
If you have installed OpenClaw on Atlantic.Net or other remote Ubuntu VPS, do not expose port 18789 directly to the public internet. The OpenClaw gateway binds to loopback by default, and SSH tunneling is the universal fallback for secure remote access.
From your laptop or local PC, create an SSH tunnel.
ssh -N -L 18789:127.0.0.1:18789 root@YOUR_SERVER_IPThe command appears to hang because it is maintaining the tunnel. Leave that terminal open.
Now, open a web browser on your local machine and visit the URL below.
http://127.0.0.1:18789/#token=515bfb6da0d4cbbcf7c211cc457607a66e3b2a71749a8256You will see the Openclaw dashboard.
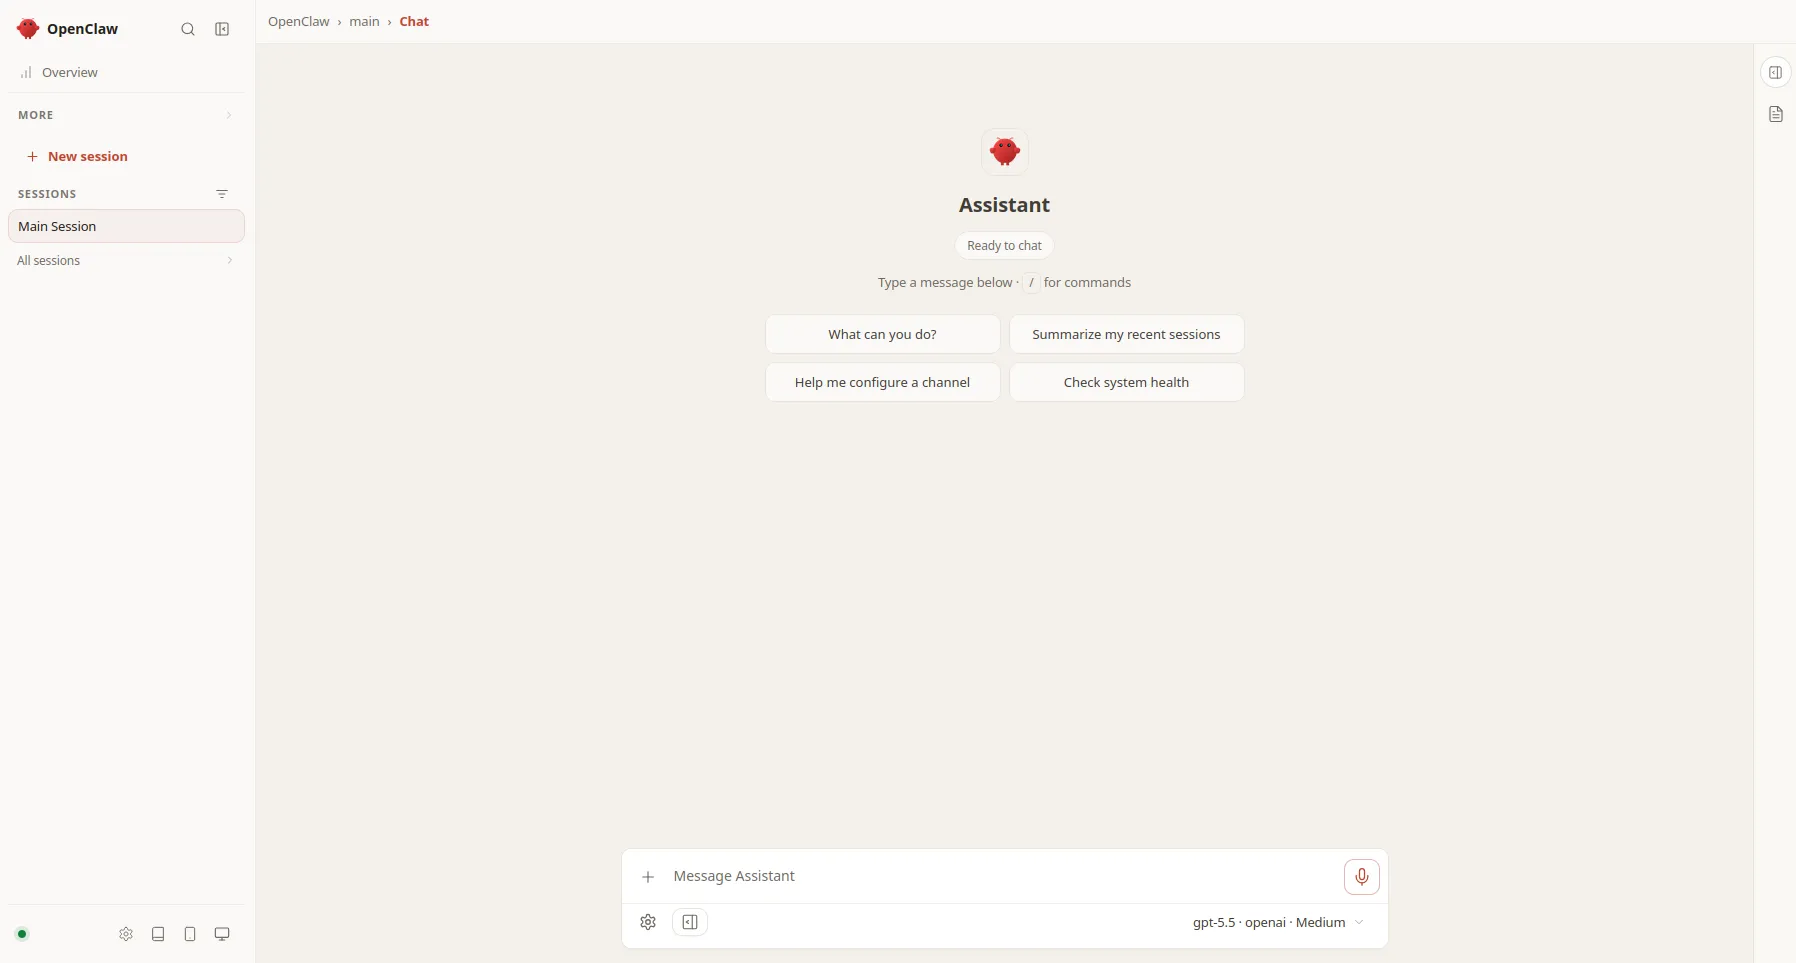
Click on the Overview tab. You will see the status of the Openclaw gateway.
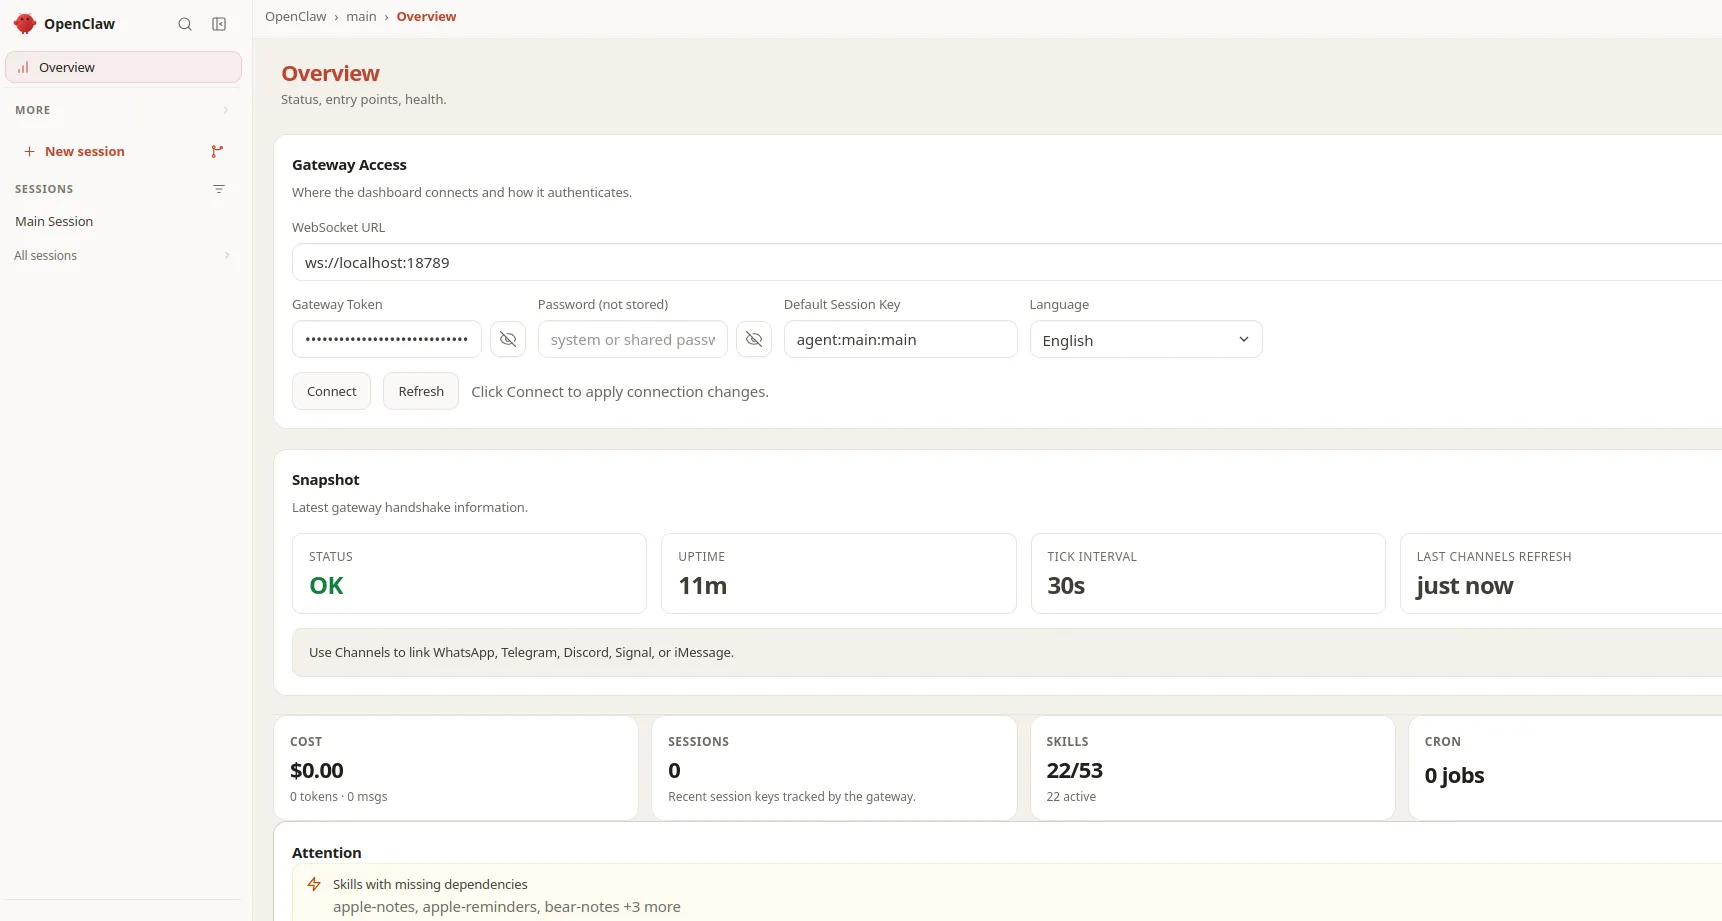
The Control UI allows you to:
- Chat with the agent.
- Inspect provider and gateway status.
- Manage channels.
- View sessions and logs.
- Change configuration.
- Manage agents, tools, and nodes.
Configure Models And API Keys
OpenClaw needs a model provider before it can answer messages and perform AI tasks. Reopen the configuration wizard at any time:
openclaw configureSelect your provider, authentication method, default model, workspace access, and runtime permissions. The onboarding system can detect existing AI access, test provider authentication, and verify that the selected model can generate a real response.
Connect OpenClaw To Telegram
Open Telegram and confirm that you are communicating with the official @BotFather.
Run:
/newbotFollow the prompts to create a new bot, choose its username, and copy the bot token.
Add the token to OpenClaw:
openclaw channels add --channel telegram --token "YOUR_TELEGRAM_BOT_TOKEN"Telegram direct messages use pairing by default. Send your new bot a message, then list pending requests:
openclaw pairing list telegramApprove the displayed code:
openclaw pairing approve telegram YOUR_CODEPairing codes expire, so approve the request soon after sending the first message.
Connect OpenClaw To Discord
Create a new application in the Discord Developer Portal, open its Bot section, and create a bot user.
Under Privileged Gateway Intents, enable:
- Message Content Intent, which is required.
- Server Members Intent, which is recommended for role allowlists, name resolution, and channel access groups.
Invite the bot to your Server with permission to view the required Discord channel, read messages, and send replies.
Add the bot token:
openclaw channels add --channel discord --token "YOUR_DISCORD_BOT_TOKEN"Probe the configured channels:
openclaw channels status --probeIf the bot appears online but does not answer, verify Message Content Intent, channel permissions, Server and channel allowlists, and mention requirements. Then inspect the logs:
openclaw doctor
openclaw logs --follow
Discord direct messages also use pairing controls by default, helping prevent unknown users from immediately accessing the agent.
Method 2: Install OpenClaw Manually On Ubuntu 24.04
Skip to Run the OpenClaw Onboarding Wizard if you do not need to install OpenClaw manually.
Option 1: Use The Official Installer Script
Use the installer script for the fastest installation method:
curl -fsSL --proto '=https' --tlsv1.2 https://openclaw.ai/install.sh | bashThis is the correctly formatted version of commonly searched phrases such as “curl fssl https openclaw.ai install.sh bash” or “fssl https openclaw.ai install.sh.” The valid option is -fsSL, and the downloaded script is piped to bash.
The installer script detects Linux, verifies the Node.js version, installs Node when needed, checks for Git, installs OpenClaw, and starts onboarding when an interactive terminal is available.
To install OpenClaw without launching onboarding immediately, run:
curl -fsSL --proto '=https' --tlsv1.2 https://openclaw.ai/install.sh | bash -s -- --no-onboardOption 2: Use The Local-Prefix Installer
The local-prefix installer keeps Node and OpenClaw under a user-owned directory such as ~/.openclaw. It does not require a global Node installation or root access:
curl -fsSL --proto '=https' --tlsv1.2 https://openclaw.ai/install-cli.sh | bashThis method is useful when you cannot modify system directories, want simpler file permissions, or need an isolated per-user installation.
Option 3: Install OpenClaw Using Docker
Docker deployment is recommended when you want stronger isolation and reproducibility. Docker is optional, but it works well for a dedicated gateway environment or a host where you do not want a local package installation.
Create the APT keyring directory and import Docker’s signing key:
install -m 0755 -d /etc/apt/keyringscurl -fsSL https://download.docker.com/linux/ubuntu/gpg -o /etc/apt/keyrings/docker.ascchmod a+r /etc/apt/keyrings/docker.ascAdd the Docker repository:
tee /etc/apt/sources.list.d/docker.sources > /dev/null <<EOF
Types: deb
URIs: https://download.docker.com/linux/ubuntu
Suites: $(. /etc/os-release && echo "${UBUNTU_CODENAME:-$VERSION_CODENAME}")
Components: stable
Architectures: $(dpkg --print-architecture)
Signed-By: /etc/apt/keyrings/docker.asc
EOF
Install Docker and Compose:
apt update -y && apt install -y docker-ce docker-ce-cli containerd.io docker-buildx-plugin docker-compose-plugin -yClone the OpenClaw official Git repository.
git clone https://github.com/openclaw/openclaw.gitNavigate to the downloaded directory.
cd openclawExport the official GitHub Container Registry image.
export OPENCLAW_IMAGE="ghcr.io/openclaw/openclaw:latest"Build the image locally.
./scripts/docker/setup.shThe setup script runs onboarding, prompts for provider API keys, generates an OpenClaw gateway token, saves it in .env, creates the authentication secret directory, and starts the gateway using Docker Compose.
Verify the container health.
curl -fsS http://127.0.0.1:18789/healthzDisplay the dashboard URL.
docker compose run --rm openclaw-cli dashboard --no-openOutput.
Dashboard URL: http://127.0.0.1:18789/Retrieve the configured token when required.
grep '^OPENCLAW_GATEWAY_TOKEN=' .envOutput:
OPENCLAW_GATEWAY_TOKEN=9c8ab92de5c1688138537c6637aac741a1c21e4fe8adfbba59785c1ac87eff4dNever publish the returned token. Anyone holding it may gain access to the Control UI and gateway.
You can access the OpenClaw dashboard anytime by combining both the URL and the token as shown below:
http://127.0.0.1:18789/#token=9c8ab92de5c1688138537c6637aac741a1c21e4fe8adfbba59785c1ac87eff4dConclusion: What’s Next After Installing OpenClaw?
Installing OpenClaw on Ubuntu is simple using the Atlantic.Net Marketplace Application, the official installer script, or Docker. After installation, run the onboarding wizard, configure your preferred AI model and API keys, verify the OpenClaw gateway, and open the Control UI securely through an SSH tunnel.
The next step is to customize OpenClaw for your workflow. Connect Telegram or Discord, add useful skills, configure web search, set appropriate permissions, and test the agent with simple tasks. You can then create specialized agents, connect additional tools, automate routine work, and expand OpenClaw gradually.
Ready to get started? Deploy OpenClaw in one click with Atlantic.Net’s OpenClaw Marketplace application.
Frequently Asked Questions
1. What Is The Easiest Way To Install OpenClaw On Ubuntu?
The easiest method is to use Atlantic.Net’s OpenClaw Marketplace application. The Marketplace option automatically provisions a cloud server with OpenClaw and its required components.
2. Can I Install OpenClaw Using Docker?
Yes, OpenClaw supports Docker deployment on Ubuntu. Docker provides better application isolation, consistent dependencies, and an easier way to manage or migrate the installation.
3. Does OpenClaw Require An API Key?
OpenClaw can complete its initial setup without an API key, but it needs access to an AI model to answer messages and perform tasks. You can configure providers such as OpenAI, Anthropic, Google, xAI, or OpenRouter during onboarding or later.
4. How Do I Access The OpenClaw Web Interface Remotely?
Create an SSH tunnel from your local computer to port 18789 on the Ubuntu server. Then open http://127.0.0.1:18789/ in your browser and enter the OpenClaw gateway token when prompted.
5. How Do I Troubleshoot OpenClaw Installation Errors?
Run openclaw
doctor to check the installation, configuration, gateway, and provider status. You can also use openclaw doctor –fix for supported repairs and openclaw logs –follow to view errors in real time.

Written by
Hitesh Jethva is a regular contributor to the Atlantic.Net blog. With over 15 years of experience in Linux and open-source technologies, he founded Linux Buz, a website dedicated to Linux enthusiasts.