Introduction
Atlantic.Net Teams (also known as Teams and the abbreviation ANT) allows users to collaborate and manage shared resources like Cloud Servers, IP Addresses, DNS, Block Storage, and more without having to share sensitive information like login credentials or billing information. Customers can control what resources users have access to create, view, and manage along with granting permission for users to contact support/billing for assistance. Teams is a feature included with an Atlantic.Net Cloud account at no additional charge.
Teams highlights:
- Ability to create a Team
- Invite others to join a Team
- Assign Group permissions to Team Users like Administrator, Technical, Billing, Observer, or custom Groups
- Track actions Users take via searchable user and service audit logs
- Set security permissions for Users (require 2FA logins, password policies, etc)
- Share important information through Notes on account resources
- Included for free with your Cloud Account
What you will learn in this guide
Creating a Team
Inviting a User to join your Team
Managing Team Users (modifying user settings, password resets, and removing users)
Team Audit Logs (viewing, searching, and sorting)
Team Notes (creating, viewing, and pinning)
Managing Team Groups (creating, editing, and deleting groups)
Managing Team Settings
Switching Between Teams
Creating a Team
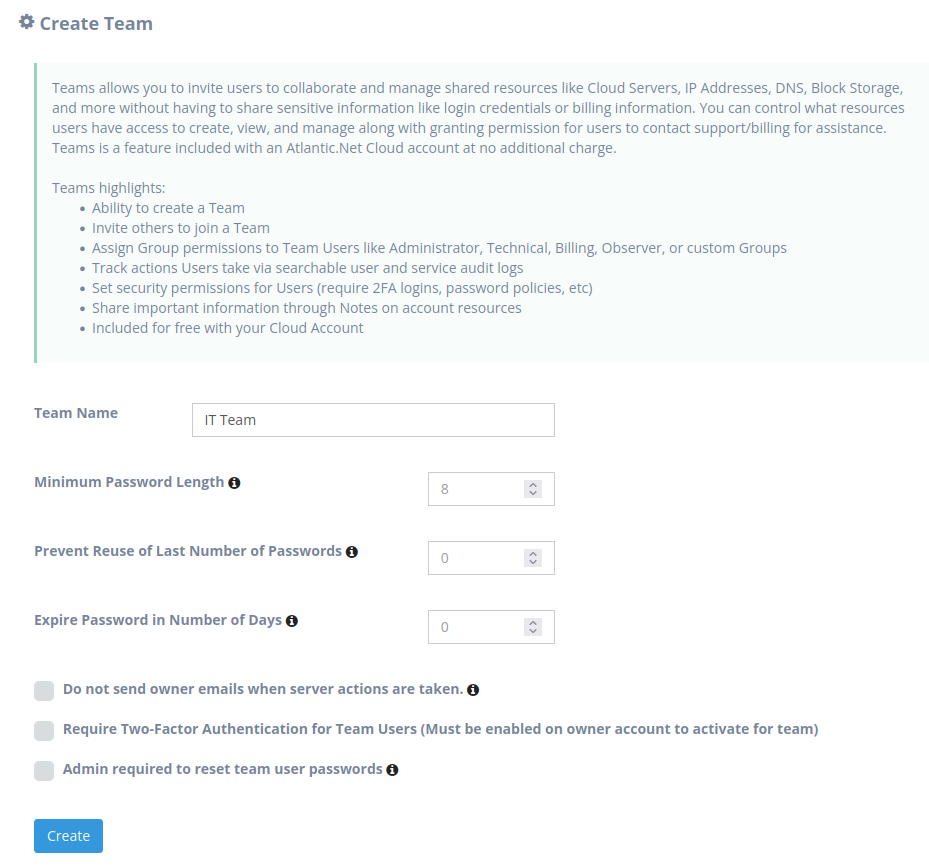
In the Atlantic.Net Control Panel, click on Teams in the navigation bar, fill out the fields based on your preference, then click the Create button to create your Team.
Field Descriptions:
- Team Name: The name you want to give your Team. It will be displayed in the control panel and in emails to users you invite.
- Minimum Password Length: The minimum number of characters you want to require your users to provide when creating or updating their passwords.
- Prevent Reuse of Last Number of Passwords: This allows you to specify how many previous passwords you do not want your users to be to use again. Enter a value of “0” to allow the reuse of passwords.
- Expire Password in Number of Days: Enter a value of “0” to never expire passwords.
- Do not send owner emails when server actions are taken: Check this box if you do not want to receive an email update for actions taken on Cloud Servers through the API or Control Panel like server creation, reprovision, etc.
- Require Two-Factor Authentication for Team Users: (Must be enabled on owner account to activate for team): Check this box to prompt your users to setup and provide a second factor (SMS or Auth App code) when logging into your Team.
- Admin required to reset team user passwords: Check this box to require a Team user with Administrative permissions to reset user passwords.
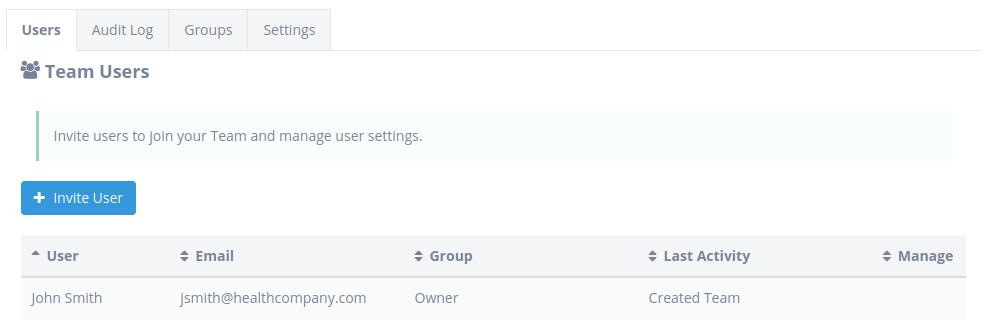
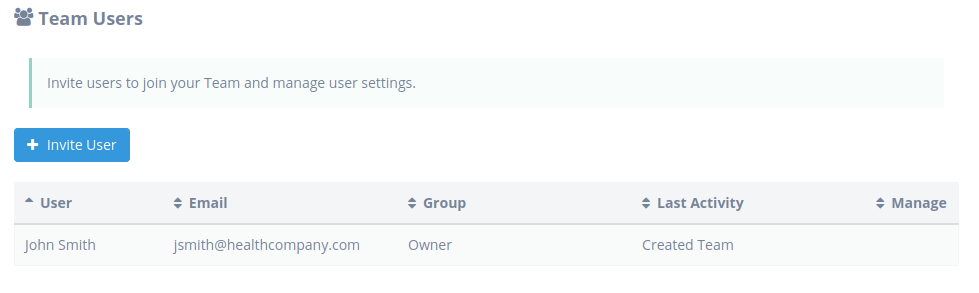
After Creating your Team you’ll be take to the Team Users page where you can invite and manage Team Users.
Inviting a User to join your Team
Once your Team is created you can invite others to join your Team. When inviting a User, you will be able to assign specific permissions to your users that will control what resources they have access to create, view, and manage. Additionally, you’ll also be able to authorize users to contact support for assistance with your account and services.
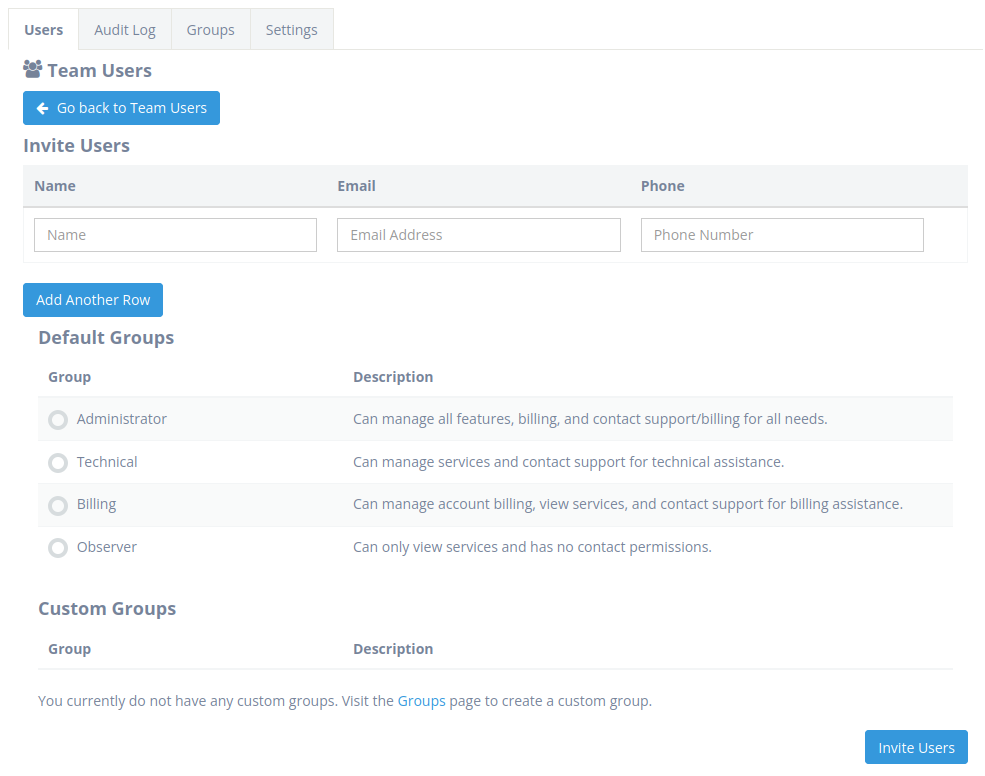
To begin inviting a user to join your Team, click the Invite Users button on the Team Users page.
You will now be viewing the Invite Users page where you can invite users and assign them Group permissions. Simply provide the name, email address, and phone number of the user you want to invite to your Team, select the permissions you want to assign to the User by picking the appropriate Group, and press the Invite Users button to invite the user. Your invited users will receive an email with instructions on how to join your Team.
Don’t worry, you can update a User’s Group permissions anytime from the Users page and if you want more granular permissions for a User than what the Default Groups provide, you can create a Custom Group with specific permissions from the Groups page.
Default Group Descriptions:
- Administrator: Can manage all features, billing, and contact support for all needs.
- Technical: Can manage technical features and contact support for technical needs.
- Billing: Can manage account billing, view servers, and contact support for billing needs.
- Observer: Can only view features and has no contact permissions. This is great for users that are in training or you don’t want to be able to take actions on your account.
Managing Team Users
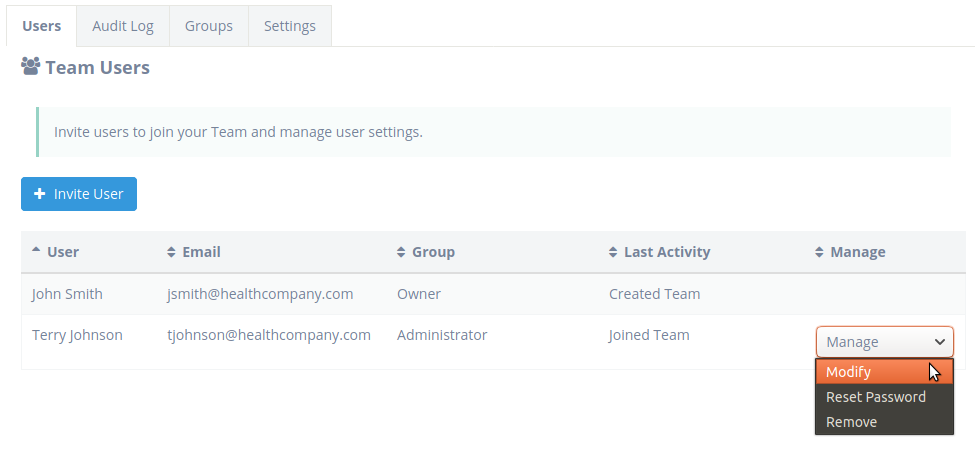
Once you have invited a User to join your Team you can modify that user’s settings, reset their password, or remove them from your Team.
To modify a Team User’s settings, click the Manage drop-down menu next to the user you want to modify on the User’s page and select Modify.
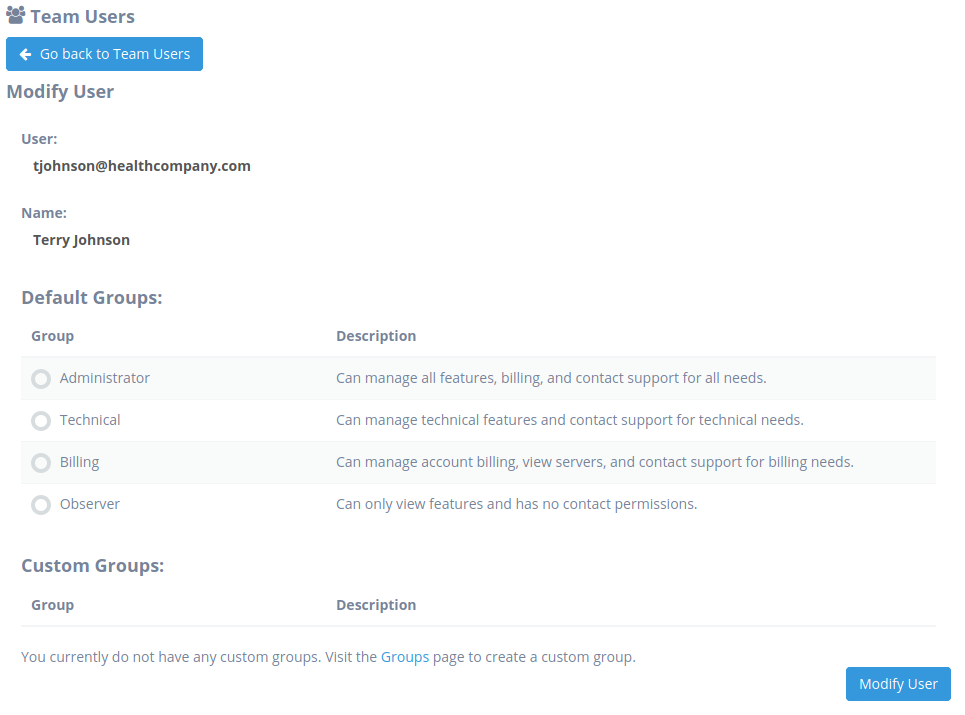
Once on the Modify User page, you can change the User’s permission Group. Simply select the new Group for the user and press the Modify User button to save the change.
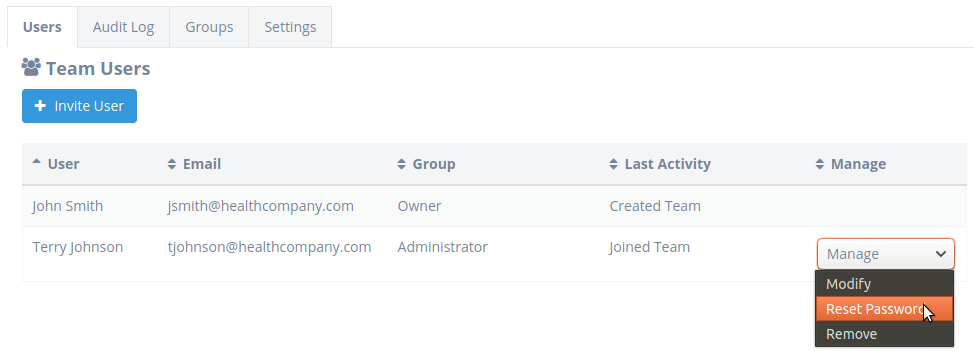
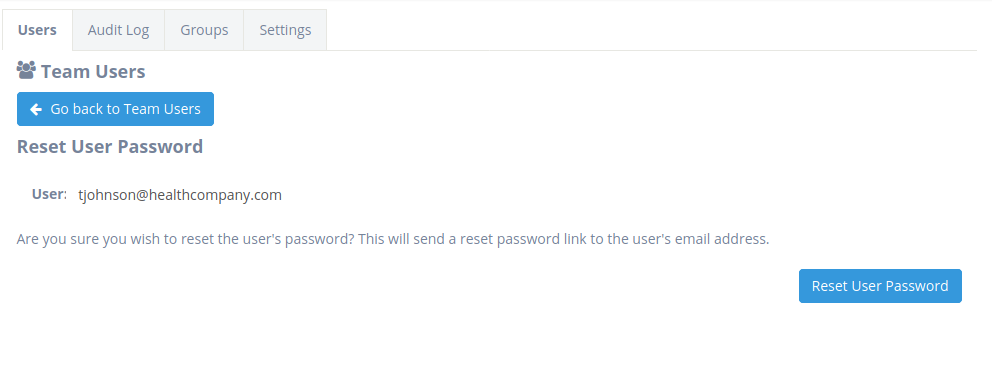
To reset a Team User’s password, click the Manage drop-down menu next to the User you want to modify on the Users page and select Reset Password.
Once on the Reset User Password page, press the Reset User Password button to send a reset password link to the User’s email address.
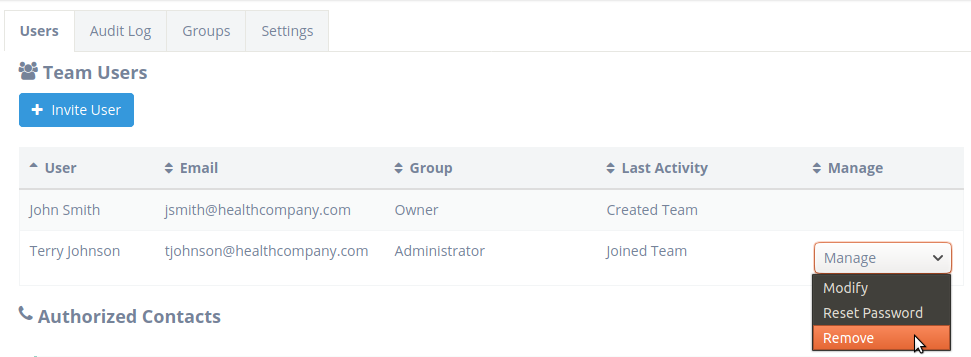
To remove a User from your Team, click the Manage drop-down menu next to the user you want to modify on the User’s page and select Remove.
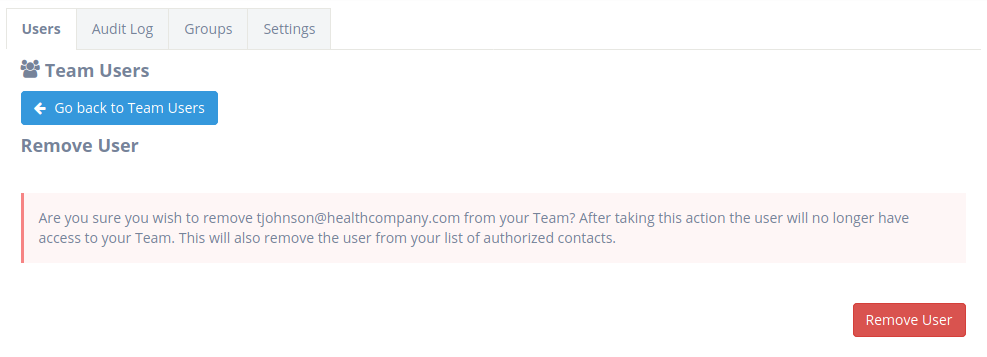
 Once on the Remove User page, press the Remove User button to remove the User from your Team. Once you proceed, the User will no longer have access to your Team and will be removed from your list of authorized contacts.
 Viewing Team Audit Logs
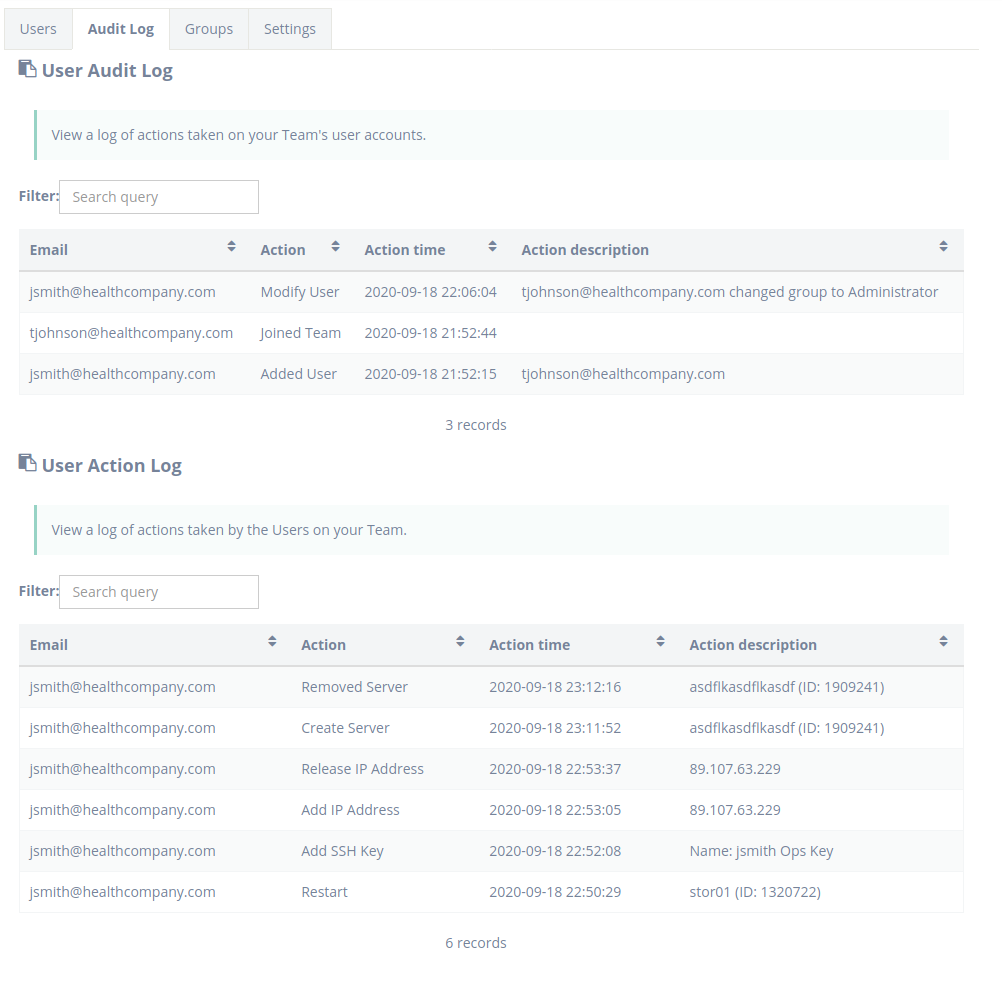
Actions like inviting Users to your Team, updating user permissions, rebooting a server, creating a block storage volume, and more are all recorded in audit logs. These audit logs allow Team Users you authorize to view the action taken, who took the action, and when the action occurred. These Audit Logs can help you meet compliance requirements for your organization or simply figure out who took a specific action of interest to you.
The audit logs are split into two categories:
- User Audit Log: Logs of actions taken on Team User accounts (inviting Users, assigning Groups, resetting passwords, etc)
- User Action Log: Logs of actions taken by Users on your Team (creating a server, rebooting a server, creating a block storage volume, etc)
To view the User Audit Log and the User Action Log, click on the Audit Log tab at the top of the Teams page.
Once on the Audit Log page you can:
- View the logged entries in order from most recent to oldest.
- Conduct a live search on by entering a search string in the Filter search query box to help narrow down what you are looking for.
- Sort the results by a column by clicking on the sorting arrows next to the column heading in the results table.
In addition to the centralized logs available to you on the Audit Log page, you can also view all actions taken by your Team on an individual Cloud Server page.
Click on Servers in the left hand navigation menu, then click on the server you want to view logs for.
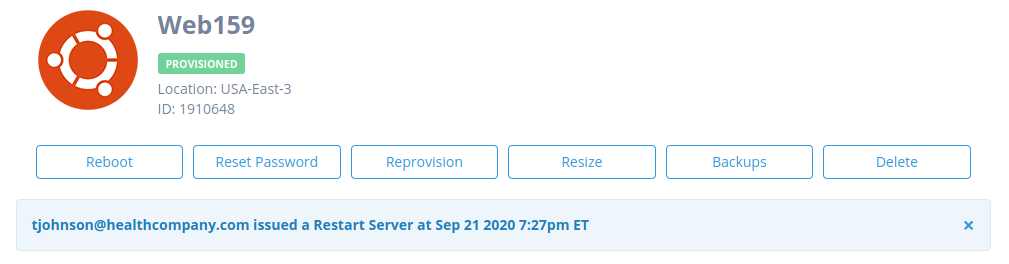
Once on the page, you will see details on the last logged action taken on the server since you created your Team.
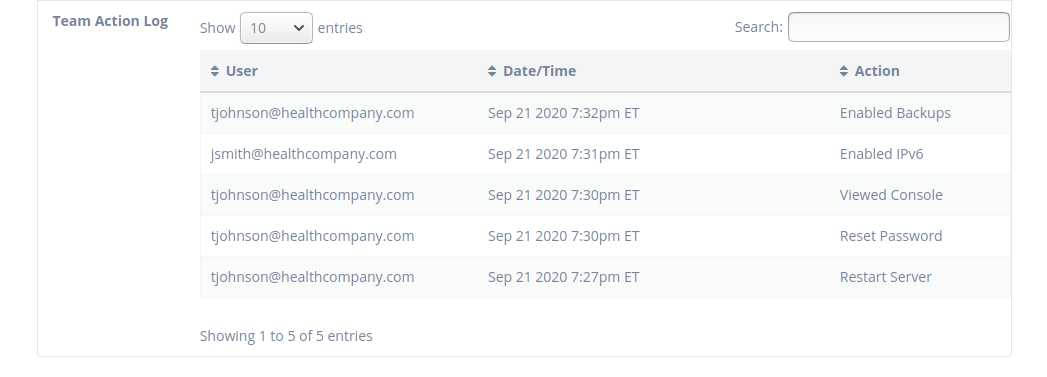
To view all logged actions taken on the server since you created your Team, scroll to the bottom of the Server page
Once you see the Logs, you can:
- View the logged entries in order from most recent to oldest.
- Conduct a live search on by entering a search string in the Search query box to help narrow down what you are looking for.
- Sort the results by a column by clicking on the sorting arrows next to the column heading in the results table.
Team Notes
Notes allow you to share important information about your services with your Team members. For more important Notes, you can Pin them as important notes to make sure your Team doesn’t overlook them. Notes are only visible to your authorized Team members and are encrypted for your privacy.
Examples of some Notes use cases:
- Post a Note instructing Team members to contact a specific User before performing a reboot on a Server
- Post a Note and Pin it as important to let your Team know about an upcoming maintenance window where you are planning to conduct software upgrades which may affect availability of the system.
To create a Note for a server, click on Servers in the left hand navigation menu, click on the server you want to post the Note to, then press the Create Note button on the Server details page.
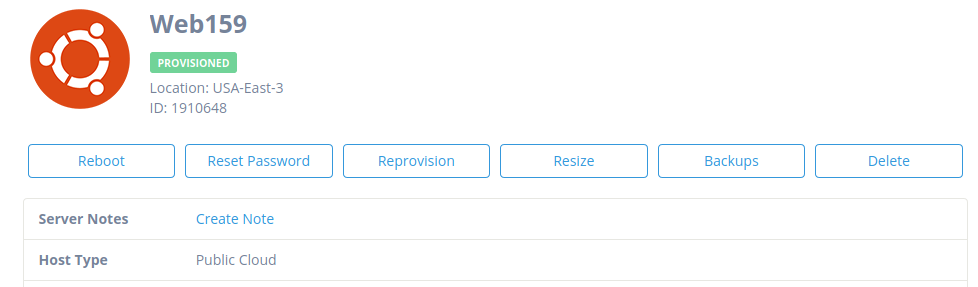
You will now see the text field entry where you can enter the text for your Note.
Your note will be prepended with the date, time, and user who is posting the Note, so you don’t have to type that information into the text field.
If you want to mark the Note as more important than others, you can check the box to Pin the Note which will display the Note in bold text separated from non pinned notes.
Once you have entered your desired Note text and selected if you want your Note Pinned or not, press the Add Note button to post your Note.
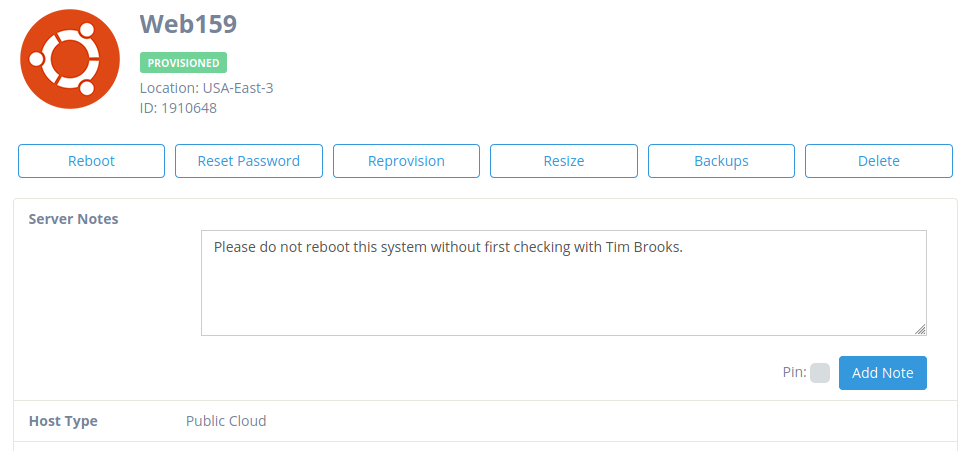
Your Note will now be displayed on the Server details page.
Now, lets create a Pinned Note.
Press the Create Note button to create a new Note.
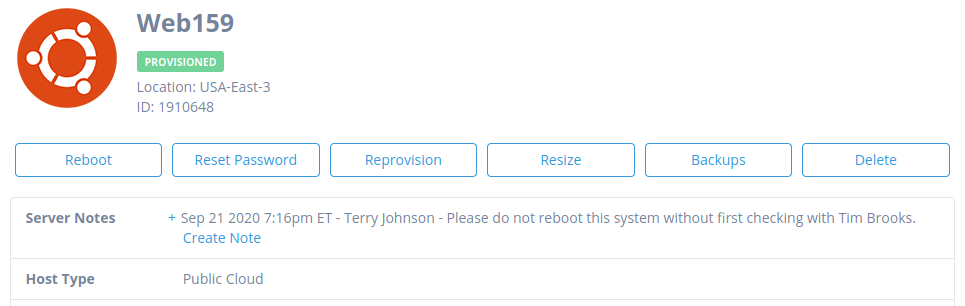
Enter the details of your new Note, click the checkbox to Pin the Note, and press the Add Note button to post the Note.
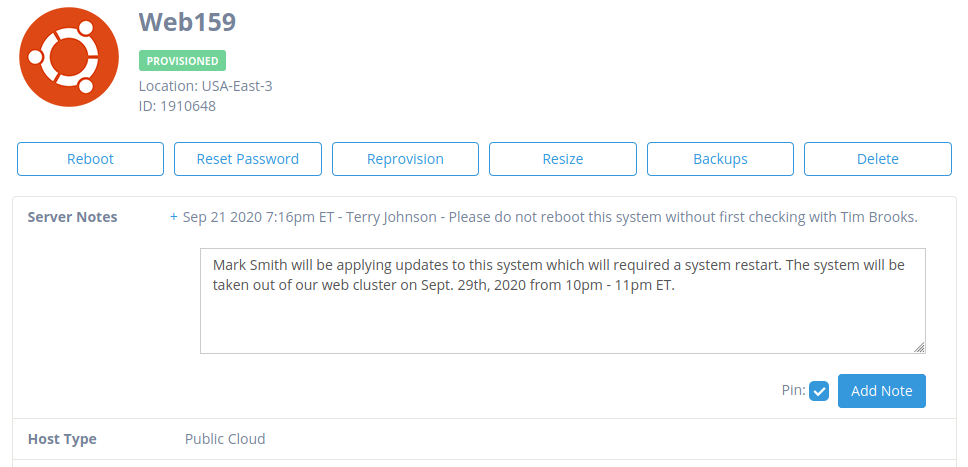
You will now see your new Note has posted and is Pinned to the top of the Notes section on the Server details page.
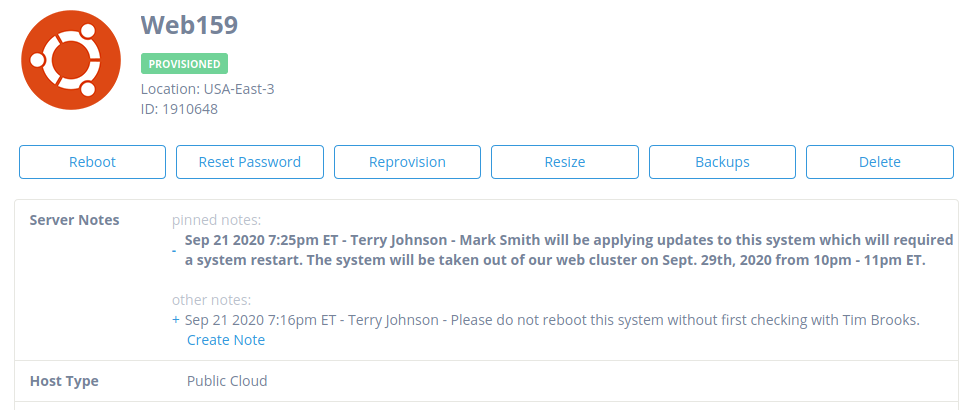
If you want to Pin or Un-Pin an existing Note, simply click the + character to Pin the Note, and the – character to Un-Pin the Note.
Managing Team Groups
In the Inviting Users to Join your Team section of this document you learned that by assigning a user to a Group you control what resources they have access to create, view, and manage along with authorizing them to contact support for assistance with your account and services. While you may only want to use the Default Groups already available (Administrator, Technical, Billing, or Observer), you can also choose to create customized Groups with granular permissions to meet your organization’s or User’s specific needs.
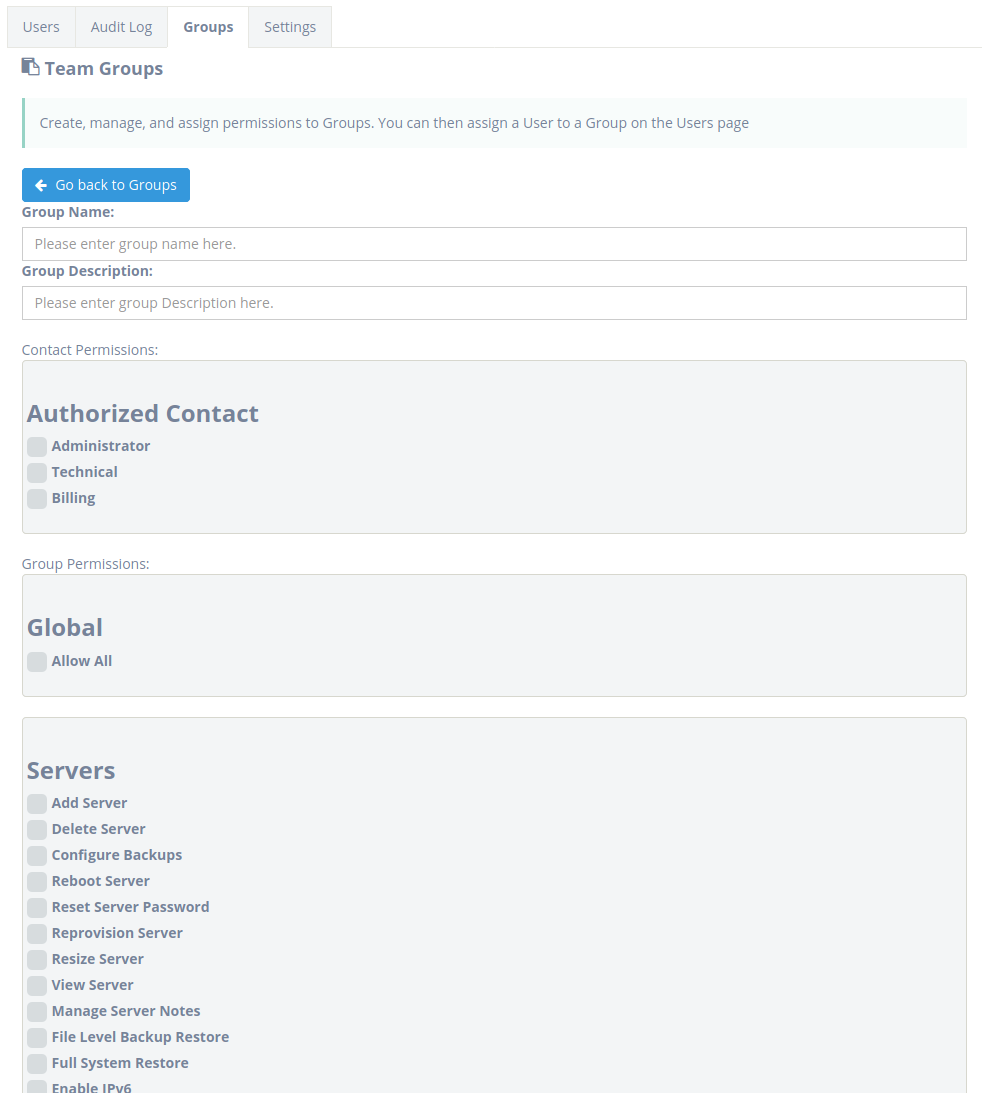
To create a new Group for your Team, click on the Groups tab at the top of the Teams page and press the Create Group button.
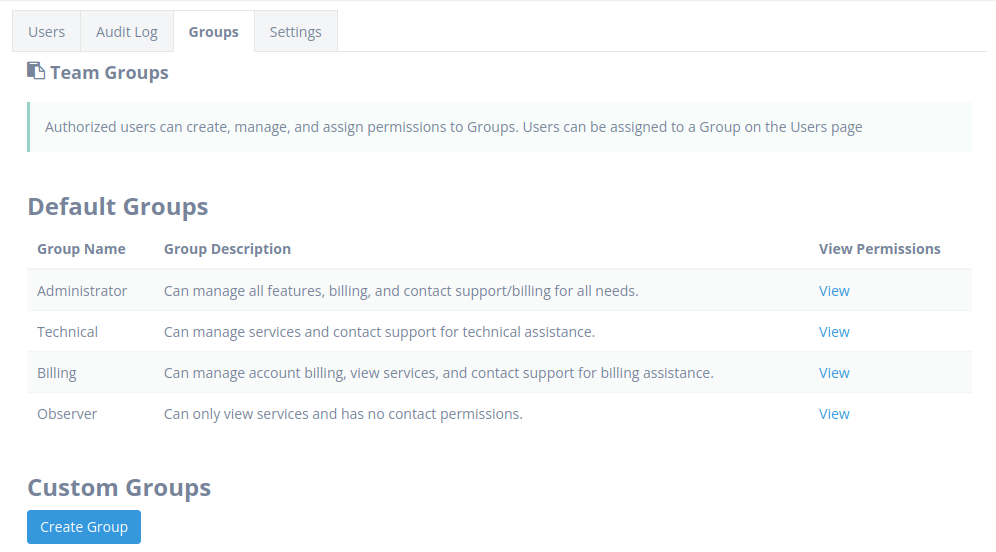
You can now create a Group by specifying the following:
- Group Name: This is the display name of the Group you are creating and will be used to identify the Group when assigning to a User
- Group Description: This field should be used to provide a short description of the permissions you have assigned to the Group
- Contact Permissions: This section is used to authorize members of the Group to contact support for assistance with your account and services
- Administrator: allows the Users in the Group access to technical, billing, and overall account related support
- Technical: allows the Users in the Group access to technical support
- Billing: allows the Users in the Group access to billing support
- Group Permissions: This section is used to authorize members of the Group to access Atlantic.Net features and services on a granular basis. For example if you want a Group to have full access to all features and services, you can check the box for Global – Allow All or if you simply want a Group to only be able to reboot servers, you can check the box Servers – Reboot Server.
Once you have selected the permissions you wish to grant to the Group, press the Create Group button at the bottom of the page to create your Group.
Once your Group has been created you can then, assign Users to your Group (see the Inviting Team Users and Managing Team Users section for details), edit Group settings, or delete your Group.
To edit an existing Group for your Team, click on the Groups tab at the top of the Teams page and press the Edit button for the desired Group.
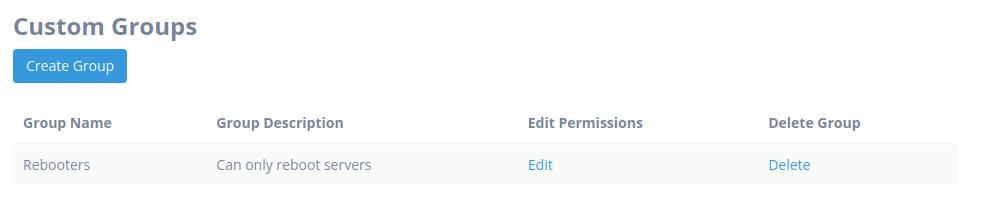
Once on the Group page, you can update the permissions for the Group and press the Update Group button to save the changes.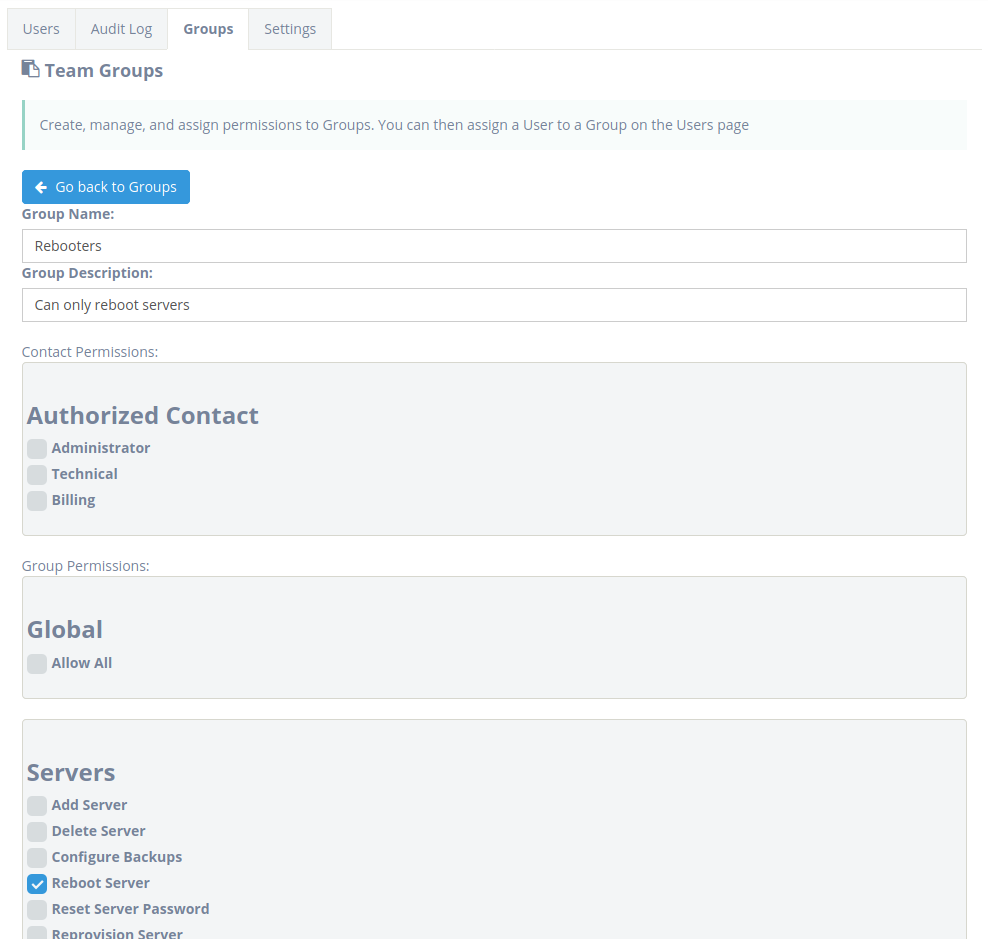
To delete an existing Group for your Team, click on the Groups tab at the top of the Teams page and press the Delete button for the desired Group.
Managing Team Settings
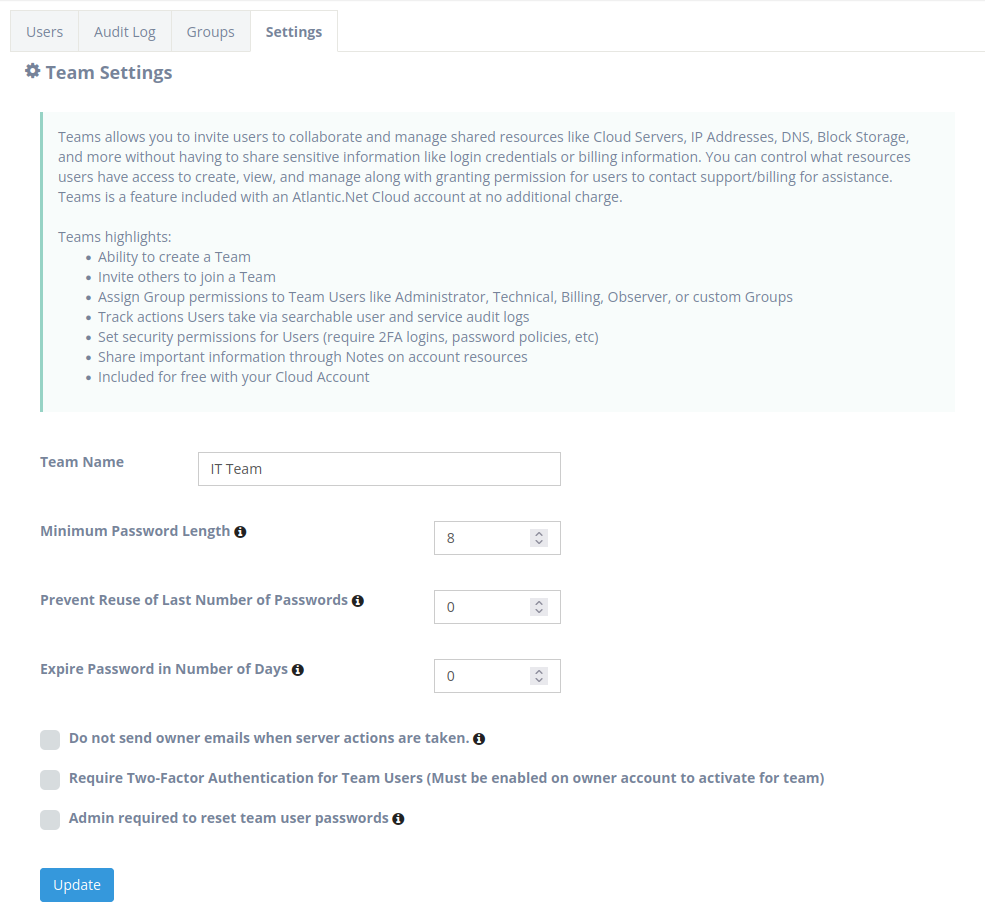
In the Atlantic.Net Control Panel, click on Teams in the navigation bar, update the fields based on your preference, then click the Update button to update your Team settings.
Field Descriptions:
- Team Name: The name you want to give your Team. It will be displayed in the control panel and in emails to Users you invite.
- Minimum Password Length: The minimum number of characters you want to require your Users to provide when creating or updating their passwords.
- Prevent Reuse of Last Number of Passwords: This allows you to specify how many previous passwords you do not want your users to be to use again. Enter a value of “0” to allow the reuse of passwords.
- Expire Password in Number of Days: Enter a value of “0” to never expire passwords.
- Do not send owner emails when server actions are taken: Check this box if you do not want to receive an email update for actions taken on Cloud Servers through the API or Control Panel like server creation, reprovision, etc.
- Require Two-Factor Authentication for Team Users (Must be enabled on owner account to activate for team): Check this box to prompt your Users to setup and provide a second factor (SMS or Auth App code) when logging into your Team.
- Admin required to reset team user passwords: Check this box to require a Team User with Administrative permissions to reset user passwords.
Switching Between Teams
If you are a member of multiple Teams or if you have a direct account with Atlantic.Net and are a member of another Team, you can will be prompted to choose the Team or Account you want to manage when you login. Additionally, once you are logged in, you can choose to switch to manage another Team you are a member of or your own Account if you have one.
To choose a Team or Account to manage during the login process, simply enter your username and password on the login screen and then click the Team or Account you want to manage.
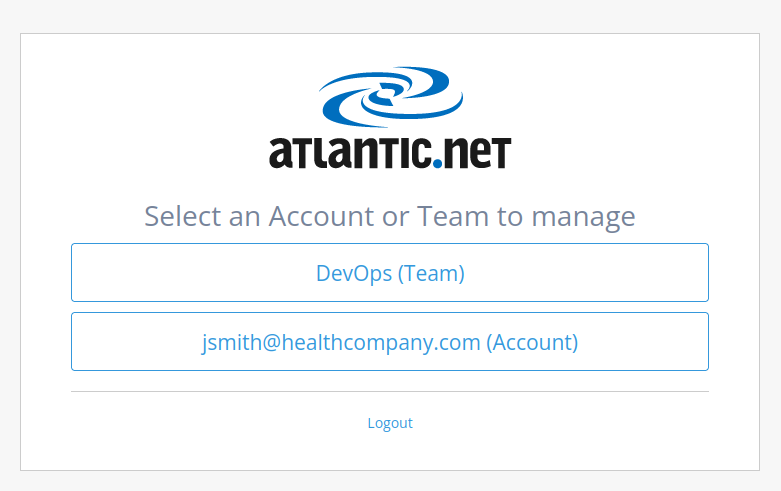
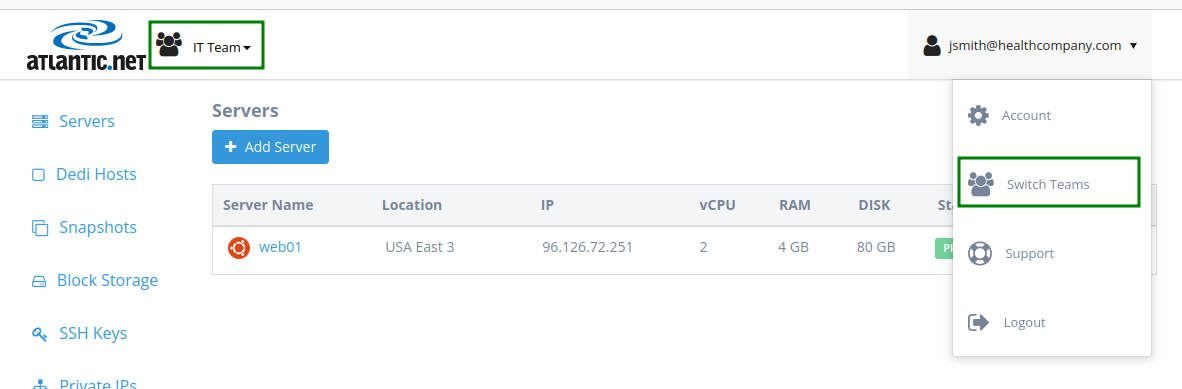
To choose a Team or Account to switch to once you are already logged in, please click the Teams menu in the upper left or the “Switch Teams” option from the Account Menu in the upper right of the control panel.